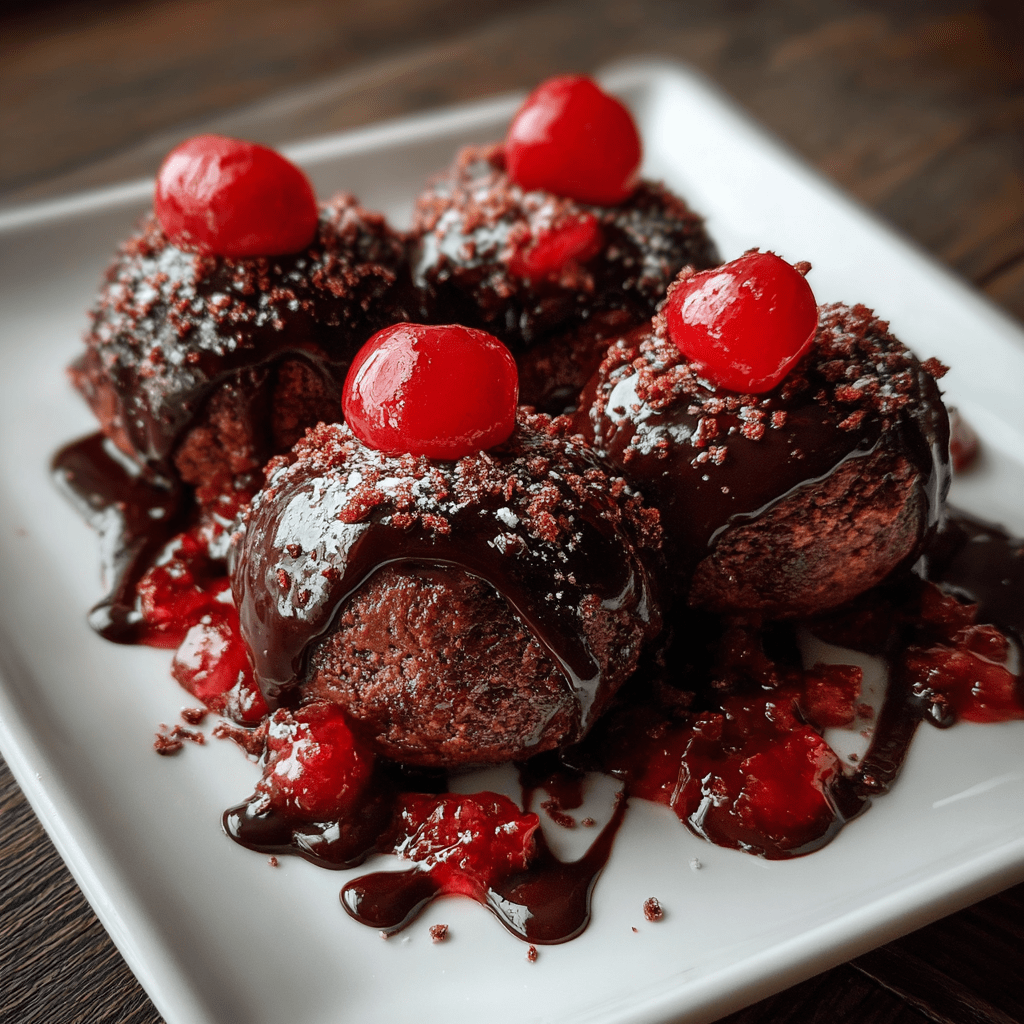
Introduction to Chocolate Covered Cherry Brownie Bombs
Hey there, fellow dessert lovers! If you’re anything like me, you know that life can get pretty hectic. Between juggling work, family, and everything in between, finding time to whip up something special can feel impossible. That’s where these delightful Chocolate Covered Cherry Brownie Bombs come in! They’re not just a treat; they’re a quick solution for a busy day or a sweet surprise to impress your loved ones. With their rich chocolatey goodness and a burst of cherry flavor, these little bites of joy are sure to bring smiles all around!
Why You’ll Love This Chocolate Covered Cherry Brownie Bombs
These Chocolate Covered Cherry Brownie Bombs are a dream come true for busy moms and professionals alike! They’re incredibly easy to make, taking just 40 minutes from start to finish. Plus, the combination of rich chocolate and sweet cherry filling creates a flavor explosion that’s hard to resist. Whether you’re hosting a gathering or just need a sweet pick-me-up, these brownie bombs are sure to delight everyone!
Ingredients for Chocolate Covered Cherry Brownie Bombs
Let’s gather our ingredients for these scrumptious Chocolate Covered Cherry Brownie Bombs. Each component plays a vital role in creating that perfect bite!
- Brownie mix: The base of our dessert, providing that rich, fudgy texture. You can use any brand you love, or even make your own from scratch if you’re feeling adventurous!
- Cherry pie filling: This sweet and tangy filling adds a burst of flavor. You can use store-bought for convenience or make your own if you have fresh cherries on hand.
- Chocolate chips: The star of the show! They’ll coat our brownie bites in a luscious layer of chocolate. Dark chocolate chips can elevate the flavor, but semi-sweet works just as well.
- Vegetable oil: This helps to achieve a smooth consistency when melting the chocolate. You can substitute with coconut oil for a hint of tropical flavor.
- Vanilla extract: A splash of this adds depth to the brownie mix, enhancing the overall flavor. Always opt for pure vanilla extract if possible for the best taste.
- Powdered sugar: This is for a light dusting on top, adding a touch of sweetness and a beautiful finish. You can skip it if you prefer a more minimalist look.
For exact measurements, check the bottom of the article where you can find everything listed for easy printing. Now, let’s get ready to create some magic in the kitchen!
How to Make Chocolate Covered Cherry Brownie Bombs
Now that we have our ingredients ready, let’s dive into the fun part: making these Chocolate Covered Cherry Brownie Bombs! Follow these simple steps, and you’ll be on your way to creating a delightful treat that everyone will love.
Step 1: Preheat the Oven
First things first, preheat your oven to 350°F (175°C). Preheating is crucial because it ensures that your brownies bake evenly. If you skip this step, you might end up with gooey centers or dry edges. Trust me, a little patience here goes a long way!
Step 2: Prepare the Brownie Mix
Next, grab your brownie mix and follow the package instructions. It’s usually as simple as adding water, eggs, and oil. To enhance the flavor, consider adding a splash of vanilla extract or a pinch of salt. This little tweak can elevate your brownies from good to absolutely divine!
Step 3: Fold in Cherry Pie Filling
Now, it’s time to fold in that luscious cherry pie filling. Gently mix it into the brownie batter using a spatula. Folding is a technique that helps maintain the airiness of the batter while incorporating the cherries. This step is key to achieving that delightful burst of cherry flavor in every bite!
Step 4: Bake the Brownies
Pour the batter into a greased baking pan and pop it in the oven. Bake for 20-25 minutes. To check for doneness, insert a toothpick into the center. If it comes out with a few moist crumbs, you’re good to go! Remember, overbaking can lead to dry brownies, so keep an eye on them!
Step 5: Cool and Cut
Once baked, let the brownies cool completely in the pan. This is super important! If you cut them too soon, they might crumble and fall apart. Patience is key here. Once cooled, cut them into bite-sized pieces, perfect for dipping!
Step 6: Melt the Chocolate
While the brownies cool, it’s time to melt the chocolate chips. You can do this in a microwave-safe bowl in 30-second intervals, stirring in between, or use a double boiler for a more controlled melt. Add a tablespoon of vegetable oil to achieve a smooth, glossy consistency. This will make your chocolate coating irresistible!
Step 7: Dip and Decorate
Now comes the fun part! Dip each brownie piece into the melted chocolate, ensuring it’s fully coated. Use a fork to lift it out, letting the excess chocolate drip off. Place the dipped brownie bombs on a parchment-lined tray. For a finishing touch, sprinkle with powdered sugar before the chocolate sets. This adds a lovely contrast and a touch of elegance!
Tips for Success
- Make sure your ingredients are at room temperature for better mixing.
- Use a toothpick to check brownie doneness; it should come out with a few moist crumbs.
- For a smoother chocolate coating, ensure your chocolate is fully melted and glossy.
- Let the chocolate set at room temperature for the best texture.
- Experiment with different toppings like crushed nuts or sprinkles for added flair!
Equipment Needed
- Baking pan: A 9×9 inch pan works perfectly. You can also use a silicone mold for easy removal.
- Mixing bowl: Any large bowl will do, but a glass bowl is great for melting chocolate.
- Spatula: A rubber spatula is ideal for folding in ingredients.
- Microwave or double boiler: Either method works for melting chocolate; choose what you have on hand.
- Parchment paper: This helps with easy cleanup and prevents sticking.
Variations of Chocolate Covered Cherry Brownie Bombs
- Nutty Delight: Add chopped walnuts or pecans to the brownie batter for a crunchy texture that complements the soft brownie.
- Minty Fresh: Incorporate a few drops of peppermint extract into the melted chocolate for a refreshing twist.
- Gluten-Free Option: Use a gluten-free brownie mix to make these treats suitable for those with gluten sensitivities.
- Fruit Fusion: Swap out cherry pie filling for raspberry or strawberry filling for a different fruity flavor.
- Vegan Version: Use a vegan brownie mix and substitute eggs with applesauce or flaxseed meal for a plant-based treat.
Serving Suggestions for Chocolate Covered Cherry Brownie Bombs
- Pair with a scoop of vanilla ice cream for a delightful contrast of temperatures.
- Serve alongside fresh berries for a pop of color and freshness on the plate.
- Drizzle with caramel sauce for an extra layer of sweetness.
- Present on a decorative platter, dusted with powdered sugar for an elegant touch.
- Enjoy with a cup of coffee or a glass of milk to balance the sweetness.
FAQs about Chocolate Covered Cherry Brownie Bombs
Got questions about these delightful Chocolate Covered Cherry Brownie Bombs? I’ve got you covered! Here are some common queries that might pop up as you whip up these treats.
Can I use fresh cherries instead of cherry pie filling?
Absolutely! Fresh cherries can be a delicious alternative. Just pit and chop them, then fold them into the brownie batter. Keep in mind that the flavor will be slightly different, but still delightful!
How do I store leftover brownie bombs?
Store your Chocolate Covered Cherry Brownie Bombs in an airtight container at room temperature for up to a week. If you want to keep them longer, they freeze beautifully. Just make sure to separate layers with parchment paper!
Can I make these brownie bombs ahead of time?
Yes! You can prepare the brownie base a day in advance and store it in the fridge. Just dip them in chocolate the day you plan to serve them for the best texture and taste.
What can I use instead of chocolate chips?
If you’re looking for a change, try using white chocolate chips or even butterscotch chips for a different flavor profile. Just remember, the melting process may vary slightly!
Are these brownie bombs suitable for a gluten-free diet?
Yes! Simply use a gluten-free brownie mix, and you’ll have a delicious treat that everyone can enjoy. Just be sure to check the labels on your chocolate chips as well!
Final Thoughts
Creating these Chocolate Covered Cherry Brownie Bombs is more than just baking; it’s about sharing joy and sweetness with those you love. Each bite is a delightful explosion of flavors that can brighten even the busiest of days. Whether you’re treating yourself or surprising your family, these little gems are sure to bring smiles and happy memories. Plus, they’re so easy to make that you’ll find yourself whipping them up for any occasion. So, roll up your sleeves, embrace the mess, and enjoy the delicious journey of making these brownie bombs!
Print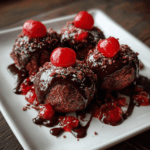
Chocolate Covered Cherry Brownie Bombs You’ll Love!
- Total Time: 40 minutes
- Yield: 24 brownie bombs 1x
- Diet: Vegetarian
Description
Delicious brownie bites filled with cherry and coated in chocolate.
Ingredients
- 1 box brownie mix
- 1 cup cherry pie filling
- 1 cup chocolate chips
- 1 tablespoon vegetable oil
- 1 teaspoon vanilla extract
- 1/4 cup powdered sugar
Instructions
- Preheat the oven to 350°F (175°C).
- Prepare the brownie mix according to package instructions.
- Fold in the cherry pie filling into the brownie batter.
- Pour the batter into a greased baking pan and bake for 20-25 minutes.
- Let the brownies cool completely before cutting them into bite-sized pieces.
- Melt the chocolate chips with vegetable oil in a microwave or double boiler.
- Dip each brownie piece into the melted chocolate and place on a parchment-lined tray.
- Sprinkle with powdered sugar and let the chocolate set.
Notes
- For a richer flavor, use dark chocolate chips.
- Store in an airtight container for up to a week.
- These can be frozen for longer storage.
- Prep Time: 15 minutes
- Cook Time: 25 minutes
- Category: Dessert
- Method: Baking
- Cuisine: American
Nutrition
- Serving Size: 1 brownie bomb
- Calories: 150
- Sugar: 10g
- Sodium: 50mg
- Fat: 7g
- Saturated Fat: 4g
- Unsaturated Fat: 2g
- Trans Fat: 0g
- Carbohydrates: 20g
- Fiber: 1g
- Protein: 2g
- Cholesterol: 15mg

