
Introduction to Chocolate Mousse Pie with Crunchy Topping
As a busy mom, I know how precious time can be, especially when it comes to whipping up something special for my family. That’s why I absolutely adore this Chocolate Mousse Pie with Crunchy Topping. It’s a delightful dessert that feels indulgent yet is surprisingly easy to make. Imagine a rich, velvety chocolate mousse nestled in a crisp pie crust, topped with a satisfying crunch. This pie is perfect for impressing guests or simply treating yourself after a long day. Trust me, once you try it, you’ll want to keep this recipe in your back pocket!
Why You’ll Love This Chocolate Mousse Pie with Crunchy Topping
This Chocolate Mousse Pie with Crunchy Topping is a game-changer for busy lives. It’s quick to prepare, taking just 30 minutes of hands-on time, and the rest is simply waiting for it to chill. The combination of creamy chocolate and a crunchy topping creates a delightful contrast that will have everyone asking for seconds. Plus, it’s a crowd-pleaser, making it perfect for family gatherings or a cozy night in!
Ingredients for Chocolate Mousse Pie with Crunchy Topping
Gathering the right ingredients is the first step to creating this delightful Chocolate Mousse Pie with Crunchy Topping. Here’s what you’ll need:
- Pre-made chocolate pie crust: This saves time and adds a delicious chocolatey base. You can find it in the baking aisle or make your own if you’re feeling adventurous.
- Heavy cream: Essential for that luscious mousse texture. It whips up beautifully and adds richness to the pie.
- Semi-sweet chocolate chips: These are the stars of the show! They melt into a smooth chocolate layer. For a deeper flavor, consider using dark chocolate.
- Large eggs: They help create a light and airy mousse. Make sure they’re at room temperature for the best results.
- Granulated sugar: This sweetens the mousse and balances the rich chocolate flavor. You can adjust the amount based on your sweetness preference.
- Vanilla extract: A splash of vanilla enhances the chocolate flavor and adds warmth to the mousse.
- Salt: Just a pinch helps to elevate the flavors and brings out the chocolate’s richness.
- Crushed cookies (for topping): Think of your favorite cookies! They add a delightful crunch. Oreos or graham crackers work wonderfully.
- Chopped nuts (for topping): Nuts like almonds or walnuts add an extra layer of crunch and flavor. Feel free to skip them if you have nut allergies.
For exact measurements, check the bottom of the article where you can find everything listed for easy printing. Happy cooking!
How to Make Chocolate Mousse Pie with Crunchy Topping
Now that you have all your ingredients ready, let’s dive into the fun part—making this Chocolate Mousse Pie with Crunchy Topping! Follow these simple steps, and you’ll have a dessert that’s sure to impress.
Step 1: Preheat the Oven
First things first, preheat your oven to 350°F (175°C). Preheating is crucial because it ensures that your pie crust bakes evenly. A hot oven helps create that perfect crispiness, making your pie crust a delightful base for the creamy mousse.
Step 2: Melt the Chocolate
Next, it’s time to melt the chocolate chips. You can do this using a double boiler or a microwave. If using the microwave, heat in short bursts of 20 seconds, stirring in between. This method prevents the chocolate from burning. Aim for a smooth, glossy consistency—this is the heart of your mousse!
Step 3: Prepare the Egg Mixture
In a separate bowl, beat the eggs and granulated sugar together until the mixture is light and fluffy. This step is essential for creating a light mousse. You want to incorporate air into the eggs, so don’t rush it! A hand mixer works wonders here, but a whisk will do if you’re feeling strong.
Step 4: Combine Chocolate and Egg Mixture
Now, gently fold the melted chocolate into the egg mixture. Use a spatula and a gentle motion to combine them. This folding technique helps maintain the airiness you just created. You want to see a beautiful marbling of chocolate and egg—don’t overmix!
Step 5: Whip the Cream
In another bowl, whip the heavy cream until stiff peaks form. This means when you lift the whisk, the cream holds its shape. This step is vital for that luscious mousse texture. Make sure your bowl and beaters are cold for the best results. It’s like magic watching the cream transform!
Step 6: Fold in the Whipped Cream
Gently fold the whipped cream into the chocolate mixture. Use the same folding technique as before. You want to combine them without deflating the whipped cream. This is what gives your mousse that light, airy feel. It’s like a fluffy cloud of chocolate goodness!
Step 7: Pour into the Crust
Carefully pour the mousse into your pre-made chocolate pie crust. Use a spatula to smooth the top, making it look as appealing as it tastes. A smooth surface will make for a beautiful presentation once it’s set. Trust me, your family will be impressed!
Step 8: Refrigerate
Now, it’s time for the mousse to chill. Place the pie in the refrigerator for at least 4 hours, or until it’s fully set. This step is crucial! The chilling allows the flavors to meld and the mousse to firm up. Patience is key here, but it’s worth the wait!
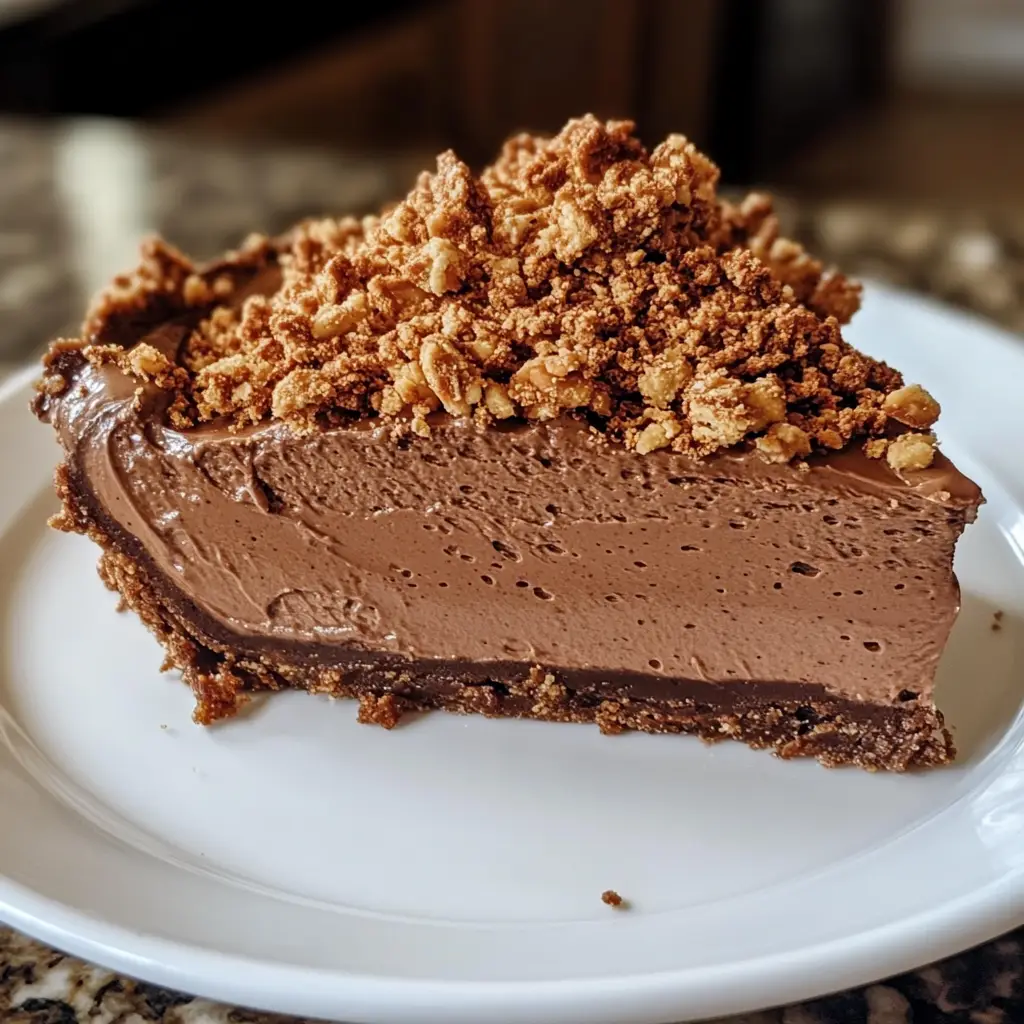
Step 9: Add the Crunchy Topping
Before serving, sprinkle the crushed cookies and chopped nuts on top for that irresistible crunchy topping. Make sure to distribute them evenly for a beautiful finish. This adds a delightful texture contrast to the creamy mousse. Your Chocolate Mousse Pie with Crunchy Topping is now ready to shine!
Tips for Success
- Use room temperature eggs for better incorporation and fluffiness.
- Chill your mixing bowl and beaters before whipping the cream for optimal results.
- Don’t rush the folding process; be gentle to keep the mousse airy.
- For a richer flavor, opt for dark chocolate instead of semi-sweet.
- Make this pie a day ahead for a stress-free dessert experience!
Equipment Needed
- Mixing bowls: A set of various sizes is handy. Glass or stainless steel works best.
- Hand mixer or whisk: A hand mixer speeds things up, but a whisk gives you a workout!
- Spatula: Essential for folding and smoothing the mousse.
- Measuring cups and spoons: Accurate measurements ensure perfect results.
- Refrigerator: For chilling the mousse until set.
Variations
- Dark Chocolate Delight: Swap semi-sweet chocolate chips for dark chocolate for a richer, more intense flavor.
- Minty Fresh: Add a few drops of peppermint extract to the mousse for a refreshing mint chocolate twist.
- Fruit Fusion: Top the pie with fresh berries like raspberries or strawberries for a fruity contrast to the chocolate.
- Gluten-Free Option: Use a gluten-free cookie crust or crushed gluten-free cookies for the topping.
- Vegan Version: Substitute eggs with aquafaba (chickpea water) and use coconut cream instead of heavy cream for a plant-based treat.
Serving Suggestions
- Pair your Chocolate Mousse Pie with a dollop of whipped cream for extra creaminess.
- Serve alongside fresh berries for a pop of color and a fruity contrast.
- Enjoy with a cup of coffee or a glass of dessert wine to elevate the experience.
- Garnish with chocolate shavings for an elegant touch.
- Present on a beautiful cake stand to impress your guests!
FAQs about Chocolate Mousse Pie with Crunchy Topping
Can I make Chocolate Mousse Pie with Crunchy Topping ahead of time?
Absolutely! This pie can be made a day in advance. Just keep it covered in the refrigerator. It actually tastes even better after chilling overnight, as the flavors meld beautifully.
What can I use instead of heavy cream?
If you’re looking for a lighter option, you can use whipped coconut cream. It gives a lovely flavor and texture, making it a great alternative for a dairy-free version of this Chocolate Mousse Pie with Crunchy Topping.
How do I store leftovers?
Store any leftovers in an airtight container in the refrigerator. It should stay fresh for up to three days. Just be sure to add the crunchy topping right before serving to keep it crisp!
Can I freeze this pie?
While you can freeze the mousse, the texture may change once thawed. If you do freeze it, wrap it tightly in plastic wrap and foil. Thaw in the refrigerator before serving.
What can I substitute for the pie crust?
If you want to switch things up, you can use a graham cracker crust or even a cookie crust made from your favorite cookies. Just make sure it’s sturdy enough to hold the mousse!
Final Thoughts
Creating this Chocolate Mousse Pie with Crunchy Topping is more than just baking; it’s about crafting a moment of joy for yourself and your loved ones. The rich, creamy mousse paired with that delightful crunch is a symphony of textures and flavors that brings smiles to the table. Whether it’s a special occasion or a simple weeknight treat, this pie is sure to impress. I love how it transforms an ordinary day into something extraordinary. So, roll up your sleeves, gather your ingredients, and let this pie be the sweet ending to your culinary adventures!
Print
Chocolate Mousse Pie with Crunchy Topping is Irresistible!
- Total Time: 4 hours 45 minutes
- Yield: 8 servings 1x
- Diet: Vegetarian
Description
A delicious and decadent chocolate mousse pie topped with a crunchy layer, perfect for dessert lovers.
Ingredients
- 1 pre-made chocolate pie crust
- 2 cups heavy cream
- 1 cup semi-sweet chocolate chips
- 3 large eggs
- 1/2 cup granulated sugar
- 1 teaspoon vanilla extract
- 1/4 teaspoon salt
- 1 cup crushed cookies (for topping)
- 1/2 cup chopped nuts (for topping)
Instructions
- Preheat the oven to 350°F (175°C).
- Melt the chocolate chips in a double boiler or microwave until smooth.
- In a separate bowl, beat the eggs and sugar until light and fluffy.
- Fold the melted chocolate into the egg mixture.
- In another bowl, whip the heavy cream until stiff peaks form.
- Gently fold the whipped cream into the chocolate mixture until combined.
- Pour the mousse into the chocolate pie crust and smooth the top.
- Refrigerate for at least 4 hours or until set.
- Before serving, sprinkle the crushed cookies and chopped nuts on top for a crunchy topping.
Notes
- For a richer flavor, use dark chocolate instead of semi-sweet.
- Make sure the mousse is fully set before adding the topping.
- This pie can be made a day in advance for convenience.
- Prep Time: 30 minutes
- Cook Time: 15 minutes
- Category: Dessert
- Method: Baking and Chilling
- Cuisine: American
Nutrition
- Serving Size: 1 slice
- Calories: 350
- Sugar: 25g
- Sodium: 150mg
- Fat: 25g
- Saturated Fat: 15g
- Unsaturated Fat: 5g
- Trans Fat: 0g
- Carbohydrates: 30g
- Fiber: 2g
- Protein: 4g
- Cholesterol: 80mg


