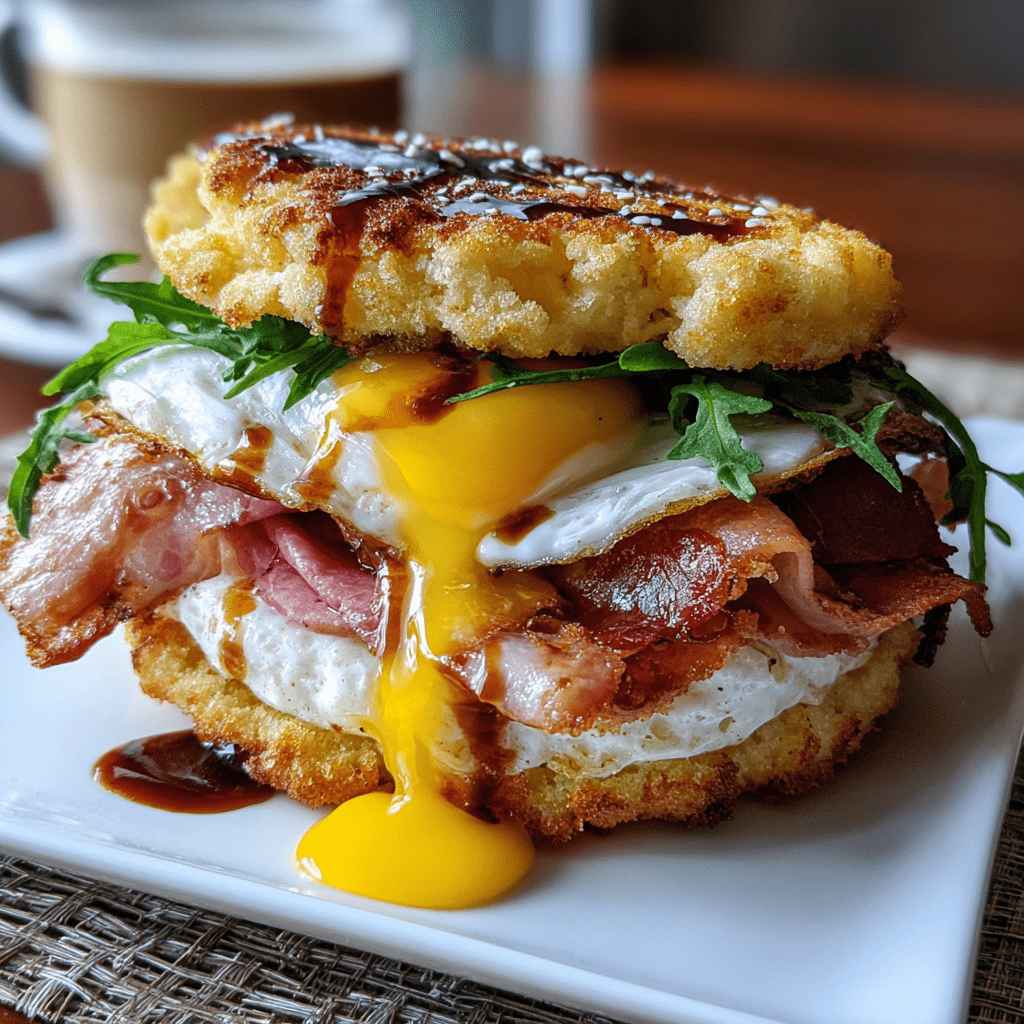
Introduction to Cloud Bread Breakfast Sandwich
As a busy mom, I know how hectic mornings can be. Between getting the kids ready and juggling my own schedule, finding time for a nutritious breakfast often feels impossible. That’s where the Cloud Bread Breakfast Sandwich comes to the rescue! This light and tasty sandwich is not only guilt-free but also a quick solution for those rushed mornings. Imagine biting into a fluffy cloud of goodness, filled with your favorite ingredients. It’s a delightful way to start your day, and trust me, your loved ones will be impressed!
Why You’ll Love This Cloud Bread Breakfast Sandwich
This Cloud Bread Breakfast Sandwich is a game-changer for busy mornings! It’s incredibly easy to whip up, taking just 40 minutes from start to finish. The taste? Oh, it’s light and fluffy, making every bite feel like a treat. Plus, it’s guilt-free, so you can enjoy it without the worry of extra calories. Whether you’re feeding a family or just yourself, this sandwich is sure to please everyone!
Ingredients for Cloud Bread Breakfast Sandwich
Let’s gather our ingredients for this delightful Cloud Bread Breakfast Sandwich! Each component plays a vital role in creating that fluffy texture and delicious flavor.
- Large eggs: The star of the show! They provide structure and richness to the cloud bread.
- Cream of tartar: This little powder helps stabilize the egg whites, ensuring they whip up to those perfect stiff peaks.
- Cream cheese: Adds a creamy texture and a subtle tang, making the yolk mixture rich and flavorful.
- Salt: Just a pinch enhances the overall taste, balancing the flavors beautifully.
- Your choice of fillings: Get creative! Think turkey, cheese, or avocado. These add protein and flavor, making your sandwich satisfying.
Feel free to experiment with different fillings to suit your taste! You can find the exact quantities for each ingredient at the bottom of the article, ready for printing. Happy cooking!
How to Make Cloud Bread Breakfast Sandwich
Now that we have our ingredients ready, let’s dive into making this delightful Cloud Bread Breakfast Sandwich! Follow these simple steps, and you’ll have a fluffy, guilt-free breakfast in no time.
Step 1: Preheat the Oven
First things first, preheat your oven to 300°F (150°C). Preheating is crucial because it ensures that the cloud bread bakes evenly. A hot oven helps create that perfect fluffy texture we’re aiming for. Trust me, you don’t want to skip this step!
Step 2: Separate the Eggs
Next, it’s time to separate the eggs. Crack each egg and gently transfer the yolk back and forth between the shells, letting the whites fall into a separate bowl. This step is vital because we need those egg whites to whip up nicely. If any yolk gets into the whites, they won’t whip properly. So, take your time here!
Step 3: Beat the Egg Whites
Now, grab your mixer and beat the egg whites with cream of tartar until stiff peaks form. This means when you lift the beaters, the peaks should stand tall and not droop. Achieving stiff peaks is essential for the texture of cloud bread. It gives it that airy, light quality that makes every bite feel like a cloud!
Step 4: Mix the Egg Yolks
In another bowl, mix the egg yolks with cream cheese and a pinch of salt. Use a whisk or mixer to combine until smooth. This mixture adds richness and flavor to your cloud bread. The cream cheese gives it a lovely creamy texture that pairs perfectly with the fluffy egg whites.
Step 5: Fold the Mixtures
Now comes the fun part! Gently fold the beaten egg whites into the yolk mixture. Use a spatula and scoop from the bottom, turning the mixture over. Be careful not to deflate the egg whites; we want to keep that airy texture. This step is where the magic happens!
Step 6: Shape the Cloud Bread
Using a spoon, drop dollops of the mixture onto a baking sheet lined with parchment paper. Space them out a bit, as they will spread slightly while baking. Think of them as little fluffy clouds waiting to rise in the oven!
Step 7: Bake
Pop the baking sheet into the preheated oven and bake for 25-30 minutes. Keep an eye on them! You’ll know they’re done when they turn golden brown. The aroma wafting through your kitchen will be heavenly!
Step 8: Assemble Your Sandwich
Once your cloud bread has cooled slightly, it’s time to assemble your sandwich. Layer your favorite fillings, like turkey, cheese, or avocado, between two pieces of cloud bread. Get creative! The fluffy bread will hold everything together beautifully, making each bite a delicious experience.
Tips for Success
- Make sure your mixing bowls and beaters are clean and dry for the best egg white results.
- For extra flavor, consider adding herbs or spices to the yolk mixture.
- Don’t rush the folding process; take your time to keep the mixture airy.
- Experiment with different fillings to keep your breakfast exciting!
- Store any leftover cloud bread in an airtight container to maintain freshness.
Equipment Needed
- Mixing bowls: Use glass or stainless steel for best results.
- Electric mixer: A hand mixer works great, but a stand mixer is even better.
- Baking sheet: A regular sheet will do, but a non-stick one makes cleanup easier.
- Parchment paper: This helps prevent sticking; silicone mats are a good alternative.
Variations for Cloud Bread Breakfast Sandwich
- Herbed Cloud Bread: Add fresh herbs like chives or parsley to the yolk mixture for an aromatic twist.
- Spicy Kick: Mix in a pinch of cayenne pepper or red pepper flakes to the yolk mixture for a spicy version.
- Sweet Cloud Bread: For a sweeter option, add a dash of vanilla extract and a sprinkle of cinnamon to the yolk mixture.
- Vegetarian Delight: Load your sandwich with sautéed spinach, mushrooms, and feta cheese for a hearty vegetarian option.
- Low-Carb Wrap: Use the cloud bread as a wrap by rolling it around your favorite fillings, like grilled chicken and veggies.
Serving Suggestions
- Pair your Cloud Bread Breakfast Sandwich with a side of fresh fruit for a refreshing touch.
- A cup of herbal tea or freshly brewed coffee complements the flavors beautifully.
- For a colorful presentation, serve on a vibrant plate with a sprinkle of microgreens.
- Add a dollop of Greek yogurt on the side for extra creaminess.
FAQs about Cloud Bread Breakfast Sandwich
Can I make Cloud Bread ahead of time?
Absolutely! You can prepare the cloud bread in advance and store it in an airtight container in the fridge for up to three days. It also freezes well, so feel free to make a batch and save some for later!
What can I use as fillings for my Cloud Bread Breakfast Sandwich?
The options are endless! You can use turkey, cheese, avocado, or even sautéed vegetables. Get creative with your favorite ingredients to make it your own!
Is Cloud Bread suitable for a low-carb diet?
Yes! Cloud bread is a fantastic low-carb option. With only 2 grams of carbohydrates per serving, it’s perfect for those watching their carb intake while still enjoying a delicious breakfast sandwich.
Can I use egg substitutes in this recipe?
While I recommend using eggs for the best texture, you can try egg substitutes like aquafaba (chickpea water) for a vegan version. Just keep in mind that the results may vary!
How do I know when the cloud bread is done baking?
Your cloud bread is ready when it turns a lovely golden brown. The edges should be firm, and the center should feel light and airy. Trust your nose; the aroma will be heavenly!
Final Thoughts
Creating a Cloud Bread Breakfast Sandwich is more than just making a meal; it’s about embracing a joyful start to your day. The light, fluffy texture and endless filling possibilities make it a delightful choice for anyone, especially busy moms like me. I love how this recipe allows for creativity while keeping things guilt-free. Each bite feels like a little cloud of happiness, perfect for fueling your morning adventures. So, gather your ingredients, and let this sandwich bring a smile to your face and a skip to your step. Happy cooking!
Print
Cloud Bread Breakfast Sandwich: Light, Tasty, Guilt-Free!
- Total Time: 40 minutes
- Yield: 4 servings 1x
- Diet: Low Calorie
Description
A light and tasty breakfast sandwich made with cloud bread, perfect for a guilt-free meal.
Ingredients
- 3 large eggs
- 1/4 teaspoon cream of tartar
- 3 tablespoons cream cheese
- Salt to taste
- Your choice of fillings (e.g., turkey, cheese, avocado)
Instructions
- Preheat the oven to 300°F (150°C).
- Separate the egg whites and yolks into two bowls.
- In the bowl with egg whites, add cream of tartar and beat until stiff peaks form.
- In the other bowl, mix egg yolks, cream cheese, and salt until smooth.
- Gently fold the egg whites into the yolk mixture until combined.
- Drop spoonfuls of the mixture onto a baking sheet lined with parchment paper.
- Bake for 25-30 minutes or until golden brown.
- Let cool slightly before assembling your sandwich with your choice of fillings.
Notes
- Store leftover cloud bread in an airtight container in the fridge for up to 3 days.
- Cloud bread can be frozen for longer storage.
- Feel free to experiment with different fillings to suit your taste.
- Prep Time: 10 minutes
- Cook Time: 30 minutes
- Category: Breakfast
- Method: Baking
- Cuisine: American
Nutrition
- Serving Size: 1 sandwich
- Calories: 120
- Sugar: 1g
- Sodium: 200mg
- Fat: 8g
- Saturated Fat: 3g
- Unsaturated Fat: 5g
- Trans Fat: 0g
- Carbohydrates: 2g
- Fiber: 0g
- Protein: 10g
- Cholesterol: 150mg

