
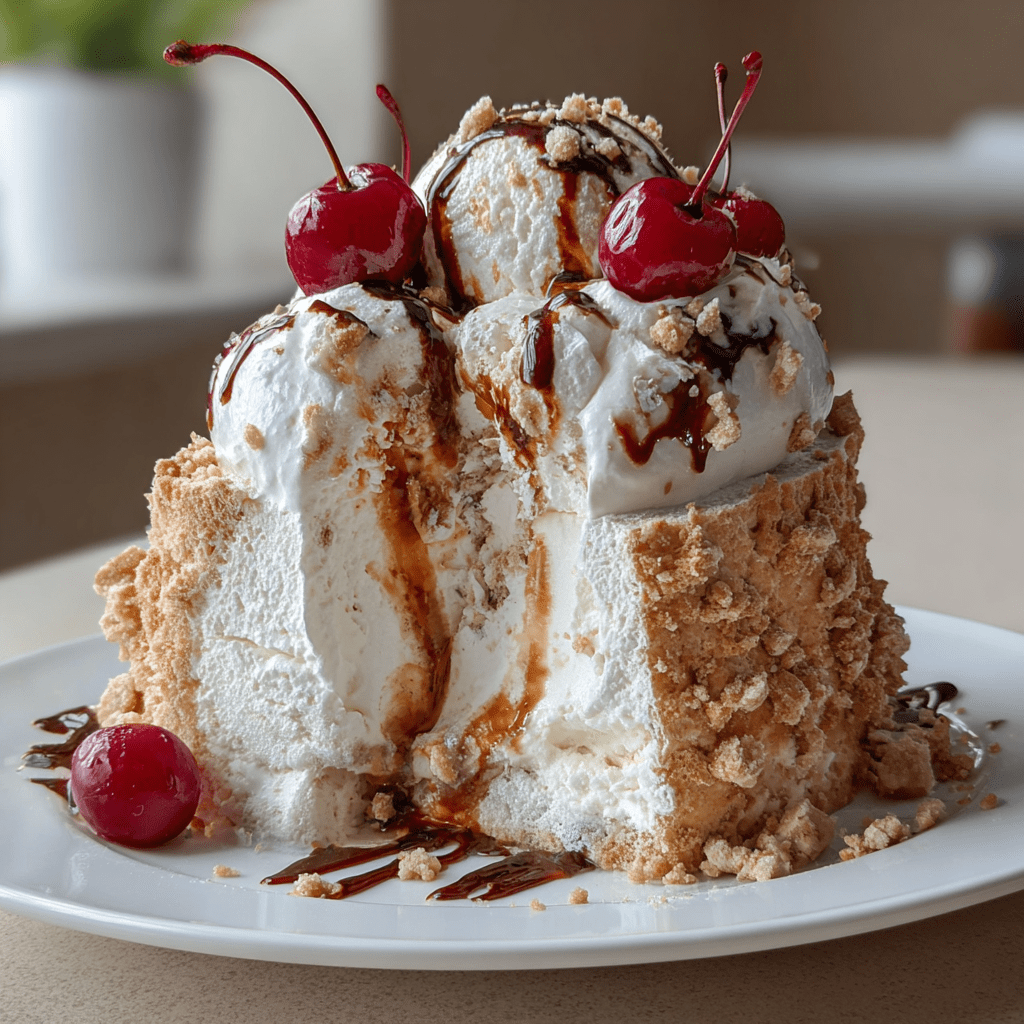
Introduction to Drumstick Ice Cream Cake
As a busy mom, I know how precious time can be, especially when it comes to whipping up something special for my family. That’s why I absolutely adore this Drumstick Ice Cream Cake! It’s a delightful blend of cake and ice cream that brings back sweet memories of summer treats. This recipe is not just a quick solution for a busy day; it’s also a showstopper for any gathering. Imagine the smiles on your loved ones’ faces when you serve this indulgent dessert. Trust me, it’s a treat that everyone will love!
Why You’ll Love This Drumstick Ice Cream Cake
This Drumstick Ice Cream Cake is a dream come true for busy cooks like us! It’s incredibly easy to make, requiring just a few simple steps. Plus, it’s a crowd-pleaser that combines the rich flavors of chocolate cake and creamy ice cream. Whether it’s a birthday party or a casual family dinner, this dessert is sure to impress. You’ll love how quickly it comes together, leaving you more time to enjoy with your loved ones!
Ingredients for Drumstick Ice Cream Cake
Gathering the right ingredients is the first step to creating this delightful Drumstick Ice Cream Cake. Here’s what you’ll need:
- Chocolate cake mix: This is the foundation of your cake. It adds a rich, chocolaty flavor that pairs perfectly with ice cream.
- Vanilla ice cream: The star of the show! Creamy and sweet, it brings that classic drumstick flavor to life. You can also use chocolate ice cream for a richer taste.
- Chocolate syrup: A drizzle of this sweet goodness adds a luscious layer of flavor. It’s like a chocolate hug for your cake!
- Crushed nuts: These add a delightful crunch and nutty flavor. I love using peanuts, but feel free to experiment with almonds or walnuts.
- Whipped cream: This fluffy topping is essential for that classic ice cream cake look. It adds a lightness that balances the richness of the cake and ice cream.
- Maraschino cherries: These bright red beauties are perfect for garnishing. They add a pop of color and a sweet-tart flavor that complements the cake.
For exact measurements, check the bottom of the article where you can find everything listed for easy printing. Happy baking!
How to Make Drumstick Ice Cream Cake
Now that you have all your ingredients ready, let’s dive into the fun part—making this Drumstick Ice Cream Cake! Follow these simple steps, and you’ll have a delicious dessert that will wow your family and friends.
Step 1: Preheat the Oven
First things first, preheat your oven according to the instructions on the cake mix box. Preheating is crucial because it ensures that your cake bakes evenly. A hot oven helps the cake rise beautifully, giving it that perfect fluffy texture we all love.
Step 2: Prepare the Cake Mix
Next, grab your chocolate cake mix and prepare it according to the package instructions. This usually involves mixing the cake mix with water, eggs, and oil. Stir until smooth, but don’t overmix! A few lumps are okay. This step is where the magic begins, as the rich chocolate aroma fills your kitchen.
Step 3: Bake the Cake
Pour the batter into a round cake pan and pop it in the oven. Bake according to the time specified on the box, usually around 30 minutes. To check for doneness, insert a toothpick into the center. If it comes out clean, your cake is ready! If not, give it a few more minutes.
Step 4: Cool and Slice the Cake
Once baked, remove the cake from the oven and let it cool in the pan for about 10 minutes. Then, transfer it to a wire rack to cool completely. This step is essential! If the cake is warm, the ice cream will melt. Once cooled, slice the cake in half horizontally. This creates a perfect layer for your ice cream.
Step 5: Add Ice Cream Layer
Now comes the fun part! Take your softened vanilla ice cream and spread it evenly over the bottom half of the cake. Use a spatula for a smooth finish. Make sure to cover the entire surface, as this will be the heart of your Drumstick Ice Cream Cake!
Step 6: Drizzle and Sprinkle
Drizzle chocolate syrup generously over the ice cream layer. Then, sprinkle crushed nuts on top for that delightful crunch. This combination adds layers of flavor and texture, making each bite a little piece of heaven!
Step 7: Assemble the Cake
Carefully place the top half of the cake back on. Now, cover the entire cake with whipped cream. Use a spatula to spread it evenly, creating a beautiful finish. Don’t be shy with the whipped cream; it’s what makes this cake look so inviting!
Step 8: Freeze Before Serving
Finally, it’s time to freeze your masterpiece! Place the cake in the freezer for at least 2 hours. This step is crucial for achieving the best texture. When you’re ready to serve, just slice and enjoy the delightful layers of cake and ice cream!
Tips for Success
- Make sure your cake is completely cool before adding ice cream to prevent melting.
- Soften the ice cream slightly for easier spreading; it should be creamy but not soupy.
- Use a hot knife to slice the cake for clean edges.
- Feel free to customize with your favorite toppings, like sprinkles or caramel sauce.
- For a fun twist, try adding a layer of crushed cookies between the ice cream and cake!
Equipment Needed
- Round cake pan: A standard 9-inch pan works well. If you don’t have one, a square pan will do in a pinch.
- Mixing bowl: Any large bowl will suffice for mixing your cake batter.
- Spatula: A rubber spatula is perfect for spreading ice cream and whipped cream.
- Wire rack: This helps cool the cake evenly. If you don’t have one, a plate will work.
- Toothpick: Essential for checking if your cake is done. A fork can also do the trick!
Variations
- Chocolate Ice Cream: Swap vanilla for chocolate ice cream for an extra chocolatey experience.
- Nut-Free Option: Omit the crushed nuts or replace them with crushed cookies for a different crunch.
- Fruit Layer: Add a layer of fresh strawberries or bananas between the ice cream and cake for a fruity twist.
- Gluten-Free Cake: Use a gluten-free chocolate cake mix to make this dessert suitable for gluten-sensitive friends.
- Vegan Version: Substitute the cake mix with a vegan option and use coconut or almond milk ice cream for a dairy-free delight.
Serving Suggestions
- Pair with a scoop of extra vanilla or chocolate ice cream for a double treat.
- Serve alongside fresh fruit, like strawberries or raspberries, for a refreshing contrast.
- Drizzle additional chocolate syrup on top for an eye-catching presentation.
- Garnish with mint leaves for a pop of color and freshness.
- Enjoy with a cup of coffee or a glass of milk to balance the sweetness!
FAQs about Drumstick Ice Cream Cake
Can I make Drumstick Ice Cream Cake ahead of time?
Absolutely! This cake can be made a day in advance. Just store it in the freezer until you’re ready to serve. It’s a great way to save time on busy days!
What if I don’t have chocolate cake mix?
No worries! You can use any flavor of cake mix you have on hand. Vanilla or even red velvet can create a unique twist on this Drumstick Ice Cream Cake.
How do I store leftovers?
To keep your cake fresh, cover it tightly with plastic wrap or aluminum foil and return it to the freezer. It should last for about a week, but trust me, it won’t last that long!
Can I use homemade ice cream?
Definitely! If you have a favorite homemade ice cream recipe, feel free to use it. Just make sure it’s firm enough to spread easily on the cake.
Is this cake suitable for kids?
Yes! This Drumstick Ice Cream Cake is a hit with kids. The combination of cake, ice cream, and fun toppings makes it a delightful treat for any celebration!
Final Thoughts
Creating this Drumstick Ice Cream Cake is more than just baking; it’s about making memories with your loved ones. The joy of watching their faces light up as they take that first bite is priceless. This dessert is a sweet reminder that even on the busiest days, we can carve out moments of happiness. Whether it’s a birthday celebration or a simple family dinner, this cake brings everyone together. So, roll up your sleeves, gather your ingredients, and let the laughter and joy fill your kitchen. Trust me, this cake will become a cherished favorite in your home!
Print
Drumstick Ice Cream Cake: Indulge in a Sweet Delight!
- Total Time: 3 hours
- Yield: 8 servings 1x
- Diet: Vegetarian
Description
A delicious and indulgent dessert that combines the flavors of drumstick ice cream with a cake base, perfect for any occasion.
Ingredients
- 1 box of chocolate cake mix
- 3 cups of vanilla ice cream
- 1 cup of chocolate syrup
- 1 cup of crushed nuts
- 1 cup of whipped cream
- 1/2 cup of maraschino cherries
Instructions
- Preheat the oven according to the cake mix instructions.
- Prepare the chocolate cake mix as directed and bake in a round cake pan.
- Once the cake is cooled, slice it in half horizontally.
- Spread a layer of vanilla ice cream on the bottom half of the cake.
- Drizzle chocolate syrup over the ice cream and sprinkle crushed nuts on top.
- Place the top half of the cake back on and cover the entire cake with whipped cream.
- Garnish with maraschino cherries and additional nuts if desired.
- Freeze the cake for at least 2 hours before serving.
Notes
- For a richer flavor, use chocolate ice cream instead of vanilla.
- Make sure the cake is completely cooled before adding ice cream to prevent melting.
- This cake can be made a day in advance and stored in the freezer.
- Prep Time: 30 minutes
- Cook Time: 30 minutes
- Category: Dessert
- Method: Baking and Freezing
- Cuisine: American
Nutrition
- Serving Size: 1 slice
- Calories: 350
- Sugar: 28g
- Sodium: 200mg
- Fat: 18g
- Saturated Fat: 10g
- Unsaturated Fat: 6g
- Trans Fat: 0g
- Carbohydrates: 42g
- Fiber: 1g
- Protein: 4g
- Cholesterol: 50mg


