Introduction to Earthquake Cake Recipe
Welcome to the delightful world of the Earthquake Cake Recipe! If you’re like me, juggling a busy life while trying to whip up something special for your loved ones can feel overwhelming. This cake is a game-changer! It’s not just a dessert; it’s a sweet hug in a pan. With its rich chocolate flavor and creamy surprises, it’s perfect for impressing guests or simply treating yourself after a long day. Plus, it’s quick and easy to make, so you can spend less time in the kitchen and more time enjoying life’s little moments.
Why You’ll Love This Earthquake Cake Recipe
This Earthquake Cake Recipe is a true lifesaver for busy moms and professionals alike. It combines ease and speed without sacrificing flavor. In just over an hour, you can create a dessert that’s not only delicious but also visually stunning. The layers of chocolate, cream cheese, and toppings create a delightful surprise in every bite. Trust me, your family will be asking for seconds, and you’ll love how simple it is to make!
Ingredients for Earthquake Cake Recipe
Gathering the right ingredients is the first step to creating this delightful Earthquake Cake. Here’s what you’ll need:
- Chocolate cake mix: The star of the show! It provides a rich, chocolatey base that pairs perfectly with the creamy layers.
- Powdered sugar: This sweet ingredient adds a touch of sweetness to the cream cheese mixture, making it irresistibly smooth.
- Cream cheese: Softened to perfection, it brings a creamy texture and tangy flavor that balances the sweetness beautifully.
- Vegetable oil: This keeps the cake moist and tender, ensuring every bite is a melt-in-your-mouth experience.
- Large eggs: Essential for binding the ingredients together, they help the cake rise and create a fluffy texture.
- Shredded coconut: Adds a tropical twist and a chewy texture that complements the chocolate wonderfully.
- Chopped nuts: Walnuts or pecans add a delightful crunch. Feel free to swap them for your favorite nuts!
- Chocolate chips: Because you can never have too much chocolate! They melt into gooey pockets of goodness throughout the cake.
For exact measurements, check the bottom of the article where you can find everything you need for printing. Happy baking!
How to Make Earthquake Cake Recipe
Now that you have all your ingredients ready, let’s dive into the fun part—making this delicious Earthquake Cake! Follow these simple steps, and you’ll have a dessert that’s sure to impress.
Step 1: Preheat the Oven
First things first, preheat your oven to 350°F (175°C). Preheating is crucial because it ensures your cake bakes evenly. A hot oven helps the cake rise beautifully, giving it that perfect fluffy texture we all love.
Step 2: Prepare the Baking Pan
Next, grab a 9×13 inch baking pan. Grease it with butter or cooking spray, then dust it with flour. This step is essential to prevent sticking. Trust me, there’s nothing worse than a cake that won’t come out of the pan!
Step 3: Mix the Cake Batter
In a large bowl, prepare the chocolate cake mix according to the package instructions. Usually, this involves adding water, oil, and eggs. Mix until everything is well combined. The batter should be smooth and slightly thick, ready to create a chocolatey masterpiece!
Step 4: Pour the Batter
Now, pour the cake batter into your prepared pan. Use a spatula to spread it evenly. This ensures that every slice has the same deliciousness. Don’t worry if it looks a bit messy; it’s all part of the charm!
Step 5: Prepare the Cream Cheese Mixture
In another bowl, mix the softened cream cheese, powdered sugar, and vegetable oil until smooth. You want a creamy consistency that’s easy to drop onto the cake batter. This mixture is the secret to the cake’s delightful creaminess!
Step 6: Layer the Cream Cheese Mixture
Using a spoon, drop dollops of the cream cheese mixture over the cake batter. Don’t worry about spreading it out; it will melt and swirl during baking, creating that signature “earthquake” effect!
Step 7: Add Toppings
Now for the fun part! Sprinkle shredded coconut, chopped nuts, and chocolate chips evenly over the top. This adds texture and flavor, making each bite a delightful surprise. Feel free to get creative with your toppings!
Step 8: Bake the Cake
Place the pan in the preheated oven and bake for 40-45 minutes. To check for doneness, insert a toothpick into the center. If it comes out clean, your cake is ready! If not, give it a few more minutes.
Step 9: Cool and Serve
Once baked, remove the cake from the oven and let it cool in the pan for about 15 minutes. Then, transfer it to a wire rack to cool completely. Serve it warm or chilled, and watch your family’s faces light up with joy!
Tips for Success
- Always preheat your oven for even baking.
- Use room temperature cream cheese for a smoother mixture.
- Don’t overmix the cake batter; a few lumps are okay!
- Let the cake cool completely before slicing for cleaner pieces.
- Experiment with toppings like dried fruits or different nuts for variety.
Equipment Needed
- 9×13 inch baking pan: A standard size for this cake. If you don’t have one, a similar-sized dish works too.
- Mixing bowls: Use any size you have on hand. Just make sure they’re large enough for mixing!
- Spatula: Perfect for spreading the batter. A spoon can work in a pinch.
- Electric mixer: Ideal for the cream cheese mixture, but a whisk will do just fine.
Variations
- Gluten-Free Option: Use a gluten-free chocolate cake mix to make this dessert suitable for those with gluten sensitivities.
- Nut-Free Version: Omit the nuts or replace them with sunflower seeds for a delightful crunch without allergens.
- Vegan Twist: Substitute eggs with flaxseed meal and use a plant-based cream cheese for a vegan-friendly version.
- Flavor Infusion: Add a teaspoon of vanilla extract to the cream cheese mixture for an extra layer of flavor.
- Fruit Addition: Toss in some fresh berries or banana slices for a fruity surprise that pairs beautifully with chocolate.
Serving Suggestions
- Pair with a scoop of vanilla ice cream for a delightful contrast.
- Serve with fresh berries on the side for a pop of color and flavor.
- Drizzle with chocolate sauce for an extra indulgent touch.
- Garnish with mint leaves for a refreshing finish.
- Present on a beautiful cake stand to impress your guests!
FAQs about Earthquake Cake Recipe
As you embark on your Earthquake Cake adventure, you might have a few questions. Here are some common queries I’ve encountered, along with helpful answers to guide you through the process.
Can I use a different cake mix for this recipe?
Absolutely! While the chocolate cake mix is a classic choice, you can experiment with other flavors like vanilla or red velvet. Just remember, the cream cheese mixture will still shine through, no matter the base!
How do I store leftover Earthquake Cake?
To keep your cake fresh, store it in an airtight container in the refrigerator. It should last for about 3-4 days. Just be sure to let it come to room temperature before serving for the best flavor!
Can I freeze Earthquake Cake?
Yes, you can freeze this cake! Wrap it tightly in plastic wrap and then in aluminum foil. It can be frozen for up to three months. When you’re ready to enjoy it, simply thaw it in the fridge overnight.
What can I substitute for cream cheese?
If you’re looking for a lighter option, you can use Greek yogurt or mascarpone cheese. Both will give you a creamy texture, but the flavor will vary slightly. Feel free to experiment!
Is this Earthquake Cake suitable for special diets?
Yes! With a few tweaks, you can make this cake gluten-free or vegan. Just swap the cake mix for a gluten-free version and use plant-based ingredients for the cream cheese. It’s all about making it work for you!
Final Thoughts
Making this Earthquake Cake Recipe is more than just baking; it’s about creating memories and sharing joy with those you love. The delightful combination of chocolate, cream cheese, and toppings brings smiles to faces and warmth to hearts. Whether it’s a family gathering or a quiet evening at home, this cake is sure to be a hit. Plus, it’s so easy to whip up, you’ll find yourself making it again and again. So, roll up your sleeves, embrace the mess, and enjoy the sweet rewards of your culinary adventure!
Print
Earthquake Cake Recipe: Discover the Ultimate Dessert!
- Total Time: 1 hour 5 minutes
- Yield: 12 servings 1x
- Diet: Vegetarian
Description
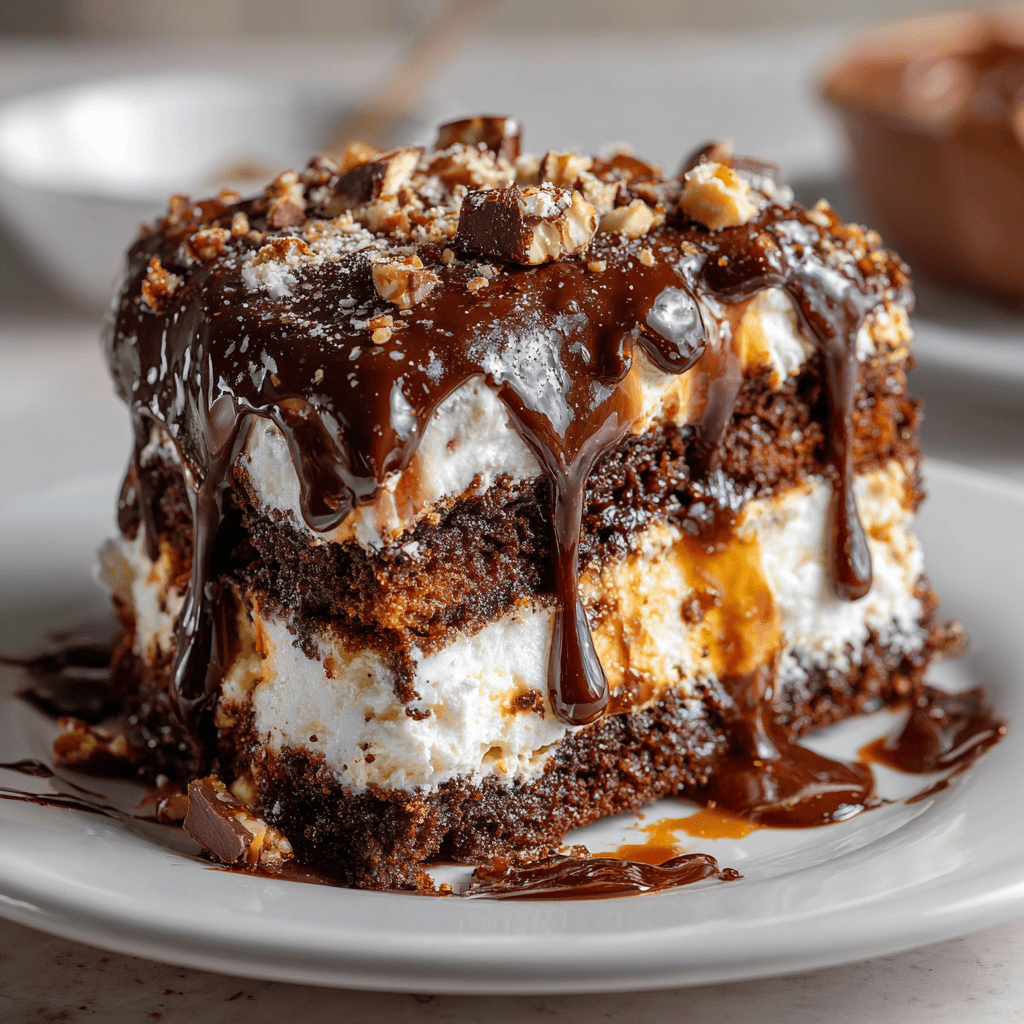
Earthquake Cake is a delicious and decadent dessert that combines chocolate cake, cream cheese, and a variety of toppings for a unique flavor experience.
Ingredients
- 1 box chocolate cake mix
- 1 cup powdered sugar
- 8 oz cream cheese, softened
- 1/2 cup vegetable oil
- 4 large eggs
- 1 cup shredded coconut
- 1 cup chopped nuts (walnuts or pecans)
- 1 cup chocolate chips
Instructions
- Preheat the oven to 350°F (175°C).
- Grease and flour a 9×13 inch baking pan.
- In a large bowl, prepare the chocolate cake mix according to package instructions.
- Pour the cake batter into the prepared pan.
- In another bowl, mix the softened cream cheese, powdered sugar, and vegetable oil until smooth.
- Drop spoonfuls of the cream cheese mixture over the cake batter.
- Sprinkle shredded coconut, chopped nuts, and chocolate chips on top.
- Bake for 40-45 minutes or until a toothpick inserted in the center comes out clean.
- Let cool before serving.
Notes
- For a richer flavor, use dark chocolate cake mix.
- Feel free to substitute the nuts with your favorite type.
- This cake can be served warm or chilled.
- Prep Time: 20 minutes
- Cook Time: 45 minutes
- Category: Dessert
- Method: Baking
- Cuisine: American
Nutrition
- Serving Size: 1 slice
- Calories: 350
- Sugar: 25g
- Sodium: 200mg
- Fat: 18g
- Saturated Fat: 8g
- Unsaturated Fat: 10g
- Trans Fat: 0g
- Carbohydrates: 40g
- Fiber: 2g
- Protein: 5g
- Cholesterol: 50mg