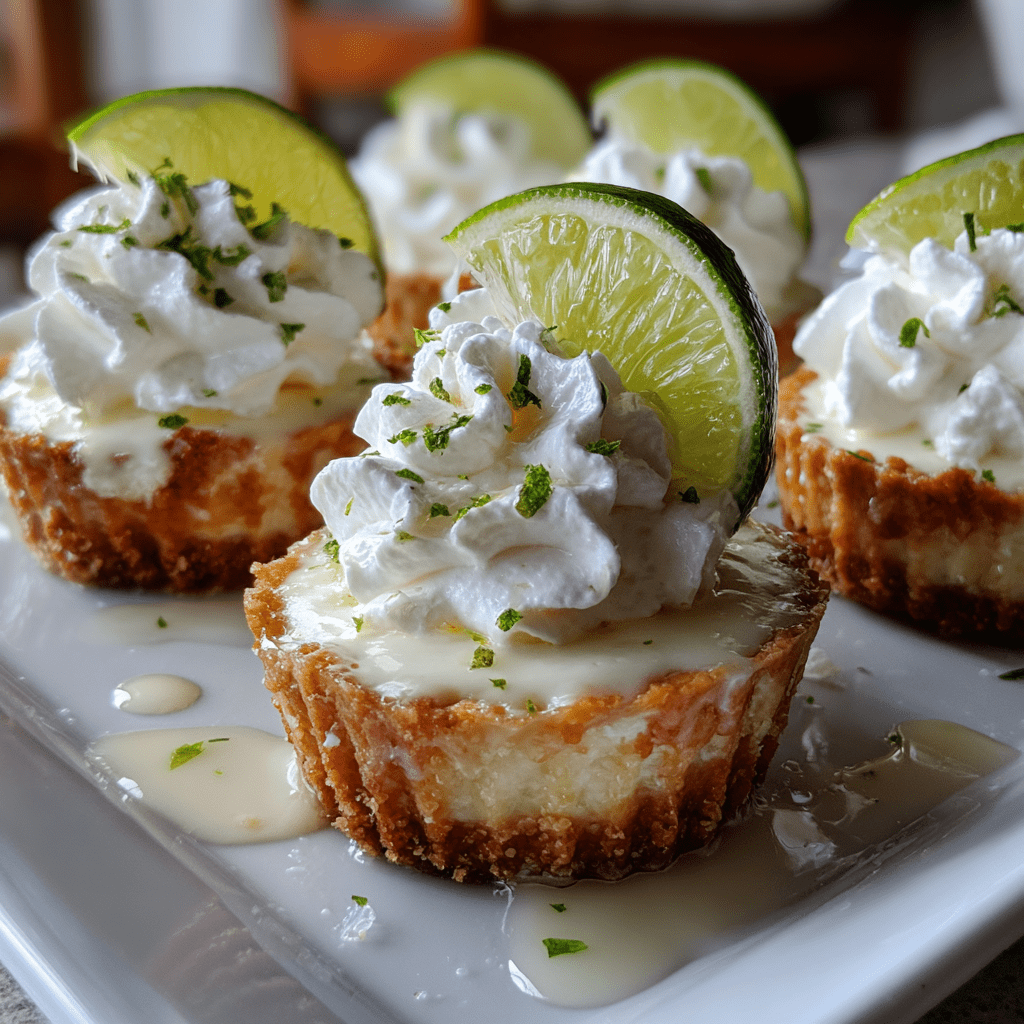
Introduction to Easy Mini Key Lime Pies
As a busy mom, I know how precious time can be, especially when it comes to whipping up something sweet. That’s why I adore these Easy Mini Key Lime Pies! They’re not just a treat; they’re a refreshing escape from the daily grind. Imagine a zesty burst of lime nestled in a buttery crust, all in a bite-sized package. Perfect for family gatherings or a simple weeknight dessert, these mini pies are sure to impress your loved ones without taking hours in the kitchen. Let’s dive into this delightful recipe that’s as easy as pie!
Why You’ll Love This Easy Mini Key Lime Pies
These Easy Mini Key Lime Pies are a lifesaver for busy days! They come together in just 40 minutes, making them a quick solution for dessert cravings. The tangy lime flavor dances on your taste buds, while the buttery crust adds a delightful crunch. Plus, they’re perfectly portioned, so you can indulge without the guilt. Trust me, once you try them, they’ll become a staple in your dessert rotation!
Ingredients for Easy Mini Key Lime Pies
Gathering the right ingredients is the first step to creating these delightful Easy Mini Key Lime Pies. Here’s what you’ll need:
- Graham cracker crumbs: These form the base of your crust, providing a sweet and crunchy texture.
- Sugar: A little sweetness to balance the tartness of the lime juice.
- Unsalted butter: This adds richness to the crust and helps it hold together. Make sure it’s melted for easy mixing.
- Sweetened condensed milk: This creamy ingredient gives the filling its luscious texture and sweetness.
- Key lime juice: The star of the show! It brings that signature tangy flavor. Fresh is best, but bottled works too.
- Egg yolks: These help to thicken the filling and give it a smooth consistency.
- Whipped cream: A fluffy topping that adds a light finish to your mini pies. You can use store-bought or homemade.
For those who want to experiment, consider adding a pinch of lime zest for an extra zing or using a gluten-free graham cracker alternative. If you’re in a pinch, you can also substitute the key lime juice with regular lime juice, though the flavor will be slightly different.
Exact measurements for each ingredient can be found at the bottom of the article, ready for printing!
How to Make Easy Mini Key Lime Pies
Now that we have our ingredients ready, let’s get to the fun part—making these Easy Mini Key Lime Pies! Follow these simple steps, and you’ll have a delightful dessert that’s sure to impress.
Step 1: Preheat the Oven
First things first, preheat your oven to 350°F (175°C). Preheating is crucial because it ensures that your crust bakes evenly and achieves that perfect golden brown color. Trust me, a well-preheated oven makes all the difference!
Step 2: Prepare the Crust
In a mixing bowl, combine the graham cracker crumbs, sugar, and melted butter. Stir until everything is well mixed and resembles wet sand. This mixture is the foundation of your mini pies, so make sure to press it firmly into the bottom and up the sides of your mini pie pans. A solid crust will hold the filling beautifully!
Step 3: Bake the Crust
Pop those crusts into the oven and bake for about 8-10 minutes. Keep an eye on them! You want them to turn a lovely golden brown. This step is essential for achieving that crunchy texture that pairs so well with the creamy filling.
Step 4: Make the Filling
While the crusts are baking, let’s whip up the filling. In a separate bowl, whisk together the sweetened condensed milk, key lime juice, and egg yolks until smooth. This mixture should be creamy and well combined. The key lime juice is what gives these pies their signature tang, so don’t skimp on it!
Step 5: Fill the Crusts
Once your crusts are baked and cooled slightly, it’s time to fill them. Carefully pour the key lime filling into each crust, filling them just to the top. Be gentle to avoid spilling! Each mini pie should be filled to the brim, ready to bake again.
Step 6: Bake Again
Return the filled mini pies to the oven and bake for an additional 15 minutes. You’ll know they’re done when the filling is set but still slightly jiggly in the center. This ensures a creamy texture that melts in your mouth!
Step 7: Cool and Chill
After baking, let the mini pies cool at room temperature for a bit. Then, refrigerate them for at least 2 hours. Chilling is key! It allows the flavors to meld and the filling to firm up, giving you that perfect slice.
Step 8: Serve with Whipped Cream
When you’re ready to serve, top each mini pie with a generous dollop of whipped cream. This adds a light, fluffy finish that complements the tangy filling beautifully. You can even sprinkle a little lime zest on top for an extra pop of color and flavor!
Tips for Success
- Use fresh key lime juice for the best flavor; it makes a world of difference!
- Don’t skip the chilling time; it’s essential for the perfect texture.
- Press the crust firmly to avoid crumbling when serving.
- Experiment with toppings like toasted coconut or lime zest for a fun twist.
- Make a double batch and freeze some for unexpected guests!
Equipment Needed
- Mini pie pans: These are perfect for individual servings. If you don’t have them, use a muffin tin instead.
- Mixing bowls: A couple of medium-sized bowls will do the trick for mixing ingredients.
- Whisk: Essential for blending the filling smoothly. A fork can work in a pinch!
- Measuring cups: Accurate measurements are key. If you’re in a hurry, eyeballing can work for some ingredients.
Variations of Easy Mini Key Lime Pies
- Chocolate Key Lime Pies: Add a layer of melted chocolate to the bottom of the crust before pouring in the filling for a decadent twist.
- Berry Topped Pies: Top your mini pies with fresh berries like strawberries or blueberries for a burst of color and flavor.
- Gluten-Free Option: Use gluten-free graham crackers or almond flour for the crust to make these pies suitable for gluten-sensitive friends.
- Vegan Version: Substitute the sweetened condensed milk with coconut cream and use flax eggs instead of egg yolks for a plant-based treat.
- Spicy Key Lime Pies: Add a pinch of cayenne pepper or chili powder to the filling for a surprising kick that complements the lime.
Serving Suggestions for Easy Mini Key Lime Pies
- Pair with a refreshing glass of iced tea or lemonade for a perfect summer treat.
- Serve alongside fresh fruit salad for a colorful and healthy contrast.
- Garnish with lime slices or mint leaves for an elegant presentation.
- Consider a scoop of vanilla ice cream for an indulgent twist.
- Arrange on a decorative platter for a stunning dessert display at gatherings.
FAQs about Easy Mini Key Lime Pies
Can I use regular limes instead of key limes?
Absolutely! While key limes have a unique flavor, regular limes can be used in a pinch. Just keep in mind that the taste will be slightly different, but still delicious!
How do I store leftovers?
Store any leftover Easy Mini Key Lime Pies in an airtight container in the refrigerator. They’ll stay fresh for up to three days, but I doubt they’ll last that long!
Can I make these pies ahead of time?
Yes! These mini pies can be made a day in advance. Just make sure to chill them properly before serving. They’re perfect for prepping ahead for parties!
What can I use instead of whipped cream?
If you’re looking for alternatives, consider using coconut whipped cream for a dairy-free option or a dollop of Greek yogurt for a tangy twist. Both pair wonderfully with the pies!
Can I freeze these mini pies?
Yes, you can freeze them! Just make sure they are well-wrapped in plastic wrap and stored in an airtight container. Thaw them in the fridge before serving for the best texture.
Final Thoughts
Making these Easy Mini Key Lime Pies is more than just baking; it’s about creating sweet memories with loved ones. Each bite is a burst of sunshine, reminding us of carefree days and joyful gatherings. Whether you’re serving them at a family dinner or enjoying one after a long day, these mini pies bring a smile to everyone’s face. Plus, they’re so simple to whip up, you’ll find yourself making them again and again. So, roll up your sleeves, gather your ingredients, and let the delightful aroma of key lime fill your kitchen. Happy baking!
Print
Easy Mini Key Lime Pies that Everyone Will Love!
- Total Time: 40 minutes plus chilling time
- Yield: 12 mini pies 1x
- Diet: Vegetarian
Description
These Easy Mini Key Lime Pies are a delightful and refreshing dessert that everyone will love, perfect for any occasion.
Ingredients
- 1 cup graham cracker crumbs
- 1/4 cup sugar
- 1/2 cup unsalted butter, melted
- 1 can (14 oz) sweetened condensed milk
- 1/2 cup key lime juice
- 2 large egg yolks
- Whipped cream for topping
Instructions
- Preheat the oven to 350°F (175°C).
- In a bowl, mix graham cracker crumbs, sugar, and melted butter until combined.
- Press the mixture into the bottom and up the sides of mini pie pans.
- Bake the crusts for 8-10 minutes until golden brown.
- In another bowl, whisk together sweetened condensed milk, key lime juice, and egg yolks until smooth.
- Pour the filling into the baked crusts.
- Bake for an additional 15 minutes.
- Let them cool, then refrigerate for at least 2 hours.
- Top with whipped cream before serving.
Notes
- For a stronger lime flavor, add more key lime juice.
- These pies can be made a day in advance.
- Store leftovers in the refrigerator.
- Prep Time: 15 minutes
- Cook Time: 25 minutes
- Category: Dessert
- Method: Baking
- Cuisine: American
Nutrition
- Serving Size: 1 mini pie
- Calories: 180
- Sugar: 12g
- Sodium: 150mg
- Fat: 9g
- Saturated Fat: 5g
- Unsaturated Fat: 3g
- Trans Fat: 0g
- Carbohydrates: 22g
- Fiber: 1g
- Protein: 2g
- Cholesterol: 50mg