
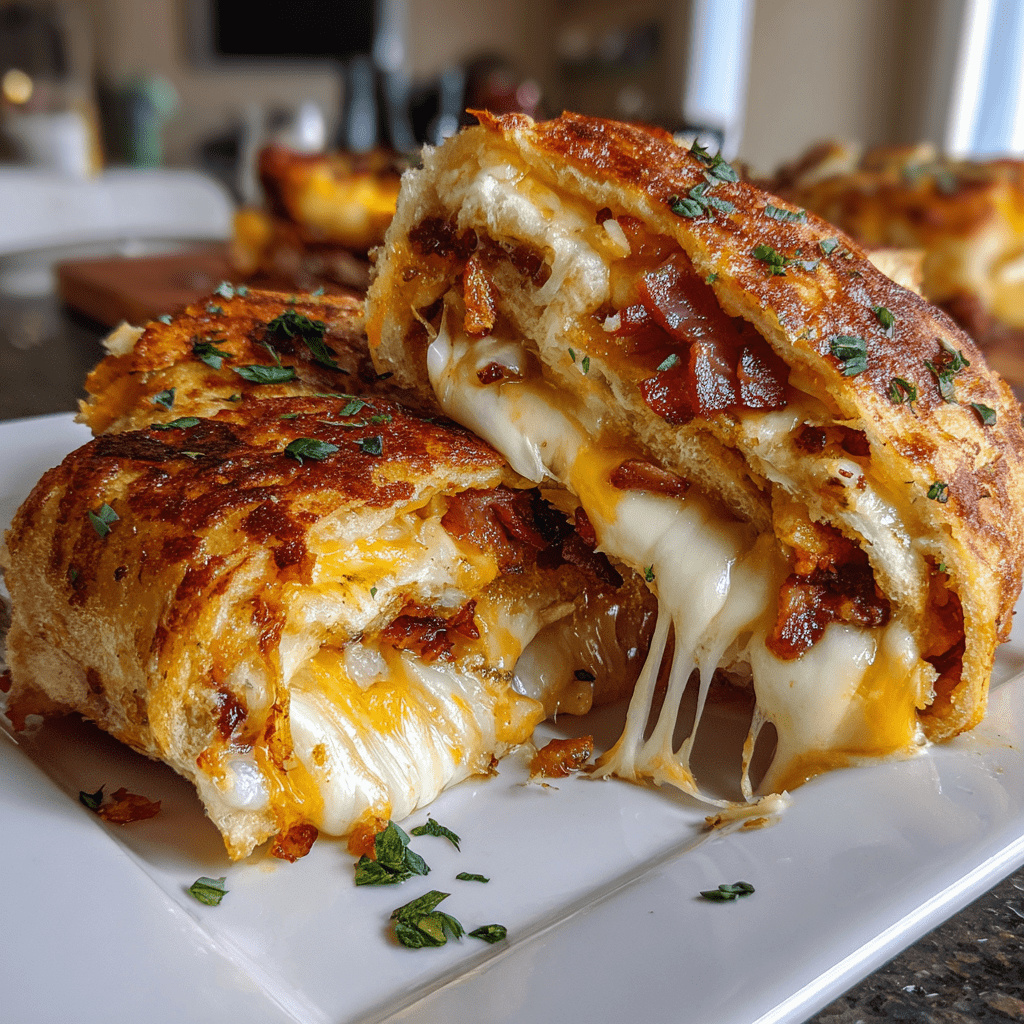
Introduction to Grilled Cheese Roll Ups
As a busy mom, I know how precious time can be, especially when it comes to meal prep. That’s why I absolutely adore these Grilled Cheese Roll Ups! They’re not just a fun twist on the classic grilled cheese sandwich; they’re a quick solution for those hectic days when you need something delicious and satisfying. Whether you’re cooking for picky eaters or just want to impress your loved ones, these roll-ups are sure to bring smiles to the table. Plus, they’re easy to whip up, making them a perfect snack or meal for any occasion!
Why You’ll Love This Grilled Cheese Roll Ups
These Grilled Cheese Roll Ups are a game-changer for busy families! They come together in just 20 minutes, making them perfect for those nights when time is tight. The crispy, golden exterior gives way to gooey, melty cheese that’s simply irresistible. Plus, they’re versatile enough to please everyone, from kids to adults. You can even customize them with different cheeses or dips, ensuring every bite is a delightful surprise!
Ingredients for Grilled Cheese Roll Ups
Gathering the right ingredients is key to making these delightful Grilled Cheese Roll Ups. Here’s what you’ll need:
- Bread: Any type works, but I love using white or whole wheat for that classic taste. You can even try sourdough for a tangy twist!
- Cheese: Cheddar is a favorite, but feel free to mix it up! Mozzarella, pepper jack, or even a creamy brie can add a unique flavor.
- Butter: This is essential for that golden, crispy exterior. You can substitute with olive oil or a dairy-free spread if you prefer.
For those who want to get creative, consider adding herbs or spices to the cheese for an extra kick. You can also use gluten-free bread if you have dietary restrictions. Remember, the exact quantities are listed at the bottom of the article for easy printing!
How to Make Grilled Cheese Roll Ups
Making Grilled Cheese Roll Ups is a breeze! Follow these simple steps, and you’ll have a delicious snack ready in no time. Let’s dive into the fun of creating these cheesy delights!
Step 1: Flatten the Bread
Start by taking each slice of bread and flattening it with a rolling pin. This step is crucial! It helps the bread roll up easily and ensures a perfect cheese-to-bread ratio. If you don’t have a rolling pin, a sturdy glass works just as well. Just make sure to apply even pressure!
Step 2: Add Cheese
Now, place a slice of cheese on each flattened piece of bread. I like to use cheddar for its classic flavor, but feel free to mix and match! You can layer different cheeses for a melty masterpiece. Just remember, the more cheese, the better!
Step 3: Roll It Up
Carefully roll the bread around the cheese, starting from one end. Tuck in the sides as you go to keep the cheese snug inside. This is where the magic happens! The tighter you roll, the better the cheese will stay put while cooking.
Step 4: Heat the Skillet
Next, heat a skillet over medium heat and add a tablespoon of butter. Let it melt and coat the bottom of the pan. This will give your roll-ups that golden, crispy finish we all love. If you’re using olive oil, just make sure it’s hot enough before adding the roll-ups!
Step 5: Cook the Roll-Ups
Place the roll-ups seam side down in the skillet. Cook them for about 2-3 minutes on each side, or until they’re golden brown. Keep an eye on them! You want that perfect crunch without burning. Flip them gently to avoid any cheese spillage!
Step 6: Serve and Enjoy
Once they’re beautifully browned, remove the roll-ups from the skillet. Slice them into bite-sized pieces and serve warm. They’re perfect on their own or with a side of marinara sauce for dipping. Trust me, your family will be asking for seconds!
Tips for Success
- Use fresh bread for the best texture and flavor.
- Don’t overfill with cheese; a little goes a long way!
- Experiment with different cheeses for unique tastes.
- Keep the heat medium to avoid burning while ensuring a crispy finish.
- For extra flavor, sprinkle some garlic powder or herbs on the butter before cooking.
Equipment Needed
- Rolling Pin: Essential for flattening the bread. A sturdy glass can work in a pinch!
- Skillet: A non-stick skillet is ideal, but any frying pan will do.
- Spatula: Perfect for flipping the roll-ups without losing any cheesy goodness.
Variations
- Herbed Cheese: Mix in some fresh herbs like basil or chives with your cheese for a burst of flavor.
- Spicy Kick: Add sliced jalapeños or a sprinkle of red pepper flakes to the cheese for a spicy twist.
- Veggie Delight: Incorporate thinly sliced veggies like spinach, bell peppers, or tomatoes inside the roll-ups for added nutrition.
- Sweet Treat: For a dessert version, use Nutella or cream cheese with fruit slices, like strawberries or bananas.
- Gluten-Free: Substitute regular bread with gluten-free options to accommodate dietary needs.
Serving Suggestions
- Marinara Sauce: Serve with a side of warm marinara for dipping; it adds a delightful twist!
- Fresh Salad: Pair with a crisp green salad for a balanced meal.
- Fruit Platter: A side of fresh fruit adds a sweet contrast to the savory roll-ups.
- Fun Presentation: Arrange roll-ups on a colorful platter for a festive touch.
- Refreshing Drink: Serve with lemonade or iced tea for a refreshing complement.
FAQs about Grilled Cheese Roll Ups
Can I make Grilled Cheese Roll Ups in advance?
Absolutely! You can prepare the roll-ups ahead of time and store them in the fridge. Just reheat them in the oven for a few minutes before serving. This makes them a fantastic option for busy days!
What types of cheese work best for these roll-ups?
While cheddar is a classic choice, feel free to experiment! Mozzarella, gouda, or even a spicy pepper jack can elevate your Grilled Cheese Roll Ups. The key is to choose cheeses that melt well.
Can I use gluten-free bread for this recipe?
Yes, you can! Gluten-free bread works perfectly for Grilled Cheese Roll Ups. Just make sure to choose a brand that holds up well when rolled.
What can I serve with Grilled Cheese Roll Ups?
These roll-ups pair wonderfully with marinara sauce for dipping. You can also serve them alongside a fresh salad or a fruit platter for a balanced meal.
How do I store leftovers?
Store any leftover roll-ups in an airtight container in the fridge. They’ll stay fresh for a couple of days. Just reheat them in the oven or skillet to enjoy again!
Final Thoughts
Creating these Grilled Cheese Roll Ups is more than just cooking; it’s about bringing joy to the table. The smiles on my family’s faces as they bite into that crispy, cheesy goodness are priceless. This recipe is a reminder that comfort food doesn’t have to be complicated. It’s a delightful way to connect with loved ones, even on the busiest days. So, whether you’re making them for a quick snack or a fun dinner, these roll-ups are sure to become a cherished favorite in your home. Enjoy every cheesy moment!
Print
Grilled Cheese Roll Ups: A Fun Twist on Classic Comfort!
- Total Time: 20 minutes
- Yield: 4 servings 1x
- Diet: Vegetarian
Description
Grilled Cheese Roll Ups are a fun and creative twist on the classic grilled cheese sandwich, perfect for kids and adults alike.
Ingredients
- 4 slices of bread
- 4 slices of cheese (cheddar or your choice)
- 2 tablespoons of butter
Instructions
- Flatten each slice of bread with a rolling pin.
- Place a slice of cheese on each flattened bread slice.
- Roll the bread tightly around the cheese.
- Heat butter in a skillet over medium heat.
- Place the roll-ups seam side down in the skillet.
- Cook until golden brown, about 2-3 minutes per side.
- Remove from skillet, slice, and serve warm.
Notes
- Experiment with different types of cheese for varied flavors.
- Serve with marinara sauce for dipping.
- Can be made in advance and reheated in the oven.
- Prep Time: 10 minutes
- Cook Time: 10 minutes
- Category: Snack
- Method: Pan-frying
- Cuisine: American
Nutrition
- Serving Size: 1 roll up
- Calories: 150
- Sugar: 1g
- Sodium: 300mg
- Fat: 10g
- Saturated Fat: 5g
- Unsaturated Fat: 3g
- Trans Fat: 0g
- Carbohydrates: 12g
- Fiber: 1g
- Protein: 6g
- Cholesterol: 20mg


