Introduction to Haunted Graveyard Pudding Cups
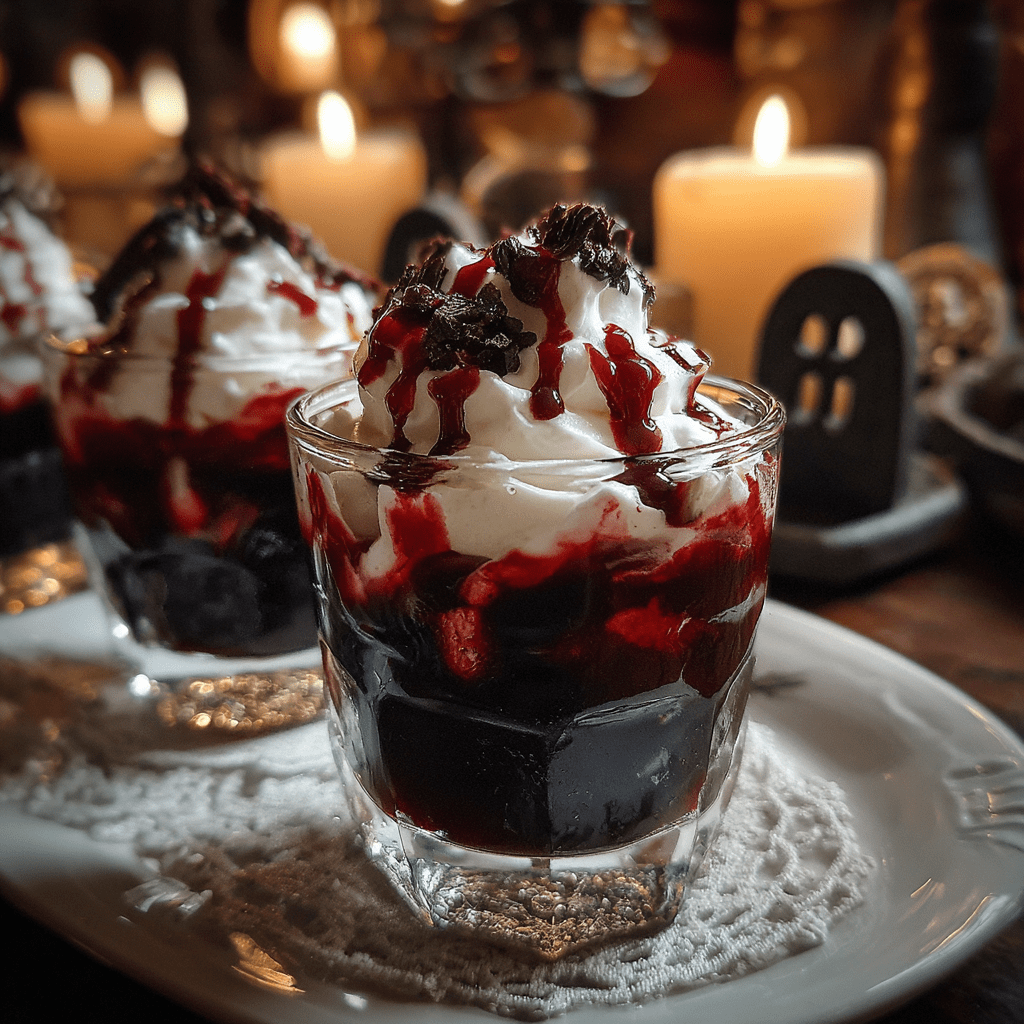
As the leaves turn and the air gets crisp, I find myself craving cozy, festive treats. That’s when I whip up my Haunted Graveyard Pudding Cups. This spooky dessert is not just a feast for the eyes; it’s a quick solution for busy days when you want to impress your loved ones. With layers of rich chocolate pudding, crushed cookies, and gummy worms, it’s a delightful way to celebrate Halloween. Plus, it’s no-bake, making it perfect for those of us juggling a million things at once. Trust me, these cups will thrill everyone!
Why You’ll Love This Haunted Graveyard Pudding Cups
These Haunted Graveyard Pudding Cups are a dream come true for busy moms and professionals alike. They come together in just 15 minutes, leaving you with more time to enjoy the festivities. The rich chocolate flavor paired with the crunch of cookies creates a delightful contrast that everyone will love. Plus, they’re customizable! You can add your favorite Halloween candies, making each cup a unique treat. What’s not to love?
Ingredients for Haunted Graveyard Pudding Cups
Gathering the right ingredients is half the fun! Here’s what you’ll need to create these spooky delights:
- Chocolate pudding: The star of the show! You can use instant or cook-and-serve varieties, depending on your preference.
- Crushed chocolate cookies: These add a delightful crunch. Oreos work wonderfully, but feel free to use any chocolate cookie you love.
- Whipped cream: This light and fluffy layer balances the richness of the pudding. You can use store-bought or homemade for a personal touch.
- Gummy worms: These creepy crawlers are essential for that Halloween vibe! They add a fun, playful element that kids adore.
- Chocolate sprinkles: A sprinkle of these adds a festive touch and enhances the spooky look of your dessert.
For those looking to intensify the chocolate flavor, consider using dark chocolate pudding instead. You can also mix in other Halloween-themed candies for decoration, like candy corn or mini chocolate bats. If you’re short on time, these ingredients can be prepped a day in advance, making your life a little easier. Exact quantities are listed at the bottom of the article for your convenience!
How to Make Haunted Graveyard Pudding Cups
Now that you have your ingredients ready, let’s dive into the fun part—making these Haunted Graveyard Pudding Cups! Follow these simple steps, and you’ll have a spooky dessert that’s sure to impress.
Step 1: Prepare the Chocolate Pudding
Start by preparing the chocolate pudding according to the package instructions. This usually involves mixing the pudding mix with milk and whisking until it thickens. If you’re using instant pudding, it’s super quick! Just remember to let it cool for a bit before layering. The last thing you want is melted whipped cream!
Step 2: Layer the Ingredients
Grab your cups or small bowls. Begin by adding a generous layer of chocolate pudding at the bottom. This rich layer sets the stage for the deliciousness to come. Make sure to spread it evenly, so every bite is a chocolatey delight!
Step 3: Repeat the Layers
Next, sprinkle a layer of crushed chocolate cookies over the pudding. This adds a delightful crunch that contrasts beautifully with the creamy pudding. Follow this with a layer of whipped cream. Repeat these layers until your cup is full, finishing with a layer of whipped cream on top. It’s like building a spooky dessert tower!
Step 4: Add the Toppings
Now comes the fun part—decorating! Top your cups with gummy worms, letting them dangle over the edges for that creepy effect. Then, sprinkle chocolate sprinkles on top for an extra festive touch. You can even add some edible eyes or Halloween-themed candies if you’re feeling adventurous!
Step 5: Chill Before Serving
Finally, place your cups in the refrigerator for at least 30 minutes. This chilling time allows the flavors to meld and the pudding to set perfectly. Plus, it makes for a refreshing treat when you’re ready to serve. Trust me, the wait will be worth it!
Tips for Success
- Use cold milk for the pudding to ensure it thickens properly.
- For a smoother texture, whisk the pudding vigorously to eliminate lumps.
- Chill your cups in the fridge for at least 30 minutes for the best flavor.
- Get creative with toppings—try adding crushed candy bars or Halloween sprinkles!
- Make these cups a day ahead to save time on party day.
Equipment Needed
- Cups or small bowls: Use clear cups for a spooky view of the layers. Mason jars work great too!
- Mixing bowl: A medium-sized bowl is perfect for preparing the pudding.
- Whisk or spoon: Either will do for mixing the pudding and layering the ingredients.
- Refrigerator: Essential for chilling your delicious creations before serving.
Variations
- Vegan Option: Substitute chocolate pudding with a plant-based version and use coconut whipped cream for a dairy-free treat.
- Gluten-Free: Use gluten-free chocolate cookies to make this dessert suitable for those with gluten sensitivities.
- Fruit Layer: Add a layer of mashed bananas or pureed pumpkin for a fruity twist that complements the chocolate.
- Nutty Crunch: Incorporate crushed nuts or granola between the layers for added texture and flavor.
- Spooky Flavors: Experiment with flavored pudding, like vanilla or butterscotch, for a different taste experience.
Serving Suggestions
- Pair these Haunted Graveyard Pudding Cups with spooky-themed cookies for a delightful dessert spread.
- Serve alongside a warm apple cider or pumpkin spice latte to enhance the fall flavors.
- For a festive touch, use Halloween-themed napkins and plates to elevate your presentation.
- Consider adding a few decorative plastic spiders or mini pumpkins around the cups for extra flair.
FAQs about Haunted Graveyard Pudding Cups
Can I make Haunted Graveyard Pudding Cups in advance?
Absolutely! These spooky treats can be made a day ahead. Just layer everything and chill them in the fridge. This way, you’ll save time on the day of your Halloween gathering!
What can I use instead of chocolate cookies?
If chocolate cookies aren’t your thing, feel free to use graham crackers or vanilla wafers. They’ll still add a nice crunch and work well with the chocolate pudding.
How can I make these pudding cups healthier?
To lighten them up, consider using sugar-free pudding and low-fat whipped cream. You can also add fresh fruit layers for a nutritious twist!
Can I use different flavors of pudding?
Definitely! While chocolate is classic, vanilla, butterscotch, or even pumpkin spice pudding can create a fun flavor twist. Just imagine the possibilities!
What’s the best way to store leftovers?
Store any leftovers in an airtight container in the fridge. They should stay fresh for up to two days, but I doubt they’ll last that long!
Final Thoughts
Creating these Haunted Graveyard Pudding Cups is more than just making a dessert; it’s about crafting memories with your loved ones. The joy on your kids’ faces as they dig into these spooky treats is priceless. Plus, the ease of preparation means you can spend less time in the kitchen and more time enjoying the festivities. Whether it’s a Halloween party or a cozy family night, these pudding cups are sure to bring smiles and laughter. So, roll up your sleeves, get creative, and let the Halloween spirit shine through your delicious creations!
Print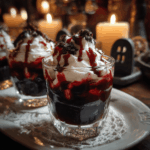
Haunted Graveyard Pudding Cups That Will Thrill Everyone!
- Total Time: 45 minutes (including chilling time)
- Yield: 4 servings 1x
- Diet: Vegetarian
Description
A spooky and delicious dessert perfect for Halloween, featuring layers of chocolate pudding, crushed cookies, and gummy worms.
Ingredients
- 2 cups chocolate pudding
- 1 cup crushed chocolate cookies
- 1 cup whipped cream
- Gummy worms
- Chocolate sprinkles
Instructions
- Prepare the chocolate pudding according to package instructions and let it cool.
- In a cup, layer chocolate pudding, crushed cookies, and whipped cream.
- Repeat the layers until the cup is full.
- Top with gummy worms and chocolate sprinkles for decoration.
- Chill in the refrigerator for at least 30 minutes before serving.
Notes
- For a more intense chocolate flavor, use dark chocolate pudding.
- Feel free to add other Halloween-themed candies for decoration.
- These can be made a day in advance for convenience.
- Prep Time: 15 minutes
- Cook Time: 0 minutes
- Category: Dessert
- Method: No-bake
- Cuisine: American
Nutrition
- Serving Size: 1 cup
- Calories: 250
- Sugar: 20g
- Sodium: 150mg
- Fat: 10g
- Saturated Fat: 5g
- Unsaturated Fat: 3g
- Trans Fat: 0g
- Carbohydrates: 35g
- Fiber: 2g
- Protein: 4g
- Cholesterol: 15mg