
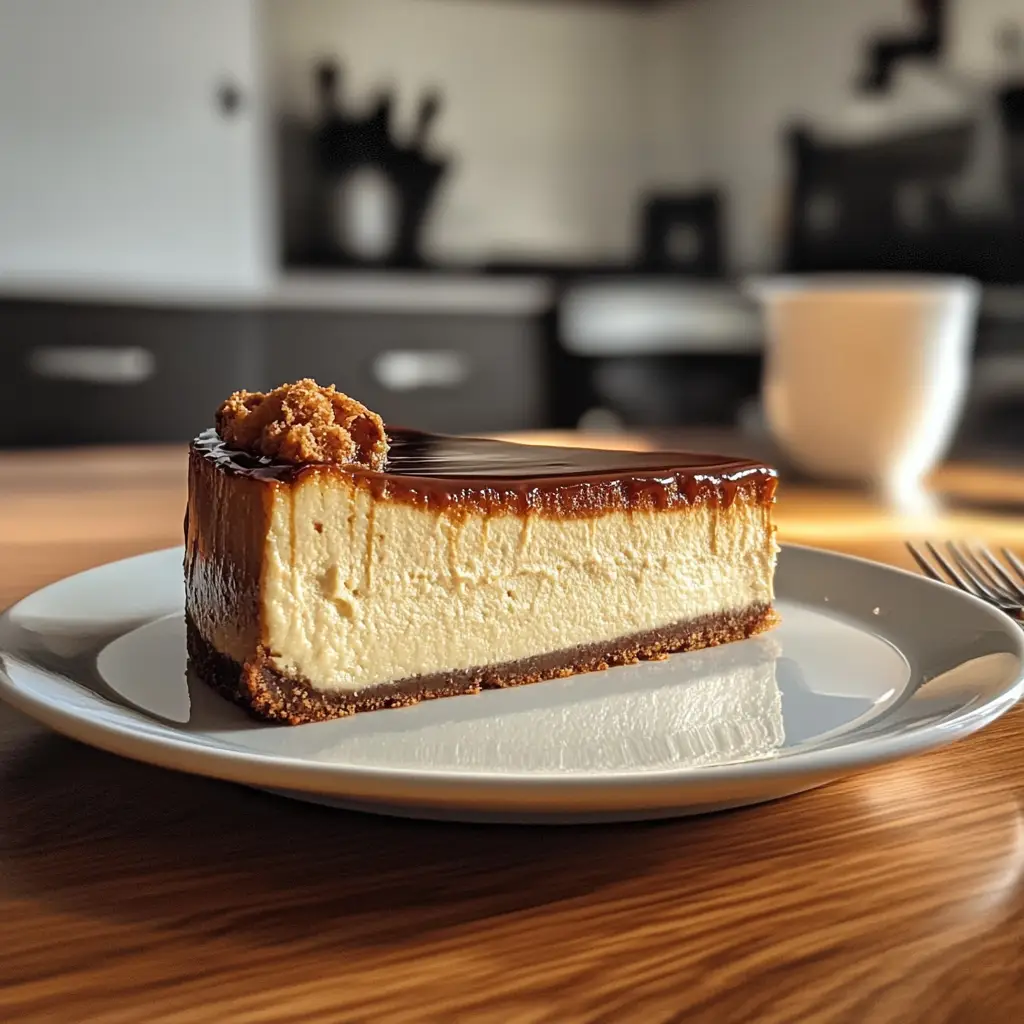
Introduction to Honeycomb Cheesecake
Welcome to the delightful world of Honeycomb Cheesecake! If you’re like me, juggling a busy life while trying to whip up something special can feel overwhelming. This creamy cheesecake, infused with the sweet crunch of honeycomb, is the perfect solution for those hectic days. It’s not just a dessert; it’s a way to impress your loved ones without spending hours in the kitchen. Imagine serving this luscious treat at your next gathering, and watching everyone’s faces light up with joy. Trust me, this recipe will quickly become a favorite in your home!
Why You’ll Love This Honeycomb Cheesecake
This Honeycomb Cheesecake is a dream come true for busy moms and professionals alike. It’s incredibly easy to make, requiring just a handful of ingredients and minimal prep time. The rich, creamy texture combined with the sweet crunch of honeycomb creates a flavor explosion that will leave your taste buds dancing. Plus, it’s a showstopper dessert that’s sure to impress, making it perfect for any occasion!
Ingredients for Honeycomb Cheesecake
Gathering the right ingredients is the first step to creating your Honeycomb Cheesecake masterpiece. Here’s what you’ll need:
- Digestive biscuits: These provide a crunchy base. You can substitute with graham crackers if you prefer.
- Unsalted butter: This binds the biscuit base together. Make sure it’s melted for easy mixing.
- Cream cheese: The star of the show! It gives the cheesecake its creamy texture. Use full-fat for the best results.
- Sugar: This sweetens the filling. You can use granulated sugar or try brown sugar for a deeper flavor.
- Large eggs: They help set the cheesecake. Room temperature eggs mix better, so take them out ahead of time.
- Sour cream: This adds a tangy flavor and creaminess. Greek yogurt can be a lighter alternative.
- Honeycomb: The delightful crunch that makes this cheesecake special! You can find it at specialty stores or online.
- Vanilla extract: A splash of this enhances the overall flavor. Pure vanilla is always best.
For exact measurements, check the bottom of the article where you can find a printable version of the recipe. Happy baking!
How to Make Honeycomb Cheesecake
Now that you have your ingredients ready, let’s dive into the steps to create this delightful Honeycomb Cheesecake. Each step is simple, and I promise you’ll feel like a pro in no time!
Step 1: Preheat the Oven
First things first, preheat your oven to 160°C (320°F). Preheating is crucial because it ensures that your cheesecake bakes evenly. A hot oven helps set the filling, giving you that perfect creamy texture. Trust me, you don’t want to skip this step!
Step 2: Prepare the Biscuit Base
Next, grab those digestive biscuits and crush them into fine crumbs. You can use a food processor or simply place them in a ziplock bag and smash them with a rolling pin. Once crushed, mix the crumbs with melted butter until it resembles wet sand. This mixture will form the delicious base of your cheesecake.
Step 3: Press the Base into the Pan
Now, take your springform pan and evenly press the biscuit mixture into the bottom. Use the back of a measuring cup or your fingers to pack it down firmly. This step is key to ensuring your base holds together when you slice into the cheesecake later. Make it nice and compact!
Step 4: Mix the Cream Cheese Filling
In a large bowl, beat the cream cheese and sugar together until smooth and creamy. I like to use an electric mixer for this, but a whisk works too if you’re feeling strong! Make sure there are no lumps; a smooth filling is what we’re after for that dreamy texture.
Step 5: Add Eggs and Other Ingredients
Now, it’s time to add the eggs. Crack them in one at a time, mixing well after each addition. This helps incorporate air, making your cheesecake light and fluffy. After the eggs, stir in the sour cream, crushed honeycomb, and vanilla extract. Each ingredient adds a layer of flavor that makes this cheesecake truly special!
Step 6: Pour and Bake
Pour the creamy mixture over your prepared biscuit base. Spread it out evenly with a spatula. Now, pop it into the preheated oven and bake for 50-60 minutes. You’ll know it’s done when the edges are set, but the center still has a slight jiggle. This is the secret to a perfect Honeycomb Cheesecake!
Step 7: Cooling and Refrigeration
Once baked, remove the cheesecake from the oven and let it cool at room temperature. This step is important to prevent cracks. After it’s cooled, refrigerate it for at least 4 hours, or overnight if you can wait! Chilling allows the flavors to meld beautifully, making each bite even more delicious.
Tips for Success
- Use room temperature ingredients for a smoother batter.
- Don’t overmix the filling; it can lead to cracks.
- Check for doneness by gently shaking the pan; a slight jiggle in the center is perfect.
- Let the cheesecake cool completely before refrigerating to avoid condensation.
- For a stunning presentation, top with extra crushed honeycomb before serving!
Equipment Needed
- Springform pan: Essential for easy removal. A regular cake pan works too, but slicing will be trickier.
- Mixing bowls: Use a large bowl for the filling and a smaller one for the biscuit base.
- Electric mixer: Makes beating the cream cheese a breeze. A whisk can work if you’re up for a workout!
- Spatula: Perfect for spreading the filling evenly.
- Measuring cups and spoons: Accurate measurements are key to success!
Variations
- Chocolate Honeycomb Cheesecake: Add melted chocolate to the cream cheese mixture for a rich, chocolatey twist.
- Fruit-Infused Cheesecake: Incorporate pureed fruits like strawberries or raspberries into the filling for a fruity flavor.
- Gluten-Free Option: Substitute digestive biscuits with gluten-free cookies to make this cheesecake suitable for gluten-sensitive friends.
- Vegan Version: Use vegan cream cheese and a flaxseed egg substitute for a plant-based delight.
- Nutty Crunch: Mix in chopped nuts like almonds or hazelnuts for an added crunch and flavor depth.
Serving Suggestions
- Pair your Honeycomb Cheesecake with a dollop of whipped cream for extra creaminess.
- Serve alongside fresh berries for a pop of color and tartness.
- A drizzle of honey or chocolate sauce adds a lovely finishing touch.
- For drinks, consider a light tea or a glass of dessert wine.
- Garnish with mint leaves for a refreshing look!
FAQs about Honeycomb Cheesecake
As you embark on your Honeycomb Cheesecake journey, you might have a few questions. Here are some common queries I’ve encountered, along with helpful answers to guide you along the way!
Can I make Honeycomb Cheesecake ahead of time?
Absolutely! In fact, making it a day in advance enhances the flavors. Just keep it covered in the fridge until you’re ready to serve.
What can I use instead of honeycomb?
If honeycomb isn’t available, you can substitute it with crushed toffee or caramel candies. They’ll still give you that sweet crunch!
How do I know when my cheesecake is done baking?
Look for the edges to be set while the center has a slight jiggle. It will firm up as it cools, giving you that perfect creamy texture.
Can I freeze Honeycomb Cheesecake?
Yes, you can freeze it! Just wrap it tightly in plastic wrap and foil. Thaw it in the fridge before serving for the best results.
What’s the best way to slice my cheesecake?
For clean slices, dip your knife in hot water and wipe it dry before cutting. This helps prevent sticking and gives you beautiful, neat pieces!
Final Thoughts
Creating this Honeycomb Cheesecake is more than just baking; it’s about crafting a moment of joy for yourself and your loved ones. Each slice is a celebration of flavors, bringing smiles and sweet memories to the table. Whether it’s a family gathering or a quiet evening at home, this cheesecake is sure to impress. I love how it transforms an ordinary day into something special. So, roll up your sleeves, embrace the process, and enjoy the delightful experience of making this creamy, dreamy dessert. Trust me, you’ll be savoring every bite and sharing the love!
Print
Honeycomb Cheesecake: Discover the Perfect Recipe!
- Total Time: 4 hours 20 minutes
- Yield: 8 servings 1x
- Diet: Vegetarian
Description
A delightful and creamy cheesecake infused with the sweet flavor of honeycomb, perfect for any occasion.
Ingredients
- 200g digestive biscuits
- 100g unsalted butter, melted
- 600g cream cheese
- 150g sugar
- 3 large eggs
- 200ml sour cream
- 100g honeycomb, crushed
- 1 tsp vanilla extract
Instructions
- Preheat the oven to 160°C (320°F).
- Crush the digestive biscuits and mix with melted butter.
- Press the biscuit mixture into the base of a springform pan.
- In a bowl, beat the cream cheese and sugar until smooth.
- Add the eggs one at a time, mixing well after each addition.
- Stir in the sour cream, crushed honeycomb, and vanilla extract.
- Pour the cheesecake mixture over the biscuit base.
- Bake in the preheated oven for 50-60 minutes until set.
- Allow to cool, then refrigerate for at least 4 hours before serving.
Notes
- For a firmer cheesecake, bake a little longer.
- Serve with extra honeycomb on top for decoration.
- Can be made a day in advance for better flavor.
- Prep Time: 20 minutes
- Cook Time: 60 minutes
- Category: Dessert
- Method: Baking
- Cuisine: American
Nutrition
- Serving Size: 1 slice
- Calories: 350
- Sugar: 25g
- Sodium: 200mg
- Fat: 22g
- Saturated Fat: 12g
- Unsaturated Fat: 8g
- Trans Fat: 0g
- Carbohydrates: 30g
- Fiber: 1g
- Protein: 5g
- Cholesterol: 80mg


