Introduction to Mini Cherry Cheesecakes
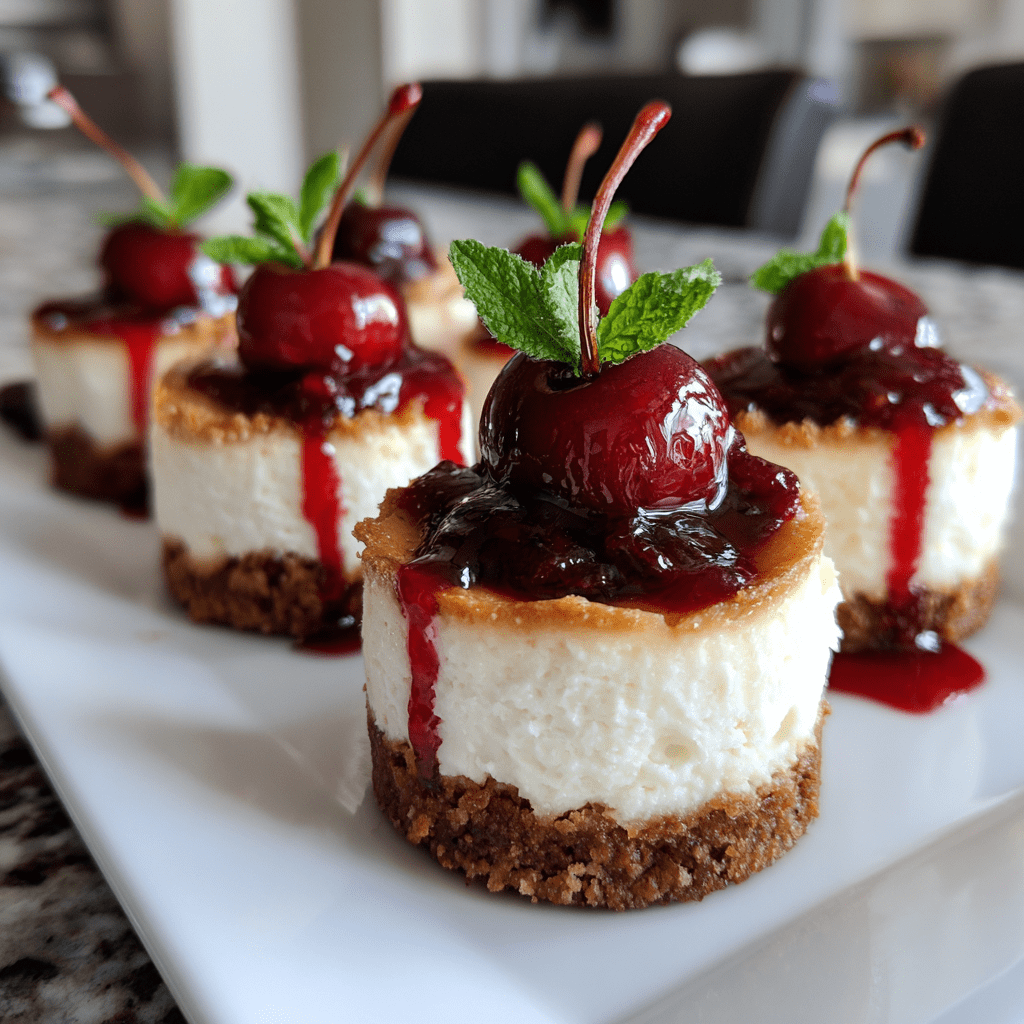
As a busy mom, I know how precious time can be, especially when it comes to whipping up something sweet. That’s why I absolutely adore these Mini Cherry Cheesecakes! They’re not just adorable; they’re a quick solution for those days when you want to impress your loved ones without spending hours in the kitchen. With a creamy filling and a delightful cherry topping, these little bites of heaven are perfect for any occasion. Whether it’s a family gathering or a cozy night in, these mini treats will surely bring smiles all around!
Why You’ll Love This Mini Cherry Cheesecakes
These Mini Cherry Cheesecakes are a dream come true for busy lives! They’re incredibly easy to make, taking just 40 minutes from start to finish. The taste? Oh, it’s a delightful balance of creamy and sweet, with that luscious cherry topping stealing the show. Plus, they’re perfectly portioned, so you can indulge without the guilt. Trust me, once you try them, they’ll become your go-to dessert for any occasion!
Ingredients for Mini Cherry Cheesecakes
Gathering the right ingredients is the first step to creating these delightful Mini Cherry Cheesecakes. Here’s what you’ll need:
- Graham cracker crumbs: These form the base of your cheesecake, providing a sweet and crunchy crust. You can use store-bought or crush your own for a fresher taste.
- Sugar: A little sweetness goes a long way! You’ll need sugar for both the crust and the filling to balance the flavors perfectly.
- Unsalted butter: This adds richness to the crust. Using unsalted butter allows you to control the saltiness of your dessert.
- Cream cheese: The star of the show! Softened cream cheese creates that creamy, dreamy filling we all love. Make sure it’s at room temperature for easy mixing.
- Vanilla extract: A splash of vanilla enhances the flavor of the cheesecake, making it even more delicious.
- Eggs: These help bind the filling together, giving it that perfect texture. Remember to add them one at a time for the best results!
- Cherry pie filling: This sweet topping adds a burst of flavor and color. Feel free to swap it out for other fruit toppings if cherries aren’t your favorite!
For those looking for alternatives, you can use gluten-free graham crackers for a gluten-free version. If you want to get creative, consider adding a hint of lemon zest to the filling for a refreshing twist. The exact quantities for each ingredient are listed at the bottom of the article, ready for you to print out and take to the kitchen!
How to Make Mini Cherry Cheesecakes
Now that you have all your ingredients ready, let’s dive into the fun part—making these Mini Cherry Cheesecakes! Follow these simple steps, and you’ll have a delightful dessert that’s sure to impress.
Step 1: Preheat the Oven
First things first, preheat your oven to 325°F (160°C). Preheating is crucial for baking cheesecakes because it ensures even cooking. If the oven isn’t hot enough, your cheesecakes may not set properly, leading to a gooey mess instead of a creamy delight. So, let that oven warm up while you prepare the crust!
Step 2: Prepare the Crust
In a mixing bowl, combine your graham cracker crumbs, sugar, and melted butter. Stir until everything is well mixed and resembles wet sand. This mixture is the foundation of your mini cheesecakes, so it’s important to press it firmly into the bottom of your mini muffin tins. Use the back of a spoon or your fingers to create an even layer. A solid crust will hold everything together beautifully!
Step 3: Make the Cheesecake Filling
In another bowl, beat the softened cream cheese until it’s smooth and creamy. Add in the sugar and vanilla extract, mixing until well combined. Now, here’s a little tip: add the eggs one at a time, mixing well after each addition. This helps to incorporate air into the filling, giving it that light and fluffy texture we all love. Don’t rush this step; take your time to ensure everything is blended perfectly!
Step 4: Assemble and Bake
Once your filling is ready, it’s time to pour it over the crusts in your muffin tins. Fill each cup about three-quarters full to allow room for rising. Bake in your preheated oven for 20-25 minutes. You’ll know they’re done when the edges are set, but the centers still have a slight jiggle. This is key to achieving that creamy texture!
Step 5: Cool and Top
After baking, let your mini cheesecakes cool in the tins for about 10 minutes. Then, transfer them to a wire rack to cool completely. Once they’re cool, it’s time for the cherry topping! Spoon a generous dollop of cherry pie filling on each cheesecake. This not only adds flavor but also makes for a beautiful presentation. Your Mini Cherry Cheesecakes are now ready to be enjoyed!
Tips for Success
- Make sure your cream cheese is at room temperature for easy mixing.
- Press the crust firmly to avoid crumbling when serving.
- Don’t overmix the filling; it can lead to cracks in your cheesecakes.
- Let the cheesecakes cool completely before adding the cherry topping.
- For a fun twist, try different fruit toppings like blueberries or strawberries!
Equipment Needed
- Mini muffin tin: If you don’t have one, a regular muffin tin works too; just adjust the baking time.
- Mixing bowls: Use any size you have on hand; just make sure they’re large enough for mixing.
- Electric mixer: A hand mixer is perfect, but a whisk will do if you’re feeling strong!
- Measuring cups and spoons: Essential for accuracy, but you can estimate if you’re in a pinch.
- Spatula: Great for scraping down the sides of the bowl and transferring the filling.
Variations of Mini Cherry Cheesecakes
- Chocolate Mini Cherry Cheesecakes: Add melted chocolate to the cheesecake filling for a rich, decadent twist.
- Berry Bliss: Swap the cherry topping for a mix of fresh berries like strawberries, blueberries, or raspberries for a refreshing change.
- Nutty Delight: Incorporate crushed nuts like pecans or walnuts into the crust for added texture and flavor.
- Vegan Option: Use vegan cream cheese and a flaxseed mixture instead of eggs for a plant-based version.
- Mini Lemon Cheesecakes: Add lemon zest and juice to the filling for a zesty, citrusy flavor that pairs beautifully with the cherry topping.
Serving Suggestions for Mini Cherry Cheesecakes
- Pair with a dollop of whipped cream for an extra touch of sweetness.
- Serve alongside a scoop of vanilla ice cream for a delightful contrast.
- Garnish with fresh mint leaves for a pop of color and freshness.
- Enjoy with a cup of coffee or tea to balance the sweetness.
- Present on a decorative platter for a stunning dessert display.
FAQs about Mini Cherry Cheesecakes
Can I make Mini Cherry Cheesecakes ahead of time?
Absolutely! These mini treats can be made a day in advance. Just store them in the refrigerator until you’re ready to serve. This makes them perfect for parties or family gatherings!
What can I use instead of cherry pie filling?
If cherries aren’t your thing, feel free to swap the cherry pie filling for other fruit toppings. Blueberries, strawberries, or even a mix of berries work wonderfully!
How do I know when the cheesecakes are done baking?
Look for the edges to be set while the centers still have a slight jiggle. This ensures a creamy texture that’s simply irresistible!
Can I freeze Mini Cherry Cheesecakes?
Yes, you can freeze them! Just make sure they’re completely cooled and wrapped tightly. Thaw them in the refrigerator before serving for the best taste.
What’s the best way to serve Mini Cherry Cheesecakes?
For a beautiful presentation, serve them on a decorative platter. Add a dollop of whipped cream or a sprinkle of fresh mint for that extra touch!
Final Thoughts
Making Mini Cherry Cheesecakes is more than just baking; it’s about creating sweet memories in the kitchen. These delightful treats bring joy to any gathering, and their bite-sized nature makes them perfect for sharing. I love how they can turn an ordinary day into something special with just a few simple ingredients. Plus, the smiles on my family’s faces when they take that first bite? Priceless! So, whether you’re celebrating a special occasion or just treating yourself, these mini cheesecakes are sure to bring happiness to your table. Enjoy every delicious moment!
Print
Mini Cherry Cheesecakes: A Delicious Treat You Must Try!
- Total Time: 40 minutes
- Yield: 24 mini cheesecakes 1x
- Diet: Vegetarian
Description
Mini Cherry Cheesecakes are delightful bite-sized desserts featuring a creamy cheesecake filling topped with sweet cherry topping, perfect for any occasion.
Ingredients
- 1 cup graham cracker crumbs
- 1/4 cup sugar
- 1/2 cup unsalted butter, melted
- 16 oz cream cheese, softened
- 1/2 cup sugar
- 1 tsp vanilla extract
- 2 large eggs
- 1 can cherry pie filling
Instructions
- Preheat the oven to 325°F (160°C).
- In a bowl, mix graham cracker crumbs, 1/4 cup sugar, and melted butter until combined.
- Press the mixture into the bottom of mini muffin tins to form the crust.
- In another bowl, beat the cream cheese, 1/2 cup sugar, and vanilla extract until smooth.
- Add eggs one at a time, mixing well after each addition.
- Pour the cheesecake mixture over the crusts in the muffin tins.
- Bake for 20-25 minutes or until set.
- Let cool, then top with cherry pie filling before serving.
Notes
- For a gluten-free version, use gluten-free graham crackers.
- These can be made a day in advance and stored in the refrigerator.
- Feel free to substitute the cherry topping with other fruit toppings if desired.
- Prep Time: 15 minutes
- Cook Time: 25 minutes
- Category: Dessert
- Method: Baking
- Cuisine: American
Nutrition
- Serving Size: 1 mini cheesecake
- Calories: 150
- Sugar: 10g
- Sodium: 150mg
- Fat: 8g
- Saturated Fat: 5g
- Unsaturated Fat: 2g
- Trans Fat: 0g
- Carbohydrates: 18g
- Fiber: 1g
- Protein: 2g
- Cholesterol: 30mg