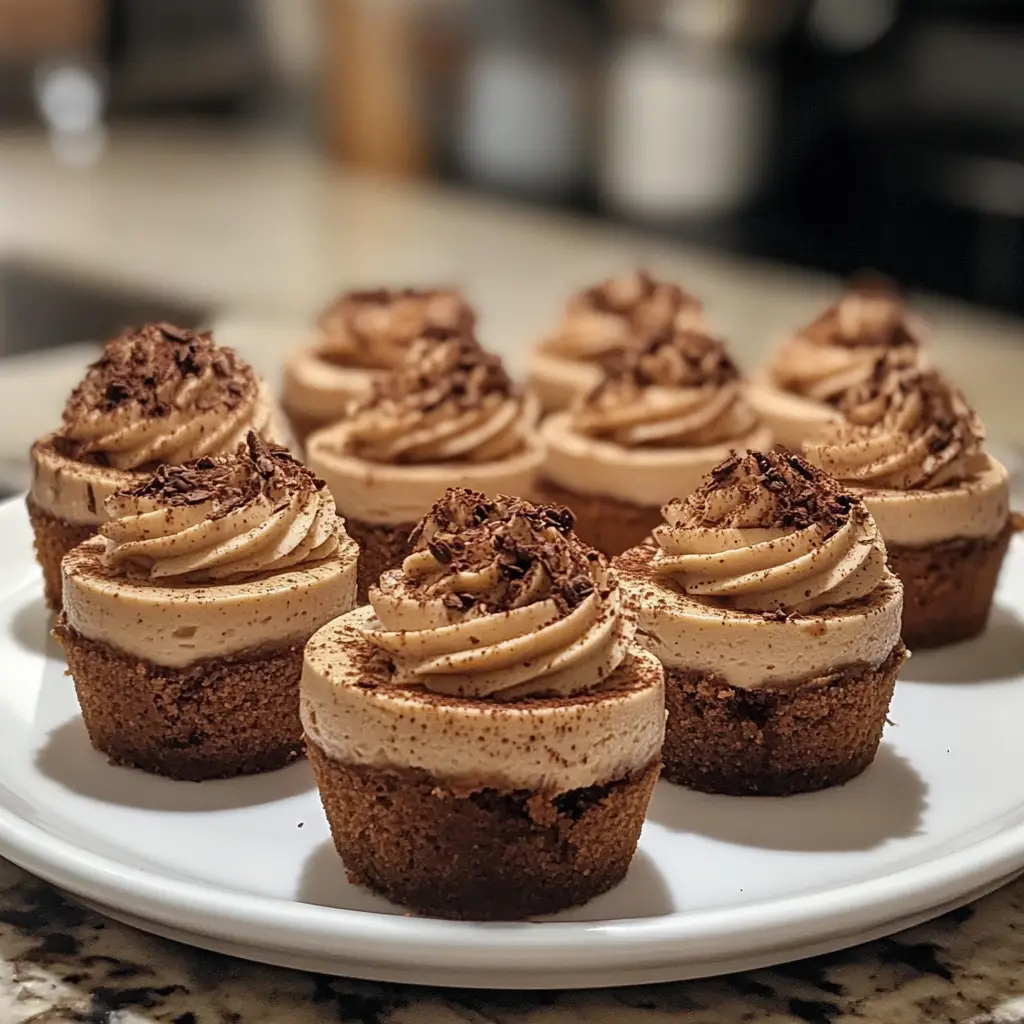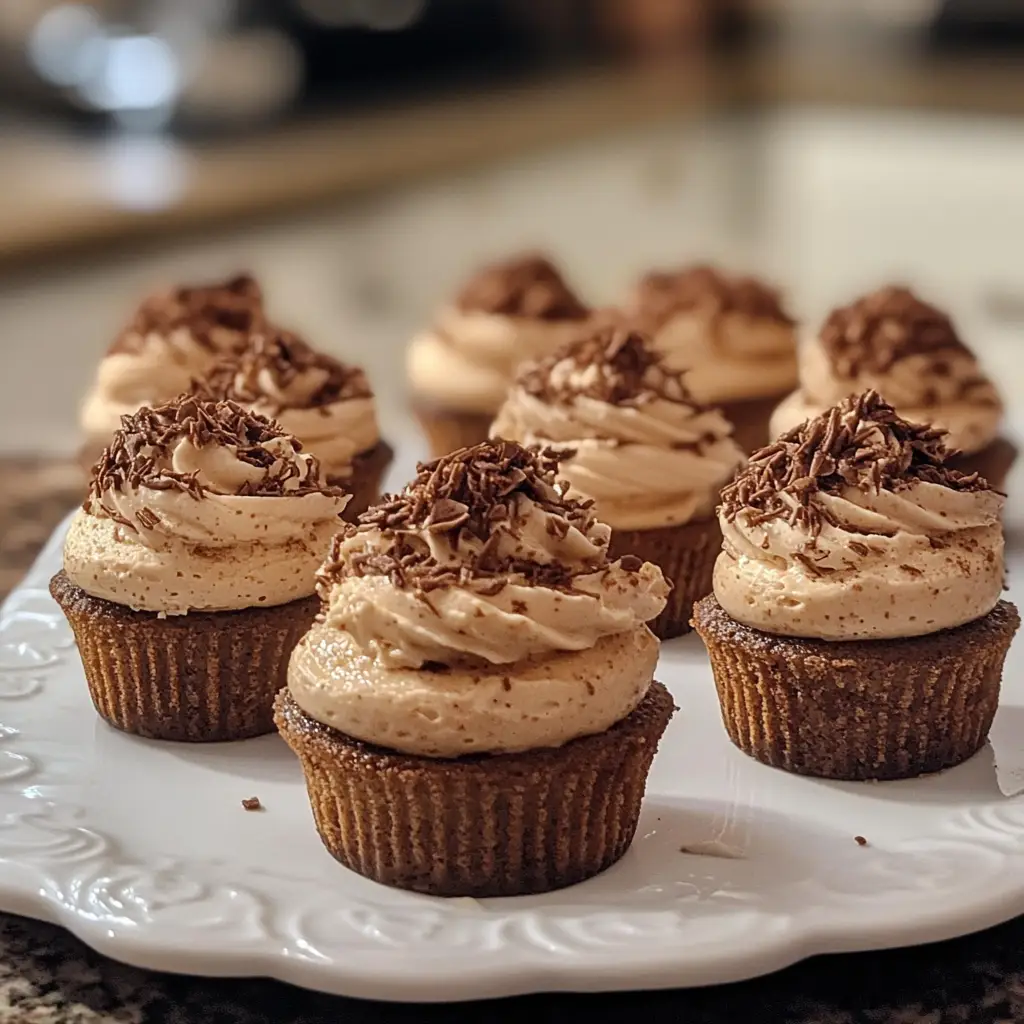
Introduction to Mocha Latte Cheesecake Cups
As a busy mom, I know how precious time can be, especially when it comes to whipping up something special for family or friends. That’s why I absolutely adore these Mocha Latte Cheesecake Cups! They’re not just a treat; they’re a delightful way to impress your loved ones without spending hours in the kitchen. Imagine creamy cheesecake infused with rich espresso, all nestled in a crunchy chocolate cookie base. It’s the perfect quick solution for a busy day or a sweet ending to a dinner party. Trust me, these little cups of joy will have everyone asking for seconds!
Why You’ll Love This Mocha Latte Cheesecake Cups
These Mocha Latte Cheesecake Cups are a dream come true for anyone who loves dessert but is short on time. They’re incredibly easy to make, requiring no baking at all! Plus, the combination of creamy cheesecake and bold coffee flavor is simply irresistible. Whether you’re hosting a gathering or just treating yourself, these cups deliver a gourmet experience without the fuss. You’ll be amazed at how quickly they disappear!
Ingredients for Mocha Latte Cheesecake Cups
Gathering the right ingredients is the first step to creating these delightful Mocha Latte Cheesecake Cups. Here’s what you’ll need:
- Cream Cheese: This is the star of the show! Softened cream cheese gives the cheesecake its rich and creamy texture.
- Sugar: A touch of sweetness balances the coffee flavor, making each bite a little piece of heaven.
- Heavy Cream: This adds a luscious creaminess to the mixture, ensuring it’s smooth and decadent.
- Brewed Espresso: The heart of the mocha flavor! Use cooled espresso for that perfect coffee kick. You can adjust the amount for a stronger taste.
- Vanilla Extract: A splash of vanilla enhances the overall flavor, adding warmth and depth.
- Chocolate Cookie Crumbs: These provide a delightful crunch at the bottom of the cups. You can use store-bought or crush your favorite chocolate cookies.
- Cocoa Powder: A sprinkle of cocoa adds an extra layer of chocolatey goodness to the dessert.
- Whipped Cream: This is the perfect topping to add a light and airy finish to your cheesecake cups.
- Chocolate Shavings: For garnish, these add a touch of elegance and a hint of extra chocolate flavor.
For exact measurements, check the bottom of the article where you can find everything listed for easy printing. Feel free to get creative with your ingredients! You can swap out the chocolate cookie crumbs for graham cracker crumbs or even use a dairy-free cream cheese for a lighter version. The possibilities are endless!
How to Make Mocha Latte Cheesecake Cups
Now that you have all your ingredients ready, let’s dive into the fun part—making these Mocha Latte Cheesecake Cups! Follow these simple steps, and you’ll have a delicious dessert that’s sure to impress.
Step 1: Prepare the Cream Cheese Mixture
Start by taking your softened cream cheese and placing it in a mixing bowl. It’s crucial to let the cream cheese sit at room temperature for about 30 minutes before you begin. This makes it easier to beat and ensures a smooth texture. Add the sugar to the bowl and beat them together until the mixture is creamy and free of lumps. You want it to be as smooth as a cloud!
Step 2: Add the Cream and Espresso
Next, pour in the heavy cream, cooled espresso, and vanilla extract. This is where the magic happens! Mix everything together until it’s well combined and creamy. The heavy cream adds that luscious texture, while the espresso gives it that rich mocha flavor. You’ll want to make sure there are no streaks left in the mixture—smooth is the name of the game!
Step 3: Layer the Cookie Crumbs
Now, grab your serving cups. At the bottom of each cup, layer in the chocolate cookie crumbs. This crunchy base is like a little surprise waiting to be discovered. Use about a tablespoon or so in each cup, pressing it down gently to create a solid foundation. It’s the perfect contrast to the creamy cheesecake above!
Step 4: Fill the Cups
With the cookie crumbs in place, it’s time to fill the cups with your cheesecake mixture. Spoon the creamy goodness over the cookie layer, filling each cup to the top. Don’t worry about being too neat; a little mess adds character! Just make sure each cup is filled evenly so everyone gets the same delicious experience.
Step 5: Chill to Set
Once your cups are filled, it’s time for the most challenging part—waiting! Place the cups in the refrigerator and let them chill for at least 2 hours. This step is essential for the cheesecake to set properly. The longer they chill, the better the flavors meld together. Trust me, the wait will be worth it!
Step 6: Garnish and Serve
Finally, it’s time to add the finishing touches! Before serving, top each cup with a generous dollop of whipped cream. For an elegant touch, sprinkle some chocolate shavings on top. This not only looks beautiful but also adds an extra layer of chocolatey goodness. Your Mocha Latte Cheesecake Cups are now ready to wow your guests!
Tips for Success
- Make sure your cream cheese is fully softened for a smooth mixture.
- Chill the cups overnight for even better flavor and texture.
- Use a piping bag for the whipped cream for a professional look.
- Experiment with flavored coffee for a unique twist.
- Don’t skip the chocolate shavings; they elevate the presentation!
Equipment Needed
- Mixing Bowl: A medium-sized bowl works best. You can also use a stand mixer for ease.
- Electric Mixer: A hand mixer is perfect for beating the cream cheese. A whisk can work too, but it’ll take longer.
- Serving Cups: Any small cups or jars will do. Mason jars add a rustic touch!
- Spatula: A rubber spatula helps in scraping down the sides of the bowl.
Variations
- Flavored Espresso: Try using flavored espresso, like hazelnut or vanilla, for a unique twist on the classic mocha.
- Dairy-Free Option: Substitute cream cheese with a dairy-free alternative and use coconut cream instead of heavy cream for a vegan-friendly version.
- Nutty Crunch: Add crushed nuts, like almonds or hazelnuts, to the cookie crumb layer for an extra crunch and flavor.
- Chocolate Lovers: Mix in mini chocolate chips into the cheesecake mixture for an added chocolatey surprise.
- Seasonal Flavors: Incorporate pumpkin spice or peppermint extract during the holidays for a festive flair.
Serving Suggestions
- Pair these Mocha Latte Cheesecake Cups with a hot cup of coffee or a creamy latte for a delightful dessert experience.
- Serve alongside fresh berries for a pop of color and a refreshing contrast to the rich cheesecake.
- For an elegant presentation, arrange the cups on a decorative platter with chocolate drizzles.
FAQs about Mocha Latte Cheesecake Cups
Can I make Mocha Latte Cheesecake Cups ahead of time?
Absolutely! These cups can be made a day in advance. Just store them in the refrigerator until you’re ready to serve. This actually enhances the flavors!
What can I use instead of espresso?
If you don’t have espresso on hand, strong brewed coffee works just as well. Just make sure it’s cooled before adding it to the mixture.
How long do leftovers last?
Leftover Mocha Latte Cheesecake Cups can be stored in the refrigerator for up to 3 days. Just make sure they’re covered to keep them fresh!
Can I use a different type of cookie for the crust?
Definitely! While chocolate cookie crumbs are delicious, you can use graham crackers or even vanilla wafers for a different flavor profile.
Is this recipe suitable for a gluten-free diet?
To make these cups gluten-free, simply use gluten-free cookies for the crust. The rest of the ingredients are naturally gluten-free!
Final Thoughts
Creating these Mocha Latte Cheesecake Cups is more than just making a dessert; it’s about sharing joy and deliciousness with those you love. Each creamy, coffee-infused bite is a little celebration, perfect for any occasion. Whether it’s a cozy family dinner or a gathering with friends, these cups will surely impress. Plus, the no-bake aspect means you can whip them up quickly, leaving you more time to enjoy the moment. So, roll up your sleeves, gather your ingredients, and let the magic happen. Trust me, your taste buds will thank you!