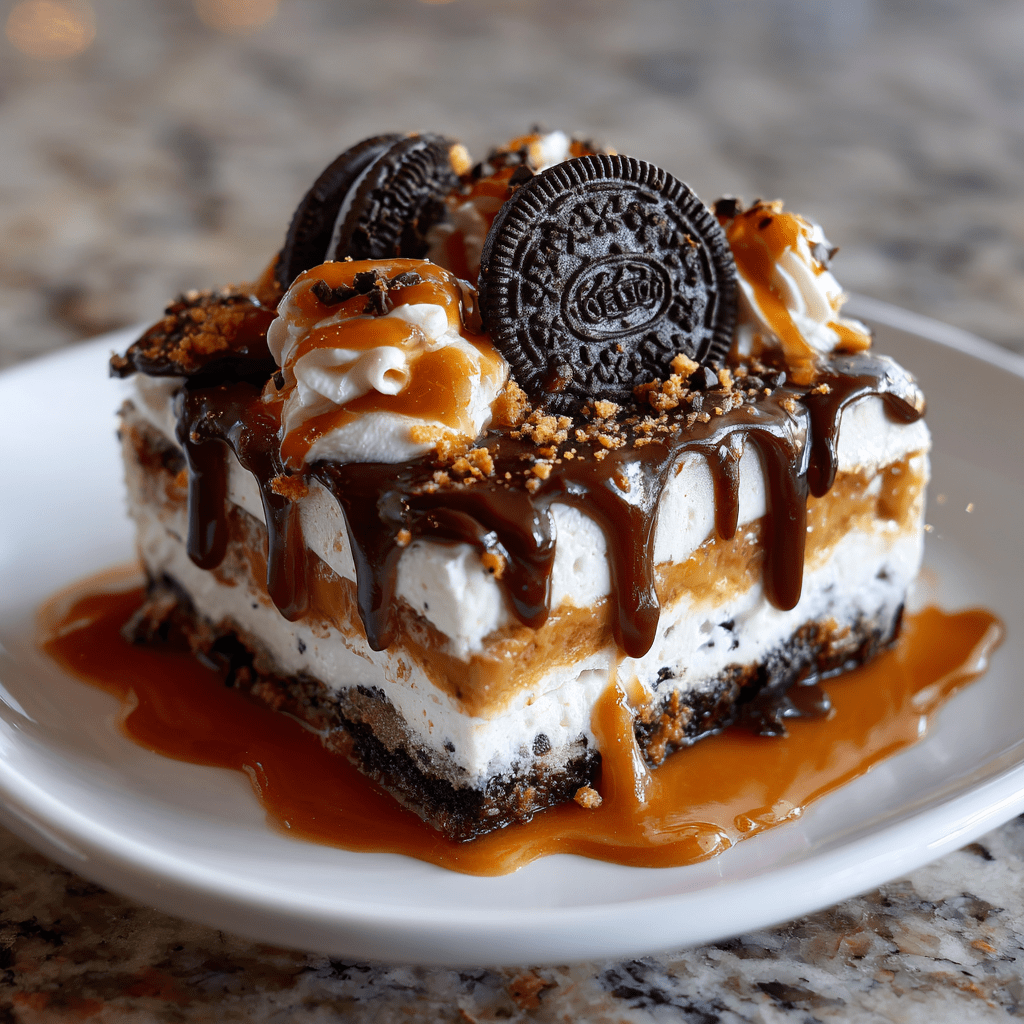
Introduction to Oreo Peanut Butter Dream Lasagna
Hey there, fellow dessert lovers! If you’re anything like me, you know that life can get pretty hectic. Between juggling work, family, and everything in between, finding time to whip up a delightful treat can feel impossible. That’s where my Oreo Peanut Butter Dream Lasagna comes in! This no-bake dessert is not only a quick solution for a busy day, but it’s also a showstopper that will impress your loved ones. With layers of creamy peanut butter and crunchy Oreo goodness, it’s a sweet escape that everyone will adore. Let’s dive into this delicious adventure together!
Why You’ll Love This Oreo Peanut Butter Dream Lasagna
This Oreo Peanut Butter Dream Lasagna is a game-changer for busy moms and professionals alike. It’s incredibly easy to make, requiring no baking at all! You can whip it up in just 30 minutes, and the hardest part is waiting for it to chill. The combination of rich peanut butter and crunchy Oreos creates a flavor explosion that will have everyone coming back for seconds. Trust me, it’s a dessert you won’t want to miss!
Ingredients for Oreo Peanut Butter Dream Lasagna
Gathering the right ingredients is the first step to creating this delightful dessert. Here’s what you’ll need:
- Oreo cookies: The star of the show! These chocolatey cookies provide a crunchy base and a rich flavor.
- Unsalted butter: This helps bind the crushed Oreos together, creating a sturdy crust. Unsalted is best to control the saltiness.
- Creamy peanut butter: Smooth and rich, it adds that irresistible nutty flavor. You can use crunchy if you prefer a bit of texture.
- Powdered sugar: This sweetens the peanut butter layer and gives it a lovely creamy consistency.
- Cream cheese: Softened cream cheese adds a tangy richness that balances the sweetness perfectly.
- Whipped topping: Light and airy, it makes the peanut butter layer fluffy. You can use homemade whipped cream if you’re feeling adventurous!
- Milk: Essential for the pudding layer, it helps create that creamy texture we all love.
- Instant vanilla pudding mix: This thickens the milk into a luscious layer that complements the peanut butter beautifully.
- Chocolate chips: These are the cherry on top! They add a delightful chocolatey crunch. Dark chocolate chips can elevate the flavor even more.
For exact measurements, check the bottom of the article where you can find everything listed for easy printing. Now that you have your ingredients ready, let’s get cooking!
How to Make Oreo Peanut Butter Dream Lasagna
Now that we have our ingredients ready, let’s dive into the fun part—making this delicious Oreo Peanut Butter Dream Lasagna! Follow these simple steps, and you’ll have a dessert that’s sure to impress.
Step 1: Preheat the Oven
Even though this is a no-bake dessert, preheating the oven is essential for any recipe that requires baking. It sets the stage for the perfect crust if you ever decide to bake something else. For this recipe, we won’t actually use the oven, but it’s a good habit to get into!
Step 2: Prepare the Oreo Crust
Grab your food processor and toss in those Oreo cookies. Pulse them until they resemble fine crumbs. The texture should be similar to sand. Next, pour in the melted butter and mix until it’s well combined. This mixture should hold together when pressed. Now, firmly press the Oreo mixture into the bottom of a 9×13 inch baking dish. This crust is the foundation of our lasagna, so make sure it’s nice and compact!
Step 3: Create the Peanut Butter Layer
In a mixing bowl, combine the creamy peanut butter, softened cream cheese, and powdered sugar. Use a hand mixer or a whisk to blend everything until it’s smooth and creamy. This layer should be thick and luscious, almost like a dreamy peanut butter frosting. It’s hard to resist tasting it at this point!
Step 4: Add the Whipped Topping
Now, it’s time to fold in the whipped topping. This step is crucial for achieving that light and airy texture. Gently mix the whipped topping into the peanut butter mixture until just combined. Be careful not to overmix; we want to keep that fluffiness intact!
Step 5: Make the Pudding Layer
In another bowl, whisk together the milk and instant vanilla pudding mix. Keep whisking until the mixture thickens up nicely. This should take just a couple of minutes. The pudding layer adds a creamy contrast to the rich peanut butter, making each bite a delightful experience.
Step 6: Assemble the Layers
Now comes the fun part—layering! Spread the peanut butter mixture evenly over the Oreo crust. Then, pour the thickened pudding layer on top of the peanut butter. Use a spatula to smooth it out. Each layer should be distinct, creating a beautiful visual when you cut into it!
Step 7: Top with Chocolate Chips
Sprinkle chocolate chips generously over the top of the pudding layer. If you’re feeling adventurous, you can also add crushed Oreos or even chopped nuts for extra texture. This is your dessert, so feel free to get creative!
Step 8: Chill Before Serving
Finally, cover the dish with plastic wrap and refrigerate for at least 4 hours, or overnight if you can wait that long. Chilling is key to achieving the best texture. It allows the layers to set and meld together, making each slice a heavenly experience. Trust me, the wait will be worth it!
Tips for Success
- Use a food processor for quick and even cookie crumbs.
- Let the cream cheese soften at room temperature for easier mixing.
- Don’t skip the chilling time; it’s crucial for the best texture.
- Feel free to customize with your favorite toppings or mix-ins.
- For a richer flavor, opt for dark chocolate chips.
Equipment Needed
- Food processor: Perfect for crushing Oreos quickly. A zip-top bag and rolling pin work too!
- Mixing bowls: Essential for combining ingredients. Any size will do, but a large bowl is best.
- Hand mixer or whisk: For blending the peanut butter layer. A sturdy spoon can work in a pinch!
- 9×13 inch baking dish: Ideal for layering. A similar-sized dish will work as well.
Variations of Oreo Peanut Butter Dream Lasagna
- Nut-Free Version: Substitute peanut butter with sunbutter or almond butter for a nut-free alternative.
- Gluten-Free Option: Use gluten-free Oreo cookies to make this dessert suitable for those with gluten sensitivities.
- Healthier Twist: Swap out regular cream cheese for low-fat or Greek yogurt to lighten up the dessert.
- Flavor Infusion: Add a teaspoon of vanilla extract or a pinch of sea salt to the peanut butter layer for an extra flavor boost.
- Fruit Layer: Incorporate sliced bananas or strawberries between the layers for a fruity twist that adds freshness.
Serving Suggestions for Oreo Peanut Butter Dream Lasagna
- Pair with Coffee: A cup of freshly brewed coffee complements the sweetness perfectly.
- Serve with Fresh Berries: A side of strawberries or raspberries adds a refreshing contrast.
- Presentation: Garnish with whipped cream and a sprinkle of crushed Oreos for a stunning look.
- Chill Before Serving: Ensure it’s well-chilled for the best texture and flavor.
FAQs about Oreo Peanut Butter Dream Lasagna
Can I make Oreo Peanut Butter Dream Lasagna ahead of time?
Absolutely! This dessert is perfect for making a day in advance. Just keep it covered in the fridge until you’re ready to serve. The flavors meld beautifully overnight!
How long does this dessert need to chill?
For the best texture, let it chill for at least 4 hours. If you can wait overnight, even better! It allows the layers to set perfectly.
Can I use different cookies for the crust?
Sure! While Oreos are the classic choice, you can experiment with other cookies like chocolate wafers or even graham crackers for a different flavor profile.
Is this dessert suitable for kids?
Definitely! Kids love the combination of peanut butter and chocolate. Just be mindful of any nut allergies if you’re serving it to a group.
What can I do with leftovers?
If you have any leftovers, store them in an airtight container in the fridge. They should last for about 3-4 days, but trust me, they won’t last long!
Final Thoughts
Creating this Oreo Peanut Butter Dream Lasagna is more than just making a dessert; it’s about bringing joy to your kitchen and smiles to your loved ones. Each layer tells a story of indulgence, from the crunchy Oreo crust to the creamy peanut butter filling. It’s a delightful treat that transforms any gathering into a celebration. Plus, the ease of preparation means you can focus on what truly matters—making memories with family and friends. So, roll up your sleeves, dive into this sweet adventure, and let the deliciousness unfold. You won’t regret it!
Print
Oreo Peanut Butter Dream Lasagna: A Sweet Delight Awaits!
- Total Time: 4 hours 30 minutes
- Yield: 12 servings 1x
- Diet: Vegetarian
Description
Oreo Peanut Butter Dream Lasagna is a delicious layered dessert that combines the rich flavors of Oreo cookies and creamy peanut butter, creating a sweet treat that is perfect for any occasion.
Ingredients
- 1 package Oreo cookies (about 36 cookies)
- 1/2 cup unsalted butter, melted
- 1 cup creamy peanut butter
- 1 cup powdered sugar
- 1 package (8 oz) cream cheese, softened
- 1 cup whipped topping
- 2 cups milk
- 1 package (3.4 oz) instant vanilla pudding mix
- 1 cup chocolate chips
Instructions
- Preheat the oven to 350°F (175°C).
- Crush the Oreo cookies in a food processor and mix with melted butter.
- Press the Oreo mixture into the bottom of a 9×13 inch baking dish to form the crust.
- In a bowl, mix peanut butter, cream cheese, and powdered sugar until smooth.
- Fold in the whipped topping and spread the mixture over the Oreo crust.
- In another bowl, whisk together milk and instant vanilla pudding mix until thickened.
- Spread the pudding mixture over the peanut butter layer.
- Sprinkle chocolate chips on top.
- Refrigerate for at least 4 hours or overnight before serving.
Notes
- For a richer flavor, use dark chocolate chips.
- Make sure to let the lasagna chill for the best texture.
- This dessert can be made a day in advance.
- Prep Time: 30 minutes
- Cook Time: 0 minutes
- Category: Dessert
- Method: No-Bake
- Cuisine: American
Nutrition
- Serving Size: 1 slice
- Calories: 350
- Sugar: 25g
- Sodium: 200mg
- Fat: 20g
- Saturated Fat: 10g
- Unsaturated Fat: 8g
- Trans Fat: 0g
- Carbohydrates: 35g
- Fiber: 2g
- Protein: 5g
- Cholesterol: 30mg