Introduction to Pumpkin Butterscotch Cheesecake with Oreo Crust
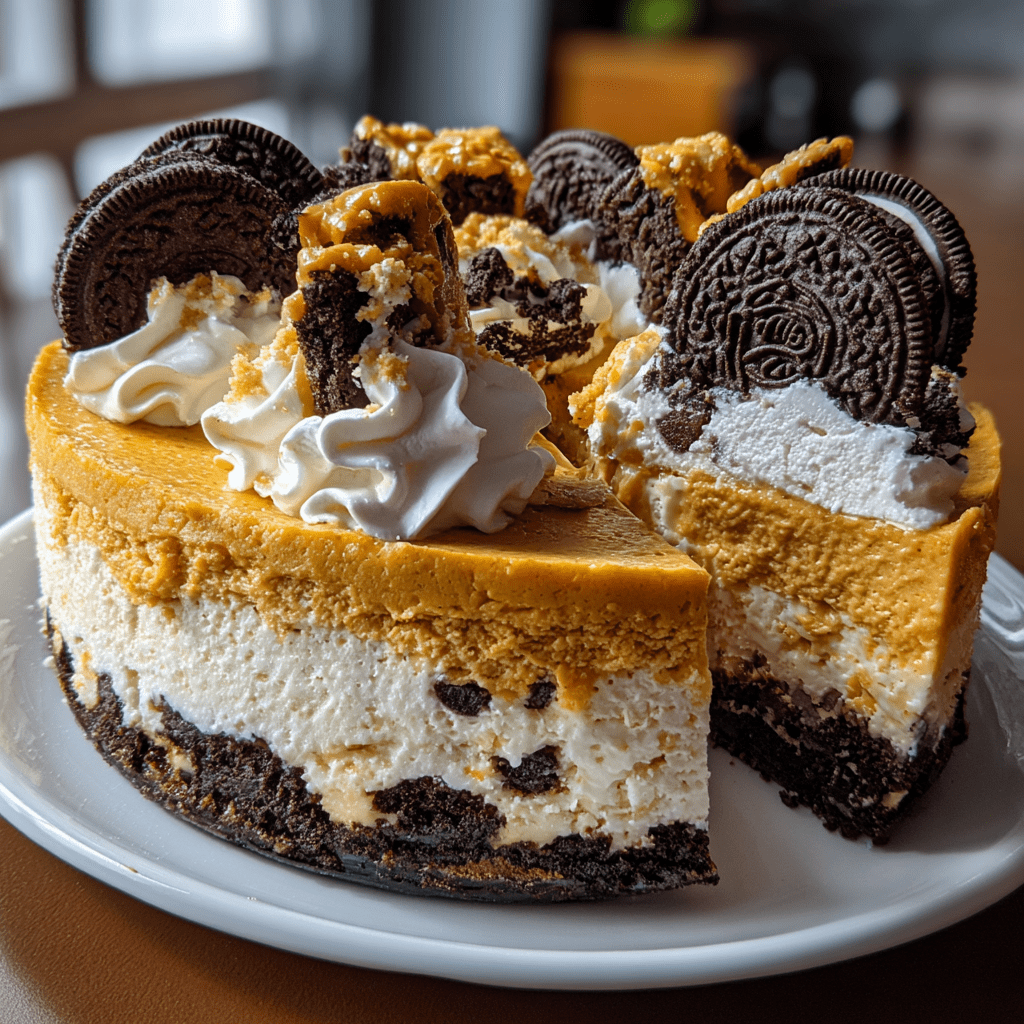
As the leaves turn and the air gets crisp, I find myself craving something warm and comforting. That’s where my Pumpkin Butterscotch Cheesecake with Oreo Crust comes in! This delightful dessert is not just a treat; it’s a celebration of fall flavors that can brighten any busy day. Whether you’re hosting a gathering or simply want to indulge your family, this cheesecake is a quick solution that impresses without the fuss. Trust me, once you take a bite, you’ll understand why it’s become a staple in my kitchen!
Why You’ll Love This Pumpkin Butterscotch Cheesecake with Oreo Crust
This Pumpkin Butterscotch Cheesecake with Oreo Crust is a dream come true for busy moms and professionals alike. It’s incredibly easy to whip up, taking just a little over four hours from start to finish, including chilling time. The rich, creamy filling paired with the crunchy Oreo crust creates a flavor explosion that’s simply irresistible. Plus, it’s a showstopper that will have your loved ones raving about your baking skills!
Ingredients for Pumpkin Butterscotch Cheesecake with Oreo Crust
Gathering the right ingredients is the first step to creating this delicious Pumpkin Butterscotch Cheesecake with Oreo Crust. Here’s what you’ll need:
- Oreo cookie crumbs: These provide a crunchy, chocolatey base that perfectly complements the creamy filling.
- Unsalted butter: Melted butter binds the crumbs together, creating a rich crust. Unsalted is best to control the saltiness.
- Cream cheese: The star of the show! Softened cream cheese gives the cheesecake its creamy texture and rich flavor.
- Pumpkin puree: This adds that classic fall flavor and a beautiful orange hue. Make sure to use pure pumpkin, not pumpkin pie filling.
- Butterscotch chips: These little gems melt into the filling, adding a sweet, buttery flavor that pairs beautifully with pumpkin.
- Granulated sugar: Sweetens the cheesecake. For a deeper flavor, consider using dark brown sugar instead.
- Eggs: They help bind everything together and give the cheesecake its structure.
- Vanilla extract: A splash of vanilla enhances the overall flavor, making it even more delightful.
- Ground cinnamon: This warm spice is essential for that cozy fall taste.
- Ground nutmeg: Just a pinch adds a lovely depth of flavor that complements the pumpkin.
- Salt: A little salt balances the sweetness and enhances the flavors.
For exact measurements, check the bottom of the article where you can find everything listed for easy printing. Happy baking!
How to Make Pumpkin Butterscotch Cheesecake with Oreo Crust
Now that you have all your ingredients ready, let’s dive into the steps to create this heavenly Pumpkin Butterscotch Cheesecake with Oreo Crust. Each step is simple, and I promise you’ll feel like a pro in no time!
Step 1: Preheat the Oven
First things first, preheat your oven to 325°F (163°C). Preheating is crucial because it ensures that your cheesecake bakes evenly. A hot oven helps set the filling just right, giving you that creamy texture we all love. So, don’t skip this step!
Step 2: Prepare the Oreo Crust
In a mixing bowl, combine your Oreo cookie crumbs with the melted butter. Stir until the crumbs are fully coated. This mixture should resemble wet sand. Now, take a 9-inch springform pan and press the crumb mixture firmly into the bottom. Use the back of a measuring cup or your fingers to create an even layer. This crust is the foundation of your cheesecake, so make it sturdy!
Step 3: Make the Cheesecake Filling
In a large mixing bowl, beat the softened cream cheese until it’s smooth and creamy. This step is key! If the cream cheese isn’t soft enough, you’ll end up with lumps. Next, add in the pumpkin puree, butterscotch chips, sugar, eggs, vanilla extract, cinnamon, nutmeg, and salt. Mix everything until it’s well combined and silky smooth. The aroma will be heavenly!
Step 4: Combine and Pour
Now it’s time to pour that luscious filling over your prepared Oreo crust. Make sure to spread it evenly with a spatula. This ensures every slice has that perfect balance of crust and filling. You want to see that beautiful layer of creamy goodness just waiting to be baked!
Step 5: Bake the Cheesecake
Place your cheesecake in the preheated oven and bake for 50-60 minutes. Keep an eye on it! The center should be set but still slightly jiggly. This is a good sign that it will firm up as it cools. If the edges start to brown too much, you can cover them with foil.
Step 6: Cooling Process
Once baked, turn off the oven and let the cheesecake cool inside with the door ajar for about an hour. This gradual cooling helps prevent cracks on the surface. Trust me, a smooth top makes for a prettier presentation!
Step 7: Refrigerate
After the cheesecake has cooled, transfer it to the refrigerator. Chill it for at least 4 hours, or overnight if you can wait! Chilling allows the flavors to meld beautifully and gives the cheesecake its perfect texture. The anticipation will be worth it!
Tips for Success
- Make sure your cream cheese is at room temperature for a smooth filling.
- Don’t rush the cooling process; it’s key to a crack-free cheesecake.
- Use a water bath for extra moisture while baking, if desired.
- For a festive touch, sprinkle some cinnamon on top before serving.
- Store leftovers in an airtight container in the fridge for up to five days.
Equipment Needed
- 9-inch springform pan: Essential for easy removal. A regular pie dish works too, but slicing will be trickier.
- Mixing bowls: Use a large bowl for the filling and a smaller one for the crust. Any size will do!
- Electric mixer: A hand mixer or stand mixer makes beating the cream cheese a breeze.
- Spatula: Perfect for spreading the filling evenly. A rubber spatula is ideal.
- Measuring cups and spoons: Accurate measurements are key for baking success!
Variations of Pumpkin Butterscotch Cheesecake with Oreo Crust
- Gluten-Free Option: Substitute regular Oreo cookies with gluten-free Oreos to make this cheesecake gluten-free without sacrificing flavor.
- Vegan Twist: Use vegan cream cheese and replace eggs with flaxseed meal mixed with water for a plant-based version.
- Chocolate Drizzle: Drizzle melted chocolate over the top before serving for an extra indulgent touch.
- Spiced Up: Add a pinch of ground ginger or cloves to the filling for an extra layer of warmth and spice.
- Nutty Crust: Mix in some finely chopped pecans or walnuts with the Oreo crumbs for a crunchy texture and nutty flavor.
Serving Suggestions for Pumpkin Butterscotch Cheesecake with Oreo Crust
- Whipped Cream: Top each slice with a dollop of freshly whipped cream for a light, airy contrast.
- Butterscotch Sauce: Drizzle warm butterscotch sauce over the cheesecake for an extra sweet touch.
- Spiced Coffee: Pair with a cup of spiced coffee or chai tea to enhance the fall flavors.
- Garnish: Sprinkle with crushed Oreos or a sprinkle of cinnamon for a beautiful presentation.
- Seasonal Fruits: Serve alongside sliced apples or pears for a refreshing balance.
FAQs about Pumpkin Butterscotch Cheesecake with Oreo Crust
Can I make this Pumpkin Butterscotch Cheesecake with Oreo Crust ahead of time?
Absolutely! This cheesecake actually tastes better after chilling overnight. You can prepare it a day or two in advance, making it perfect for busy schedules or holiday gatherings.
What can I substitute for cream cheese?
If you’re looking for a lighter option, you can use Greek yogurt or mascarpone cheese. Just keep in mind that the texture and flavor will vary slightly.
How do I know when the cheesecake is done baking?
The cheesecake is done when the edges are set, but the center still has a slight jiggle. It will firm up as it cools, so don’t worry if it looks a bit wobbly!
Can I freeze the Pumpkin Butterscotch Cheesecake?
Yes, you can freeze it! Just wrap it tightly in plastic wrap and then in aluminum foil. It can be frozen for up to three months. Thaw it in the fridge before serving.
What’s the best way to serve this cheesecake?
For a delightful presentation, serve chilled slices topped with whipped cream and a drizzle of butterscotch sauce. It’s a showstopper that will impress your guests!
Final Thoughts
Creating this Pumpkin Butterscotch Cheesecake with Oreo Crust is more than just baking; it’s about bringing joy to your kitchen and your loved ones. The rich flavors and creamy texture make every bite a celebration of fall. I love how this cheesecake can turn an ordinary day into something special, whether it’s a family dinner or a cozy gathering with friends. Plus, the smiles on my family’s faces when they take that first bite? Priceless! So, roll up your sleeves, embrace the process, and enjoy the delicious rewards of your hard work. Happy baking!
Print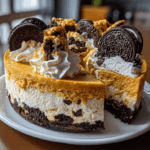
Pumpkin Butterscotch Cheesecake with Oreo Crust Delights!
- Total Time: 4 hours 20 minutes
- Yield: 12 servings 1x
- Diet: Vegetarian
Description
A deliciously creamy pumpkin butterscotch cheesecake with a crunchy Oreo crust, perfect for fall celebrations.
Ingredients
- 1 ½ cups Oreo cookie crumbs
- ½ cup unsalted butter, melted
- 2 (8 oz) packages cream cheese, softened
- 1 cup pumpkin puree
- 1 cup butterscotch chips
- ¾ cup granulated sugar
- 3 large eggs
- 1 tsp vanilla extract
- 1 tsp ground cinnamon
- ½ tsp ground nutmeg
- ½ tsp salt
Instructions
- Preheat the oven to 325°F (163°C).
- In a bowl, mix Oreo cookie crumbs and melted butter until combined.
- Press the mixture into the bottom of a 9-inch springform pan to form the crust.
- In a large mixing bowl, beat the cream cheese until smooth.
- Add pumpkin puree, butterscotch chips, sugar, eggs, vanilla, cinnamon, nutmeg, and salt. Mix until well combined.
- Pour the cheesecake filling over the crust in the springform pan.
- Bake for 50-60 minutes or until the center is set but slightly jiggly.
- Turn off the oven and let the cheesecake cool in the oven with the door ajar for 1 hour.
- Refrigerate for at least 4 hours or overnight before serving.
- Serve chilled and enjoy!
Notes
- For a richer flavor, use dark brown sugar instead of granulated sugar.
- Top with whipped cream and additional butterscotch sauce if desired.
- Make sure to let the cheesecake cool completely before refrigerating.
- Prep Time: 20 minutes
- Cook Time: 60 minutes
- Category: Dessert
- Method: Baking
- Cuisine: American
Nutrition
- Serving Size: 1 slice
- Calories: 350
- Sugar: 25g
- Sodium: 300mg
- Fat: 22g
- Saturated Fat: 12g
- Unsaturated Fat: 8g
- Trans Fat: 0g
- Carbohydrates: 30g
- Fiber: 1g
- Protein: 5g
- Cholesterol: 70mg

