Introduction to Pumpkin Magic Bars
As the leaves turn and the air gets crisp, I find myself craving something warm and comforting. That’s where these delightful Pumpkin Magic Bars come in! They’re not just a treat; they’re a hug in dessert form. Perfect for busy days, these bars are quick to whip up and sure to impress your loved ones. Whether you’re hosting a gathering or just need a sweet pick-me-up after a long day, these bars are your go-to solution. Trust me, once you try them, you’ll wonder how you ever lived without this delicious fall treat!
Why You’ll Love This Pumpkin Magic Bars
These Pumpkin Magic Bars are a dream come true for busy moms and professionals alike. They come together in just 45 minutes, making them a quick and easy dessert option. The combination of creamy pumpkin, rich chocolate, and crunchy nuts creates a flavor explosion that will have everyone asking for seconds. Plus, they’re perfect for any occasion, from cozy family nights to festive gatherings. You’ll love how effortlessly they brighten up your day!
Ingredients for Pumpkin Magic Bars
Gathering the right ingredients is the first step to creating your Pumpkin Magic Bars. Here’s what you’ll need:
- Graham cracker crumbs: These form the base of your bars, providing a sweet and crunchy crust. You can crush whole graham crackers if you prefer.
- Unsalted butter: Melted butter binds the crust together and adds richness. If you’re looking for a healthier option, coconut oil works well too.
- Pumpkin puree: This is the star of the show! It gives the bars their signature flavor and moisture. Make sure to use pure pumpkin puree, not pumpkin pie filling.
- Sweetened condensed milk: This adds creaminess and sweetness, making the filling luscious. If you want a dairy-free version, look for coconut condensed milk.
- Pumpkin pie spice: A blend of warm spices that enhances the pumpkin flavor. If you don’t have it, a mix of cinnamon, nutmeg, and ginger will do the trick.
- Chocolate chips: These add a delightful sweetness and richness. Dark chocolate chips are a great option for a more intense flavor.
- Chopped nuts: Walnuts or pecans add a nice crunch. Feel free to skip them if you have nut allergies or prefer a nut-free treat.
For exact measurements, check the bottom of the article where you can find everything listed for easy printing. Now that you have your ingredients ready, let’s dive into the fun part—making these delicious bars!
How to Make Pumpkin Magic Bars
Now that you have your ingredients ready, let’s get to the fun part—making these Pumpkin Magic Bars! Follow these simple steps, and you’ll have a delicious treat in no time.
Step 1: Preheat the Oven
First things first, preheat your oven to 350°F (175°C). Preheating is crucial because it ensures even baking. If you skip this step, your bars might not set properly, and nobody wants a gooey mess!
Step 2: Prepare the Crust
In a mixing bowl, combine your graham cracker crumbs and melted butter. Stir until everything is well mixed. The mixture should resemble wet sand. Now, press it firmly into the bottom of a greased 9×13 inch baking dish. This step is important! A well-pressed crust will hold the bars together and provide a satisfying crunch.
Step 3: Make the Pumpkin Filling
In another bowl, combine the pumpkin puree, sweetened condensed milk, and pumpkin pie spice. Mix until smooth and creamy. This filling is where the magic happens! The flavors meld together beautifully, creating a rich and luscious layer that will make your bars irresistible.
Step 4: Assemble the Bars
Now it’s time to layer! Spread the pumpkin mixture evenly over the crust in your baking dish. Then, sprinkle the chocolate chips and chopped nuts on top. Feel free to get creative here! You can add more chocolate or even some dried cranberries for a pop of color and flavor.
Step 5: Bake to Perfection
Place your baking dish in the preheated oven and bake for 25-30 minutes. Keep an eye on them! You’ll know they’re done when the edges are golden brown. A toothpick inserted in the center should come out clean or with just a few moist crumbs.
Step 6: Cool and Cut
Once baked, remove the dish from the oven and let it cool completely. This step is essential for the bars to set properly. After cooling, cut them into squares or rectangles. Serve them warm or cold—either way, they’re sure to be a hit!
Tips for Success
- Use fresh pumpkin puree for the best flavor. Canned works too, but fresh is magic!
- Don’t skip the cooling time; it helps the bars set and makes cutting easier.
- For a fun twist, try adding a sprinkle of sea salt on top before baking.
- Store leftovers in an airtight container to keep them fresh and delicious.
- Feel free to experiment with different nuts or chocolate types for variety!
Equipment Needed
- Mixing bowls: A set of various sizes is handy. You can also use any large container.
- Measuring cups and spoons: Essential for accuracy. If you don’t have them, a regular coffee mug can work in a pinch.
- 9×13 inch baking dish: This is perfect for the bars. A similar-sized dish will do if you’re in a bind.
- Spatula: Great for spreading the filling. A large spoon can also work.
Variations of Pumpkin Magic Bars
- Gluten-Free: Substitute graham cracker crumbs with gluten-free cookie crumbs or almond flour for a gluten-free version.
- Dairy-Free: Use coconut condensed milk and dairy-free chocolate chips to make these bars suitable for a dairy-free diet.
- Spiced Up: Add a pinch of cayenne pepper or a dash of ginger for a spicy kick that complements the pumpkin flavor.
- Nut-Free: Omit the nuts entirely or replace them with seeds like sunflower or pumpkin seeds for a nut-free treat.
- Chocolate Lovers: Double the amount of chocolate chips or swirl in some melted chocolate for an extra indulgent experience.
Serving Suggestions for Pumpkin Magic Bars
- Pair with Coffee: A warm cup of coffee or spiced chai complements the flavors beautifully.
- Top with Whipped Cream: A dollop of whipped cream adds a creamy touch that elevates each bite.
- Serve with Ice Cream: Vanilla or cinnamon ice cream makes for a delightful contrast to the bars.
- Garnish with Nuts: Sprinkle extra chopped nuts on top for added crunch and visual appeal.
- Festive Platter: Arrange the bars on a decorative platter with seasonal fruits for a beautiful presentation.
FAQs about Pumpkin Magic Bars
As you embark on your journey to make these delightful Pumpkin Magic Bars, you might have a few questions. Here are some common queries that I often hear, along with helpful answers to guide you along the way.
Can I use fresh pumpkin instead of canned?
Absolutely! Fresh pumpkin puree can add a wonderful flavor. Just make sure to cook and blend it until smooth before using it in the recipe.
How should I store leftover Pumpkin Magic Bars?
Store any leftovers in an airtight container in the refrigerator. They’ll stay fresh for about a week, but I doubt they’ll last that long!
Can I freeze Pumpkin Magic Bars?
Yes, you can freeze them! Just wrap the bars tightly in plastic wrap and then place them in a freezer-safe container. They’ll keep well for up to three months.
What can I substitute for sweetened condensed milk?
If you need a substitute, try using coconut condensed milk for a dairy-free option. You can also make your own by simmering milk and sugar until thickened.
Are there any nut-free options for this recipe?
Definitely! You can simply omit the nuts or replace them with seeds like sunflower or pumpkin seeds for a nut-free treat that still has a delightful crunch.
Final Thoughts
Making these Pumpkin Magic Bars is more than just baking; it’s about creating memories and sharing joy with those you love. The warm, inviting aroma that fills your kitchen as they bake is simply irresistible. Each bite offers a delightful blend of flavors that can brighten even the busiest of days. Whether you’re enjoying them with family or sharing them at a gathering, these bars are sure to bring smiles all around. So, roll up your sleeves, embrace the magic of pumpkin, and let these bars become a cherished part of your fall traditions!
Print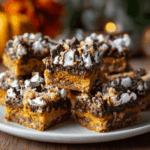
Pumpkin Magic Bars: Discover Your New Favorite Treat!
- Total Time: 45 minutes
- Yield: 12 bars 1x
- Diet: Vegetarian
Description
Delicious and easy-to-make Pumpkin Magic Bars that combine the flavors of pumpkin, chocolate, and nuts for a delightful treat.
Ingredients
- 1 cup graham cracker crumbs
- 1/2 cup unsalted butter, melted
- 1 cup pumpkin puree
- 1 cup sweetened condensed milk
- 1 teaspoon pumpkin pie spice
- 1 cup chocolate chips
- 1/2 cup chopped nuts (walnuts or pecans)
Instructions
- Preheat the oven to 350°F (175°C).
- In a bowl, mix graham cracker crumbs and melted butter until combined.
- Press the mixture into the bottom of a greased 9×13 inch baking dish.
- In another bowl, combine pumpkin puree, sweetened condensed milk, and pumpkin pie spice.
- Spread the pumpkin mixture over the crust in the baking dish.
- Sprinkle chocolate chips and chopped nuts evenly on top.
- Bake for 25-30 minutes or until the edges are golden brown.
- Allow to cool before cutting into bars.
Notes
- Store leftovers in an airtight container in the refrigerator.
- These bars can be served warm or cold.
- Feel free to substitute the nuts with your favorite type.
- Prep Time: 15 minutes
- Cook Time: 30 minutes
- Category: Dessert
- Method: Baking
- Cuisine: American
Nutrition
- Serving Size: 1 bar
- Calories: 200
- Sugar: 15g
- Sodium: 150mg
- Fat: 10g
- Saturated Fat: 5g
- Unsaturated Fat: 3g
- Trans Fat: 0g
- Carbohydrates: 25g
- Fiber: 2g
- Protein: 3g
- Cholesterol: 15mg