Introduction to Red Velvet Cheesecake Balls
As a busy mom, I know how precious time can be, especially when it comes to whipping up something special in the kitchen. That’s why I absolutely adore these Red Velvet Cheesecake Balls! They’re not just a treat; they’re a delightful fusion of rich red velvet cake and creamy cheesecake, all rolled into bite-sized bliss. Perfect for any occasion, whether it’s a family gathering or a cozy night in, these little gems are sure to impress your loved ones. Plus, they’re quick to make, so you can enjoy more time with your family and less time in the kitchen!
Why You’ll Love This Red Velvet Cheesecake Balls
These Red Velvet Cheesecake Balls are a dream come true for busy moms and professionals alike. They’re incredibly easy to make, requiring minimal effort for maximum flavor. The rich, velvety taste combined with the creamy cheesecake filling is simply irresistible. Plus, they’re perfect for any occasion, whether you’re hosting a party or just treating yourself after a long day. Who wouldn’t love a little indulgence that’s quick and delightful?
Ingredients for Red Velvet Cheesecake Balls
Gathering the right ingredients is the first step to creating these delightful Red Velvet Cheesecake Balls. Here’s what you’ll need:
- Red velvet cake mix: This is the star of the show, providing that signature color and flavor.
- Water: Essential for mixing the cake batter, it helps bring everything together.
- Vegetable oil: This adds moisture to the cake, ensuring it stays soft and tender.
- Large eggs: They act as a binding agent, giving the cake structure and richness.
- Cream cheese: Softened cream cheese is key for that luscious cheesecake filling. Make sure it’s at room temperature for easy mixing.
- Powdered sugar: This sweetens the cream cheese mixture, giving it that delightful sweetness without any graininess.
- Vanilla extract: A splash of vanilla enhances the flavors, making everything taste even better.
- White chocolate chips: These are melted and used to coat the cheesecake balls, adding a creamy, sweet layer.
- Sprinkles: Optional, but they add a fun and festive touch to your treats!
For those looking to switch things up, consider adding a splash of almond extract to the cream cheese mixture for a nutty twist. You can find all the exact measurements at the bottom of the article, ready for printing!
How to Make Red Velvet Cheesecake Balls
Now that you have all your ingredients ready, let’s dive into the fun part—making these delightful Red Velvet Cheesecake Balls! Follow these simple steps, and you’ll have a treat that’s sure to impress.
Step 1: Preheat the Oven
First things first, preheat your oven to 350°F (175°C). Preheating is crucial because it ensures that your cake bakes evenly. A hot oven helps the cake rise beautifully, giving it that perfect texture.
Step 2: Prepare the Cake Mix
Next, grab your box of red velvet cake mix. Follow the package instructions, mixing it with water, vegetable oil, and eggs. It’s as easy as pie! Just whisk until smooth, and you’re ready for the next step.
Step 3: Bake the Cake
Pour the batter into a greased pan and pop it in the oven. Bake for 30-35 minutes. To check for doneness, insert a toothpick into the center. If it comes out clean, your cake is ready! Once baked, let it cool completely on a wire rack. This cooling step is essential; it prevents the cake from becoming mushy when crumbled.
Step 4: Crumble the Cake
Once the cake is cool, it’s time to crumble it. I find the best method is to use your hands. Just break it into small pieces in a large bowl. This way, you can ensure even crumbles, which will mix better with the cream cheese.
Step 5: Make the Cream Cheese Mixture
In a separate bowl, mix the softened cream cheese, powdered sugar, and vanilla extract. Make sure your cream cheese is at room temperature; this helps achieve a smooth, creamy texture. No one wants lumps in their cheesecake filling!
Step 6: Combine Mixtures
Now, add the cream cheese mixture to the crumbled cake. Use a spatula or your hands to mix everything together until well combined. You want to ensure every crumb is coated in that luscious cream cheese goodness.
Step 7: Form the Balls
Time to roll! Take small portions of the mixture and form them into balls, about the size of a tablespoon. Don’t stress about making them perfect; a little variation adds charm. Just make sure they’re all roughly the same size for even coating later.
Step 8: Chill the Balls
Place the formed balls on a baking sheet lined with parchment paper and chill them in the refrigerator for at least an hour. Chilling helps them firm up, making them easier to dip in chocolate later. Plus, it enhances the flavors!
Step 9: Melt the Chocolate
While the balls chill, melt your white chocolate chips. You can do this in a microwave-safe bowl, heating in 30-second intervals, stirring in between. Alternatively, use a double boiler for a gentler melt. Just be careful not to overheat; burnt chocolate is a sad sight!
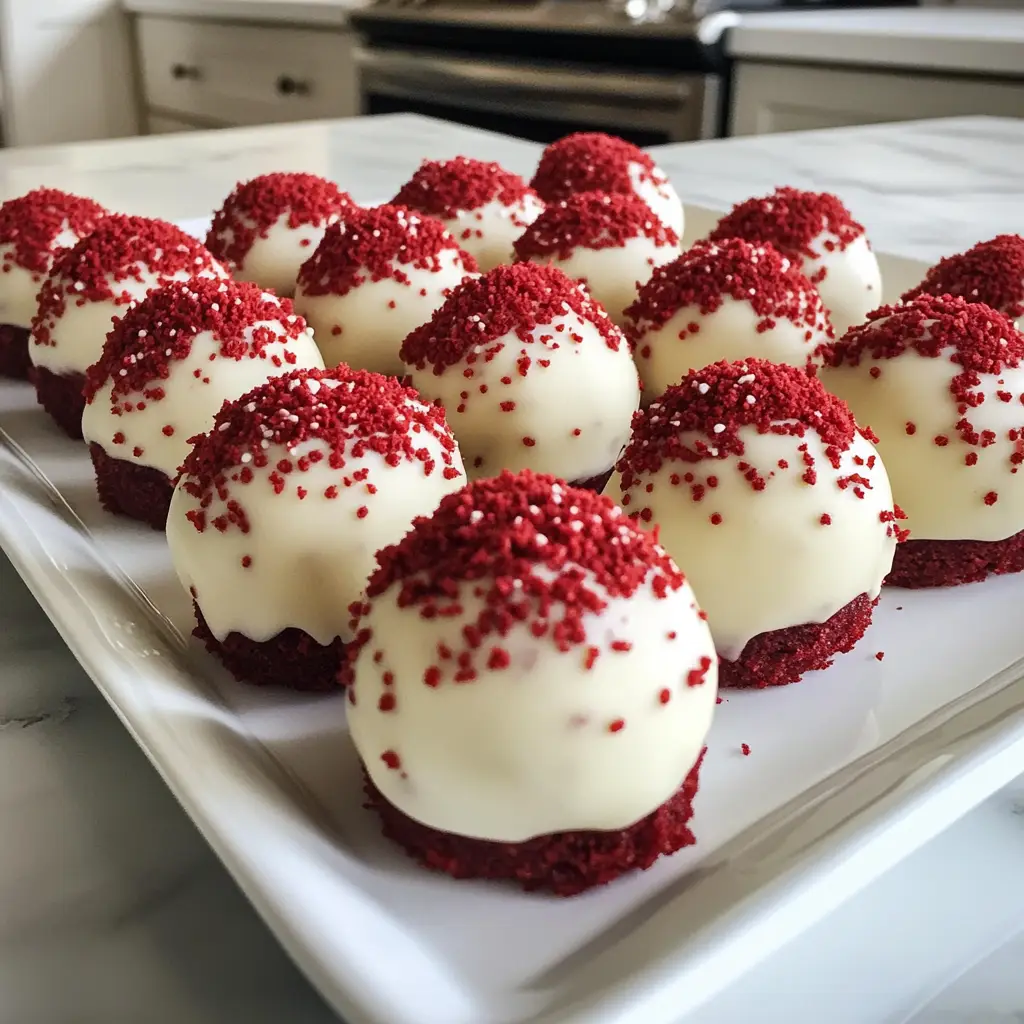
Step 10: Dip and Decorate
Once the cheesecake balls are chilled, it’s time for the fun part! Dip each ball into the melted chocolate, ensuring it’s fully coated. Place them back on the parchment paper and sprinkle with your favorite decorations. Let the chocolate set before serving, and enjoy the delightful treat you’ve created!
Tips for Success
- Make sure your cream cheese is softened for easy mixing.
- Chill the cheesecake balls long enough to firm up; this makes dipping easier.
- Use a cookie scoop for uniform ball sizes.
- Experiment with different sprinkles for a fun twist.
- Don’t rush the melting process; patience is key to smooth chocolate.
Equipment Needed
- Mixing bowls: Use any size you have; just make sure they’re large enough for mixing.
- Whisk or spatula: A whisk is great for mixing the cake batter, while a spatula helps combine the cream cheese.
- Baking sheet: A standard baking sheet works perfectly for chilling the balls.
- Parchment paper: This keeps the balls from sticking; wax paper can be a substitute.
- Microwave or double boiler: Either will work for melting chocolate; just choose what you’re comfortable with!
Variations
- Chocolate Red Velvet Cheesecake Balls: Swap out some of the red velvet cake mix for chocolate cake mix for a double chocolate delight.
- Gluten-Free Option: Use a gluten-free red velvet cake mix to make these treats suitable for gluten-sensitive friends.
- Nutty Twist: Add crushed walnuts or pecans to the cream cheese mixture for a delightful crunch.
- Vegan Version: Substitute eggs with flaxseed meal and use vegan cream cheese and chocolate for a plant-based treat.
- Flavor Infusion: Experiment with different extracts like peppermint or orange for a unique flavor profile.
Serving Suggestions for Red Velvet Cheesecake Balls
- Pair with a scoop of vanilla ice cream for a delightful contrast in temperature and texture.
- Serve alongside fresh berries for a pop of color and a refreshing bite.
- Drizzle with chocolate or caramel sauce for an extra indulgent touch.
- Present on a decorative platter with a sprinkle of powdered sugar for an elegant look.
- Enjoy with a cup of coffee or hot cocoa for a cozy treat experience.
FAQs about Red Velvet Cheesecake Balls
Can I make Red Velvet Cheesecake Balls ahead of time?
Absolutely! These delightful treats can be made a day in advance. Just store them in an airtight container in the refrigerator. They’ll taste even better after the flavors have had time to meld!
How do I store leftover Red Velvet Cheesecake Balls?
Leftovers can be kept in an airtight container in the fridge for up to a week. If you want to keep them longer, you can freeze them. Just thaw before serving for the best texture.
Can I use a different cake mix for these cheesecake balls?
Yes! Feel free to experiment with different flavors. Chocolate or vanilla cake mixes can create a fun twist on the classic Red Velvet Cheesecake Balls.
What can I use instead of white chocolate for coating?
If white chocolate isn’t your thing, you can use milk chocolate or dark chocolate instead. Just melt it the same way, and you’ll have a deliciously different flavor!
Are these Red Velvet Cheesecake Balls suitable for a gluten-free diet?
Yes! Simply use a gluten-free red velvet cake mix, and you’ll have a treat that everyone can enjoy, regardless of dietary restrictions.
Final Thoughts
Creating these Red Velvet Cheesecake Balls is more than just baking; it’s about sharing joy and indulgence with those you love. Each bite is a celebration of flavors, bringing smiles to faces young and old. Whether you’re serving them at a gathering or enjoying them during a quiet moment, these treats are sure to create lasting memories. Plus, the ease of making them means you can focus on what truly matters—spending time with family and friends. So, roll up your sleeves, dive into this delightful recipe, and let the sweet moments unfold!