
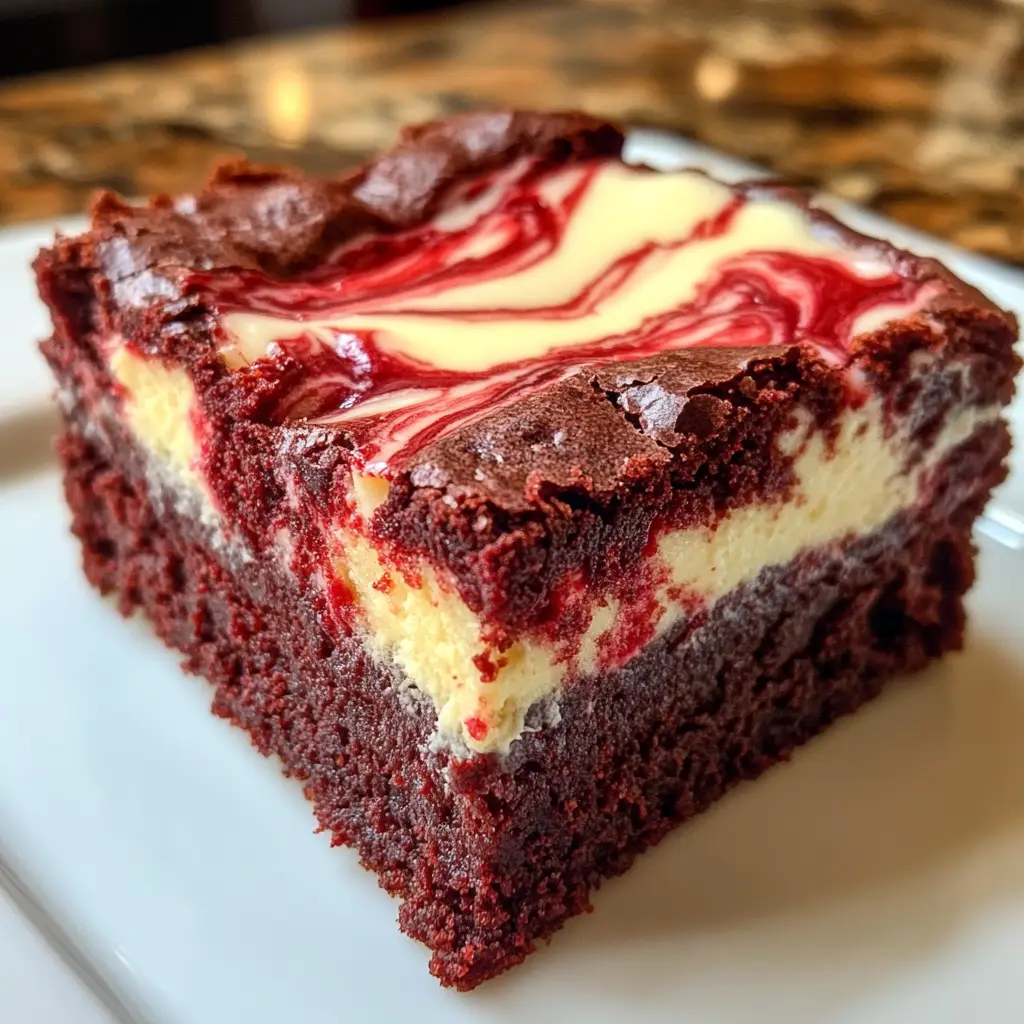
Introduction to Red Velvet Cheesecake Brownies
As a busy mom, I know how precious time can be, especially when it comes to whipping up something special for my family. That’s why I absolutely adore these Red Velvet Cheesecake Brownies! They’re the perfect blend of rich, velvety cake and creamy cheesecake, making them a delightful treat for any occasion. Whether it’s a last-minute dessert for a gathering or a sweet surprise for your loved ones, these brownies are sure to impress. Plus, they’re quick to make, so you can indulge without the stress!
Why You’ll Love This Red Velvet Cheesecake Brownies
These Red Velvet Cheesecake Brownies are a dream come true for busy lives! They combine the classic flavors of red velvet with a creamy cheesecake layer, creating a dessert that’s both indulgent and satisfying. Plus, they’re easy to whip up in just over 50 minutes. You’ll love how they impress guests while being simple enough for a weeknight treat. Trust me, every bite is a little piece of heaven!
Ingredients for Red Velvet Cheesecake Brownies
Gathering the right ingredients is the first step to creating these delightful Red Velvet Cheesecake Brownies. Here’s what you’ll need:
- Unsalted butter: This adds richness and moisture to the brownies. You can substitute with margarine if needed.
- Granulated sugar: Sweetens the brownies and helps achieve that perfect texture.
- Large eggs: They bind the ingredients together and provide structure. You can use flax eggs for a vegan option.
- Vanilla extract: A splash of this enhances the overall flavor, making it more aromatic.
- All-purpose flour: The base of the brownies, giving them that chewy texture. Whole wheat flour can be a healthier alternative.
- Cocoa powder: Adds a rich chocolate flavor, balancing the sweetness of the red velvet.
- Baking powder: This leavening agent helps the brownies rise, creating a light texture.
- Salt: Just a pinch enhances the flavors and balances the sweetness.
- Red food coloring: Essential for that iconic red velvet look. You can use natural alternatives like beet juice if you prefer.
- Cream cheese: The star of the cheesecake layer, providing creaminess and tanginess.
- Powdered sugar: Sweetens the cheesecake layer and gives it a smooth texture.
- Additional egg: This helps the cheesecake layer set perfectly.
For exact measurements, check the bottom of the article where you can find everything listed for easy printing. Happy baking!
How to Make Red Velvet Cheesecake Brownies
Step 1: Preheat and Prepare
First things first, let’s get that oven preheating! Set it to 350°F (175°C). While it warms up, grab a 9×13 inch baking pan and grease it well. You can use butter or non-stick spray—whatever you have on hand. This step is crucial because it prevents those delicious brownies from sticking. Trust me, you want every last crumb! Once your pan is ready, you can move on to the fun part: making the batter!
Step 2: Make the Red Velvet Batter
Now, let’s dive into creating that luscious red velvet batter. Start by melting 1 cup of unsalted butter in a large bowl. I usually do this in the microwave for about 30 seconds. Once melted, mix in 2 cups of granulated sugar until it’s well combined. The mixture should look smooth and glossy. Next, crack in 4 large eggs, one at a time, mixing well after each addition. Don’t forget to add 2 teaspoons of vanilla extract for that lovely aroma! Stir until everything is blended perfectly. This is where the magic begins, and your kitchen will start to smell heavenly!
Step 3: Combine Dry Ingredients
In a separate bowl, whisk together 2 cups of all-purpose flour, 1/2 cup of cocoa powder, 1 teaspoon of baking powder, and 1 teaspoon of salt. This dry mixture is essential for the structure of your brownies. Once it’s well combined, gradually add it to your wet mixture. Stir gently until just combined. Be careful not to overmix; we want those brownies to be soft and chewy, not tough. The batter should be thick and rich, ready to take on that vibrant red color!
Step 4: Add Red Food Coloring
Now comes the fun part—adding the red food coloring! You’ll need 1 tablespoon for that classic red velvet hue. Mix it into the batter until it’s evenly distributed. The color should be bright and cheerful, just like a celebration! If you want a deeper red, feel free to add a bit more. Just remember, the color will deepen as it bakes. This step is what makes your Red Velvet Cheesecake Brownies truly stand out!
Step 5: Prepare the Cheesecake Layer
Let’s not forget about the creamy cheesecake layer! In a separate bowl, beat 8 oz of softened cream cheese until it’s smooth and fluffy. This is where the magic happens! Gradually mix in 1/2 cup of powdered sugar and 1 egg. Blend until everything is well combined and creamy. This layer adds a delightful contrast to the rich red velvet, making each bite a heavenly experience. Set this mixture aside while we layer everything together.
Step 6: Layer and Swirl
It’s time to bring it all together! Pour half of the red velvet batter into your prepared pan, spreading it evenly. Next, drop spoonfuls of the cheesecake mixture over the red velvet layer. Don’t worry about making it perfect; the swirls will come together beautifully! Then, pour the remaining red velvet batter on top. Using a knife, gently swirl the cheesecake and red velvet layers together. This creates that stunning marbled effect that’s not only beautiful but also adds a delightful mix of flavors. Your brownies are now ready for the oven!
Step 7: Bake to Perfection
Pop your pan into the preheated oven and bake for 30-35 minutes. Keep an eye on them! To check for doneness, insert a toothpick into the center. If it comes out clean or with a few moist crumbs, they’re ready. If it’s too wet, give them a few more minutes. Once baked, let them cool in the pan before cutting into squares. The aroma wafting through your kitchen will be irresistible, and you’ll be counting down the minutes until you can indulge!
Tips for Success
- Make sure your ingredients are at room temperature for better mixing.
- Don’t overmix the batter; it should be just combined for soft brownies.
- Use a toothpick to check for doneness; a few moist crumbs are perfect.
- Let the brownies cool completely before cutting for clean edges.
- Store leftovers in an airtight container to keep them fresh.
Equipment Needed
- 9×13 inch baking pan: A standard size for brownies; you can use a glass or metal pan.
- Mixing bowls: Use large bowls for mixing wet and dry ingredients.
- Whisk: A handy tool for combining dry ingredients and beating the cream cheese.
- Spatula: Perfect for spreading the batter evenly in the pan.
- Toothpick: Essential for checking the doneness of your brownies.
Variations
- Nutty Delight: Add 1 cup of chopped walnuts or pecans to the red velvet batter for a crunchy texture.
- Chocolate Chip Twist: Fold in 1 cup of chocolate chips into the red velvet batter for an extra chocolatey treat.
- Gluten-Free Option: Substitute all-purpose flour with a gluten-free flour blend for a gluten-free version.
- Vegan Version: Use flax eggs instead of regular eggs and coconut oil in place of butter for a vegan-friendly treat.
- Minty Fresh: Add 1 teaspoon of peppermint extract to the cheesecake layer for a refreshing twist.
Serving Suggestions
- Serve warm with a dollop of whipped cream for an extra indulgent touch.
- Pair with a scoop of vanilla ice cream for a delightful contrast.
- Dust with powdered sugar for a beautiful presentation.
- Enjoy with a cup of coffee or a glass of milk.
FAQs about Red Velvet Cheesecake Brownies
Can I make these Red Velvet Cheesecake Brownies ahead of time?
Absolutely! These brownies can be made a day in advance. Just store them in an airtight container at room temperature. They’ll taste just as delicious the next day, if not better!
What can I use instead of red food coloring?
If you prefer a natural alternative, beet juice works wonders! It gives a lovely red hue without artificial ingredients. Just be mindful that the color may not be as vibrant.
How do I know when the brownies are done baking?
To check for doneness, insert a toothpick into the center. If it comes out clean or with a few moist crumbs, they’re ready! If it’s too wet, give them a few more minutes in the oven.
Can I freeze these brownies?
Yes, you can freeze them! Just wrap individual squares in plastic wrap and place them in a freezer-safe container. They’ll stay fresh for up to three months. Just thaw them in the fridge before serving.
What’s the best way to store leftover brownies?
Store any leftovers in an airtight container at room temperature for up to five days. If you want to keep them longer, consider freezing them as mentioned above!
Final Thoughts
Making these Red Velvet Cheesecake Brownies is more than just baking; it’s about creating sweet memories in the kitchen. The joy of watching my family’s faces light up as they take that first bite is priceless. Each brownie is a delightful blend of flavors and textures, making them perfect for any occasion. Whether it’s a cozy family night or a festive gathering, these brownies bring a touch of indulgence that everyone will love. So, roll up your sleeves, embrace the mess, and enjoy the delicious journey of baking these heavenly treats!
Print
Red Velvet Cheesecake Brownies: Indulge in Decadence!
- Total Time: 55 minutes
- Yield: 24 brownies 1x
- Diet: Vegetarian
Description
Red Velvet Cheesecake Brownies are a rich and decadent dessert that combines the classic flavors of red velvet cake with a creamy cheesecake layer, creating a delightful treat for any occasion.
Ingredients
- 1 cup unsalted butter
- 2 cups granulated sugar
- 4 large eggs
- 2 teaspoons vanilla extract
- 2 cups all-purpose flour
- 1/2 cup cocoa powder
- 1 teaspoon baking powder
- 1 teaspoon salt
- 1 tablespoon red food coloring
- 8 oz cream cheese, softened
- 1/2 cup powdered sugar
- 1 egg
Instructions
- Preheat the oven to 350°F (175°C) and grease a 9×13 inch baking pan.
- In a large bowl, melt the butter and mix in the granulated sugar until well combined.
- Add the eggs and vanilla extract, mixing until smooth.
- In another bowl, whisk together the flour, cocoa powder, baking powder, and salt.
- Gradually add the dry ingredients to the wet mixture, stirring until just combined.
- Stir in the red food coloring until the batter is evenly colored.
- In a separate bowl, beat the cream cheese until smooth, then add the powdered sugar and egg, mixing until well combined.
- Pour half of the red velvet batter into the prepared pan, spreading it evenly.
- Drop spoonfuls of the cheesecake mixture over the red velvet layer, then pour the remaining red velvet batter on top.
- Use a knife to swirl the cheesecake and red velvet layers together for a marbled effect.
- Bake for 30-35 minutes or until a toothpick inserted in the center comes out clean.
- Allow to cool before cutting into squares and serving.
Notes
- For a more intense red color, add more food coloring as desired.
- These brownies can be stored in an airtight container for up to 5 days.
- Serve with whipped cream or a dusting of powdered sugar for extra indulgence.
- Prep Time: 20 minutes
- Cook Time: 35 minutes
- Category: Dessert
- Method: Baking
- Cuisine: American
Nutrition
- Serving Size: 1 brownie
- Calories: 250
- Sugar: 20g
- Sodium: 150mg
- Fat: 12g
- Saturated Fat: 7g
- Unsaturated Fat: 3g
- Trans Fat: 0g
- Carbohydrates: 30g
- Fiber: 1g
- Protein: 3g
- Cholesterol: 50mg


