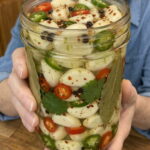
Ingredients
One of the best things about this recipe is that it uses simple, accessible ingredients you can find at any grocery store. Here’s a closer look at what goes into the jar and why each ingredient matters.
For the Garlic
4 cups peeled garlic cloves — This is the star of the show. You can buy pre-peeled garlic cloves to save time, or peel your own from whole heads. Using fresh, firm garlic cloves (not sprouted or soft ones) will give you the best texture and flavor.
For the Brine
2 fresh red or green chilies, thinly sliced — Fresh chilies add real heat and a fresh, vegetal spice note that dried spices alone can’t replicate. Use jalapeños, serranos, Fresno chilies, or Thai bird chilies depending on how much heat you want.
1 cup white vinegar — White vinegar provides the sharp, clean acidity that forms the backbone of any good pickling brine. Its neutral flavor lets the other ingredients shine.
1 cup fresh lime juice — This is what makes the recipe “chili lime.” Fresh lime juice adds bright, citrusy acidity and a distinct flavor that pairs perfectly with the chilies and garlic. Always use freshly squeezed lime juice rather than bottled for the best flavor.
1 cup water — Water dilutes the acidity slightly so the brine isn’t overwhelmingly sharp, allowing the other flavors to come through.
2 tablespoons granulated sugar — A touch of sugar balances the acidity and heat, rounding out the flavor so the pickle isn’t one-dimensionally sour or spicy.
1 tablespoon kosher salt — Salt is essential for both flavor and preservation. It helps draw out moisture and season the garlic all the way through.
1 teaspoon red pepper flakes — These add a steady, background heat that complements the fresh chilies.
1 teaspoon black peppercorns — Whole peppercorns infuse the brine with warm, slightly floral heat and classic pickling flavor.
1 teaspoon mustard seeds — A staple in pickling brines, mustard seeds add a subtle tang and a bit of texture and visual interest to the jar.
2 bay leaves — Bay leaves contribute a subtle herbal, slightly floral note that rounds out the spice blend.
Instructions
Start by peeling your garlic cloves and trimming off any rough or discolored ends. If you’re peeling whole heads of garlic yourself, a helpful trick is to smash the cloves lightly with the flat side of a knife first, which loosens the skins and makes peeling much faster. Once your 4 cups of garlic are peeled, slice your fresh chilies into thin rounds, leaving the seeds in if you want extra heat, or removing them if you prefer a milder pickle.
In a saucepan, combine the white vinegar, fresh lime juice, water, sugar, salt, red pepper flakes, black peppercorns, mustard seeds, and bay leaves. This combination of acids, aromatics, and spices is what gives the finished pickled garlic its signature chili-lime flavor.
Place the saucepan over medium heat and bring the mixture to a gentle simmer, stirring occasionally to help the sugar and salt fully dissolve into the liquid. You want a gentle simmer, not a rolling boil, so the flavors have time to meld without evaporating too much liquid.
Once the brine is simmering, add the peeled garlic cloves and sliced chilies directly into the saucepan. Let everything simmer gently for 2 to 3 minutes. This brief cooking time is key: it softens the garlic just enough to become tender-crisp while still holding its shape and a bit of bite. Overcooking at this stage can lead to mushy garlic, so keep an eye on the clock.
Remove the saucepan from the heat and let the mixture cool for a few minutes. This makes it easier and safer to handle when packing the jars, and it also stops the garlic from continuing to soften.
Using a clean spoon or tongs, pack the garlic cloves and sliced chilies into clean glass jars, distributing the spices (mustard seeds, peppercorns, bay leaves) evenly among the jars. Pour the warm brine over the garlic, making sure every clove is fully submerged in liquid. This is important, as any garlic exposed to air can spoil more quickly or develop off flavors.
Let the jars cool to room temperature on the counter before sealing them with their lids. Sealing while the brine is still hot can cause condensation to build up inside the jar, which isn’t ideal for a refrigerator pickle.
Once sealed, transfer the jars to the refrigerator. While you technically could taste the pickled garlic right away, it’s best to let it rest for at least 24 hours before serving. This resting period allows the garlic to fully absorb the tangy, spicy, citrusy brine. For the best flavor, let the jars sit for 3 to 5 days before diving in, the longer they sit, the more the flavors develop and deepen.
Once your chili lime pickled garlic has had time to marinate, it’s ready to enjoy straight from the jar or as a flavor-packed addition to countless dishes.