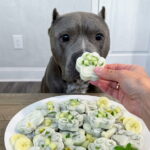
Ingredients
Each ingredient in this recipe was chosen with your dog’s health and enjoyment in mind. Here’s a closer look at what goes into these treats and why.
Plain Unsweetened Greek Yogurt
Greek yogurt serves as the creamy base for these treats. It’s an excellent source of protein and contains probiotics that can support healthy digestion. Always choose a plain, unsweetened variety — flavored yogurts often contain added sugars or artificial sweeteners, some of which can be harmful to dogs.
Cucumber
Cucumber is the star ingredient in this recipe, and for good reason. It’s low in calories, high in water content, and offers a satisfying crunch that many dogs enjoy. Peeling the cucumber before blending helps create a smoother texture and removes any waxy coating that’s sometimes applied to store-bought cucumbers.
Ripe Banana
Banana adds natural sweetness and a smooth, creamy texture to the blended mixture. It also contributes potassium and fiber. A ripe banana, with a few brown speckles on the peel, will blend more easily and taste sweeter than an unripe one.
Natural Peanut Butter (Xylitol-Free)
Peanut butter adds richness and a flavor most dogs find irresistible. However, it’s critical to choose a natural peanut butter that does not contain xylitol, a sugar substitute that is highly toxic to dogs, even in small amounts. Always check the ingredient label carefully before using any peanut butter in a homemade dog treat.
Fresh Mint Leaves
Mint is what gives this recipe its signature cooling sensation. In small, moderate amounts, mint is considered safe for dogs and can even help freshen their breath. However, it should be used sparingly — too much mint can potentially cause digestive upset in some dogs, so 2–3 leaves is the right amount for this recipe.
Optional Add-Ins
To customize this recipe further, you can incorporate any of the following:
- Pumpkin purée – Adds fiber and a subtle earthy sweetness.
- Ground flaxseed – A source of omega-3 fatty acids that can support skin and coat health.
- Unsweetened coconut water – Adds extra hydration and a mild natural sweetness.
- Unsweetened applesauce – Boosts sweetness and smoothness without added sugar.
- Finely shredded carrots – Adds texture, fiber, and beta-carotene.
These add-ins are entirely optional, but they’re a great way to introduce variety if you plan to make this recipe regularly.
Instructions
Add the Greek yogurt, chopped cucumber, banana, and peanut butter to a blender or food processor. Blend on high until the mixture becomes completely smooth and creamy, with no visible chunks of cucumber or banana remaining. This usually takes about 30–60 seconds, depending on your blender’s power.
Finely chop 2–3 fresh mint leaves and gently stir them into the blended mixture by hand. Stirring the mint in after blending, rather than blending it with the other ingredients, helps distribute small flecks of mint evenly throughout the mixture without turning the entire treat green or overpowering the flavor.
If you’re using any of the optional add-ins — pumpkin purée, ground flaxseed, coconut water, applesauce, or shredded carrots — stir them into the mixture at this stage until everything is evenly combined. Feel free to mix and match based on what you have available or what your dog enjoys most.
Spoon or pipe the mixture into silicone paw-shaped molds, bone-shaped molds, or mini ice cube trays. Silicone molds are ideal because they make it much easier to pop out the finished treats without cracking or breaking them. If you don’t have specialty molds, a standard ice cube tray works perfectly well too.
Place the filled molds in the freezer and freeze for 4–6 hours, or until the treats are completely firm all the way through. For best results, avoid stacking or moving the molds during this time to help the treats set evenly.
Once the treats are completely frozen, pop them out of the molds and transfer them to an airtight, freezer-safe container. Proper storage helps prevent freezer burn and keeps the treats tasting fresh for weeks to come.