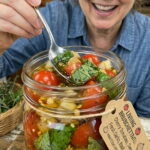
Ingredients
This recipe uses fresh, simple ingredients paired with raw honey to create a bold, savory-sweet infusion. Here’s what you’ll need:
- 2 cups fresh cherry tomatoes, halved or pierced
- ½ small sweet onion, finely chopped
- 4 garlic cloves, minced
- ½ cup fresh basil leaves, torn
- 1–1½ cups raw honey, enough to thoroughly coat the ingredients
- 1 tbsp extra-virgin olive oil, optional
- 1 tbsp fresh lemon juice, optional
- ¼ tsp freshly cracked black pepper
- Pinch of sea salt
Instructions
Wash and thoroughly dry the cherry tomatoes, onion, garlic, and basil. Drying the produce well is important, since excess surface moisture can affect how the mixture develops.
Cut the cherry tomatoes in half. If you prefer to keep them whole, carefully pierce each tomato once with a knife or skewer. This allows the honey to penetrate the tomatoes and draw out their juices.
Add the tomatoes, chopped onion, minced garlic, and fresh basil to a clean glass jar, leaving plenty of headspace at the top. Headspace is important, as the mixture may expand slightly as it develops.
Add the black pepper and a small pinch of sea salt to the jar.
Pour the raw honey over the mixture, making sure the ingredients are thoroughly coated and mostly submerged.
Stir gently with a clean utensil to help distribute the honey evenly throughout the mixture and to release any trapped air bubbles, which can otherwise create pockets where spoilage is more likely to develop.
This step is essential for safety. If you intend to let this mixture actively ferment, use a validated fermentation method and a container specifically designed to safely release built-up pressure, such as an airlock lid or a jar designed for fermentation. Do not tightly seal an actively fermenting jar with a standard lid, as pressure can build up and cause the container to fail.
Throughout the fermentation or infusion period, monitor the mixture closely. Discard it immediately if you notice any mold, an unpleasant or off odor, unusual discoloration, or any other signs of spoilage.
Once the mixture has reached your desired flavor using a validated process, transfer it to a clean container and refrigerate.
For a smooth dressing or sauce consistency, blend the mixture until it reaches your preferred texture.
If you’re using the mixture as a dressing, stir in the optional olive oil and fresh lemon juice at this stage for added richness and brightness.