Ingredients
The secret to this simple homemade bread is using the correct proportions of a few everyday ingredients.
All-Purpose Flour: 3 Cups (375 g)
All-purpose flour provides the structure of the loaf. Its gluten-forming proteins help the dough hold the gases produced by the yeast, allowing it to rise and develop its characteristic texture.
For consistent results, measuring flour by weight is recommended. If you use measuring cups, spoon the flour into the cup and level it without packing it down. Scooping directly into the flour bag can add too much flour and make the dough unnecessarily dry.
Warm Water: 1½ Cups (360 ml)
Water hydrates the flour, activates the yeast, and helps create the sticky dough that gives no-knead bread its rustic character.
The water should feel comfortably warm rather than hot. A temperature around 100–110°F (38–43°C) is generally suitable for instant yeast, although following the yeast package instructions is best.
Water that is excessively hot can damage or kill the yeast, preventing the dough from rising properly.
Instant Yeast: 2 Teaspoons
Instant yeast helps the dough rise by producing carbon dioxide during fermentation. Those gas bubbles expand within the dough, contributing to the bread’s volume and airy texture.
Instant yeast can generally be mixed directly into the dry ingredients without being dissolved separately in water.
Make sure your yeast is fresh and has been stored according to the package directions. Old or improperly stored yeast may lose its effectiveness.
Salt: 1½ Teaspoons
Salt enhances the flavor of the bread and helps regulate yeast activity. Without salt, the loaf may taste bland, even when its texture is excellent.
Measure the salt carefully and distribute it throughout the flour before adding the water.
Sugar: 1 Teaspoon
A small amount of sugar adds a subtle touch of flavor and can help support yeast activity. It also contributes to browning during baking.
Instructions
Follow these steps to create a rustic loaf with a crisp crust and soft center.
Step 1: Combine the Dry Ingredients
Add the all-purpose flour, instant yeast, salt, and sugar to a large mixing bowl.
Stir everything together with a wooden spoon until the ingredients are evenly distributed.
Mixing the dry ingredients first helps spread the yeast and salt throughout the flour, supporting more consistent fermentation and flavor.
Step 2: Add the Warm Water
Pour the warm water into the bowl. Stir with a wooden spoon until the flour is hydrated and a sticky, shaggy dough forms.
The dough should look rough and somewhat loose rather than smooth and elastic. You may see small patches of flour disappear as you continue mixing.
Avoid adding extra flour simply because the dough feels sticky. A wetter dough is normal for this style of bread and helps produce a tender interior.
You do not need to knead the dough. Mix only until there are no large pockets of dry flour remaining.
Step 3: Cover and Let the Dough Rise
Cover the bowl with a clean kitchen towel or plastic wrap.
Place the bowl in a comfortably warm, draft-free location and let the dough rise for approximately 1½–2 hours, or until it has roughly doubled in size.
The exact rising time depends on the temperature of your kitchen, the freshness of the yeast, and the temperature of the water.
Rather than relying only on the clock, look for visible expansion and a bubbly surface. If your kitchen is cool, the dough may need additional time. If it is warm, it may rise more quickly.
This resting period allows the yeast to produce gas and the dough to develop flavor and structure.
Step 4: Preheat the Oven and Dutch Oven
About 30 minutes before baking, place your oven-safe Dutch oven and its lid in the oven.
Preheat the oven to 450°F (230°C), allowing the pot to become thoroughly hot.
A properly preheated Dutch oven helps the loaf begin baking immediately when the dough is added. This strong initial heat encourages oven spring and contributes to a crisp crust.
Handle the hot pot carefully, using appropriate oven mitts. Place it on a heat-resistant surface when removing it from the oven.
Step 5: Shape the Dough Gently
Lightly flour your work surface and carefully turn the risen dough onto it.
Dust your hands with flour if necessary, then gently gather the edges of the dough toward the center to form a round loaf.
Avoid aggressive kneading or excessive handling. The goal is simply to create a reasonably compact shape while preserving as much of the air inside the dough as possible.
Place the shaped loaf on a sheet of parchment paper suitable for high-temperature baking.
If the dough feels especially sticky, use a light dusting of flour rather than working large amounts of additional flour into it.
Step 6: Transfer the Dough to the Hot Pot
Carefully remove the preheated Dutch oven from the oven.
Using the parchment paper as a sling, lower the dough into the hot pot. Keep your hands away from the hot sides and rim.
Place the lid on the Dutch oven and return it to the oven.
The covered pot creates a steam-rich environment during the initial stage of baking. This helps keep the surface flexible while the loaf expands, allowing it to develop a more impressive shape and crust.
Step 7: Bake Covered for 30 Minutes
Bake the bread with the lid on for approximately 30 minutes at 450°F (230°C).
During this stage, the dough expands, the crumb begins to set, and the loaf develops its structure.
Keep the oven door closed as much as possible to maintain a steady temperature.
Step 8: Remove the Lid and Finish Baking
Carefully remove the Dutch oven lid, watching for escaping steam.
Continue baking the bread uncovered for another 10–15 minutes, or until the crust becomes deep golden brown and crisp.
The exact baking time depends on your oven and the shape of your loaf. If you prefer a lighter crust, begin checking earlier. For a deeper, more robust crust, allow additional time as needed while avoiding burning.
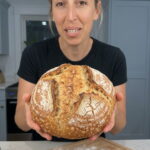
The finished loaf should feel firm on the outside and have a beautifully browned surface.
Step 9: Cool Before Slicing
Remove the bread from the Dutch oven and transfer it to a wire rack.
Allow it to cool for at least 30–45 minutes before slicing.
Although the smell of fresh bread may make it tempting to cut into the loaf immediately, cooling is an important part of the process. The interior continues to settle as the bread cools, helping the crumb finish setting.
Cutting too early can release excess moisture and leave the inside gummy or compressed.