5-Ingredient No-Knead Bread for Beginners: Easy Homemade Artisan Bread with a Crispy Crust
Crusty on the outside, soft and airy on the inside, this 5-Ingredient No-Knead Bread for Beginners is the perfect recipe for anyone who wants to enjoy fresh, homemade bread without complicated baking techniques. Made with just five simple pantry ingredients, this rustic artisan-style loaf delivers a beautifully golden crust, a tender interior, and the comforting aroma of freshly baked bread. Best of all, you don’t need a stand mixer, special bread-making equipment, or hours of kneading to achieve delicious results.
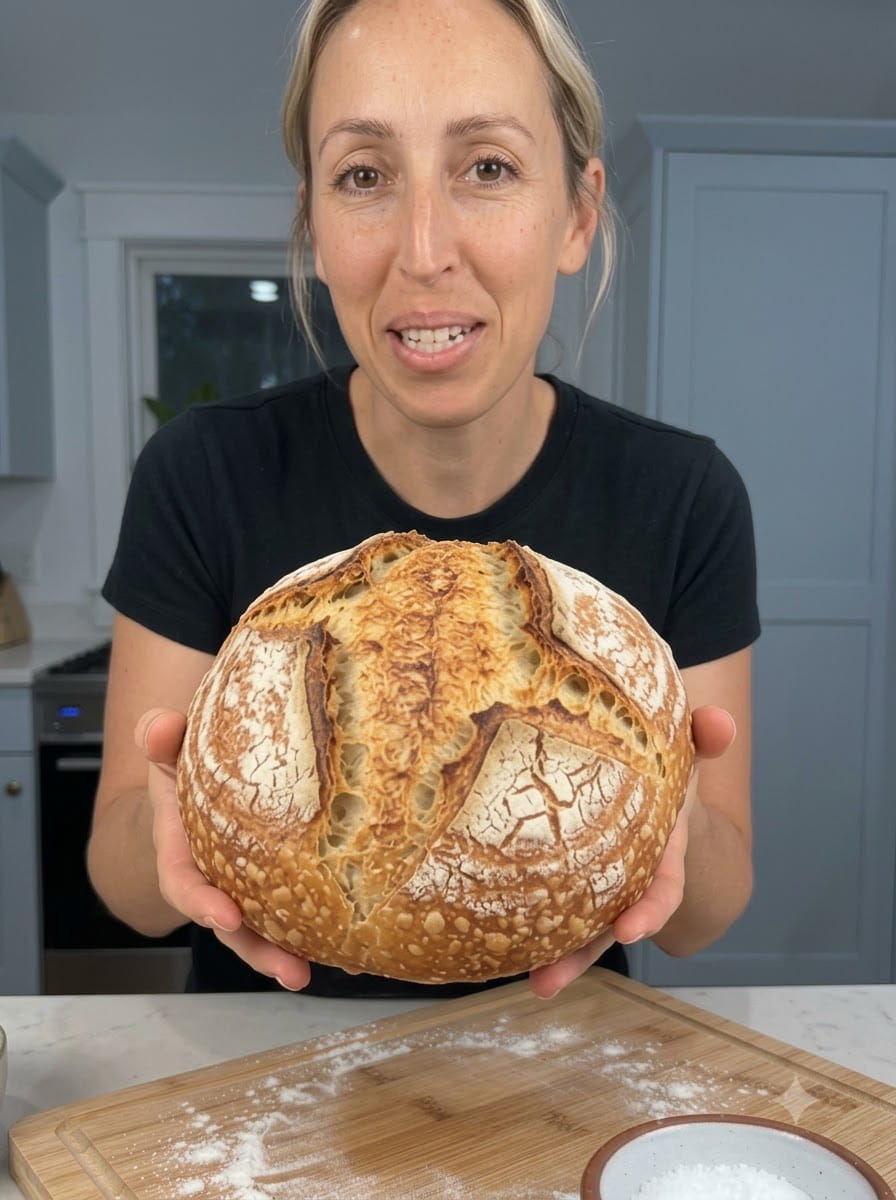
Whether you’re new to baking bread or simply looking for an easy homemade bread recipe for busy days, this no-knead method makes the entire process approachable and rewarding. The dough comes together in one bowl, rises naturally, and develops its structure while resting. Once baked in a preheated Dutch oven, it transforms into a gorgeous loaf with a crisp, crackly exterior and a soft, chewy crumb.
This easy artisan bread is perfect for serving warm with butter, dipping into extra virgin olive oil, pairing with hearty soups and stews, or turning into delicious sandwiches. It also makes a wonderful addition to family dinners, weekend brunches, holiday meals, and cozy evenings at home.
If you’ve always wanted to bake homemade bread but felt intimidated by traditional recipes, this simple five-ingredient loaf is an excellent place to start. With a few basic ingredients, a little patience, and the right baking technique, you can create bakery-style bread right in your own kitchen.
What Is 5-Ingredient No-Knead Bread?
No-knead bread is a simple homemade bread made without the traditional process of kneading dough by hand or using a mixer. Instead of developing gluten through repeated stretching and folding, the dough rests and rises, allowing the flour to hydrate and the yeast to produce gas that helps the dough expand.
This resting period is an important part of the bread-making process. As the dough sits, its gluten network gradually develops, helping create the structure needed for a soft interior and a satisfying crust.
Unlike many traditional bread recipes that require several rounds of kneading, resting, and shaping, this beginner-friendly version keeps things simple. You mix the ingredients, cover the bowl, let the dough rise, shape it gently, and bake it in a hot covered pot.
The Dutch oven plays a particularly important role in the recipe. Its heavy construction retains heat, while the lid traps moisture released by the dough during the early stages of baking. This moist environment allows the bread to expand before the crust fully sets. Removing the lid toward the end of baking allows the exterior to dry, brown, and become wonderfully crisp.
The result is rustic homemade bread that looks impressive but requires very little hands-on work.
Why You’ll Love This Easy No-Knead Bread Recipe
There are plenty of reasons to make this five-ingredient bread a regular part of your baking routine.
1. Only Five Simple Ingredients
You don’t need a long shopping list or expensive specialty ingredients. All-purpose flour, warm water, instant yeast, salt, and sugar are enough to create a delicious homemade loaf.
These basic pantry staples are easy to find in most grocery stores, making this recipe convenient whenever you’re craving freshly baked bread.
2. No Kneading Required
Traditional bread dough often requires several minutes of kneading to develop the gluten structure. This recipe skips that step entirely.
Simply mix the ingredients until a sticky, shaggy dough forms. The dough will look rough rather than smooth, and that’s exactly what you want. Time and fermentation help develop the dough while it rises.
This makes the recipe especially suitable for beginners, busy home cooks, and anyone who prefers a straightforward baking process.
3. A Beautifully Crispy Golden Crust
One of the best features of homemade artisan bread is its crust. Baking the loaf in a preheated Dutch oven helps create the hot, moist environment needed for a crisp exterior and good oven spring.
After the lid comes off, the bread continues baking until its crust develops a rich golden-brown color and a satisfying crunch.
4. Soft, Airy Interior
The inside of this bread is tender, moist, and pleasantly chewy. When the dough rises properly and is handled gently, it can develop an attractive open crumb with small and medium air pockets.
Every slice is ideal for spreading with butter, dipping into soup, or layering with your favorite sandwich ingredients.
5. Beginner-Friendly Instructions
You don’t need professional baking skills to make this recipe. Each step is straightforward, and most of the preparation time involves waiting for the dough to rise or the bread to bake.
With a little attention to water temperature, rising time, and oven heat, even first-time bread makers can achieve excellent results.
6. Perfect for Many Meals
This rustic loaf works beautifully at breakfast, lunch, and dinner. Serve it with scrambled eggs in the morning, use it to make sandwiches for lunch, or pair it with pasta, soup, roasted vegetables, and casseroles at dinner.
It is also delicious toasted the next day.
Ingredients for 5-Ingredient No-Knead Bread
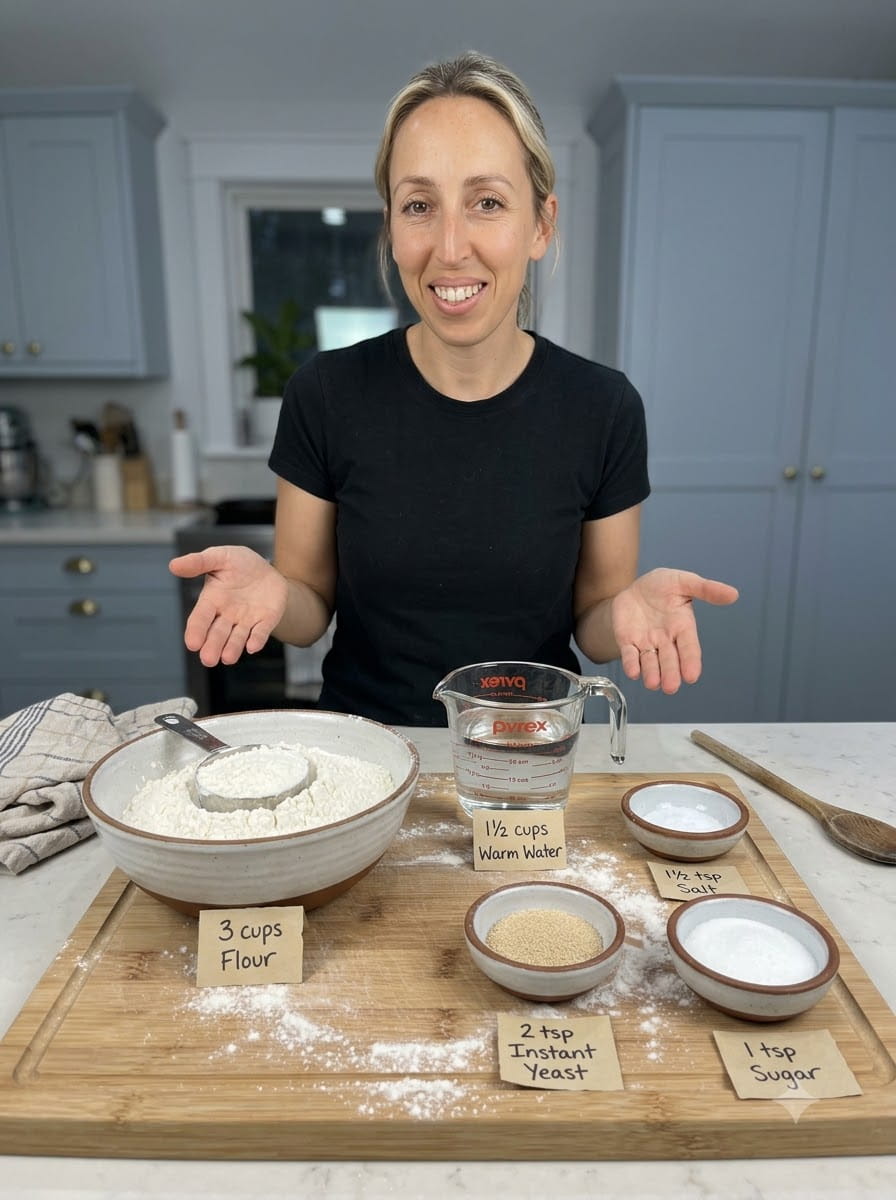
The secret to this simple homemade bread is using the correct proportions of a few everyday ingredients.
All-Purpose Flour: 3 Cups (375 g)
All-purpose flour provides the structure of the loaf. Its gluten-forming proteins help the dough hold the gases produced by the yeast, allowing it to rise and develop its characteristic texture.
For consistent results, measuring flour by weight is recommended. If you use measuring cups, spoon the flour into the cup and level it without packing it down. Scooping directly into the flour bag can add too much flour and make the dough unnecessarily dry.
Warm Water: 1½ Cups (360 ml)
Water hydrates the flour, activates the yeast, and helps create the sticky dough that gives no-knead bread its rustic character.
The water should feel comfortably warm rather than hot. A temperature around 100–110°F (38–43°C) is generally suitable for instant yeast, although following the yeast package instructions is best.
Water that is excessively hot can damage or kill the yeast, preventing the dough from rising properly.
Instant Yeast: 2 Teaspoons
Instant yeast helps the dough rise by producing carbon dioxide during fermentation. Those gas bubbles expand within the dough, contributing to the bread’s volume and airy texture.
Instant yeast can generally be mixed directly into the dry ingredients without being dissolved separately in water.
Make sure your yeast is fresh and has been stored according to the package directions. Old or improperly stored yeast may lose its effectiveness.
Salt: 1½ Teaspoons
Salt enhances the flavor of the bread and helps regulate yeast activity. Without salt, the loaf may taste bland, even when its texture is excellent.
Measure the salt carefully and distribute it throughout the flour before adding the water.
Sugar: 1 Teaspoon
A small amount of sugar adds a subtle touch of flavor and can help support yeast activity. It also contributes to browning during baking.
The quantity is small enough that the finished loaf remains a savory, versatile bread rather than a sweet one.
Equipment You’ll Need
You don’t need a professional bakery setup to make this recipe. A few basic kitchen tools are sufficient.
- A large mixing bowl
- A wooden spoon or sturdy spatula
- Measuring cups and spoons or a kitchen scale
- A clean kitchen towel or plastic wrap
- A Dutch oven with an oven-safe lid
- Parchment paper suitable for the intended oven temperature
- A baking mitt or heat-resistant gloves
- A wire cooling rack
- A serrated bread knife
A Dutch oven is particularly useful because it retains heat and traps steam. If you don’t have one, you can use a suitable oven-safe baking dish with a lid, provided the cookware is rated for the baking temperature and is safe to preheat empty.
Always follow the cookware manufacturer’s instructions. Never place a cold or unsuitable glass dish into a very hot oven, and avoid exposing hot cookware to sudden temperature changes.
How to Make 5-Ingredient No-Knead Bread
Follow these steps to create a rustic loaf with a crisp crust and soft center.
Step 1: Combine the Dry Ingredients
Add the all-purpose flour, instant yeast, salt, and sugar to a large mixing bowl.
Stir everything together with a wooden spoon until the ingredients are evenly distributed.
Mixing the dry ingredients first helps spread the yeast and salt throughout the flour, supporting more consistent fermentation and flavor.
Step 2: Add the Warm Water
Pour the warm water into the bowl. Stir with a wooden spoon until the flour is hydrated and a sticky, shaggy dough forms.
The dough should look rough and somewhat loose rather than smooth and elastic. You may see small patches of flour disappear as you continue mixing.
Avoid adding extra flour simply because the dough feels sticky. A wetter dough is normal for this style of bread and helps produce a tender interior.
You do not need to knead the dough. Mix only until there are no large pockets of dry flour remaining.
Step 3: Cover and Let the Dough Rise
Cover the bowl with a clean kitchen towel or plastic wrap.
Place the bowl in a comfortably warm, draft-free location and let the dough rise for approximately 1½–2 hours, or until it has roughly doubled in size.
The exact rising time depends on the temperature of your kitchen, the freshness of the yeast, and the temperature of the water.
Rather than relying only on the clock, look for visible expansion and a bubbly surface. If your kitchen is cool, the dough may need additional time. If it is warm, it may rise more quickly.
This resting period allows the yeast to produce gas and the dough to develop flavor and structure.
Step 4: Preheat the Oven and Dutch Oven
About 30 minutes before baking, place your oven-safe Dutch oven and its lid in the oven.
Preheat the oven to 450°F (230°C), allowing the pot to become thoroughly hot.
A properly preheated Dutch oven helps the loaf begin baking immediately when the dough is added. This strong initial heat encourages oven spring and contributes to a crisp crust.
Handle the hot pot carefully, using appropriate oven mitts. Place it on a heat-resistant surface when removing it from the oven.
Step 5: Shape the Dough Gently
Lightly flour your work surface and carefully turn the risen dough onto it.
Dust your hands with flour if necessary, then gently gather the edges of the dough toward the center to form a round loaf.
Avoid aggressive kneading or excessive handling. The goal is simply to create a reasonably compact shape while preserving as much of the air inside the dough as possible.
Place the shaped loaf on a sheet of parchment paper suitable for high-temperature baking.
If the dough feels especially sticky, use a light dusting of flour rather than working large amounts of additional flour into it.
Step 6: Transfer the Dough to the Hot Pot
Carefully remove the preheated Dutch oven from the oven.
Using the parchment paper as a sling, lower the dough into the hot pot. Keep your hands away from the hot sides and rim.
Place the lid on the Dutch oven and return it to the oven.
The covered pot creates a steam-rich environment during the initial stage of baking. This helps keep the surface flexible while the loaf expands, allowing it to develop a more impressive shape and crust.
Step 7: Bake Covered for 30 Minutes
Bake the bread with the lid on for approximately 30 minutes at 450°F (230°C).
During this stage, the dough expands, the crumb begins to set, and the loaf develops its structure.
Keep the oven door closed as much as possible to maintain a steady temperature.
Step 8: Remove the Lid and Finish Baking
Carefully remove the Dutch oven lid, watching for escaping steam.
Continue baking the bread uncovered for another 10–15 minutes, or until the crust becomes deep golden brown and crisp.
The exact baking time depends on your oven and the shape of your loaf. If you prefer a lighter crust, begin checking earlier. For a deeper, more robust crust, allow additional time as needed while avoiding burning.
The finished loaf should feel firm on the outside and have a beautifully browned surface.
Step 9: Cool Before Slicing
Remove the bread from the Dutch oven and transfer it to a wire rack.
Allow it to cool for at least 30–45 minutes before slicing.
Although the smell of fresh bread may make it tempting to cut into the loaf immediately, cooling is an important part of the process. The interior continues to settle as the bread cools, helping the crumb finish setting.
Cutting too early can release excess moisture and leave the inside gummy or compressed.
Once cooled, slice the loaf with a serrated bread knife and enjoy the contrast between the crunchy crust and tender interior.
Essential Tips for Perfect Homemade No-Knead Bread
A few small details can make a significant difference in the quality of your homemade loaf.
Measure the Flour Accurately
Too much flour is one of the most common reasons homemade bread turns out dense or dry.
A kitchen scale provides the most reliable measurement. For this recipe, use 375 grams of all-purpose flour.
If measuring by volume, spoon the flour into your measuring cup and level the top with a straight edge.
Don’t Worry About Sticky Dough
No-knead bread dough is typically stickier than traditional kneaded dough. That moisture helps produce a softer crumb and supports the bread’s rustic texture.
Use a little flour on your hands and work surface when shaping, but avoid adding excessive amounts to the dough itself.
Give the Dough Enough Time to Rise
Yeast needs time to produce gas and develop the dough. If the dough has not expanded sufficiently, the finished bread may be denser than expected.
Look for a noticeable increase in volume and a bubbly appearance before shaping.
Preheat the Dutch Oven Properly
The hot pot is one of the most important elements of this recipe. Starting with a thoroughly heated Dutch oven helps create strong oven spring and encourages a crisp crust.
Allow approximately 30 minutes of preheating once the oven reaches the target temperature.
Handle the Dough Gently
When shaping, try to preserve the air bubbles created during fermentation. Excessive handling can deflate the dough and reduce its volume.
A light touch is usually all you need.
Let the Bread Cool Completely
For the best texture, allow the loaf to cool before cutting. The crust becomes easier to slice cleanly, and the interior has time to stabilize.
If you want warm bread, reheat individual slices briefly after the loaf has cooled.
Why Is My No-Knead Bread Dense?
If your homemade bread turns out heavier than expected, several factors may be responsible.
The dough didn’t rise enough. A cool kitchen, inactive yeast, or insufficient rising time can prevent the dough from developing enough air pockets. Give the dough additional time if it has not expanded noticeably.
Too much flour was added. Excess flour creates a stiffer dough that may struggle to expand. Measure the flour accurately and resist the urge to eliminate all stickiness.
The yeast was inactive. Check the expiration date and storage instructions on your yeast package. Yeast that has lost its activity will not produce enough gas for a good rise.
The dough was handled too aggressively. Rough shaping can remove some of the gas that helps create an airy crumb. Shape the dough gently and avoid unnecessary kneading.
The bread was sliced too soon. Cutting while the interior is still hot can make the crumb appear wet, gummy, or compressed. Allow adequate cooling time before slicing.
Why Didn’t My Bread Develop a Crispy Crust?
A soft crust can occur when the bread does not bake long enough uncovered or when the baking environment remains too moist.
To improve the crust, make sure your oven is fully preheated, use the covered baking stage as directed, and remove the lid for the final 10–15 minutes.
The loaf should develop a rich golden-brown exterior before you remove it from the oven.
Cooling the bread on a wire rack also helps prevent condensation from collecting underneath the loaf. Avoid covering freshly baked bread with a towel if you want to preserve its crisp crust.
Can You Make No-Knead Bread Without a Dutch Oven?
Yes, although the results may differ slightly.
A Dutch oven is useful because it traps steam and maintains high heat around the loaf. Without one, you can use another oven-safe covered baking vessel that is designed to withstand the required temperature.
Choose cookware that is safe for preheating and baking at 450°F (230°C). Check the manufacturer’s instructions before placing the vessel in the oven.
If you don’t have a suitable covered vessel, bake the shaped dough on a preheated baking surface and use a carefully managed steam method designed for your oven and equipment. Avoid pouring water onto hot glass, exposed heating elements, or the oven floor unless the manufacturer specifically permits it.
The crust may be somewhat different, but you can still make delicious homemade bread without specialized equipment.
Delicious Ways to Serve No-Knead Bread
One of the best things about this rustic homemade bread is its versatility. Its mild flavor and chewy texture complement a wide range of foods.
Serve It Warm with Butter
A slice of freshly baked bread with softened butter is a simple classic. The butter melts into the tender crumb while the crisp crust provides a satisfying contrast.
For extra flavor, try herb butter made with finely chopped parsley, garlic, and a pinch of salt.
Dip It in Olive Oil
Cut the loaf into thick slices and serve it with extra virgin olive oil. Add dried oregano, black pepper, or a little balsamic vinegar to create a simple dipping mixture.
This makes an easy appetizer for family dinners or casual gatherings.
Pair It with Soups and Stews
The sturdy crumb makes this bread an excellent companion for hearty meals.
Serve it alongside tomato soup, vegetable soup, lentil soup, chicken soup, beef stew, or creamy potato soup. The slices are perfect for soaking up flavorful broth without falling apart immediately.
Make Homemade Sandwiches
Use thick slices for turkey and cheese sandwiches, grilled chicken sandwiches, roasted vegetable sandwiches, or classic tomato-and-cheese combinations.
The bread’s rustic texture holds up well to flavorful fillings, especially when the slices are lightly toasted.
Serve It with Pasta
A loaf of crusty bread pairs beautifully with spaghetti, lasagna, baked ziti, and other pasta dishes. Use it to scoop up tomato sauce or serve it with a little garlic butter.
Turn Leftovers into Garlic Bread
Slice the bread, brush it with a mixture of olive oil or softened butter and minced garlic, and toast until golden.
Add chopped parsley for freshness or a little grated Parmesan for a savory finish.
Enjoy It at Breakfast
Toast a slice and top it with scrambled eggs, avocado, cottage cheese, or your favorite breakfast spread. Its sturdy texture also makes it suitable for simple open-faced sandwiches.
Easy Variations to Try
Once you’ve mastered the basic five-ingredient recipe, you can experiment with different flavors.
Keep in mind that additions can change the dough’s moisture balance, rise, or baking behavior. Start with small quantities and avoid changing the flour-to-water ratio too drastically.
Garlic and Herb Bread
Add a small amount of dried rosemary, thyme, or oregano to the dry ingredients. Garlic powder can also provide savory flavor without introducing extra moisture.
This variation is delicious with soups, pasta, and roasted vegetables.
Rustic Black Pepper Bread
Mix freshly ground black pepper into the flour before adding the water. The pepper adds gentle warmth and pairs particularly well with cheese, olive oil, and hearty stews.
Sesame Seed Bread
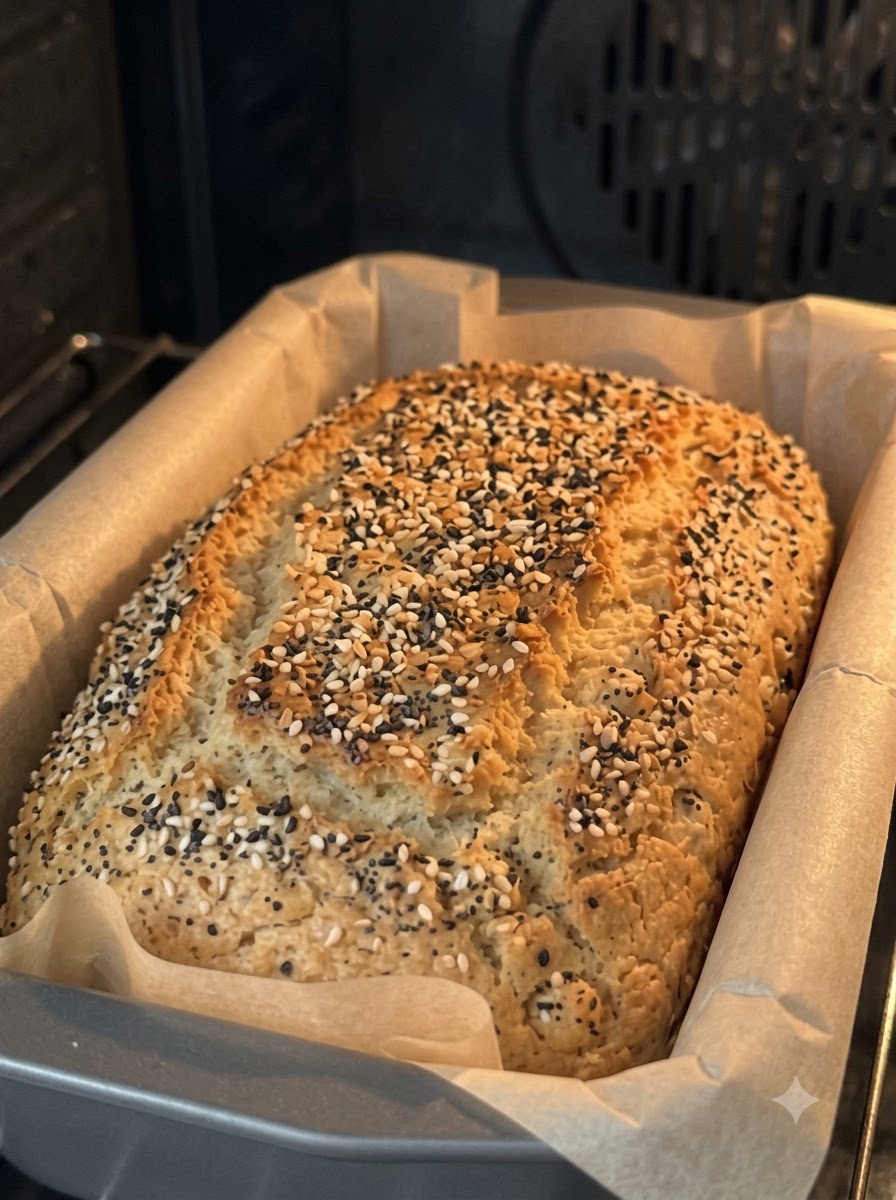
Sprinkle sesame seeds over the shaped loaf before baking. Lightly press them into the surface so they adhere.
The seeds create a toasted aroma and an attractive finish.
Whole-Wheat No-Knead Bread
Replace part of the all-purpose flour with whole-wheat flour for a more robust flavor.
Because whole-wheat flour absorbs water differently and contains bran that affects gluten development, the dough may need a little adjustment. Start by replacing a small portion of the flour rather than substituting the entire amount.
Cheesy Herb Bread
For a richer loaf, gently incorporate a modest amount of grated cheese and dried herbs during mixing.
Cheese introduces fat, salt, and moisture, so the texture may differ from the original bread. Keep the additions moderate and check the loaf as it bakes.
How to Store Homemade No-Knead Bread
Homemade bread without commercial preservatives generally has a shorter shelf life than packaged supermarket bread.
For the best texture, allow the loaf to cool completely before storing it.
Keep the bread in a breathable bread bag or bread box at room temperature for approximately two to three days, depending on your kitchen conditions. A tightly sealed container can soften the crust, while excessive exposure to air can dry out the crumb.
Avoid refrigerating the loaf simply to extend its life, as refrigeration can accelerate the staling process in many types of bread.
If you want to keep the bread longer, freezing is a practical option. Slice the completely cooled loaf, place the slices in a freezer-safe bag, and remove excess air before sealing. Freeze for up to approximately three months for good quality.
You can toast frozen slices directly or thaw them at room temperature. To refresh a larger portion, warm it briefly in an oven until the crust becomes crisp again.
Discard bread if you notice mold or signs of spoilage.
Frequently Asked Questions About 5-Ingredient No-Knead Bread
Is No-Knead Bread Really Easy for Beginners?
Yes. This recipe eliminates the need for traditional kneading and relies on resting time to help the dough develop. As long as you measure the ingredients accurately, allow the dough to rise sufficiently, and bake it in a properly preheated oven, the method is straightforward for beginners.
How Long Does This Bread Take to Make?
The dough requires approximately 1½–2 hours to rise, followed by around 40–45 minutes of baking and at least 30–45 minutes of cooling.
The Dutch oven also needs approximately 30 minutes to preheat. Some of this time overlaps with the dough’s preparation and rising period.
The total elapsed time is generally around three hours, depending on your kitchen temperature and schedule, while the hands-on preparation time is relatively short.
Can I Use Active Dry Yeast Instead of Instant Yeast?
Yes, active dry yeast can often be substituted for instant yeast. However, the activation instructions and rising time may differ depending on the product.
Follow the manufacturer’s directions for the yeast you’re using, and make sure it is active before relying on it to raise the dough.
Why Is My Dough So Wet?
The dough is meant to be sticky. Its relatively high hydration helps create a tender interior and rustic texture.
If the dough is difficult to handle, lightly flour your hands and work surface. Avoid adding large quantities of flour, which can make the finished bread dense.
Can I Prepare the Dough the Night Before?
Yes, a longer, refrigerated fermentation can be useful for planning ahead, but it requires adjusting the original rising schedule. Because this recipe contains a relatively generous amount of instant yeast, the dough may rise too quickly if left at room temperature overnight.
For an overnight method, reduce the yeast and refrigerate the dough promptly after mixing. Allow sufficient time for it to warm or finish rising as needed before shaping and baking. Expect some differences in flavor and timing.
How Do I Know When the Bread Is Fully Baked?
Look for a deep golden-brown crust and a firm exterior. The loaf should sound somewhat hollow when tapped on the bottom, although this traditional test is not perfectly reliable.
For a more precise check, the center of a lean loaf is generally fully baked at approximately 200–210°F (93–99°C).
Can I Make This Bread Without Sugar?
The small amount of sugar in this recipe helps support yeast activity and contributes to browning, but it is not always essential for a basic flour, water, yeast, and salt loaf.
You can omit it, although the crust color, flavor, and fermentation behavior may vary slightly.
Can I Use Bread Flour Instead of All-Purpose Flour?
Yes. Bread flour generally contains more protein than all-purpose flour and may produce a slightly chewier loaf with a different crumb structure.
Because different flours absorb water differently, the dough may feel somewhat different. Use the same quantities initially and assess the texture before making further adjustments.
Why Does My Bread Have a Thick Crust?
A thicker crust can result from longer uncovered baking, a hotter oven, or the characteristics of your flour and dough.
If you prefer a thinner crust, check the loaf a few minutes earlier during the uncovered stage. Let it cool on a wire rack to help maintain the texture you prefer.
Can I Freeze Homemade No-Knead Bread?
Absolutely. Let the bread cool completely, slice it if desired, and freeze it in a well-sealed freezer-safe bag. Individual slices can be toasted straight from frozen, making homemade bread convenient for everyday meals.
Final Thoughts on This Easy Five-Ingredient Bread
This 5-Ingredient No-Knead Bread for Beginners proves that homemade bread doesn’t have to be complicated. With all-purpose flour, warm water, instant yeast, salt, and a little sugar, you can create a rustic loaf with a golden, crunchy crust and a soft, airy interior.
The simple mixing method, hands-off rising time, and covered Dutch oven baking technique make this recipe an excellent introduction to homemade artisan bread. You don’t need advanced skills or expensive equipment to enjoy the satisfaction of pulling a beautiful loaf from your own oven.
Serve it warm with butter, dip it into olive oil, pair it with your favorite soup, or use it to build delicious sandwiches. Once you experience the aroma, texture, and flavor of freshly baked bread, this easy recipe may become one of your favorite kitchen staples.
Save this easy no-knead bread recipe for your next baking day, share it with someone who loves homemade bread, and enjoy the simple pleasure of baking a fresh loaf from scratch. 🌾🍞
Print
5-Ingredient No-Knead Bread for Beginners
Ingredients
The secret to this simple homemade bread is using the correct proportions of a few everyday ingredients.
All-Purpose Flour: 3 Cups (375 g)
All-purpose flour provides the structure of the loaf. Its gluten-forming proteins help the dough hold the gases produced by the yeast, allowing it to rise and develop its characteristic texture.
For consistent results, measuring flour by weight is recommended. If you use measuring cups, spoon the flour into the cup and level it without packing it down. Scooping directly into the flour bag can add too much flour and make the dough unnecessarily dry.
Warm Water: 1½ Cups (360 ml)
Water hydrates the flour, activates the yeast, and helps create the sticky dough that gives no-knead bread its rustic character.
The water should feel comfortably warm rather than hot. A temperature around 100–110°F (38–43°C) is generally suitable for instant yeast, although following the yeast package instructions is best.
Water that is excessively hot can damage or kill the yeast, preventing the dough from rising properly.
Instant Yeast: 2 Teaspoons
Instant yeast helps the dough rise by producing carbon dioxide during fermentation. Those gas bubbles expand within the dough, contributing to the bread’s volume and airy texture.
Instant yeast can generally be mixed directly into the dry ingredients without being dissolved separately in water.
Make sure your yeast is fresh and has been stored according to the package directions. Old or improperly stored yeast may lose its effectiveness.
Salt: 1½ Teaspoons
Salt enhances the flavor of the bread and helps regulate yeast activity. Without salt, the loaf may taste bland, even when its texture is excellent.
Measure the salt carefully and distribute it throughout the flour before adding the water.
Sugar: 1 Teaspoon
A small amount of sugar adds a subtle touch of flavor and can help support yeast activity. It also contributes to browning during baking.
Instructions
Follow these steps to create a rustic loaf with a crisp crust and soft center.
Step 1: Combine the Dry Ingredients
Add the all-purpose flour, instant yeast, salt, and sugar to a large mixing bowl.
Stir everything together with a wooden spoon until the ingredients are evenly distributed.
Mixing the dry ingredients first helps spread the yeast and salt throughout the flour, supporting more consistent fermentation and flavor.
Step 2: Add the Warm Water
Pour the warm water into the bowl. Stir with a wooden spoon until the flour is hydrated and a sticky, shaggy dough forms.
The dough should look rough and somewhat loose rather than smooth and elastic. You may see small patches of flour disappear as you continue mixing.
Avoid adding extra flour simply because the dough feels sticky. A wetter dough is normal for this style of bread and helps produce a tender interior.
You do not need to knead the dough. Mix only until there are no large pockets of dry flour remaining.
Step 3: Cover and Let the Dough Rise
Cover the bowl with a clean kitchen towel or plastic wrap.
Place the bowl in a comfortably warm, draft-free location and let the dough rise for approximately 1½–2 hours, or until it has roughly doubled in size.
The exact rising time depends on the temperature of your kitchen, the freshness of the yeast, and the temperature of the water.
Rather than relying only on the clock, look for visible expansion and a bubbly surface. If your kitchen is cool, the dough may need additional time. If it is warm, it may rise more quickly.
This resting period allows the yeast to produce gas and the dough to develop flavor and structure.
Step 4: Preheat the Oven and Dutch Oven
About 30 minutes before baking, place your oven-safe Dutch oven and its lid in the oven.
Preheat the oven to 450°F (230°C), allowing the pot to become thoroughly hot.
A properly preheated Dutch oven helps the loaf begin baking immediately when the dough is added. This strong initial heat encourages oven spring and contributes to a crisp crust.
Handle the hot pot carefully, using appropriate oven mitts. Place it on a heat-resistant surface when removing it from the oven.
Step 5: Shape the Dough Gently
Lightly flour your work surface and carefully turn the risen dough onto it.
Dust your hands with flour if necessary, then gently gather the edges of the dough toward the center to form a round loaf.
Avoid aggressive kneading or excessive handling. The goal is simply to create a reasonably compact shape while preserving as much of the air inside the dough as possible.
Place the shaped loaf on a sheet of parchment paper suitable for high-temperature baking.
If the dough feels especially sticky, use a light dusting of flour rather than working large amounts of additional flour into it.
Step 6: Transfer the Dough to the Hot Pot
Carefully remove the preheated Dutch oven from the oven.
Using the parchment paper as a sling, lower the dough into the hot pot. Keep your hands away from the hot sides and rim.
Place the lid on the Dutch oven and return it to the oven.
The covered pot creates a steam-rich environment during the initial stage of baking. This helps keep the surface flexible while the loaf expands, allowing it to develop a more impressive shape and crust.
Step 7: Bake Covered for 30 Minutes
Bake the bread with the lid on for approximately 30 minutes at 450°F (230°C).
During this stage, the dough expands, the crumb begins to set, and the loaf develops its structure.
Keep the oven door closed as much as possible to maintain a steady temperature.
Step 8: Remove the Lid and Finish Baking
Carefully remove the Dutch oven lid, watching for escaping steam.
Continue baking the bread uncovered for another 10–15 minutes, or until the crust becomes deep golden brown and crisp.
The exact baking time depends on your oven and the shape of your loaf. If you prefer a lighter crust, begin checking earlier. For a deeper, more robust crust, allow additional time as needed while avoiding burning.
The finished loaf should feel firm on the outside and have a beautifully browned surface.
Step 9: Cool Before Slicing
Remove the bread from the Dutch oven and transfer it to a wire rack.
Allow it to cool for at least 30–45 minutes before slicing.
Although the smell of fresh bread may make it tempting to cut into the loaf immediately, cooling is an important part of the process. The interior continues to settle as the bread cools, helping the crumb finish setting.
Cutting too early can release excess moisture and leave the inside gummy or compressed.