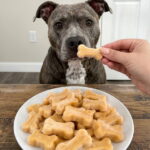
Ingredients
For the Frozen Dog Treats
- 1 ripe banana, peeled
- ½ cup (120 g) plain pumpkin puree (100% pumpkin, not pumpkin pie filling)
- ½ cup (120 g) plain, unsweetened Greek yogurt
This makes roughly 1½ cups of mixture. Depending on your mold size, that’s about 15 to 25 small treats.
Instructions
Peel the ripe banana and break it into small pieces. Smaller pieces blend faster and give you a smoother mixture. Banana with brown spots is ideal because it’s sweeter and softer.
Place the banana pieces and the pumpkin puree in a blender or food processor. Double-check that the can says 100% pumpkin and not pie filling.
Add the plain Greek yogurt to the mixture. Confirm one more time that the yogurt is unsweetened and contains no xylitol or other artificial sweeteners.
Blend until the mixture is smooth and thick with a consistent creamy texture. Stop and scrape down the sides if needed. There should be no banana lumps left, since lumps freeze into uneven bits that can be harder to unmold.
Spoon or pour the mixture into bone-shaped silicone molds or small ice cube trays. A small spoon works well for tiny molds. For a neater result, transfer the mixture to a zip-top bag, snip off one corner, and pipe it into the molds.
Gently tap the molds against the counter to release trapped air and smooth the tops. This helps the treats freeze with clean shapes and prevents hollow spots.
Place the molds flat in the freezer for 3 to 4 hours, or until completely solid. A baking sheet underneath makes it easier to carry the filled molds without spilling. If you’re using larger molds, they may need a little longer.
Carefully remove the frozen treats by gently flexing the silicone and pushing them out from the bottom. If they stick, let the mold sit at room temperature for a minute or two and try again.
Offer your dog one appropriately sized treat at a time as an occasional snack. Supervise while your dog enjoys it, and put the rest back in the freezer right away.