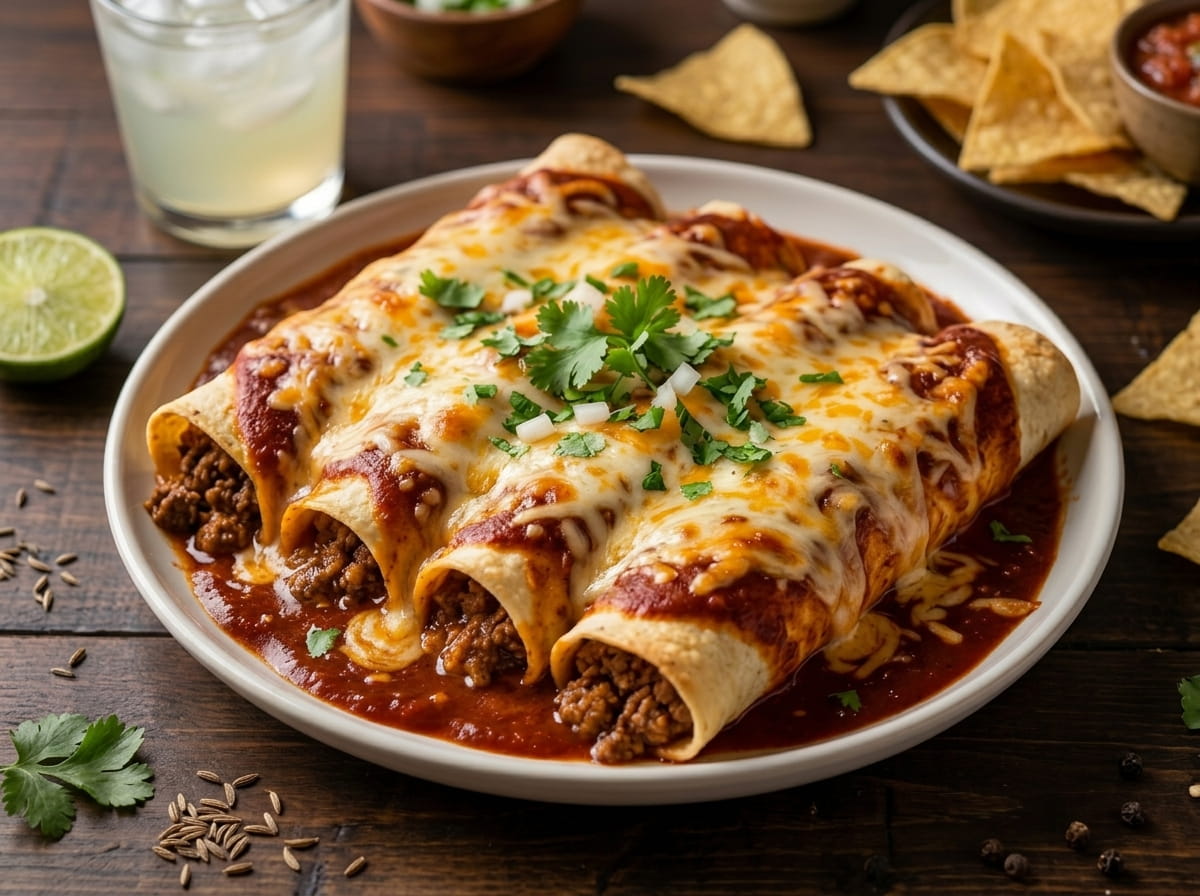
Introduction to Cheesy Beef Enchiladas
Welcome to a world of flavor with my Cheesy Beef Enchiladas! If you’re like me, juggling a busy schedule while trying to whip up something delicious can feel overwhelming. These enchiladas are the perfect solution for those hectic weeknights when you crave comfort food without the fuss. With their gooey cheese and rich flavors, they’re sure to impress your family and friends. Plus, they come together quickly, making them an ideal choice for busy moms and professionals alike. Let’s dive into this delightful recipe that will satisfy your cravings and warm your heart!
Why You’ll Love This Cheesy Beef Enchiladas
These Cheesy Beef Enchiladas are a game-changer for busy nights! They’re not just quick to prepare; they’re bursting with flavor that will make your taste buds dance. The gooey cheese melts beautifully, creating a comforting embrace in every bite. Plus, they’re versatile enough to please even the pickiest eaters in your family. Trust me, once you try them, they’ll become a staple in your dinner rotation!
Ingredients for Cheesy Beef Enchiladas
Gathering the right ingredients is the first step to creating these mouthwatering Cheesy Beef Enchiladas. Here’s what you’ll need:
- Ground beef: This is the star of the show, providing a hearty base. You can also use ground turkey or chicken for a lighter option.
- Onion: Chopped onion adds sweetness and depth. Yellow or white onions work best, but feel free to experiment with red onions for a bolder flavor.
- Enchilada sauce: This sauce brings the dish to life with its rich, spicy flavor. You can use store-bought or make your own for a personal touch.
- Flour tortillas: Soft and pliable, these are perfect for wrapping up your filling. Corn tortillas are a gluten-free alternative, but they can be a bit more delicate.
- Shredded cheese: A blend of cheddar or Mexican cheese adds that gooey, melty goodness we all love. Feel free to mix in some pepper jack for a spicy kick!
- Black beans: These add protein and fiber, making your enchiladas more filling. You can substitute with pinto beans or even lentils for a vegetarian option.
- Corn: Sweet corn adds a pop of color and sweetness. Frozen or canned works well, so use what you have on hand.
- Cumin: This spice gives a warm, earthy flavor that complements the beef beautifully. If you’re out of cumin, chili powder can be a good substitute.
- Garlic powder: A dash of garlic powder enhances the overall flavor. Fresh garlic can be used too, just adjust the amount to your taste.
- Salt and pepper: Essential for seasoning, these will elevate all the flavors in your dish.
For those who like a little heat, consider adding jalapeños to the beef mixture. And remember, if you want to prep ahead, these enchiladas can be assembled and stored in the fridge before baking. For exact measurements, check the bottom of the article where you can find everything available for printing!
How to Make Cheesy Beef Enchiladas
Now that we have our ingredients ready, let’s dive into the fun part—making these Cheesy Beef Enchiladas! Follow these simple steps, and you’ll have a delicious meal on the table in no time.
Step 1: Preheat the Oven
First things first, preheat your oven to 350°F (175°C). Preheating is crucial because it ensures that your enchiladas cook evenly. No one likes a soggy tortilla, right? So, let that oven warm up while you prepare the filling!
Step 2: Cook the Beef and Onion
In a skillet over medium heat, add your ground beef and chopped onion. Cook until the beef is browned and the onion is soft, about 5-7 minutes. Stir occasionally to break up the meat. This step is key for maximum flavor! The onions will sweeten and add depth to the dish, while the beef becomes juicy and savory.
Step 3: Add Beans and Corn
Next, stir in the black beans and corn. These ingredients not only add texture but also pack a nutritional punch. Black beans are rich in protein and fiber, making your enchiladas more filling. Cook for another 2-3 minutes, allowing the flavors to meld together. Your kitchen will smell heavenly!
Step 4: Prepare the Baking Dish
Grab a baking dish and spread a thin layer of enchilada sauce on the bottom. This prevents the tortillas from sticking and adds flavor to the base. It’s like giving your enchiladas a cozy bed to rest in while they bake!
Step 5: Fill the Tortillas
Now it’s time to fill those tortillas! Take one tortilla and spoon a generous amount of the beef mixture down the center. Sprinkle a little cheese on top, then roll it up tightly. Place it seam-side down in the baking dish. If you find the tortillas tearing, try warming them slightly in the microwave for a few seconds to make them more pliable.
Step 6: Assemble the Enchiladas
Once all the tortillas are in the dish, pour the remaining enchilada sauce over the top. Don’t be shy—cover them well! Then, sprinkle the rest of the cheese on top. This will create that gooey, melty goodness we all crave. It’s like a warm hug for your taste buds!
Step 7: Bake to Perfection
Pop the baking dish into your preheated oven and bake for 20-25 minutes. You’ll know they’re done when the cheese is melted and bubbly, creating a golden crust on top. Let them cool for a few minutes before serving. This will help the flavors settle and make them easier to serve!
Tips for Success
- Warm tortillas before filling to prevent tearing.
- Use a mix of cheeses for extra flavor and creaminess.
- Don’t skip the sauce layer at the bottom; it keeps enchiladas moist.
- Let the enchiladas cool slightly before serving for easier slicing.
- Feel free to customize with your favorite veggies or proteins!
Equipment Needed
- Skillet: A non-stick skillet works best, but any frying pan will do.
- Baking dish: A 9×13 inch dish is ideal; you can use a casserole dish as an alternative.
- Spatula: A sturdy spatula helps with flipping and serving.
- Measuring cups: Handy for portioning ingredients, but you can eyeball it if you prefer!
Variations of Cheesy Beef Enchiladas
- Vegetarian Enchiladas: Swap the ground beef for sautéed mushrooms, zucchini, or a mix of your favorite vegetables. Add extra beans for protein!
- Spicy Enchiladas: For a kick, mix in diced jalapeños or use a spicy enchilada sauce. You can also sprinkle some crushed red pepper flakes on top before baking.
- Cheesy Chicken Enchiladas: Substitute ground beef with shredded rotisserie chicken for a quicker option. It’s a great way to use leftovers!
- Gluten-Free Option: Use corn tortillas instead of flour. Just be gentle when rolling them to prevent tearing.
- Breakfast Enchiladas: Fill the tortillas with scrambled eggs, cheese, and veggies for a delightful breakfast twist!
Serving Suggestions for Cheesy Beef Enchiladas
- Side Salad: A fresh green salad with avocado and lime dressing complements the richness of the enchiladas.
- Rice: Serve with Mexican rice or cilantro-lime rice for a hearty meal.
- Drinks: Pair with a refreshing margarita or iced tea for a delightful experience.
- Garnishes: Top with sour cream, guacamole, or fresh cilantro for added flavor and color.
FAQs about Cheesy Beef Enchiladas
As a passionate home cook, I often get questions about my Cheesy Beef Enchiladas. Here are some common queries that might help you on your culinary journey!
Can I make Cheesy Beef Enchiladas ahead of time?
Absolutely! You can assemble the enchiladas and store them in the refrigerator for up to 24 hours before baking. Just cover them tightly with foil to keep them fresh. When you’re ready to bake, add a few extra minutes to the cooking time.
What can I substitute for ground beef?
If you’re looking for alternatives, ground turkey or chicken works wonderfully. For a vegetarian option, try using black beans, lentils, or sautéed vegetables. The flavor will still be fantastic!
How do I store leftovers?
Leftover Cheesy Beef Enchiladas can be stored in an airtight container in the fridge for up to 3 days. Reheat them in the oven or microwave until warmed through. They make for a quick and satisfying lunch!
Can I freeze Cheesy Beef Enchiladas?
Yes, you can freeze them! Just assemble the enchiladas without baking, cover them tightly, and freeze for up to 3 months. When you’re ready to enjoy, thaw in the fridge overnight and bake as directed.
What toppings go well with Cheesy Beef Enchiladas?
There are so many delicious options! Sour cream, guacamole, fresh cilantro, or diced tomatoes add a burst of flavor. You can also sprinkle some sliced jalapeños for an extra kick!
Final Thoughts
Making Cheesy Beef Enchiladas is more than just cooking; it’s about creating a warm, inviting experience for your family. The joy of pulling a bubbling dish from the oven, the aroma wafting through your home, and the smiles around the dinner table are priceless. This recipe not only satisfies cravings but also brings loved ones together. Whether it’s a busy weeknight or a special occasion, these enchiladas are sure to become a cherished favorite. So roll up your sleeves, embrace the mess, and enjoy the delicious journey of making these cheesy delights!
Print
Cheesy Beef Enchiladas That Will Delight Your Taste Buds!
- Total Time: 45 minutes
- Yield: 4 servings 1x
- Diet: Gluten Free
Description
Delicious cheesy beef enchiladas that are sure to satisfy your cravings with their rich flavors and gooey cheese.
Ingredients
- 1 lb ground beef
- 1 cup onion, chopped
- 2 cups enchilada sauce
- 8 flour tortillas
- 2 cups shredded cheese (cheddar or Mexican blend)
- 1 can black beans, drained and rinsed
- 1 cup corn, frozen or canned
- 1 tsp cumin
- 1 tsp garlic powder
- Salt and pepper to taste
Instructions
- Preheat your oven to 350°F (175°C).
- In a skillet, cook the ground beef and onion over medium heat until the beef is browned and the onion is soft.
- Add the black beans, corn, cumin, garlic powder, salt, and pepper to the skillet. Stir to combine and cook for another 2-3 minutes.
- Spread a thin layer of enchilada sauce on the bottom of a baking dish.
- Fill each tortilla with the beef mixture and a sprinkle of cheese, then roll them up and place them seam-side down in the baking dish.
- Pour the remaining enchilada sauce over the top of the rolled tortillas.
- Sprinkle the remaining cheese on top.
- Bake in the preheated oven for 20-25 minutes, or until the cheese is melted and bubbly.
- Let cool for a few minutes before serving.
Notes
- For a spicier version, add jalapeños to the beef mixture.
- These enchiladas can be made ahead of time and stored in the refrigerator before baking.
- Top with sour cream or guacamole for extra flavor.
- Prep Time: 15 minutes
- Cook Time: 30 minutes
- Category: Main Dish
- Method: Baking
- Cuisine: Mexican
Nutrition
- Serving Size: 1 enchilada
- Calories: 350
- Sugar: 3g
- Sodium: 800mg
- Fat: 20g
- Saturated Fat: 10g
- Unsaturated Fat: 8g
- Trans Fat: 0g
- Carbohydrates: 30g
- Fiber: 5g
- Protein: 20g
- Cholesterol: 60mg