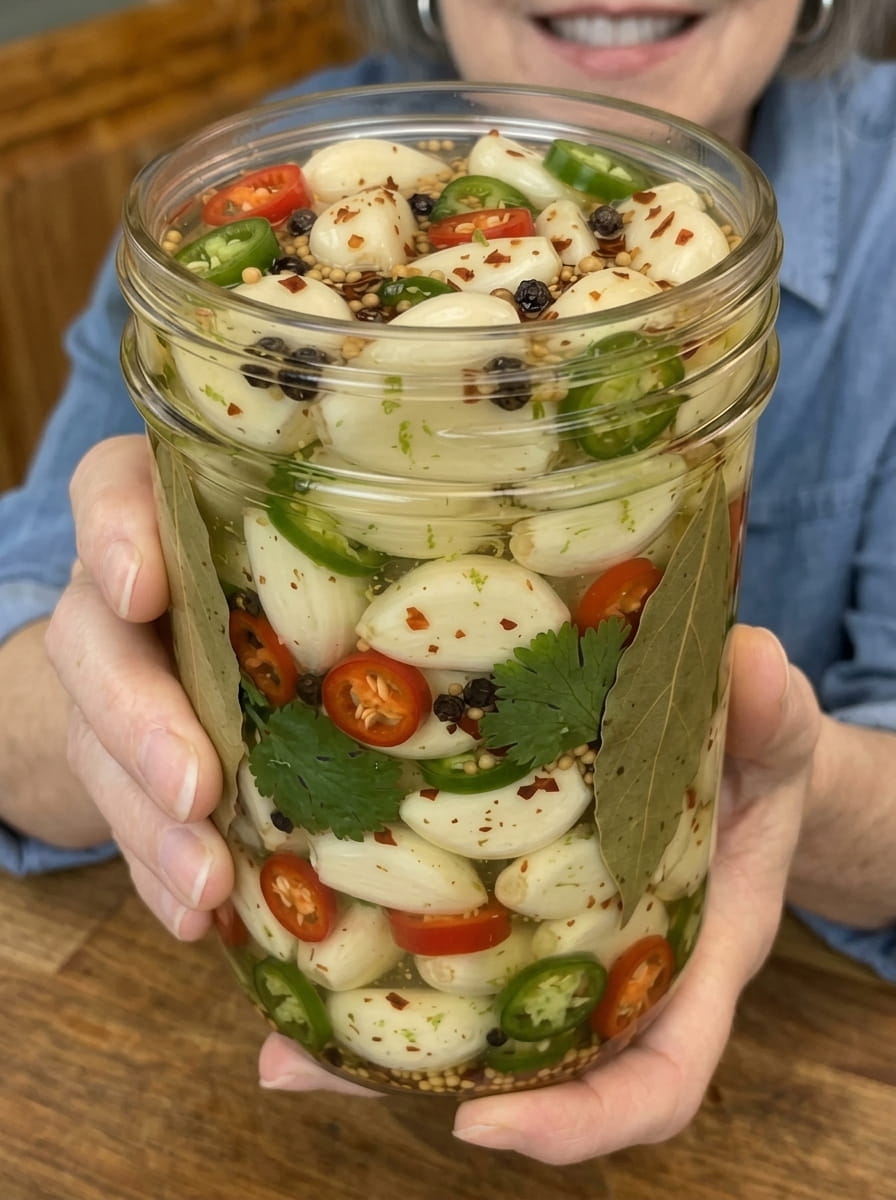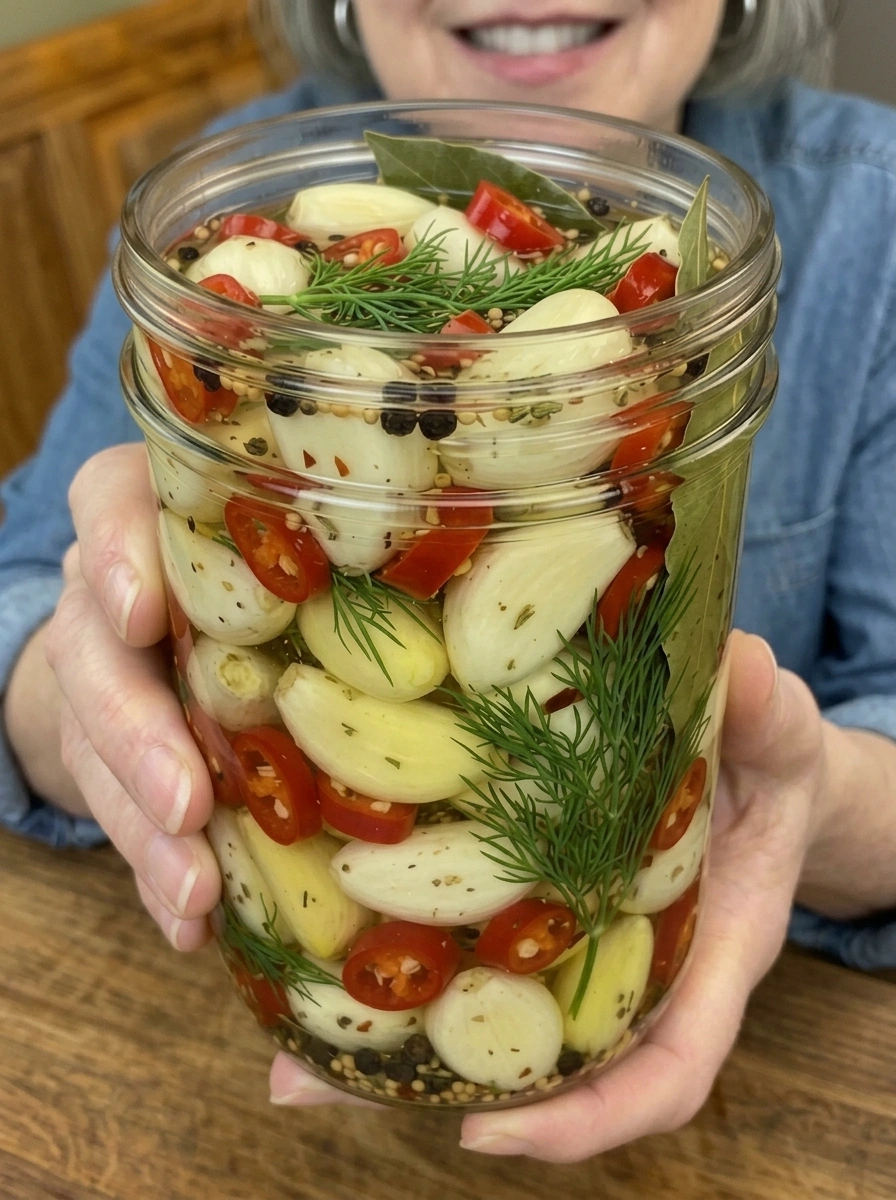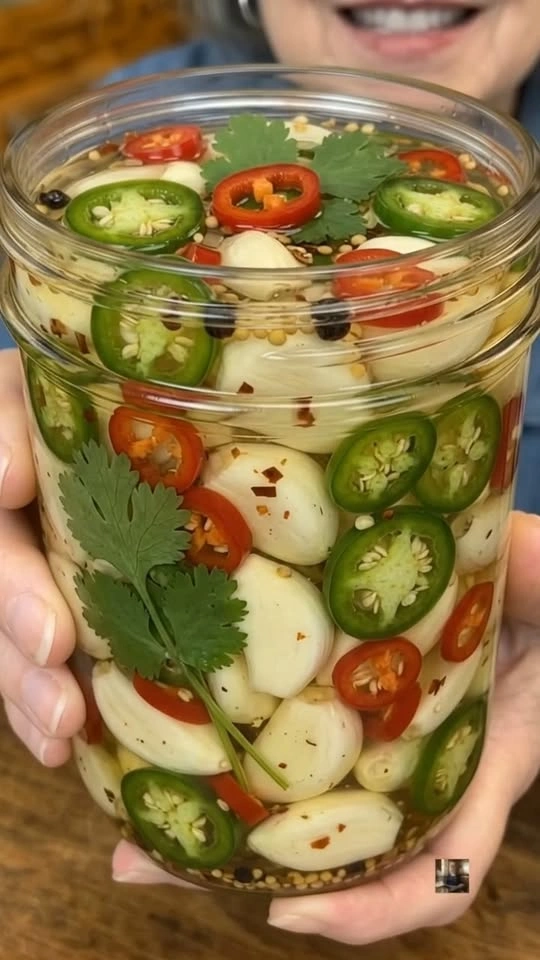
This Chili Lime Pickled Garlic is bright, tangy, spicy, and packed with bold flavor. Whole garlic cloves are soaked in a zesty vinegar and lime brine with fresh jalapeños, red chilies, cilantro, and aromatic spices, creating an irresistible refrigerator pickle that’s perfect for tacos, grilled meats, sandwiches, salads, snack boards, and more.
If you love bold pickled flavors, this Chili Lime Pickled Garlic is the kind of condiment you’ll want to keep in your refrigerator. Whole garlic cloves are transformed in a punchy brine made with vinegar, fresh lime juice, salt, and a touch of sweetness. Fresh jalapeño and red chili slices provide heat, while cilantro, peppercorns, mustard seeds, and red pepper flakes add layers of fresh and aromatic flavor.
As the garlic rests in the brine, its sharp raw bite mellows while the cloves absorb the citrusy, spicy flavors surrounding them. The result is tangy and garlicky with a satisfying bite and enough chile heat to keep you reaching back into the jar.
This is a refrigerator pickle, so there’s no complicated canning process involved. Prepare the brine, pack the jar, refrigerate it, and give the flavors time to develop.
Let’s dive into everything you need to know to make this spicy, citrusy Chili Lime Pickled Garlic at home.
Why You’ll Love This Chili Lime Pickled Garlic
There’s plenty to love about this bold refrigerator pickle:
Bright lime flavor. Fresh lime juice and zest bring a vibrant citrus note that balances the strong garlic beautifully.
Spicy but customizable. Jalapeños, red chilies, and red pepper flakes provide plenty of heat, but you can easily adjust them to your preference.
The garlic mellows as it pickles. The sharpness of raw garlic gradually softens while the cloves absorb the tangy brine.
No traditional canning required. This recipe is designed as a refrigerator pickle, making the preparation straightforward.
Packed with aromatic flavor. Cilantro, mustard seeds, peppercorns, garlic, lime, and chilies create much more complexity than a basic vinegar brine.
Perfect for meal prep. Keep a jar refrigerated and use a few cloves whenever a meal needs a punch of acidity, garlic, or heat.
Extremely versatile. Serve it with tacos, sandwiches, grilled meats, salads, rice bowls, beans, or appetizer boards.
Ingredients You’ll Need
Here’s what you’ll need to make a flavorful jar of Chili Lime Pickled Garlic.
- 2 cups peeled whole garlic cloves — The star of the recipe. Pickling mellows their aggressive raw flavor while keeping a satisfying bite.
- 1 cup white vinegar — Creates the acidic foundation of the pickling brine.
- ½ cup fresh lime juice — Adds the bright citrus flavor that distinguishes this pickle from traditional pickled garlic.
- ½ cup water — Dilutes the brine to balance its acidity.
- 1 tablespoon kosher or pickling salt — Seasons the garlic and is an essential component of the brine.
- 1 tablespoon granulated sugar — Adds just enough sweetness to balance the vinegar, lime, salt, and chile heat.
- 2 fresh jalapeños, thinly sliced — Provide fresh green chile flavor and moderate heat.
- 1–2 small red chilies, thinly sliced — Add additional heat and bright color.
- ¼ cup fresh cilantro — Brings a fresh herbal flavor that pairs naturally with lime and chile.
- 1 teaspoon black peppercorns — Add subtle peppery warmth.
- 1 teaspoon mustard seeds — Provide a classic aromatic pickling note.
- ½ teaspoon red pepper flakes — Reinforce the chile flavor and add extra heat.
- ½ teaspoon dried oregano — Adds subtle earthy herbal depth.
- Zest of 1 lime — Intensifies the fresh lime aroma without adding additional liquid.
How to Make Chili Lime Pickled Garlic
The preparation itself is simple, but allowing enough refrigerator time is important for developing the best flavor.
Step 1: Prepare the Garlic
Peel enough fresh garlic cloves to measure approximately 2 cups.
Inspect the cloves and discard any that are bruised, damaged, or beginning to spoil.
For the most attractive jar, leave the cloves whole.
Step 2: Prepare the Chilies
Thinly slice the jalapeños and red chilies.
For a milder pickle, remove some or all of the chile seeds and membranes before slicing.
For a hotter version, leave them intact and add the optional red pepper flakes.
Step 3: Prepare the Pickling Brine
Add the white vinegar, water, salt, and sugar to a small saucepan.
Heat gently, stirring until the salt and sugar have completely dissolved.
Remove the mixture from the heat and allow it to cool slightly before stirring in the fresh lime juice.
Adding the lime juice after heating helps preserve more of its bright, fresh citrus character.
Step 4: Pack the Jar
Place some of the garlic cloves into a clean jar.
Layer in sliced jalapeños, red chilies, fresh cilantro, black peppercorns, mustard seeds, red pepper flakes, oregano, and lime zest.
Continue layering until the jar is filled, leaving enough room for the brine to completely surround the ingredients.
Step 5: Add the Chili Lime Brine
Carefully pour the prepared brine over the garlic and chilies.
Make sure the garlic is completely covered with liquid. Gently tap the jar against the counter or use a clean utensil to release trapped air bubbles.
Add additional brine if necessary to keep everything submerged.
Step 6: Cool and Refrigerate
Allow the jar to cool before sealing it tightly.
Transfer it directly to the refrigerator.
This recipe is intended for refrigerator storage rather than shelf-stable canning.
Step 7: Let the Garlic Pickle
For the best flavor, allow the garlic to pickle in the refrigerator for at least 3–5 days before eating.
The flavor will continue developing as it rests, with the garlic becoming more mellow, tangy, citrusy, and chile-infused.
Step 8: Serve
Use a clean utensil to remove the desired amount from the jar.
Serve the pickled garlic cloves along with some of the jalapeño and red chile slices for an extra burst of flavor.
Recipe Notes
Use fresh garlic: Firm, fresh cloves provide the best texture after pickling.
Keep the garlic submerged: The cloves should remain covered by the acidic brine while stored.
Adjust the heat: Remove the chile seeds for less heat or add extra jalapeño, serrano, or red pepper flakes for a hotter version.
Fresh lime matters: Freshly squeezed lime juice gives the pickle its distinctive bright citrus flavor.
Don’t skip the sugar completely: A small amount helps balance the acidity and chile heat without making the garlic noticeably sweet.
Give it time: The garlic will still taste fairly sharp immediately after preparation. Several days of refrigeration allow the flavor to mellow and develop.
Use a clean jar: Start with a thoroughly cleaned jar and clean utensils.
Refrigerator pickle only: Do not treat this recipe as a tested shelf-stable canning formula. Keep it refrigerated.
How to Serve Chili Lime Pickled Garlic
These spicy, tangy cloves can instantly add flavor to all kinds of savory meals.
- Chop and scatter over tacos
- Serve alongside carne asada or grilled chicken
- Add to burritos and quesadillas
- Chop into fresh salsa
- Add to sandwiches and wraps
- Serve alongside beans and rice
- Add to grain or burrito bowls
- Chop into guacamole
- Serve on an antipasto or snack board
- Add to salads for a tangy garlic bite
- Serve with grilled steak or seafood
- Chop and stir into creamy dips
- Pair with roasted vegetables
- Enjoy a clove straight from the jar
The pickled jalapeño and red chile slices are also delicious, so don’t overlook them when serving.
Flavor Variations
Extra Spicy Chili Lime Garlic: Add sliced serrano peppers and increase the red pepper flakes.
Mild Chili Lime Garlic: Remove the seeds and membranes from the jalapeños and omit the red pepper flakes.
Cilantro Lime: Increase the fresh cilantro and lime zest for a brighter, herb-forward version.
Mexican Oregano: Increase the oregano slightly for more earthy herbal flavor.
Peppercorn Garlic: Add extra black peppercorns for a stronger peppery note.
Cumin Chili Lime: Add a small pinch of cumin seeds for another layer of warm, earthy flavor.
Sweet & Spicy: Increase the sugar slightly to create a more noticeable sweet-heat contrast.
Tips for the Best Chili Lime Pickled Garlic
Choose firm garlic cloves. Fresh, firm garlic will maintain a much better texture than older cloves that have started becoming soft.
Use similar-sized cloves. This helps them pickle at approximately the same rate.
Slice the peppers evenly. Thin slices distribute chile flavor throughout the jar more effectively.
Don’t boil the fresh lime juice. Stirring it into the brine after removing the pan from the heat helps maintain its brighter citrus flavor.
Pack the ingredients throughout the jar. Layering the peppers, cilantro, and spices between the garlic distributes their flavors more evenly.
Keep everything covered with brine. Press floating ingredients gently beneath the liquid when possible.
Be patient before tasting. Three to five days gives the garlic time to absorb the brine and lose some of its aggressive raw bite.
Use clean utensils. Avoid reaching into the jar with your fingers, as clean utensils help protect the quality of refrigerator pickles.
Storage Information
Keep Chili Lime Pickled Garlic refrigerated at all times in a clean, tightly sealed container.
Because this is a homemade refrigerator pickle rather than a tested shelf-stable canning recipe, it should not be stored at room temperature.
Keep the garlic submerged in its brine and always remove cloves using a clean utensil.
For food-safety purposes, if you intend to store homemade pickled garlic for an extended period, use a tested refrigerator-pickling recipe from a reliable food-preservation authority rather than relying on an untested acid ratio for long-term preservation.
Frequently Asked Questions
Does pickling make raw garlic less strong?
Yes. Raw garlic begins with a very sharp bite, but soaking in the acidic brine gradually mellows that intensity while replacing it with tangy, salty, citrusy flavor.
How long should Chili Lime Pickled Garlic sit before eating?
Give it at least 3–5 days in the refrigerator for the flavors to begin developing properly. The garlic will become more flavorful as it rests.
Can I make it less spicy?
Yes. Remove the seeds and membranes from the jalapeños, use fewer red chilies, and omit the red pepper flakes.
How can I make it hotter?
Leave the chile seeds intact, add more jalapeño, use serrano peppers, or increase the crushed red pepper flakes.
Can I use bottled lime juice?
Fresh lime juice is preferable for this recipe because its bright citrus flavor is an important part of the finished pickle.
Why is there sugar in the brine?
The small amount of sugar balances the sharp vinegar, citrus, salt, and chile heat. The goal isn’t to make the garlic sweet.
Can I eat the pickled peppers too?
Absolutely. The jalapeño and red chile slices absorb the same garlicky, tangy brine and make an excellent topping for tacos, sandwiches, and bowls.
Can I reuse the brine for another batch of garlic?
For the most predictable quality and food safety, prepare fresh brine for each new batch rather than repeatedly reusing old brine.
Does Chili Lime Pickled Garlic need to be refrigerated?
Yes. This version is intended as a refrigerator pickle and should remain refrigerated rather than being stored at room temperature.
Recipe Card
Recipe: Chili Lime Pickled Garlic
Prep Time: 15 minutes
Brine Time: About 5 minutes
Pickling Time: At least 3–5 days
Total Active Time: About 20 minutes
Storage: Refrigerated
Method: Refrigerator pickling
Main Ingredients: Whole garlic cloves, vinegar, fresh lime, jalapeño, red chili, cilantro, and pickling spices
This Chili Lime Pickled Garlic transforms whole garlic cloves into bright, tangy, spicy bites bursting with fresh lime, chile, herbs, and aromatic spices. The garlic gradually mellows in the refrigerator while soaking up all the bold flavors of the brine.
Pile the cloves onto tacos, chop them into salads and sandwiches, serve them alongside grilled meat, add them to snack boards, or simply grab one from the jar whenever you’re craving something intensely savory and tangy.
With its combination of punchy garlic, fresh citrus, spicy peppers, and fragrant cilantro, this colorful refrigerator pickle is an easy way to keep a serious burst of flavor ready in the fridge.
Print
Chili Lime Pickled Garlic
Ingredients
Here’s what you’ll need to make a flavorful jar of Chili Lime Pickled Garlic.
- 2 cups peeled whole garlic cloves — The star of the recipe. Pickling mellows their aggressive raw flavor while keeping a satisfying bite.
- 1 cup white vinegar — Creates the acidic foundation of the pickling brine.
- ½ cup fresh lime juice — Adds the bright citrus flavor that distinguishes this pickle from traditional pickled garlic.
- ½ cup water — Dilutes the brine to balance its acidity.
- 1 tablespoon kosher or pickling salt — Seasons the garlic and is an essential component of the brine.
- 1 tablespoon granulated sugar — Adds just enough sweetness to balance the vinegar, lime, salt, and chile heat.
- 2 fresh jalapeños, thinly sliced — Provide fresh green chile flavor and moderate heat.
- 1–2 small red chilies, thinly sliced — Add additional heat and bright color.
- ¼ cup fresh cilantro — Brings a fresh herbal flavor that pairs naturally with lime and chile.
- 1 teaspoon black peppercorns — Add subtle peppery warmth.
- 1 teaspoon mustard seeds — Provide a classic aromatic pickling note.
- ½ teaspoon red pepper flakes — Reinforce the chile flavor and add extra heat.
- ½ teaspoon dried oregano — Adds subtle earthy herbal depth.
- Zest of 1 lime — Intensifies the fresh lime aroma without adding additional liquid.
Instructions
The preparation itself is simple, but allowing enough refrigerator time is important for developing the best flavor.
Peel enough fresh garlic cloves to measure approximately 2 cups.
Inspect the cloves and discard any that are bruised, damaged, or beginning to spoil.
For the most attractive jar, leave the cloves whole.
Thinly slice the jalapeños and red chilies.
For a milder pickle, remove some or all of the chile seeds and membranes before slicing.
For a hotter version, leave them intact and add the optional red pepper flakes.
Add the white vinegar, water, salt, and sugar to a small saucepan.
Heat gently, stirring until the salt and sugar have completely dissolved.
Remove the mixture from the heat and allow it to cool slightly before stirring in the fresh lime juice.
Adding the lime juice after heating helps preserve more of its bright, fresh citrus character.
Place some of the garlic cloves into a clean jar.
Layer in sliced jalapeños, red chilies, fresh cilantro, black peppercorns, mustard seeds, red pepper flakes, oregano, and lime zest.
Continue layering until the jar is filled, leaving enough room for the brine to completely surround the ingredients.
Carefully pour the prepared brine over the garlic and chilies.
Make sure the garlic is completely covered with liquid. Gently tap the jar against the counter or use a clean utensil to release trapped air bubbles.
Add additional brine if necessary to keep everything submerged.
Allow the jar to cool before sealing it tightly.
Transfer it directly to the refrigerator.
This recipe is intended for refrigerator storage rather than shelf-stable canning.
For the best flavor, allow the garlic to pickle in the refrigerator for at least 3–5 days before eating.
The flavor will continue developing as it rests, with the garlic becoming more mellow, tangy, citrusy, and chile-infused.
Use a clean utensil to remove the desired amount from the jar.
Serve the pickled garlic cloves along with some of the jalapeño and red chile slices for an extra burst of flavor.