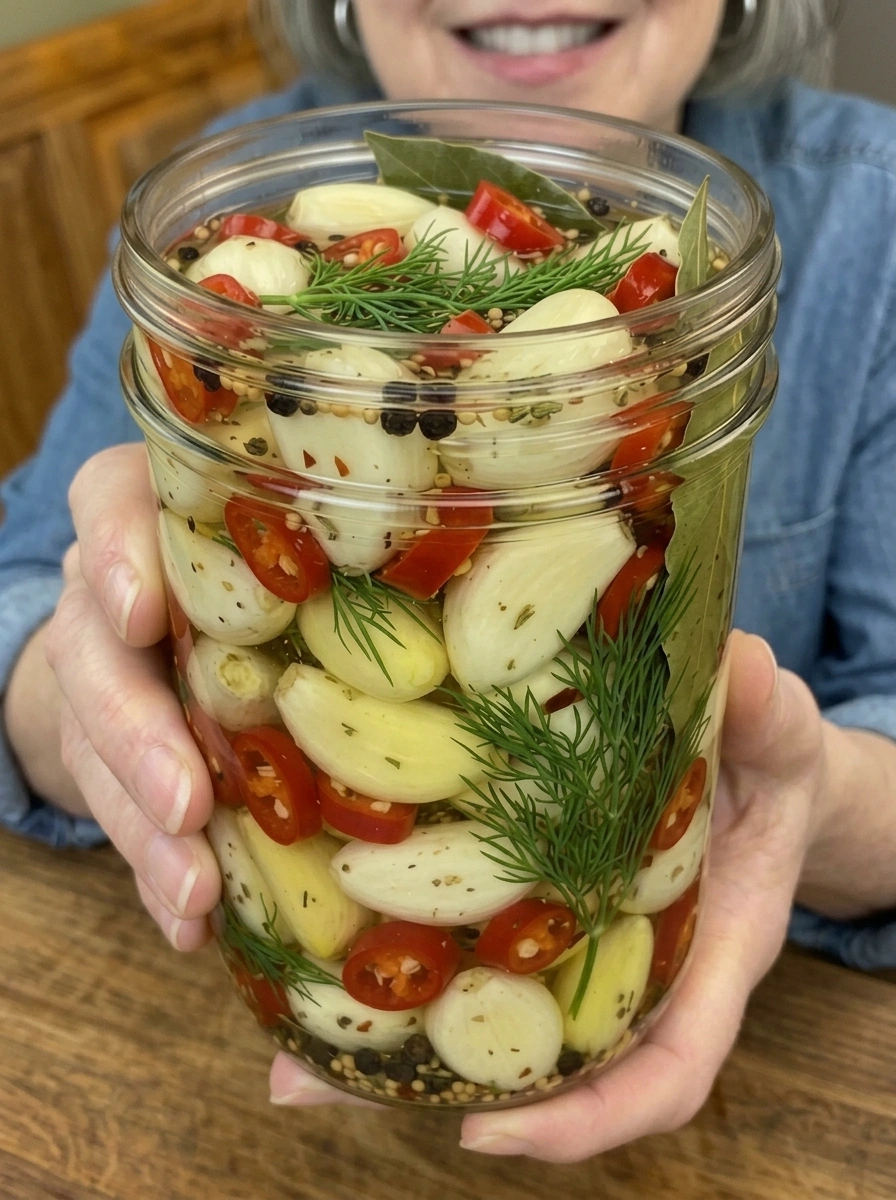
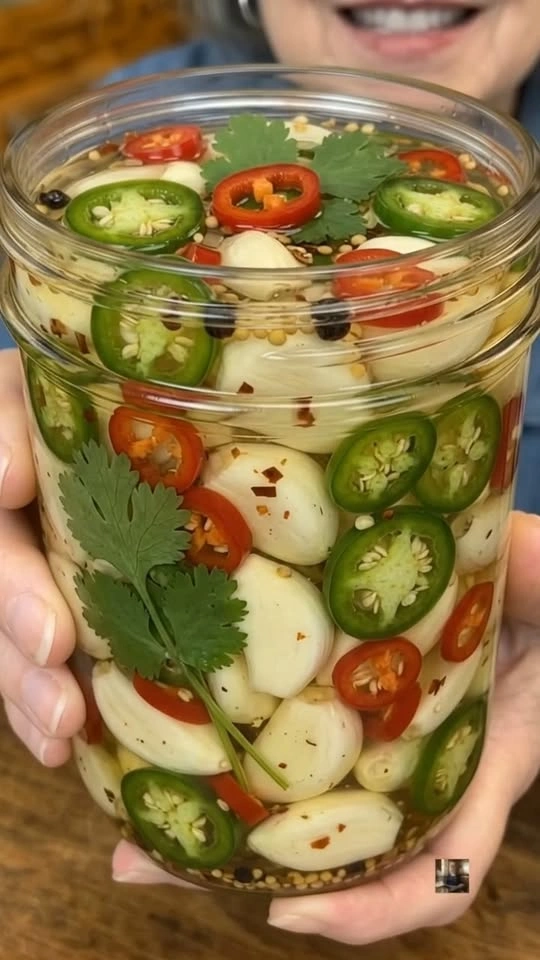
This Spicy Pickled Garlic is tangy, crunchy, garlicky, and packed with just the right amount of heat. Whole garlic cloves are soaked in a flavorful vinegar brine with fresh chili peppers, dill, bay leaves, peppercorns, and aromatic spices, creating an irresistible refrigerator pickle that gets even better as it sits.
If you’re a garlic lover, this Spicy Pickled Garlic is the kind of condiment you’ll want to keep stocked in your refrigerator. Pickling transforms the intense sharpness of raw garlic into something tangy, savory, and much more mellow while allowing the cloves to maintain a satisfying bite.
Fresh red chilies bring heat and color, while dill adds a fresh herbal note. Peppercorns, mustard seeds, bay leaves, oregano, and red pepper flakes infuse the brine with layers of aromatic flavor. The result is much more interesting than plain pickled garlic—it’s spicy, tangy, herby, and intensely savory.
Serve the cloves straight from the jar, slice them onto sandwiches and burgers, add them to tacos and pizza, chop them into salads and pasta, or place the whole jar alongside cheeses and crackers for a bold addition to a snack board.
Let’s dive into everything you need to know to make this addictive Spicy Pickled Garlic at home.
Why You’ll Love This Spicy Pickled Garlic
There’s plenty to love about keeping a jar of these flavorful garlic cloves in the refrigerator:
Bold garlic flavor without quite as much raw bite. The acidic brine gradually mellows the sharp intensity of fresh garlic.
Perfect balance of tang and heat. Vinegar provides plenty of acidity while fresh chilies and red pepper flakes add a customizable spicy kick.
Satisfying texture. The cloves retain a pleasant bite while absorbing the seasoned brine.
Packed with herbs and spices. Dill, bay leaves, peppercorns, mustard seeds, and oregano make the brine aromatic and flavorful.
No complicated canning process. This version is prepared as a refrigerator pickle and kept chilled.
Flavor improves as it rests. A few days in the refrigerator allow the garlic, peppers, herbs, and spices to meld together.
Extremely versatile. Eat the cloves as a snack or use them to instantly add acidity, garlic, and heat to countless savory dishes.
Ingredients You’ll Need
For the Pickled Garlic
- 2 cups peeled whole garlic cloves — The star of the recipe. Choose fresh, firm cloves without soft or damaged spots.
- 2–3 fresh red chili peppers, sliced — Add fresh chile flavor, color, and heat. Adjust the quantity according to your preference.
- 2–3 sprigs fresh dill — Bring a fresh, aromatic herbal flavor that pairs beautifully with garlic and vinegar.
- 2 bay leaves — Add subtle herbal depth to the pickling brine.
- 1 teaspoon black peppercorns — Provide warm, peppery flavor.
- 1 teaspoon mustard seeds — Add a classic pickling-spice note and subtle texture.
- ½ teaspoon red pepper flakes — Reinforce the heat from the fresh chilies.
- ½ teaspoon dried oregano — Adds earthy herbal flavor.
For the Pickling Brine
- 1 cup white vinegar — Provides the bright acidity that forms the foundation of the brine.
- 1 cup water — Balances the strength of the vinegar.
- 1 tablespoon kosher or pickling salt — Seasons the garlic and brine.
- 1 tablespoon granulated sugar — Softens the sharp edges of the vinegar and heat without making the garlic overly sweet.
How to Make Spicy Pickled Garlic
The preparation is simple, but giving the garlic enough time to rest in the refrigerator is important for developing its flavor.
Step 1: Prepare the Garlic
Peel enough fresh garlic cloves to measure approximately 2 cups.
Inspect each clove and discard any that are soft, bruised, moldy, or otherwise damaged.
Leave the cloves whole for the best texture and presentation.
Step 2: Prepare the Chili Peppers
Wash and thinly slice the fresh red chili peppers.
For a milder version, remove the seeds and membranes before slicing.
If you enjoy more heat, leave the seeds intact and use the full amount of red pepper flakes.
Step 3: Prepare the Brine
Combine the white vinegar, water, salt, and sugar in a small saucepan.
Bring the mixture to a gentle simmer, stirring until the salt and sugar have completely dissolved.
Remove the brine from the heat.
Step 4: Pack the Jar
Place some of the garlic cloves into a clean glass jar.
Layer the sliced red chilies, fresh dill, bay leaves, black peppercorns, mustard seeds, red pepper flakes, and oregano throughout the garlic.
Continue layering until the jar is comfortably packed.
Avoid crushing the garlic cloves.
Step 5: Add the Brine
Carefully pour the prepared vinegar brine over the garlic, peppers, herbs, and spices.
The garlic should remain covered by the brine.
Gently tap the jar against the counter to help release trapped air bubbles. You can also carefully move a clean utensil around the inside edge of the jar to release additional bubbles.
Step 6: Cool and Refrigerate
Allow the jar to cool before sealing it tightly.
Once cooled, transfer the jar to the refrigerator.
This recipe is intended as a refrigerator pickle, not as a shelf-stable canned product.
Step 7: Let the Garlic Pickle
Although it can begin taking on flavor fairly quickly, allow the garlic to pickle for at least 3–5 days before serving for better flavor.
As it rests, the harshness of the raw garlic begins to mellow while the cloves absorb the spicy, tangy, herbal brine.
Step 8: Serve
Use a clean utensil to remove garlic cloves from the jar.
Enjoy them whole or slice, chop, or mince them before adding them to your favorite dishes.
Don’t forget the pickled chili slices—they’re delicious too.
Recipe Notes
Use fresh garlic: Firm, fresh garlic cloves maintain the best texture during pickling.
Keep the cloves whole: Whole cloves retain a satisfying bite and look especially attractive in the finished jar.
Control the heat: Remove the chile seeds for a milder pickle or add more fresh chilies and red pepper flakes for extra heat.
Choose your chilies: Fresno, red jalapeño, or another fresh red chile can work depending on the heat level you prefer.
Fresh dill: Fresh dill gives the brine a bright herbal quality and pairs especially well with garlic.
Keep everything submerged: The garlic should remain beneath the brine during refrigerator storage.
Give it time: The flavor improves after several days as the garlic absorbs the vinegar, chile, and spices.
Use a clean jar: Always start with a thoroughly cleaned container and use clean utensils when removing garlic.
Refrigerator pickle: This recipe is not intended for room-temperature storage or shelf-stable canning.
How to Serve Spicy Pickled Garlic
Once you have a jar in the refrigerator, there are countless ways to use these flavorful cloves.
- Eat a clove straight from the jar
- Slice and add to sandwiches
- Chop and scatter over burgers
- Add to tacos and quesadillas
- Slice over homemade pizza
- Chop into pasta dishes
- Add to grain bowls
- Toss into salads
- Serve alongside grilled meats
- Add to charcuterie and cheese boards
- Chop into hummus
- Mix into creamy dips
- Add to potato or pasta salad
- Serve with roasted vegetables
- Chop into salsa
- Add to avocado toast
You can also finely chop the pickled garlic and chilies together to make an instant spicy-garlic topping.
Flavor Variations
Extra Spicy Pickled Garlic: Add sliced serrano peppers or increase the red pepper flakes.
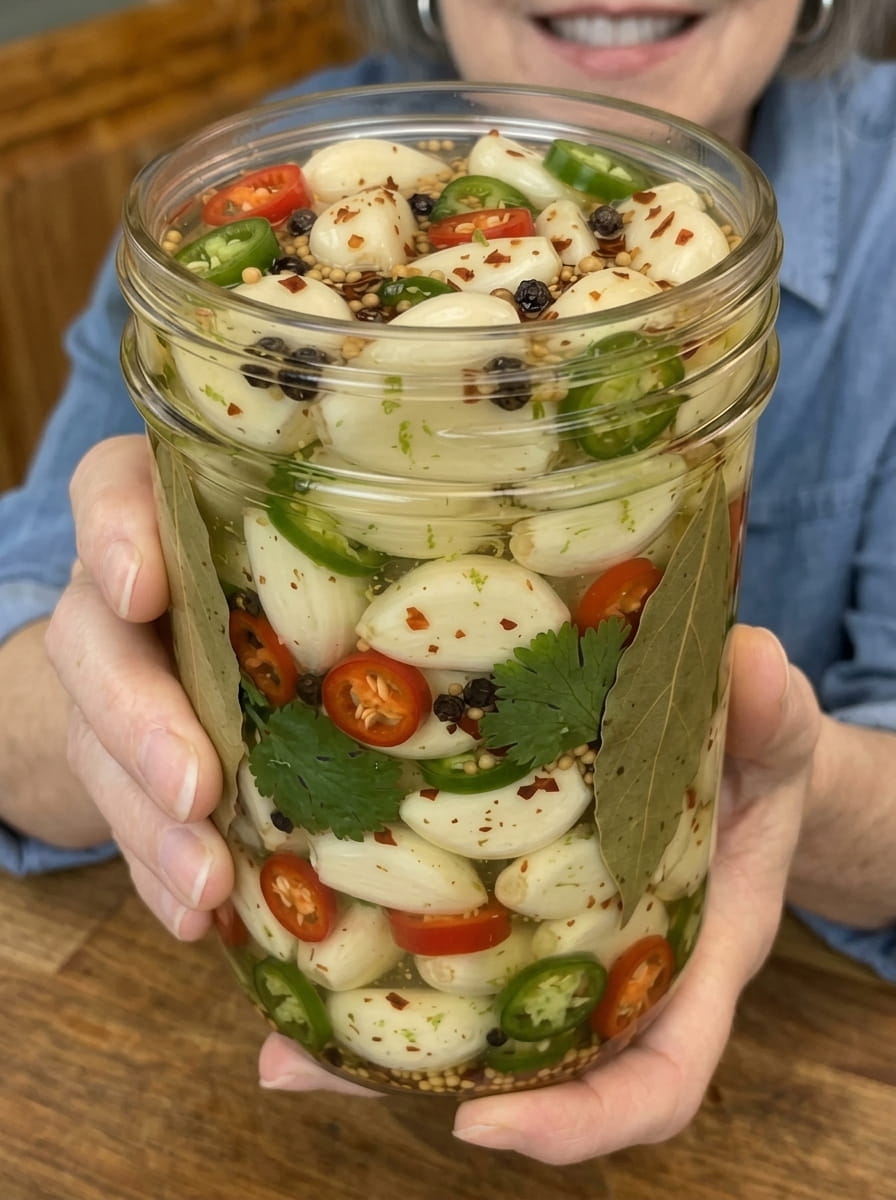
Jalapeño Garlic: Replace the red chilies with fresh jalapeño slices for a bright green chile flavor.
Dill Garlic: Double the fresh dill for a more pronounced dill-pickle flavor.
Peppercorn Garlic: Increase the black peppercorns for a stronger peppery bite.
Herbed Garlic: Add fresh rosemary or thyme alongside the dill.
Sweet & Spicy Garlic: Slightly increase the sugar for a more noticeable sweet-and-spicy contrast.
Citrus Garlic: Add a little fresh lemon zest for a bright citrus aroma.
Tips for the Best Spicy Pickled Garlic
Choose firm cloves. Older garlic that’s already soft won’t develop the same satisfying texture.
Use similarly sized cloves. Garlic cloves of roughly equal size will pickle more consistently.
Don’t burn the spices. There’s no need to aggressively cook the spices. Their flavors will gradually infuse into the brine during refrigeration.
Adjust your peppers carefully. Different chile varieties can vary considerably in heat, so choose peppers based on your preferred spice level.
Distribute the spices throughout the jar. Layering instead of putting everything at the bottom helps spread the flavors more evenly.
Make sure the garlic stays covered. Keep the cloves beneath the brine while they’re stored.
Wait before judging the flavor. Freshly prepared pickled garlic will still have a powerful raw-garlic character. Several days of pickling noticeably changes the flavor.
Use clean utensils every time. This helps maintain the quality of the refrigerator pickle.
Storage Information
Keep the Spicy Pickled Garlic refrigerated at all times in a clean, tightly sealed container.
Make sure the garlic remains covered with brine and always use clean utensils when removing cloves from the jar.
Because this is a homemade refrigerator-pickle formula rather than a tested shelf-stable canning recipe, do not store the jar at room temperature.
For long-term preservation or shelf-stable canning, use a specifically tested garlic-pickling recipe from a recognized food-preservation authority.
Frequently Asked Questions
What does pickled garlic taste like?
It retains plenty of garlic flavor, but the sharp bite of raw garlic gradually becomes more mellow. The cloves also absorb tangy vinegar, spicy chile, dill, and aromatic spice flavors.
How long should Spicy Pickled Garlic sit before eating?
For better flavor, refrigerate it for at least 3–5 days before serving. The flavor continues developing as the garlic sits in the brine.
Can I make the garlic less spicy?
Yes. Use fewer chilies, remove their seeds and membranes, and reduce or omit the red pepper flakes.
How do I make it extra spicy?
Add more red chilies, increase the red pepper flakes, or include sliced serrano peppers.
Can I use jalapeños?
Yes. Fresh jalapeños are an excellent option. You can use green jalapeños or ripe red jalapeños depending on the flavor and appearance you prefer.
Can I eat the pickled chili peppers?
Absolutely. The peppers become tangy and garlicky as they sit in the brine and make an excellent topping for tacos, sandwiches, burgers, and pizza.
Why are mustard seeds added?
Mustard seeds contribute subtle pungency and the familiar aromatic character associated with many pickled foods.
Can I add more herbs?
Yes. Fresh rosemary, thyme, or additional dill can be used to customize the flavor.
Can I reuse the brine for another batch?
It’s better to prepare a fresh batch of brine for new garlic rather than repeatedly reusing old pickling liquid.
Does homemade Spicy Pickled Garlic need refrigeration?
Yes. This version is specifically intended as a refrigerator pickle and should remain refrigerated.
Recipe Card
Recipe: Spicy Pickled Garlic That’s Addictive
Prep Time: 15 minutes
Brine Time: 5 minutes
Pickling Time: At least 3–5 days
Total Active Time: About 20 minutes
Method: Refrigerator Pickling
Main Ingredients: Whole garlic cloves, vinegar, fresh red chilies, dill, peppercorns, mustard seeds, and aromatic spices
Storage: Keep refrigerated
This Spicy Pickled Garlic transforms whole garlic cloves into tangy, spicy, aromatic bites loaded with chile, dill, peppercorn, mustard seed, and herb flavor. As the cloves sit in the refrigerator, their intense raw bite gradually mellows while they soak up all that seasoned vinegar brine.
Keep a jar in the refrigerator and you’ll always have an easy flavor booster ready for tacos, sandwiches, burgers, pizza, salads, pasta, grain bowls, grilled meats, and appetizer boards.
Whether you eat the cloves straight from the jar or chop them into your favorite dishes, this spicy, tangy, garlicky refrigerator pickle is the kind of condiment that can quickly become a kitchen staple.