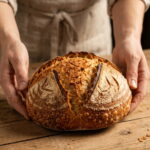
Ingredients
- 500 g bread flour
- 350 g lukewarm water
- 100 g active sourdough starter
- 10 g salt
Instructions
In a large bowl, combine the lukewarm water and active sourdough starter. Stir until the starter is mostly dissolved. Add the bread flour and mix until no dry flour remains. The dough will be shaggy and sticky. Cover and let rest for 30 minutes. This rest, called an autolyse, lets the flour absorb the water, which makes the dough smoother and easier to handle.
Sprinkle the salt over the dough and work it in with your hands until evenly incorporated. Wet your hands first to prevent sticking. Pinch and fold the dough until you can no longer feel grains of salt.
Over the next 2 hours, perform 3 to 4 sets of stretch-and-folds, spacing them about 30 minutes apart. To do a set, wet your hand, grab one edge of the dough, stretch it up gently, and fold it over the center. Rotate the bowl a quarter turn and repeat until you have stretched all four sides. Cover the dough between sets. You will notice the dough becoming smoother, stronger, and more elastic with each round.
Cover the dough and let it rise at room temperature until it looks airy, has increased in volume by about 50%, and shows bubbles along the sides. This may take 4 to 8 hours, depending on your starter and kitchen temperature. A clear container, or a rubber band marking the starting level on the bowl, makes it easy to see how much the dough has risen. Resist the temptation to wait until it doubles, since overfermented dough becomes slack and sticky and produces a flat loaf.
Transfer the dough to a lightly floured surface. Shape it into a tight round loaf and place it seam-side up in a floured proofing basket. Gently pull the edges of the dough toward the center to form a loose ball, then flip it seam-side down and drag it toward you on the counter so the surface tightens. A taut surface helps the loaf hold its shape and rise upward. Flip the loaf into the floured basket so that the seam faces up. Rice flour is especially good for dusting a basket, since it prevents sticking. If you do not have a proofing basket, use a bowl lined with a well-floured kitchen towel.
Cover and refrigerate for 8 to 12 hours for deeper flavor and easier scoring. Cover the basket with a plastic bag, a shower cap, or a damp towel to keep the surface from drying out. The cold slows fermentation dramatically, allowing flavors to develop without the dough overproofing. It also firms the dough so it is much easier to transfer and score.
Place a Dutch oven with its lid inside and preheat to 475°F (245°C) for 30 to 45 minutes. The pot must be thoroughly heated through. A fully heated Dutch oven gives the dough a powerful burst of heat that creates the dramatic oven spring and crisp crust.
Carefully turn the cold dough onto parchment paper and make a shallow slash across the top with a sharp bread lame. Hold the blade at a low angle, and make one smooth, confident cut about ¼ to ½ inch deep. Scoring lets the loaf expand in a controlled way. If you skip it, the loaf may burst open in random places.
Transfer the dough into the hot Dutch oven. Use the parchment as a sling to lower it in. Cover and bake for 20 minutes. The trapped steam keeps the crust soft and stretchy during the initial rise. Use thick oven mitts, because the pot is extremely hot.
Remove the lid, reduce the temperature to 450°F (230°C), and bake for another 20 to 25 minutes until deeply golden and crispy. The loaf is done when the crust is a deep golden brown, it sounds hollow when tapped on the bottom, and the internal temperature reaches about 205°F to 210°F (96°C to 99°C). Do not be afraid of a dark crust, since that is where much of the flavor lives.
Transfer the loaf to a wire rack and let it cool for at least 2 hours before slicing. This is the hardest step, but it matters. Sourdough continues to set as it cools. Slicing too soon can make the crumb gummy and dense. You may hear the loaf crackle as it cools, which is a great sign.