
Easy Homemade Sourdough Bread: A Crispy-Crusted, Chewy, Tangy Artisan Loaf 🍞✨
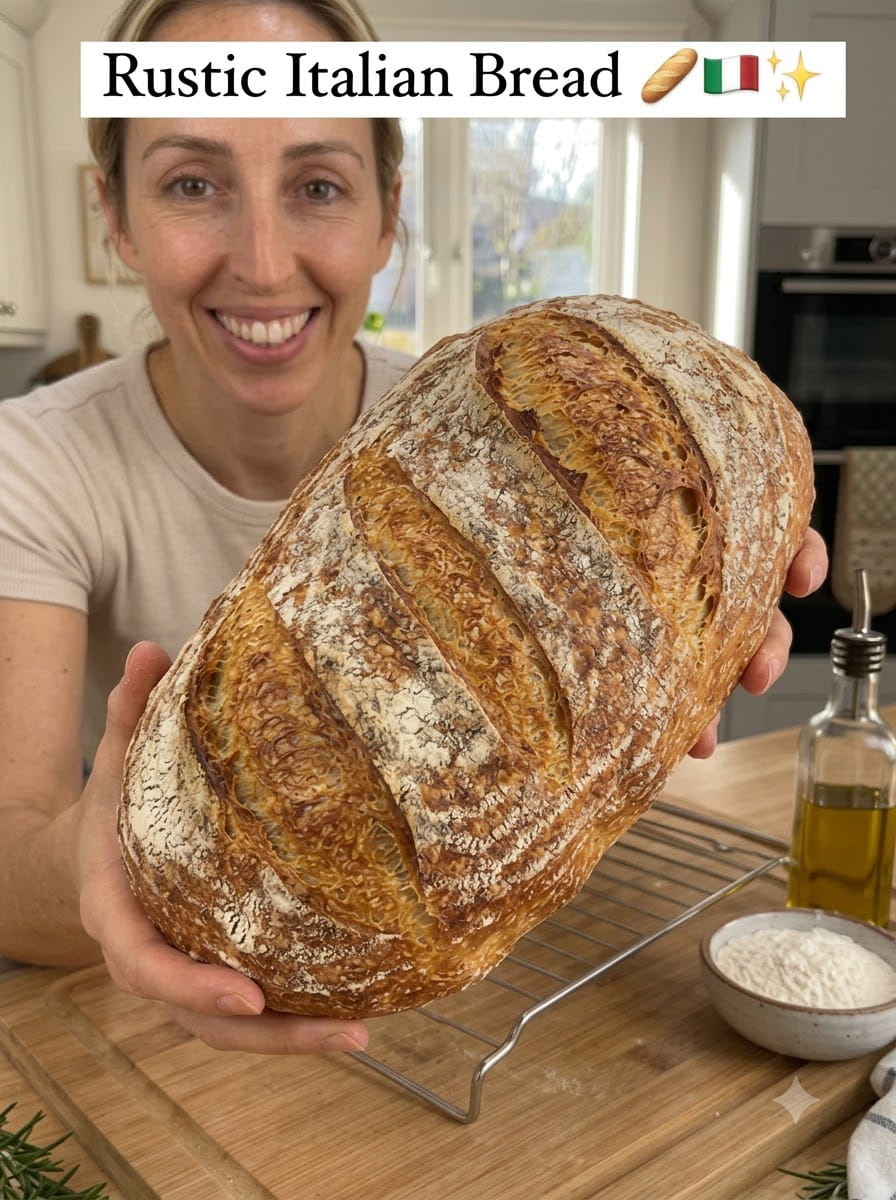
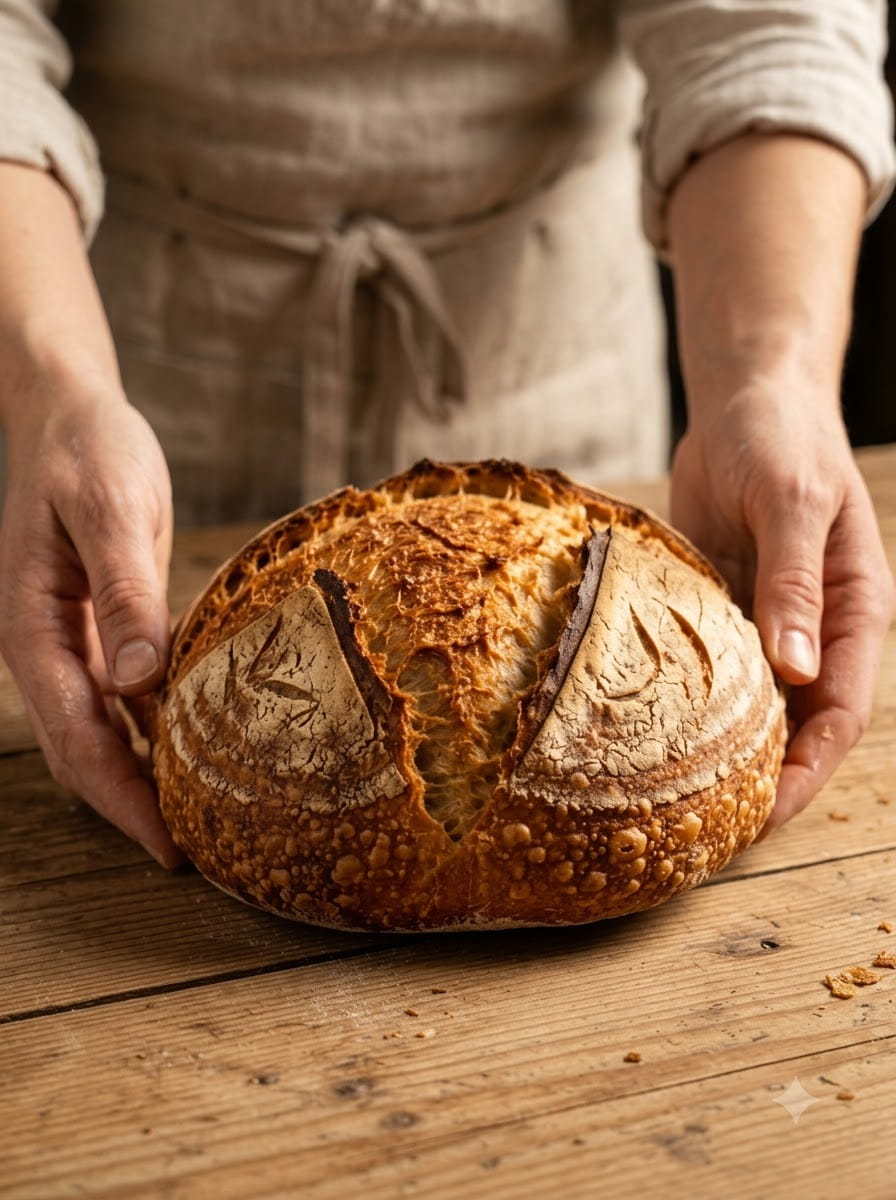
Enjoy the delicious taste of homemade sourdough bread with a beautifully crispy crust and a soft, chewy interior. This classic artisan-style loaf has a golden exterior, a satisfying texture, and a wonderful tangy flavor. It is perfect for breakfast, sandwiches, toast, or serving warm alongside your favorite meals.
Sourdough has a reputation for being mysterious, but a basic loaf really comes down to four ingredients and a bit of patience: bread flour, water, active sourdough starter, and salt. There is no commercial yeast, no kneading, and no special equipment beyond a Dutch oven. Short sets of stretch-and-folds build strength in the dough, a long fermentation develops flavor, and an overnight rest in the refrigerator makes the loaf tangier and much easier to score. The result is a loaf that looks and tastes like it came from an artisan bakery.
In this guide, you will find the full recipe, a clear step-by-step walkthrough, advice on knowing when your starter and dough are ready, tips for scoring and baking, a fermentation timeline, troubleshooting help, serving ideas, variations, storage advice, and answers to frequently asked questions about homemade sourdough bread.
Why You’ll Love This Sourdough Bread
It uses just four ingredients. Bread flour, lukewarm water, active sourdough starter, and salt are all you need.
There is no kneading. Stretch-and-folds and time build the gluten for you. Each set takes about a minute.
It has a crispy, golden crust. Baking in a preheated, covered Dutch oven traps steam, which creates a blistered, crackly crust.
It is soft and chewy inside. The fairly hydrated dough bakes into an open, tender crumb with a satisfying chew.
It has real sourdough flavor. Long fermentation and a cold proof develop a gentle tang and deep, wheaty flavor.
The cold proof is flexible. Because the loaf rests in the refrigerator for 8 to 12 hours, you can bake on your own schedule.
The dough is easier to score. Cold dough is firm, which makes clean, confident slashes much easier.
It is great for beginners and experts alike. The method is simple, and the results are impressive.
It keeps well. Sourdough tends to stay fresh longer than yeasted bread thanks to its natural acidity.
What Is Sourdough Bread?
Sourdough bread is bread leavened with a sourdough starter instead of commercial yeast. A starter is a living culture of wild yeast and lactic acid bacteria, kept alive by regular feedings of flour and water. The wild yeast produces carbon dioxide, which makes the dough rise, while the bacteria produce lactic and acetic acids, which give sourdough its characteristic tang and help preserve the bread.
Because wild yeast works more slowly than commercial yeast, sourdough bread takes longer to make. That time is a feature, not a flaw. It allows complex flavors to develop and gives the gluten time to strengthen. This recipe uses a method that balances active time and waiting time: a few quick stretch-and-folds early on, a long bulk fermentation, a shape, and an overnight cold proof before baking.
Ingredients for Easy Homemade Sourdough Bread
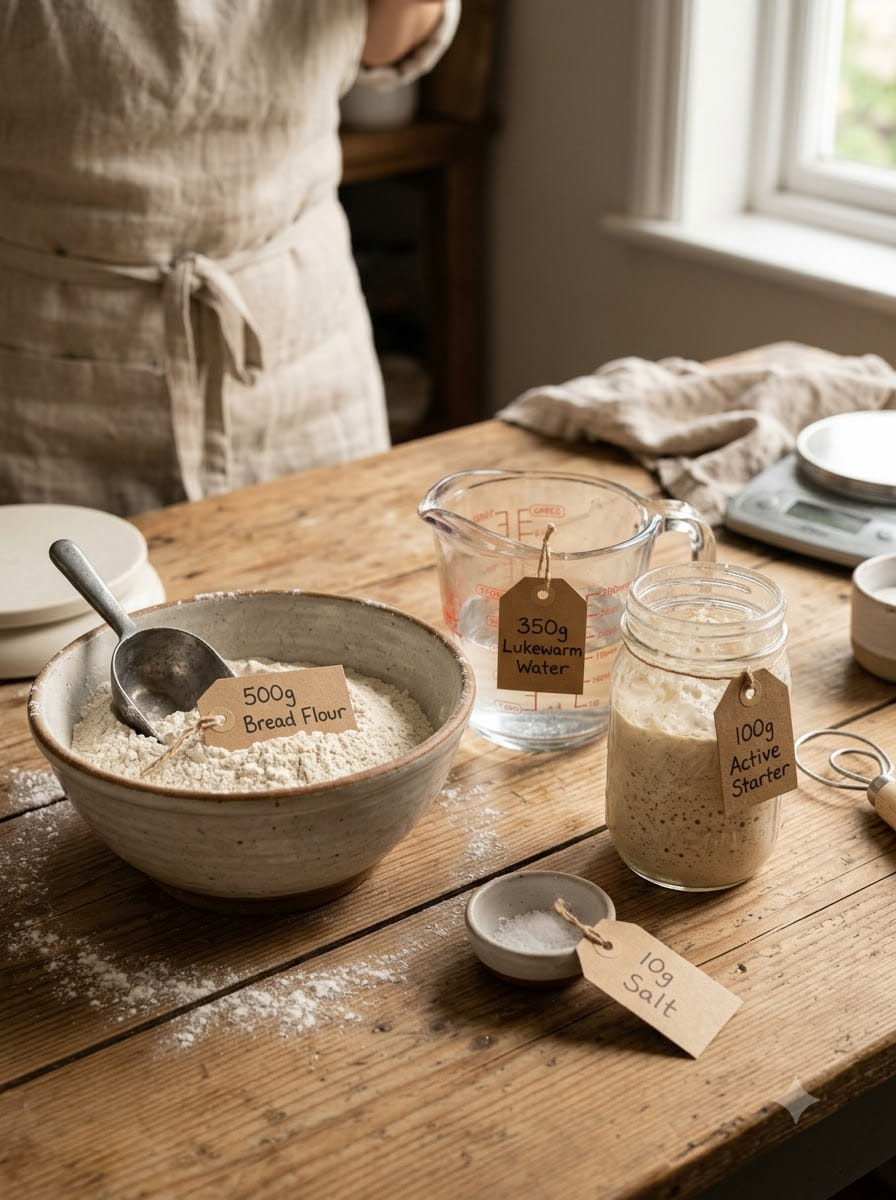
- 500 g bread flour
- 350 g lukewarm water
- 100 g active sourdough starter
- 10 g salt
A Closer Look at the Ingredients
Bread flour. Bread flour has a high protein content, which builds strong gluten and helps the dough hold its shape and trap gas. This gives the loaf a good rise and a chewy crumb. Weigh the flour with a kitchen scale for accurate results.
Lukewarm water. The water should feel just barely warm, around 80°F to 90°F (27°C to 32°C). Warmer water speeds up fermentation, and cooler water slows it down. Weighing the water is more accurate than measuring it by volume. In this recipe, 350 grams is about 350 milliliters.
Active sourdough starter. Use a starter that is bubbly, airy, and recently fed, ideally at or near its peak. A common test is to drop a spoonful in water. If it floats, it is usually active. A healthy starter often doubles in volume within 4 to 8 hours of feeding, depending on your kitchen’s temperature. A sluggish starter produces a slow, dense dough.
Salt. Salt adds flavor, strengthens the gluten, and moderates fermentation. Ten grams is roughly 1¾ teaspoons of fine salt. Fine sea salt works well. Do not skip it.
How to Make Easy Homemade Sourdough Bread: Step-by-Step Instructions
Step 1: Mix the Dough
In a large bowl, combine the lukewarm water and active sourdough starter. Stir until the starter is mostly dissolved. Add the bread flour and mix until no dry flour remains. The dough will be shaggy and sticky. Cover and let rest for 30 minutes. This rest, called an autolyse, lets the flour absorb the water, which makes the dough smoother and easier to handle.
Step 2: Add the Salt
Sprinkle the salt over the dough and work it in with your hands until evenly incorporated. Wet your hands first to prevent sticking. Pinch and fold the dough until you can no longer feel grains of salt.
Step 3: Stretch and Fold
Over the next 2 hours, perform 3 to 4 sets of stretch-and-folds, spacing them about 30 minutes apart. To do a set, wet your hand, grab one edge of the dough, stretch it up gently, and fold it over the center. Rotate the bowl a quarter turn and repeat until you have stretched all four sides. Cover the dough between sets. You will notice the dough becoming smoother, stronger, and more elastic with each round.
Step 4: Bulk Fermentation
Cover the dough and let it rise at room temperature until it looks airy, has increased in volume by about 50%, and shows bubbles along the sides. This may take 4 to 8 hours, depending on your starter and kitchen temperature. A clear container, or a rubber band marking the starting level on the bowl, makes it easy to see how much the dough has risen. Resist the temptation to wait until it doubles, since overfermented dough becomes slack and sticky and produces a flat loaf.
Step 5: Shape the Loaf
Transfer the dough to a lightly floured surface. Shape it into a tight round loaf and place it seam-side up in a floured proofing basket. Gently pull the edges of the dough toward the center to form a loose ball, then flip it seam-side down and drag it toward you on the counter so the surface tightens. A taut surface helps the loaf hold its shape and rise upward. Flip the loaf into the floured basket so that the seam faces up. Rice flour is especially good for dusting a basket, since it prevents sticking. If you do not have a proofing basket, use a bowl lined with a well-floured kitchen towel.
Step 6: Final Proof in the Refrigerator
Cover and refrigerate for 8 to 12 hours for deeper flavor and easier scoring. Cover the basket with a plastic bag, a shower cap, or a damp towel to keep the surface from drying out. The cold slows fermentation dramatically, allowing flavors to develop without the dough overproofing. It also firms the dough so it is much easier to transfer and score.
Step 7: Preheat the Oven
Place a Dutch oven with its lid inside and preheat to 475°F (245°C) for 30 to 45 minutes. The pot must be thoroughly heated through. A fully heated Dutch oven gives the dough a powerful burst of heat that creates the dramatic oven spring and crisp crust.
Step 8: Score the Dough
Carefully turn the cold dough onto parchment paper and make a shallow slash across the top with a sharp bread lame. Hold the blade at a low angle, and make one smooth, confident cut about ¼ to ½ inch deep. Scoring lets the loaf expand in a controlled way. If you skip it, the loaf may burst open in random places.
Step 9: Bake Covered
Transfer the dough into the hot Dutch oven. Use the parchment as a sling to lower it in. Cover and bake for 20 minutes. The trapped steam keeps the crust soft and stretchy during the initial rise. Use thick oven mitts, because the pot is extremely hot.
Step 10: Bake Uncovered
Remove the lid, reduce the temperature to 450°F (230°C), and bake for another 20 to 25 minutes until deeply golden and crispy. The loaf is done when the crust is a deep golden brown, it sounds hollow when tapped on the bottom, and the internal temperature reaches about 205°F to 210°F (96°C to 99°C). Do not be afraid of a dark crust, since that is where much of the flavor lives.
Step 11: Cool and Slice
Transfer the loaf to a wire rack and let it cool for at least 2 hours before slicing. This is the hardest step, but it matters. Sourdough continues to set as it cools. Slicing too soon can make the crumb gummy and dense. You may hear the loaf crackle as it cools, which is a great sign.
Your Sourdough Timeline
Here is a sample schedule to help you plan. Times will vary depending on your kitchen temperature and starter.
Morning (8:00 AM). Feed your starter. It should be ready to use in about 4 to 8 hours.
Midday (1:00 PM). Mix the dough and let it rest for 30 minutes.
1:30 PM. Add the salt.
2:00 PM to 4:00 PM. Perform 3 to 4 sets of stretch-and-folds, about 30 minutes apart.
4:00 PM to 9:00 PM. Bulk fermentation, until the dough is airy and has risen about 50%.
Evening (9:00 PM). Shape the loaf, place it in the basket, and refrigerate.
Next morning. Preheat the oven, score, and bake the loaf. It will be ready to slice by mid-morning or lunch.
You can shift this schedule earlier or later, depending on when you want to bake. Because the cold proof is flexible, you can often leave the dough in the refrigerator a bit longer if your plans change.
How to Know Your Starter Is Ready
A good loaf begins with a good starter.
It is bubbly and active. Look for bubbles throughout, not just on top.
It has risen and is near its peak. It should have increased in volume, ideally close to double, and the top should be domed.
It smells pleasantly tangy. A mild, yeasty, slightly sour smell is a good sign. A harsh acetone smell can mean it is hungry.
It floats. A spoonful dropped into water floats when it is full of gas, though this test is not perfect.
It was fed recently. Use the starter at or just after peak, usually 4 to 8 hours after feeding.
If your starter seems sluggish, feed it again and use it when it becomes lively. A reliable starter is the single biggest factor in sourdough success.
Helpful Tips for the Best Sourdough Bread
Weigh your ingredients. Sourdough is sensitive to ratios. A kitchen scale makes your results consistent.
Use wet hands. The dough is fairly wet and sticky. Wetting your hands prevents sticking better than flour does.
Watch the dough, not the clock. Fermentation time varies with temperature and starter strength. Look for airiness, bubbles, and an increase in volume of about 50 percent.
Do not overproof. Overfermented dough becomes weak and slack, which leads to flat, dense loaves. Slight underproofing is generally easier to correct than overproofing.
Build surface tension when shaping. A taut surface helps the loaf rise upward rather than outward.
Flour your basket well. A sticky dough can ruin an otherwise perfect loaf. Use rice flour for extra insurance.
Bake straight from the refrigerator. Cold dough is easier to handle and score, and it holds its shape in the hot pot.
Preheat the Dutch oven fully. This is crucial for a crisp crust and strong oven spring.
Be careful with the hot pot. Use thick oven mitts, and keep your face and arms away from the steam when lifting the lid.
Let the loaf cool completely. The wait is part of the recipe.
Troubleshooting Common Problems
The dough is too sticky. Sourdough dough is naturally sticky. Use wet hands for folds and a lightly floured surface for shaping. A bench scraper helps. Avoid adding too much extra flour.
The dough is not rising. The starter may be weak or the kitchen may be too cool. Use a more active starter, and place the dough somewhere warmer, such as an oven with only the light on.
The loaf is flat. The dough may have been overproofed, under-strengthened, or shaped without enough tension. Watch bulk fermentation closely, do the full set of folds, and shape tightly.
The crumb is dense and gummy. The loaf may have been underfermented, underbaked, or sliced too early. Let the dough become visibly airy, bake until deeply golden, and cool for at least 2 hours.
The crust is pale. The pot may not have been hot enough, or the loaf may have been removed too soon. Preheat fully and bake uncovered until deep golden brown.
The crust is too hard. The loaf may have baked too long. Check it at the early end of the baking window, and cool uncovered on a rack.
The bottom is burnt. The pot may be too close to the heating element. Move the rack up a position, or place a baking sheet on the rack beneath it.
The loaf did not open at the score. The dough may have been overproofed, or the blade may have been dull. Use a sharp blade and bake while the dough is still cold and springy.
The bread is too sour. A longer cold proof, a very ripe starter, or a warm kitchen can make the bread tangier. Shorten the cold proof, or use a younger starter.
The bread is not sour enough. A shorter cold proof and a young starter give a milder flavor. For a more pronounced tang, extend the cold proof up to 16 hours or more.
The dough stuck to the basket. Flour the basket more generously, and use rice flour.
Delicious Ways to Serve Sourdough Bread
With butter and jam. A thick slice with butter and homemade jam is classic.
With olive oil. Dip warm bread in good olive oil with salt, herbs, or balsamic vinegar.
As breakfast toast. Toast slices and top with butter, avocado, a fried egg, or nut butter.
As sandwiches. Sourdough is sturdy and flavorful, perfect for grilled cheese, BLTs, and turkey sandwiches.
With soup and stew. Serve alongside tomato soup, chili, chowder, or a hearty stew, or use it as a bread bowl.
As bruschetta. Toast slices, rub with garlic, and top with tomatoes, basil, and olive oil.
With cheese. Serve with cheese, charcuterie, olives, and fruit for a rustic board.
As garlic bread. Slice, spread with garlic butter, and bake until golden.
As French toast. Day-old sourdough makes superb French toast.
As croutons or breadcrumbs. Use leftover bread for croutons, panzanella salad, or breadcrumbs.
Variations to Try
- Whole wheat sourdough. Replace up to 100 grams of the bread flour with whole wheat flour for a heartier loaf. You may need a little more water.
- Seeded sourdough. Roll the shaped dough in sesame, sunflower, or poppy seeds before the cold proof.
- Rosemary and garlic. Fold in fresh rosemary and roasted garlic.
- Cheese and jalapeño. Add grated cheese and diced jalapeño during the last fold.
- Olive loaf. Fold in chopped olives.
- Cinnamon raisin. Add cinnamon and raisins during the final folds for a sweet loaf.
- Rye blend. Replace a small portion of the flour with rye for earthier flavor.
- Batards or baguettes. Shape into an oval loaf or into baguettes and adjust the baking time.
- Loaf pan sourdough. Bake in a loaf pan for a sandwich-style loaf.
Keep in mind that mix-ins and flour changes can affect hydration and fermentation, so watch the dough closely.
Baking Without a Dutch Oven
A Dutch oven is the easiest way to get great crust, but you do have options.
Use another heavy, oven-safe pot with a lid. Make sure it can handle 475°F (245°C).
Use a baking stone or steel with a steam tray. Preheat the stone and a metal tray on a lower rack. Slide the loaf onto the stone, pour hot water into the tray, and bake with steam for the first 20 minutes.
Use an upside-down roasting pan. Place the roasting pan over the dough on a baking sheet to trap steam.
Safety first. Always use thick oven mitts and take care when handling hot water and steam.
How to Store Homemade Sourdough Bread
At room temperature. Store the loaf cut-side down on a cutting board, or in a paper bag or bread box, for up to 3 to 4 days. Sourdough tends to keep better than yeasted bread. Avoid sealed plastic bags, which soften the crust.
In the refrigerator. Refrigeration speeds up staling and is generally not recommended.
In the freezer. Slice the cooled loaf and freeze the slices in an airtight bag for up to 3 months. Toast slices straight from the freezer.
Reviving stale bread. Lightly sprinkle the loaf with water and warm it in a 350°F (175°C) oven for about 5 to 10 minutes.
Using leftovers. Turn stale bread into croutons, breadcrumbs, French toast, or bread pudding.
Is Sourdough Bread Healthy?
This loaf is made from just flour, water, starter, and salt, with no additives, preservatives, or added sugars. The long fermentation breaks down some of the starches and phytic acid in the flour, which can make the bread easier to digest for some people. Sourdough also has a lower glycemic impact than some other breads, according to some research, though results vary.
That said, this loaf is made with refined bread flour, so it is not especially high in fiber. You can replace part of the flour with whole wheat for extra fiber and flavor. Nutritional values vary with slice size. If you track nutrition closely, calculate it using your own ingredients.
If you have food allergies, intolerances, or dietary needs, check your ingredients. Sourdough made with wheat flour contains gluten, and fermentation does not make it gluten-free. People with celiac disease or gluten sensitivity should avoid it unless a doctor has advised otherwise.
Frequently Asked Questions
Do I need a Dutch oven?
A Dutch oven gives the best crust, but you can use another heavy, covered, oven-safe pot, or bake on a hot stone with a steam tray.
How do I know when bulk fermentation is done?
Look for an increase in volume of about 50 percent, an airy and jiggly texture, and bubbles around the edges. In a warm kitchen, this may take 4 to 6 hours, while a cooler kitchen may take 8 hours or more.
Why does the recipe include a cold proof?
Refrigerating the shaped loaf for 8 to 12 hours slows fermentation, develops deeper flavor, and firms the dough so it is easier to score and transfer.
Can I skip the refrigerator step?
Yes. You can proof the shaped loaf at room temperature for about 1 to 2 hours until puffy, then bake. The flavor will be milder, and the dough will be softer and harder to score.
Can I use all-purpose flour?
Yes, but the loaf may be a bit flatter and less chewy. All-purpose flour absorbs less water, so you may need to reduce it slightly.
Why is my loaf flat?
Flat loaves are usually caused by overproofing, a weak starter, or insufficient shaping tension. Watch the dough closely and shape it tightly.
How active should my starter be?
It should be bubbly, airy, and recently fed, at or near its peak. A weak starter makes a slow, dense dough.
Can I use discard instead of active starter?
Unfed discard is not active enough to leaven this loaf reliably. Use active starter for the best results. Save discard for pancakes, crackers, and other recipes.
How long can the dough stay in the refrigerator?
Most doughs do well for 8 to 12 hours, and many can stay for up to 16 to 24 hours, though they will become tangier and may overproof. Check the dough and adjust.
How do I get a more open crumb?
Use an active starter, ferment fully, handle the dough gently, shape with good tension, and bake in a very hot Dutch oven.
Why is my crust too hard?
The loaf may have baked too long or cooled in a humid place. Check for doneness earlier, and cool the loaf uncovered on a rack.
How do I make it more or less sour?
For more tang, extend the cold proof or use a more mature starter. For a milder flavor, shorten the cold proof and use a younger starter.
Final Thoughts
This Easy Homemade Sourdough Bread shows that a bakery-quality loaf is within reach for any home baker. With bread flour, water, active starter, and salt, a few gentle stretch-and-folds, and an overnight cold proof, you will have a golden, crackling loaf with a soft, chewy, tangy interior.
The process is simple but rewarding: mix, rest, salt, fold, ferment, shape, chill, score, and bake. With practice, you will learn to read your dough, and each loaf will teach you something new.
If you are looking for a satisfying sourdough project that fits into a busy schedule, give this recipe a try. Slice it, toast it, or serve it warm with butter, jam, olive oil, or your favorite soup, and enjoy the crackle of that first slice. 🍞✨
Print
Easy Homemade Sourdough Bread
Ingredients
- 500 g bread flour
- 350 g lukewarm water
- 100 g active sourdough starter
- 10 g salt
Instructions
In a large bowl, combine the lukewarm water and active sourdough starter. Stir until the starter is mostly dissolved. Add the bread flour and mix until no dry flour remains. The dough will be shaggy and sticky. Cover and let rest for 30 minutes. This rest, called an autolyse, lets the flour absorb the water, which makes the dough smoother and easier to handle.
Sprinkle the salt over the dough and work it in with your hands until evenly incorporated. Wet your hands first to prevent sticking. Pinch and fold the dough until you can no longer feel grains of salt.
Over the next 2 hours, perform 3 to 4 sets of stretch-and-folds, spacing them about 30 minutes apart. To do a set, wet your hand, grab one edge of the dough, stretch it up gently, and fold it over the center. Rotate the bowl a quarter turn and repeat until you have stretched all four sides. Cover the dough between sets. You will notice the dough becoming smoother, stronger, and more elastic with each round.
Cover the dough and let it rise at room temperature until it looks airy, has increased in volume by about 50%, and shows bubbles along the sides. This may take 4 to 8 hours, depending on your starter and kitchen temperature. A clear container, or a rubber band marking the starting level on the bowl, makes it easy to see how much the dough has risen. Resist the temptation to wait until it doubles, since overfermented dough becomes slack and sticky and produces a flat loaf.
Transfer the dough to a lightly floured surface. Shape it into a tight round loaf and place it seam-side up in a floured proofing basket. Gently pull the edges of the dough toward the center to form a loose ball, then flip it seam-side down and drag it toward you on the counter so the surface tightens. A taut surface helps the loaf hold its shape and rise upward. Flip the loaf into the floured basket so that the seam faces up. Rice flour is especially good for dusting a basket, since it prevents sticking. If you do not have a proofing basket, use a bowl lined with a well-floured kitchen towel.
Cover and refrigerate for 8 to 12 hours for deeper flavor and easier scoring. Cover the basket with a plastic bag, a shower cap, or a damp towel to keep the surface from drying out. The cold slows fermentation dramatically, allowing flavors to develop without the dough overproofing. It also firms the dough so it is much easier to transfer and score.
Place a Dutch oven with its lid inside and preheat to 475°F (245°C) for 30 to 45 minutes. The pot must be thoroughly heated through. A fully heated Dutch oven gives the dough a powerful burst of heat that creates the dramatic oven spring and crisp crust.
Carefully turn the cold dough onto parchment paper and make a shallow slash across the top with a sharp bread lame. Hold the blade at a low angle, and make one smooth, confident cut about ¼ to ½ inch deep. Scoring lets the loaf expand in a controlled way. If you skip it, the loaf may burst open in random places.
Transfer the dough into the hot Dutch oven. Use the parchment as a sling to lower it in. Cover and bake for 20 minutes. The trapped steam keeps the crust soft and stretchy during the initial rise. Use thick oven mitts, because the pot is extremely hot.
Remove the lid, reduce the temperature to 450°F (230°C), and bake for another 20 to 25 minutes until deeply golden and crispy. The loaf is done when the crust is a deep golden brown, it sounds hollow when tapped on the bottom, and the internal temperature reaches about 205°F to 210°F (96°C to 99°C). Do not be afraid of a dark crust, since that is where much of the flavor lives.
Transfer the loaf to a wire rack and let it cool for at least 2 hours before slicing. This is the hardest step, but it matters. Sourdough continues to set as it cools. Slicing too soon can make the crumb gummy and dense. You may hear the loaf crackle as it cools, which is a great sign.