Easy No-Knead Homemade White Bread 🍞✨
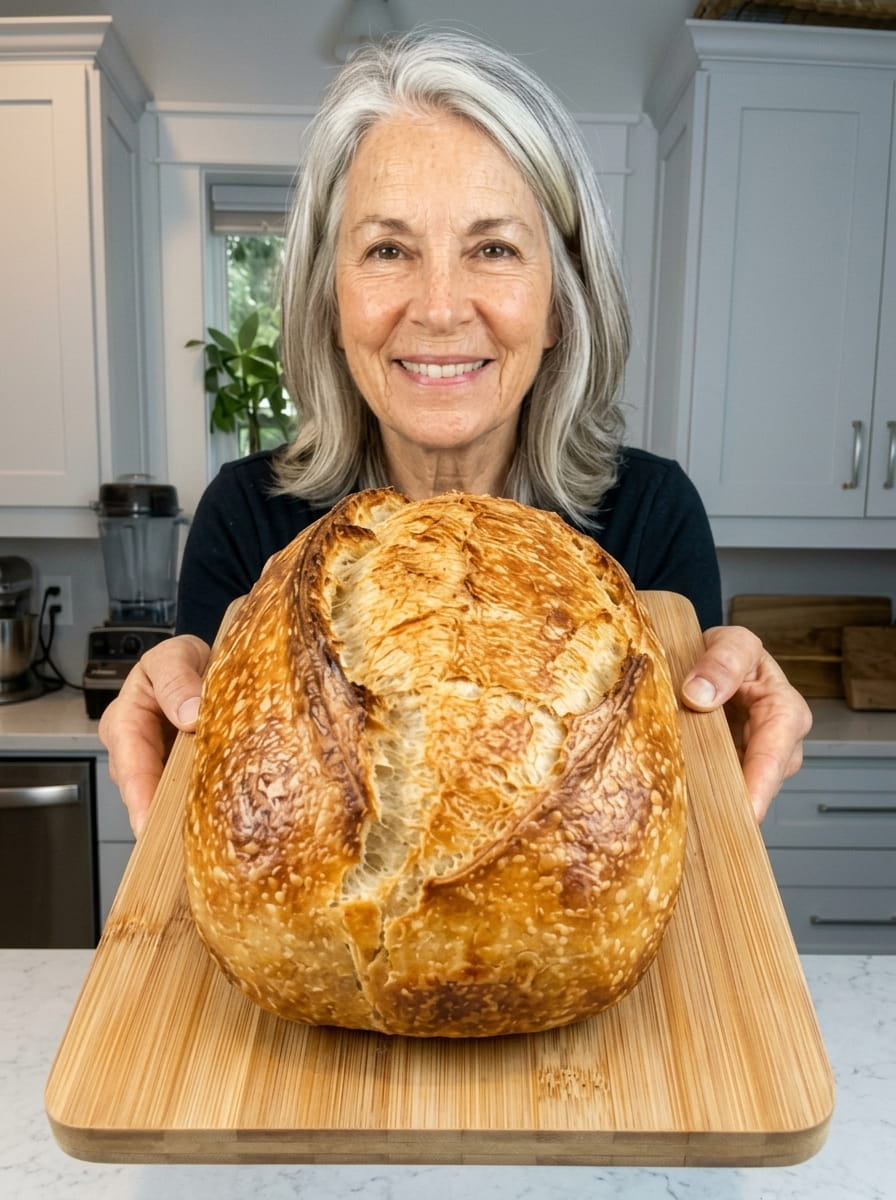
There is something almost magical about pulling a golden, crackling loaf of bread out of your own oven. The smell fills the kitchen, the crust sings as it cools, and the first warm slice spread with butter tastes better than anything you can buy at the store. The best part? You do not need to knead, you do not need special equipment beyond a heavy pot, and you do not need any baking experience.
This easy no-knead white bread uses just five simple ingredients: flour, water, instant yeast, salt and a touch of honey. You stir everything together in a bowl in about five minutes, then let time do the hard work. After a long, slow rise, you shape the dough, bake it in a hot Dutch oven, and end up with a loaf that has a deeply golden crust and a tender, airy center.
Whether you are a complete beginner who has never baked bread, a busy parent who wants fresh sandwich bread without a daily time commitment, or an experienced home cook looking for the simplest loaf possible, this recipe is for you. In this guide you will find the full recipe, a clear explanation of how no-knead bread works, step-by-step tips, troubleshooting advice, creative variations, storage ideas and answers to the most common questions.
Table of Contents
- What Is No-Knead Bread?
- Why You Will Love This Recipe
- Ingredients (and What Each One Does)
- Equipment You Will Need
- Step-by-Step Instructions
- Pro Tips for the Best Loaf
- Troubleshooting Common Problems
- Delicious Variations
- How to Store and Freeze Homemade Bread
- Ways to Enjoy Your Bread
- Frequently Asked Questions
- Final Thoughts
What Is No-Knead Bread?
No-knead bread is exactly what it sounds like: a yeast bread that develops its structure without the traditional work of kneading. In conventional bread making, you push, fold and stretch the dough for ten minutes or more. This process builds gluten, the network of proteins that traps gas bubbles and gives bread its chewy, airy texture.
No-knead bread achieves the same result in a different way. Instead of using your hands, it uses time and moisture. A wet, sticky dough allows the proteins in the flour to hydrate fully and link together on their own during a long rest. Over eight to twelve hours, gluten strands form naturally, and the yeast slowly ferments the dough, creating bubbles and developing rich, complex flavor.
The method became hugely popular after baker Jim Lahey introduced it to a wide audience, and home bakers around the world have embraced it ever since because it delivers bakery-quality results with almost no active effort. Your total hands-on time is roughly fifteen minutes. The rest is waiting.
Why You Will Love This Recipe
It is genuinely easy. There is no kneading, no stand mixer, no complicated shaping and no proofing basket. If you can stir a bowl of dough with a wooden spoon, you can make this bread.
It uses simple pantry ingredients. You probably already have everything in your kitchen: flour, water, yeast, salt and honey. There are no eggs, no butter, no milk and no specialty flours.
The flavor is better than store-bought. The long fermentation develops a subtle, slightly tangy, wheaty flavor that quick breads cannot match. Even though it is a white bread, it tastes complex and satisfying.
The texture is perfect. The crust turns deeply golden and crisp, while the inside stays soft, moist and full of irregular airy holes. It is lovely sliced thin for toast or thick for sandwiches.
It fits a busy schedule. Mix the dough in the evening, go to bed, and shape it in the morning. Or mix it in the morning and bake it after work. The dough is very forgiving about timing.
It is cheap. A whole loaf costs only a few cents’ worth of ingredients, far less than a loaf of artisan bread from a bakery.
Ingredients (and What Each One Does)
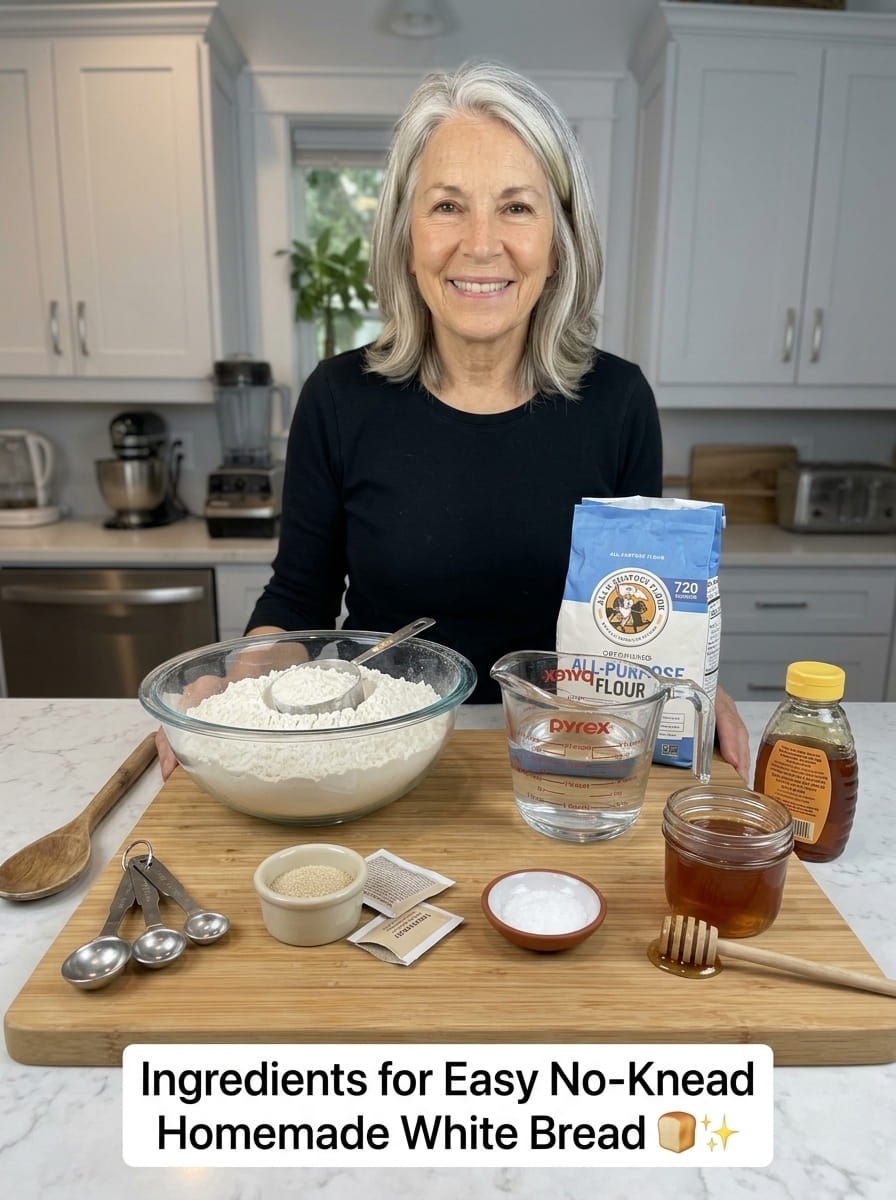
Here is everything you need to make one large round loaf:
- 3 cups (375 g) all-purpose flour
- 1½ cups (360 ml) warm water
- 1 teaspoon instant yeast
- 1½ teaspoons salt
- 1 tablespoon honey
Understanding the role of each ingredient helps you bake with confidence and troubleshoot if something goes wrong.
All-Purpose Flour
All-purpose flour has a moderate protein content, usually between 10 and 12 percent, which is enough to form a strong gluten network in a wet dough. It gives the bread a soft, tender crumb. For best accuracy, weigh your flour with a kitchen scale. Scooping flour with a measuring cup can pack in up to 20 percent extra, which makes the dough too stiff. If you do not have a scale, spoon the flour lightly into the cup and level it off with a knife rather than scooping directly from the bag.
You can also use bread flour if you prefer a chewier, taller loaf. Because bread flour absorbs more water, you may want to add one or two extra tablespoons of water.
Warm Water
Water hydrates the flour and activates the yeast. Aim for lukewarm water, about 100°F to 110°F (38°C to 43°C). It should feel pleasantly warm on your wrist, not hot. Water that is too hot can kill the yeast, while water that is too cold will slow the rise down significantly.
Instant Yeast
Instant yeast (sometimes sold as rapid-rise or bread machine yeast) can be mixed directly into the dry ingredients without proofing first. Only one teaspoon is needed because the long rise gives it plenty of time to work. If you only have active dry yeast, you can use the same amount, but stir it into the warm water for five minutes first to make sure it is alive.
Salt
Salt is not just for flavor. It strengthens the gluten structure, controls the speed of fermentation and helps the crust brown. Bread without enough salt tastes flat and rises unevenly. Fine sea salt or table salt both work well. If using a coarse kosher salt, add a little extra to compensate for its larger crystals.
Honey
A single tablespoon of honey gives the yeast a bit of food, adds a barely noticeable sweetness, softens the crumb and encourages a beautiful golden crust. You can replace it with sugar or maple syrup in equal amounts.
Equipment You Will Need
One of the great things about this recipe is how little equipment it requires:
- A large mixing bowl. The dough will double in size, so choose a bowl with plenty of room.
- A wooden spoon or dough whisk. For stirring the shaggy dough together.
- A heavy pot with a lid. A 5 to 6 quart (about 5 liter) Dutch oven is ideal. Cast iron, enameled cast iron or a heavy ceramic pot with an oven-safe lid all work.
- Parchment paper. It makes lowering the dough into a scorching hot pot safe and easy.
- Plastic wrap, a plate or a damp towel. For covering the bowl during the rise.
- A wire cooling rack. Essential for keeping the bottom crust crisp.
- A sharp knife or razor blade (optional). For scoring the top.
Why a Dutch Oven?
The Dutch oven is the secret to a bakery-style crust. When the covered pot heats up, it traps the steam released by the wet dough. That steam keeps the surface of the loaf soft and flexible during the first half of baking, allowing the bread to expand fully, a phenomenon bakers call “oven spring.” Once you remove the lid, the dry heat turns the crust crisp, golden and beautifully caramelized. Without that trapped steam, a home oven simply cannot produce the same crackly crust.
Step-by-Step Instructions
Step 1: Combine the Dry Ingredients
In a large bowl, whisk together the flour, instant yeast and salt. Make sure the yeast and salt are evenly distributed through the flour. Keeping them mixed into the flour rather than in direct contact helps protect the yeast.
Step 2: Add the Water and Honey
Pour in the warm water and add the honey. Stir with a wooden spoon until no dry flour remains and a sticky, shaggy dough forms. This takes only about one minute. The dough should look rough and messy, and that is exactly right. Do not add more flour. The high moisture is what makes the dough work without kneading.
Step 3: Let the Dough Rise for 8 to 12 Hours
Cover the bowl tightly with plastic wrap or a lid and leave it at room temperature. After 8 to 12 hours, the dough should have doubled in size, look puffy and be covered in bubbles on the surface. When you peek through the side of a glass bowl, you should see a web of bubbles throughout.
The exact time depends on the temperature of your kitchen. In a warm kitchen (around 77°F or 25°C), the dough may be ready in about eight hours. In a cooler kitchen, it may take closer to twelve. A common routine is to mix the dough at night before bed and bake the next morning.
Step 4: Shape the Loaf
Lightly flour a clean work surface and scrape the dough out of the bowl. It will be loose, sticky and stringy. Dust your hands with flour and gently fold the edges of the dough toward the center a few times, turning the dough as you go. Then flip it so the seam is underneath and tuck it into a rough round shape. Be gentle and quick. The goal is to keep as many of those lovely air bubbles as possible, not to knead.
Step 5: Rest the Dough
Place the shaped dough onto a sheet of parchment paper. Cover it loosely with a towel or inverted bowl and let it rest for 30 to 45 minutes. During this time, the dough relaxes and puffs up slightly.
Step 6: Preheat the Oven and the Pot
While the dough rests, preheat your oven to 450°F (230°C) with the empty Dutch oven and its lid inside. Allow the pot to heat for at least 30 minutes so it is thoroughly hot. A hot pot is crucial because it gives the loaf an immediate burst of heat that drives the oven spring.
Step 7: Bake Covered
Carefully remove the hot pot from the oven using thick oven mitts. Lift the dough by the edges of the parchment paper and lower it into the pot. If you like, quickly score the top with a sharp knife, making one slash about half an inch deep. Cover with the lid and return the pot to the oven. Bake for 30 minutes.
Step 8: Bake Uncovered
Remove the lid, being careful of the escaping steam. The loaf should be puffed and pale golden. Continue baking for another 10 to 15 minutes, until the crust is deep golden brown. For a perfectly baked loaf, the internal temperature should read about 205°F to 210°F (96°C to 99°C) on an instant-read thermometer.
Step 9: Cool Completely
Lift the bread out of the pot and place it on a wire rack. Resist the temptation to slice it right away. Letting it cool for at least one hour allows the interior to finish setting. Cutting too early can result in a gummy, damp texture. As the loaf cools, you may hear it crackle, which is the sound of the crust contracting and a good sign of a crisp exterior.
Pro Tips for the Best Loaf
1. Weigh your ingredients. A kitchen scale is the single best investment for consistent bread. This recipe uses about 375 g of flour and 360 g of water, which is roughly 96 percent hydration by volume conversion and produces a very wet dough. Accuracy matters.
2. Be patient with the rise. The dough is ready when it has doubled, appears bubbly and jiggles slightly when you shake the bowl. If it has not doubled after 12 hours, give it more time, especially in a cold kitchen.
3. Use enough flour on your hands and surface. The dough is sticky. A generous dusting of flour on your hands and the counter makes shaping far easier, and the extra flour will not noticeably change the final loaf.
4. Preheat the pot fully. Do not skimp on the heating time. A properly hot pot is the difference between a flat loaf and a tall, beautifully risen one.
5. Use parchment paper. It prevents sticking, makes transferring the dough safe and lets you lift the loaf out easily. Choose a paper rated for temperatures of at least 450°F.
6. Score the top. A simple slash gives steam a controlled place to escape and creates an attractive “ear” on the loaf. It is optional, but it makes the bread look more professional.
7. Cool on a wire rack. Leaving the loaf in the hot pot or on a flat surface traps steam under the bottom and makes the crust soggy.
8. Try a cold fermentation for more flavor. After the initial rise, you can refrigerate the covered dough for up to 24 hours before shaping. This slows fermentation further and builds deeper flavor.
Troubleshooting Common Problems
My dough did not rise.
The most common culprits are expired yeast, water that was too hot or too cold, or a very cool kitchen. Check the expiration date on your yeast and use lukewarm water. If your kitchen is chilly, place the covered bowl in an oven with only the light turned on, or let it rise longer.
My bread is dense.
Dense bread usually means the dough did not ferment long enough, too much flour was added, or the loaf was handled too roughly during shaping. Make sure the dough doubles and is full of bubbles, and measure the flour carefully.
The loaf spread out flat.
If the dough was over-fermented, it can lose its structure and collapse. In a hot kitchen, check the dough after eight hours. Also make sure the pot is fully preheated, as lower heat can cause spreading rather than rising.
The crust is too hard or too dark.
Reduce the uncovered baking time by five minutes, or lower the oven temperature to 425°F (220°C) for the second half of baking. Every oven is slightly different, so make notes and adjust.
The bottom burned.
Place a baking sheet on the rack below the Dutch oven, or raise the pot to a higher rack. You can also reduce the preheat temperature slightly.
The inside is gummy.
This means the bread was either underbaked or cut too soon. Bake until the internal temperature reaches at least 205°F and wait at least an hour before slicing.
There are huge holes under the crust.
This can happen when the dough has too much trapped gas or was shaped with a loose surface. Handle gently, shape with a bit more tension and make sure to score the top.
Delicious Variations
Once you have mastered the basic no-knead white bread, there are endless ways to make it your own.
Herb and garlic bread. Add 2 teaspoons of dried rosemary or Italian herbs and 3 cloves of finely minced garlic to the dry ingredients for an aromatic, savory loaf.
Cheddar and jalapeño. Fold in ¾ cup of shredded sharp cheddar and 2 tablespoons of diced pickled jalapeños right when you shape the dough.
Cinnamon raisin. Stir in 1 teaspoon of cinnamon and ½ cup of raisins with the flour. This loaf makes outstanding toast.
Olive and rosemary. Add ½ cup of chopped olives and 1 tablespoon of fresh rosemary for a Mediterranean flavor.
Whole wheat blend. Replace up to 1 cup of the all-purpose flour with whole wheat flour. Add an extra tablespoon of water, because whole wheat absorbs more moisture.
Seeded crust. Brush the top of the dough with water just before baking and sprinkle with sesame seeds, poppy seeds or sunflower seeds for added crunch.
Sandwich loaf style. If you prefer a classic sandwich shape, bake the dough in a greased, lidded loaf pan instead of a Dutch oven. Cover the pan with foil for the first 30 minutes to trap steam.
How to Store and Freeze Homemade Bread
Homemade bread contains no preservatives, so it is best enjoyed within a few days. Here is how to keep it fresh.
At room temperature. Store the cooled loaf cut-side down on a cutting board for the first day, or place it in a paper bag or bread box for up to three days. A paper bag keeps the crust crisp, while a plastic bag softens it.
In the refrigerator. Refrigeration can make bread go stale faster, so only do this in a very humid climate where mold is a concern.
In the freezer. For longer storage, slice the completely cooled loaf, place the slices in a freezer bag with the air pressed out and freeze for up to three months. Toast slices directly from frozen, or thaw whole slices at room temperature.
Reviving a day-old loaf. Sprinkle the crust lightly with water and warm the bread in a 350°F (175°C) oven for 8 to 10 minutes. It will come out with a refreshed, crackly crust.
Using leftovers. Stale bread makes superb croutons, breadcrumbs, French toast, bread pudding, panzanella salad and strata.
Ways to Enjoy Your Bread
This versatile white loaf pairs with almost anything. Here are some favorite ways to serve it:
- Warm with butter. Nothing beats a thick slice of just-cooled bread with a pat of salted butter melting into it.
- Classic toast. Serve with jam, honey, peanut butter or mashed avocado.
- Sandwiches. Use it for grilled cheese, BLTs, egg salad or turkey sandwiches.
- Soup companion. Tear off chunks to dunk into tomato soup, hearty stews or creamy chowders.
- Bruschetta. Toast slices, rub them with garlic and top with chopped tomatoes, basil and olive oil.
- Breakfast. Pair thick slices with scrambled eggs, or make golden French toast on a lazy weekend morning.
- Cheese board. Serve with olive oil for dipping, cheese, cured meats and fruit.
Frequently Asked Questions
Can I make no-knead bread without a Dutch oven?
Yes. Any heavy, oven-safe pot with a lid will work. If you do not have one, bake the loaf on a preheated baking sheet or pizza stone and place a pan of hot water on the lower rack to create steam. The crust will not be quite as crisp, but the bread will still be delicious.
Can I use active dry yeast instead of instant yeast?
Yes. Use the same quantity, and dissolve it in the warm water for about five minutes before adding it to the flour. The rising time may be slightly longer.
Can I let the dough rise longer than 12 hours?
You can, but in a warm kitchen it may over-ferment and become too slack. If you need more time, put the dough in the refrigerator, where it can safely rest for up to 24 hours.
Do I really not need to knead at all?
Correct. The long fermentation and high water content develop the gluten for you. The brief folding when shaping is all the handling the dough needs.
Why is my dough so sticky?
The dough is meant to be very wet. That stickiness is what allows it to build structure on its own. Use floured hands and a lightly floured surface to manage it, but resist adding flour to the dough itself.
Can I make this bread with whole wheat flour only?
You can, but the loaf will be denser and more rustic. A blend of white and whole wheat gives a good balance of flavor and softness. Add extra water when using whole wheat.
What if I do not have parchment paper?
You can lightly dust the bottom of the dough with flour or cornmeal and carefully drop it into the hot pot. Be extremely careful, as the pot is very hot. Parchment is strongly recommended for safety and convenience.
How do I know when the bread is done?
Look for a deep golden-brown crust, a hollow sound when you tap the bottom of the loaf, and an internal temperature of about 205°F to 210°F (96°C to 99°C).
Why does homemade bread get stale so fast?
Without commercial preservatives and dough conditioners, bread stales naturally within a couple of days. Freezing slices right after cooling is the best way to keep it fresh.
Can I halve or double the recipe?
Yes. For a double batch, bake two loaves one after the other, or use two pots. If you want a smaller loaf, halve the ingredients and reduce the baking time by about five to ten minutes.
Quick Recipe Card: Easy No-Knead White Bread
Prep time: 15 minutes Rise time: 8 to 12 hours Rest time: 30 to 45 minutes Bake time: 40 to 45 minutes Yield: 1 large loaf (about 10 slices) Oven temperature: 450°F (230°C)
Ingredients:
- 3 cups (375 g) all-purpose flour
- 1½ cups (360 ml) warm water
- 1 teaspoon instant yeast
- 1½ teaspoons salt
- 1 tablespoon honey
Instructions:
- Whisk the flour, yeast and salt in a large bowl.
- Add the warm water and honey. Stir until a sticky, shaggy dough forms.
- Cover tightly and let rise at room temperature for 8 to 12 hours, until doubled and bubbly.
- Turn the dough onto a floured surface and gently shape into a round without kneading.
- Place on parchment paper and rest for 30 to 45 minutes.
- Preheat the oven to 450°F (230°C) with a covered Dutch oven inside.
- Lower the dough into the hot pot, cover and bake for 30 minutes.
- Remove the lid and bake 10 to 15 minutes more, until deep golden brown.
- Cool on a wire rack before slicing.
Final Thoughts
If you have ever felt intimidated by baking bread, this easy no-knead homemade white bread is the perfect place to start. With only five ingredients, a bowl, a spoon and a little patience, you can create a loaf with a crackling golden crust and a soft, airy crumb that rivals any bakery.
The secret is simple: let time do the work. Mix the dough in the evening, let it ferment quietly overnight, and wake up to a bubbly dough that is ready to shape and bake. The reward is a kitchen that smells like a bakery and a loaf you can be proud of.
Once you have baked this recipe a few times, you will start to recognize how the dough should look and feel, and you can experiment with herbs, cheese, seeds and whole grains. Bread making becomes less of a chore and more of a joyful routine.
So grab your flour, set your bowl on the counter, and give it a try tonight. Tomorrow, you will be slicing into a warm, homemade loaf. If you enjoyed this recipe, save it for later, share it with a friend who is learning to bake, and leave a comment letting us know how your bread turned out. Happy baking! 🍞✨
Print
Easy No-Knead Homemade White Bread
Ingredients
Here is everything you need to make one large round loaf:
- 3 cups (375 g) all-purpose flour
- 1½ cups (360 ml) warm water
- 1 teaspoon instant yeast
- 1½ teaspoons salt
- 1 tablespoon honey
Understanding the role of each ingredient helps you bake with confidence and troubleshoot if something goes wrong.
All-Purpose Flour
All-purpose flour has a moderate protein content, usually between 10 and 12 percent, which is enough to form a strong gluten network in a wet dough. It gives the bread a soft, tender crumb. For best accuracy, weigh your flour with a kitchen scale. Scooping flour with a measuring cup can pack in up to 20 percent extra, which makes the dough too stiff. If you do not have a scale, spoon the flour lightly into the cup and level it off with a knife rather than scooping directly from the bag.
You can also use bread flour if you prefer a chewier, taller loaf. Because bread flour absorbs more water, you may want to add one or two extra tablespoons of water.
Warm Water
Water hydrates the flour and activates the yeast. Aim for lukewarm water, about 100°F to 110°F (38°C to 43°C). It should feel pleasantly warm on your wrist, not hot. Water that is too hot can kill the yeast, while water that is too cold will slow the rise down significantly.
Instant Yeast
Instant yeast (sometimes sold as rapid-rise or bread machine yeast) can be mixed directly into the dry ingredients without proofing first. Only one teaspoon is needed because the long rise gives it plenty of time to work. If you only have active dry yeast, you can use the same amount, but stir it into the warm water for five minutes first to make sure it is alive.
Salt
Salt is not just for flavor. It strengthens the gluten structure, controls the speed of fermentation and helps the crust brown. Bread without enough salt tastes flat and rises unevenly. Fine sea salt or table salt both work well. If using a coarse kosher salt, add a little extra to compensate for its larger crystals.
Honey
A single tablespoon of honey gives the yeast a bit of food, adds a barely noticeable sweetness, softens the crumb and encourages a beautiful golden crust. You can replace it with sugar or maple syrup in equal amounts.
Instructions
In a large bowl, whisk together the flour, instant yeast and salt. Make sure the yeast and salt are evenly distributed through the flour. Keeping them mixed into the flour rather than in direct contact helps protect the yeast.
Pour in the warm water and add the honey. Stir with a wooden spoon until no dry flour remains and a sticky, shaggy dough forms. This takes only about one minute. The dough should look rough and messy, and that is exactly right. Do not add more flour. The high moisture is what makes the dough work without kneading.
Cover the bowl tightly with plastic wrap or a lid and leave it at room temperature. After 8 to 12 hours, the dough should have doubled in size, look puffy and be covered in bubbles on the surface. When you peek through the side of a glass bowl, you should see a web of bubbles throughout.
The exact time depends on the temperature of your kitchen. In a warm kitchen (around 77°F or 25°C), the dough may be ready in about eight hours. In a cooler kitchen, it may take closer to twelve. A common routine is to mix the dough at night before bed and bake the next morning.
Lightly flour a clean work surface and scrape the dough out of the bowl. It will be loose, sticky and stringy. Dust your hands with flour and gently fold the edges of the dough toward the center a few times, turning the dough as you go. Then flip it so the seam is underneath and tuck it into a rough round shape. Be gentle and quick. The goal is to keep as many of those lovely air bubbles as possible, not to knead.
Place the shaped dough onto a sheet of parchment paper. Cover it loosely with a towel or inverted bowl and let it rest for 30 to 45 minutes. During this time, the dough relaxes and puffs up slightly.
While the dough rests, preheat your oven to 450°F (230°C) with the empty Dutch oven and its lid inside. Allow the pot to heat for at least 30 minutes so it is thoroughly hot. A hot pot is crucial because it gives the loaf an immediate burst of heat that drives the oven spring.
Carefully remove the hot pot from the oven using thick oven mitts. Lift the dough by the edges of the parchment paper and lower it into the pot. If you like, quickly score the top with a sharp knife, making one slash about half an inch deep. Cover with the lid and return the pot to the oven. Bake for 30 minutes.
Remove the lid, being careful of the escaping steam. The loaf should be puffed and pale golden. Continue baking for another 10 to 15 minutes, until the crust is deep golden brown. For a perfectly baked loaf, the internal temperature should read about 205°F to 210°F (96°C to 99°C) on an instant-read thermometer.
Lift the bread out of the pot and place it on a wire rack. Resist the temptation to slice it right away. Letting it cool for at least one hour allows the interior to finish setting. Cutting too early can result in a gummy, damp texture. As the loaf cools, you may hear it crackle, which is the sound of the crust contracting and a good sign of a crisp exterior.