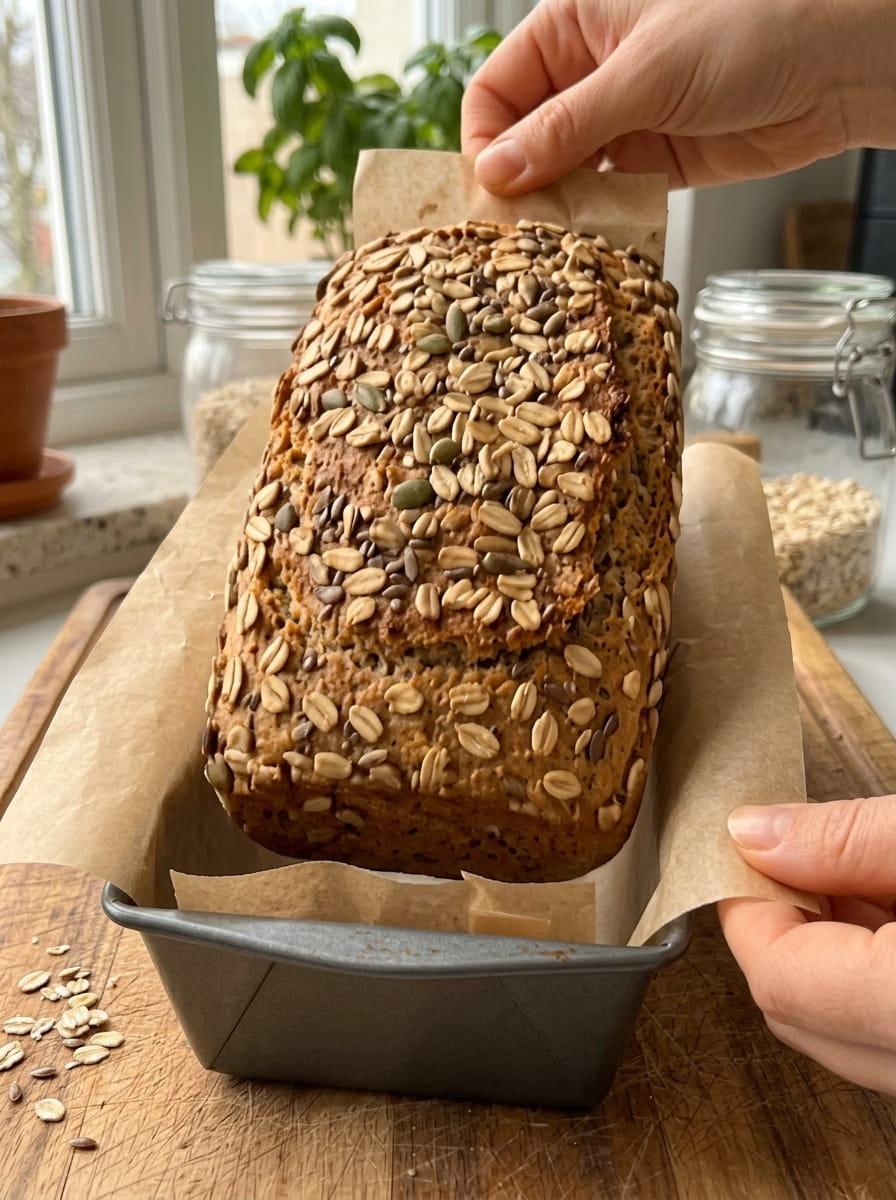
Flour-Free Oat & Chia Bread: Soft, Hearty, and Made in a Blender
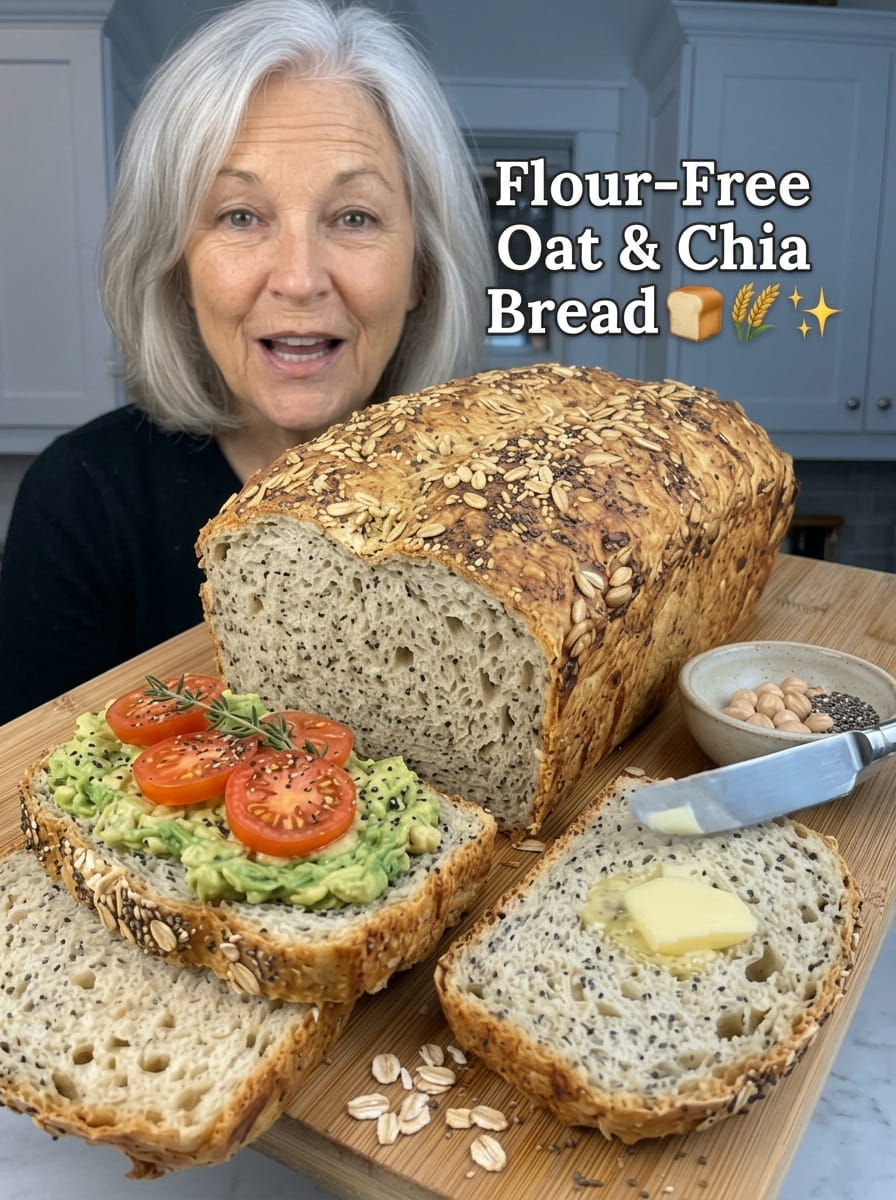
Soft, moist, hearty, and made without any wheat flour, this easy oat and chia bread is packed with rolled oats and chia seeds. It has a tender center, a golden crust, and a deliciously nutty seeded topping. It’s simple, wholesome, and satisfying, and it’s perfect for breakfast, sandwiches, toast, or enjoying warm with your favorite spread.
If you’ve ever wanted to bake homemade bread but felt put off by yeast, kneading, proofing, and long waiting times, this recipe is for you. There’s no yeast and no kneading, and you don’t even need a mixing bowl. Everything goes into a blender, rests for ten minutes, and bakes in a single loaf pan. The most work you’ll do is pressing a button and sprinkling seeds on top.
In this complete guide, you’ll find the full recipe, a closer look at why each ingredient matters, step-by-step tips for the best texture, ideas for variations, serving suggestions, storage and freezing advice, and answers to the most common questions about oat and chia bread.
Why You’ll Love This Flour-Free Oat and Chia Bread
Here’s what makes this recipe a staple worth keeping on repeat.
It’s incredibly easy. There’s no yeast to activate, no dough to knead, and no rising time. Blend, rest, pour, and bake. If you can use a blender, you can make this bread.
It uses just a handful of simple ingredients. Rolled oats, chia seeds, eggs, water, olive oil, honey, baking powder, salt, and a spoonful of mixed seeds. Most of these are probably already in your pantry.
It’s made without wheat flour. The oats are ground right in your blender, so there’s no bag of flour to buy. That makes it a great option when you want a wholesome loaf without reaching for traditional flour.
It’s soft, moist, and hearty. Thanks to the chia seeds, which absorb liquid and form a gel, the crumb stays tender and moist rather than dry or crumbly.
It’s versatile. Slice it for toast, build a sandwich, serve it alongside soup, or enjoy it warm with butter. It works for breakfast, lunch, snacks, and dinner.
It looks beautiful. That golden crust and seeded top make it look like it came from a bakery, even though it took only a few minutes of hands-on time.
Ingredients for Flour-Free Oat & Chia Bread
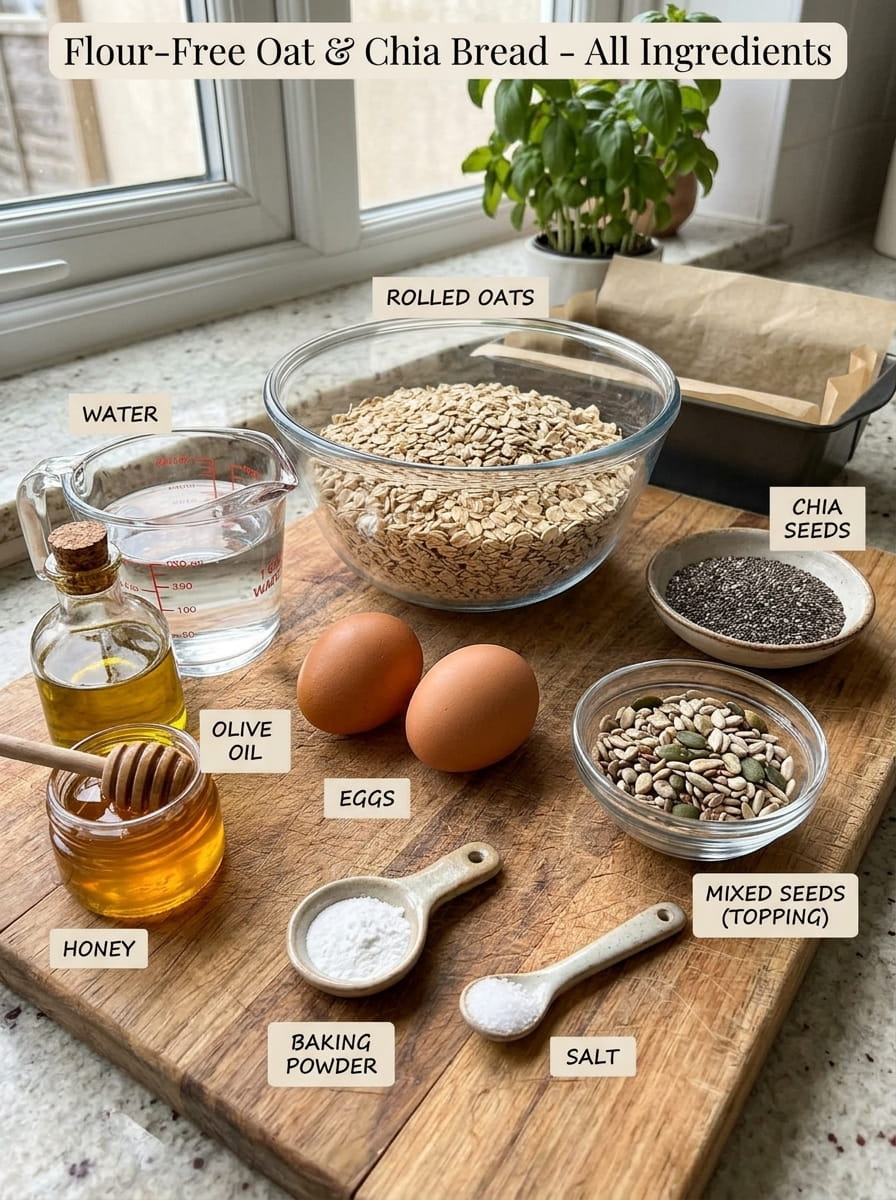
Here’s everything you need for one loaf.
- 2½ cups rolled oats
- 3 tablespoons chia seeds
- 2 large eggs
- 1 cup water
- 2 tablespoons olive oil
- 1 tablespoon honey
- 1 teaspoon baking powder
- ½ teaspoon salt
- 1 tablespoon mixed seeds, for topping
A Closer Look at the Key Ingredients
Rolled oats. These are the foundation of the loaf. When pulsed in a blender, they break down into a fine, flour-like texture that gives the bread its structure and a mildly sweet, nutty flavor. Use old-fashioned rolled oats for the best results. Quick oats can work, but they’re thinner and may produce a slightly denser loaf.
Chia seeds. Chia seeds are the secret to the bread’s moist texture. They absorb many times their weight in liquid and form a gel-like consistency, which helps bind the batter and keep the crumb soft. They also add a subtle earthy flavor and tiny, pleasant flecks throughout the slices.
Eggs. The eggs provide structure, richness, and lift. Because there’s no gluten in this bread, eggs do a lot of the work of holding everything together.
Water. The water hydrates the oats and chia seeds, creating the thick batter that bakes into a tender loaf.
Olive oil. Olive oil adds moisture, a soft crumb, and a touch of richness. Choose a mild extra virgin olive oil so the flavor doesn’t overpower the oats.
Honey. Just a tablespoon adds a gentle sweetness, helps with browning, and balances the earthiness of the oats and seeds. The bread is not sweet, so it works for savory and sweet toppings alike.
Baking powder. This gives the loaf a little lift so it isn’t overly dense.
Salt. Salt brings out the natural flavor of the oats and keeps the bread from tasting flat.
Mixed seeds. Sunflower seeds, pumpkin seeds, sesame seeds, flaxseeds, or any combination you like make a crunchy, nutty topping and give the loaf its bakery-style look.
How to Make Flour-Free Oat and Chia Bread (Step by Step)
Prep time: 15 minutes (including resting) Bake time: 35 to 45 minutes Yield: 1 loaf, about 8 to 10 slices
Step 1: Preheat the Oven
Preheat your oven to 350°F. Line a loaf pan with parchment paper so the bread lifts out easily and doesn’t stick. A standard loaf pan works well.
Step 2: Grind the Oats and Chia Seeds
Add the rolled oats and chia seeds to a blender and pulse until finely ground. You’re aiming for a flour-like consistency. A few small flecks are fine, but you don’t want large whole oats remaining, since they can make the texture rougher.
Step 3: Blend the Batter
Add the eggs, water, olive oil, honey, baking powder, and salt to the blender. Blend until a thick, smooth batter forms. Scrape down the sides if needed and blend again briefly so everything is well combined. The batter will be thick, much like a cake batter or a thick pancake batter.
Step 4: Let the Batter Rest
Let the mixture rest for 10 minutes. This is an important step. During this time, the chia seeds and ground oats absorb the liquid, and the batter thickens. Skipping the rest can give you a looser batter and a less sturdy loaf.
Step 5: Pour into the Pan
Pour the batter into the lined loaf pan and smooth the top with a spatula or the back of a spoon so the surface is even.
Step 6: Add the Seed Topping
Sprinkle the mixed seeds evenly over the surface. Gently press them in with your fingertips or the back of a spoon so they stay in place while baking.
Step 7: Bake
Bake for 35 to 45 minutes, until the loaf is golden and firm in the center. Ovens vary, so start checking around 35 minutes. A toothpick inserted into the middle should come out mostly clean, and the top should feel set when lightly pressed.
Step 8: Cool Completely
Let the bread cool completely before slicing. This is the step people most often rush, but it matters. As the loaf cools, the crumb finishes setting, and the slices hold together beautifully instead of crumbling. Lift the loaf out with the parchment and place it on a wire rack.
Step 9: Slice and Serve
Slice and serve with butter, avocado, cheese, eggs, or your favorite toppings.
Tips for the Best Oat and Chia Bread
A few small tricks make a big difference.
Grind the oats finely. The finer the grind, the smoother and more bread-like the crumb. Pulse in short bursts so you don’t overheat the blender.
Don’t skip the 10-minute rest. The chia seeds need time to absorb liquid. Resting lets the batter thicken, which gives the loaf its structure.
Use a lined pan. Parchment paper makes removal effortless and prevents the bottom from sticking.
Cool it fully before slicing. Warm slices can feel gummy or fall apart. Patience gives you clean, sturdy slices.
Use a sharp serrated knife. A bread knife cuts through the crust and seeds without squishing the crumb.
Check doneness by feel and by toothpick. The top should be golden, the center firm, and a toothpick should come out mostly clean.
Toast the slices. Toasting brings out the nutty flavor and gives the bread a crisp edge, which is especially nice for sandwiches and spreads.
Easy Variations and Add-Ins
Once you’ve made the basic loaf, it’s easy to customize.
Savory Oat and Chia Bread
Skip the honey or reduce it to a teaspoon, and add a teaspoon of garlic powder, a teaspoon of dried herbs such as rosemary or Italian seasoning, or a few tablespoons of grated Parmesan to the blender. This version is wonderful with soup or alongside eggs.
Sweet and Cinnamon Version
Add a teaspoon of cinnamon and a little extra honey. Stir in a handful of raisins or chopped dried fruit after blending. This turns the loaf into a breakfast bread that’s delicious with butter or nut butter.
Nutty Crunch
Fold in chopped walnuts, pecans, or almonds after blending for extra texture and flavor.
Seed Boost
Add a tablespoon of ground flaxseed or hemp seeds to the blender, or mix more seeds into the batter, for an even heartier loaf. If you add extra dry ingredients, you may need a splash more water to keep the batter thick but pourable.
Cheesy Version
Fold in a half cup of shredded cheddar or another favorite cheese and sprinkle a little on top before baking.
Swap the Sweetener
Maple syrup can replace honey if you prefer. The bread will taste almost the same.
Swap the Oil
Melted butter, avocado oil, or melted coconut oil can replace the olive oil. Each gives a slightly different flavor.
What to Serve with Oat and Chia Bread
This bread is a blank canvas. Here are some of our favorite ways to enjoy it.
For breakfast:
- Butter and a drizzle of honey
- Mashed avocado with salt, pepper, and chili flakes
- Scrambled, fried, or poached eggs
- Nut butter and sliced banana
- Greek yogurt and berries on the side
For lunch:
- Sandwiches with turkey, chicken, or tuna salad
- Cheese and tomato toasties
- Hummus and cucumber slices
- Egg salad with fresh herbs
For dinner:
- Alongside a bowl of soup or stew
- With a big green salad
- As a base for open-faced savory toasts
For snacks:
- Cream cheese and sliced radish
- Ricotta with a drizzle of honey
- Peanut butter and apple slices
How to Store Oat and Chia Bread
At room temperature: Once completely cool, wrap the loaf in parchment or a clean kitchen towel, or place it in an airtight container. Store at room temperature for up to 2 days.
In the refrigerator: Because this bread is moist, the refrigerator helps it stay fresh longer. Store it in an airtight container or wrapped well for up to 5 days. Toast slices before serving for the best texture.
In the freezer: Slice the cooled loaf and freeze the slices in a freezer-safe bag, separated by small pieces of parchment so they don’t stick together. Freeze for up to 3 months. Toast slices straight from the freezer, or thaw them at room temperature.
Make-Ahead and Meal Prep Tips
This bread is excellent for planning ahead.
- Bake on the weekend. Make a loaf on Sunday and enjoy it all week as toast or sandwich bread.
- Slice and freeze. Having slices in the freezer means you can toast one at a time, with no waste.
- Prep dry ingredients in advance. Measure the oats, chia seeds, baking powder, and salt into a jar. When you’re ready to bake, just pour them into the blender and add the wet ingredients.
- Make mini loaves or muffins. The same batter can be baked in muffin tins for portable, grab-and-go portions. Reduce the baking time and check them early.
Frequently Asked Questions About Oat and Chia Bread
Is this bread really flour-free?
It contains no wheat flour or other store-bought flour. However, the rolled oats are ground in the blender, which turns them into a flour-like meal. So the bread is “flour-free” in the sense that you don’t add any packaged flour, but the oats themselves become the flour.
Is oat and chia bread gluten-free?
Oats don’t contain wheat gluten, but they’re often processed alongside wheat, barley, or rye, so cross-contamination is common. If you need the loaf to be gluten-free, look for oats that are labeled certified gluten-free, and check the labels on your baking powder and other ingredients. People with celiac disease or a gluten allergy should check with their healthcare provider about oats.
Can I make this bread without eggs?
Eggs play a major role in structure and lift, so this recipe is best made with eggs. If you want to experiment with an egg-free version, you could try replacing each egg with a flax egg (1 tablespoon ground flaxseed mixed with 3 tablespoons water, rested until gelled). The texture will be denser and softer, so results may vary.
Can I use quick oats instead of rolled oats?
Yes, quick oats can work. They grind more easily, but they’re thinner, so the loaf may be a little denser. Old-fashioned rolled oats generally give the best flavor and texture.
Why is my bread gummy in the middle?
Gummy centers usually come from slicing too early or underbaking. Make sure the loaf is golden, firm in the center, and passes the toothpick test, then let it cool completely before slicing. Ovens also vary, so you may need a few extra minutes of baking.
Why did my bread turn out crumbly?
Crumbly bread often means the oats weren’t ground finely enough, the batter wasn’t rested long enough, or the loaf was sliced while warm. Make sure the oats are finely ground, allow the full 10-minute rest, and cool the loaf completely before cutting.
Can I use whole chia seeds or ground chia?
Whole chia seeds are the best choice here, since they’re ground along with the oats at the start. If you only have ground chia, you can add it with the oats and skip the pulsing of the seeds, though the gel will form even faster.
Can I leave out the honey?
Yes. The honey is just one tablespoon and adds a touch of sweetness and browning. You can reduce it or leave it out if you prefer a completely savory loaf. The bread will be slightly less golden.
What can I use instead of mixed seeds on top?
Rolled oats, sesame seeds, sunflower seeds, pumpkin seeds, poppy seeds, or flaxseeds all work well. Use whatever you have on hand.
Can I double the recipe?
Yes. You can double the ingredients and bake in a larger loaf pan or in two pans. Bake time may increase, so check for doneness with a toothpick and by touch.
Does this bread make good toast?
It makes fantastic toast. Toasting crisps the edges, deepens the nutty flavor, and makes it sturdy enough to hold toppings like avocado, eggs, or nut butter.
How many slices does one loaf make?
You can expect about 8 to 10 slices from a standard loaf pan, depending on how thick you slice it.
Final Thoughts: Simple, Wholesome Bread You Can Make Any Day
Flour-free oat and chia bread proves that homemade bread doesn’t have to be complicated. With a blender, a loaf pan, and a short list of everyday ingredients, you can bake a soft, moist, hearty loaf with a golden crust and a crunchy seeded top. It’s wholesome, satisfying, and flexible enough to suit breakfast, lunch, snacks, and dinner.
Make it once, and you’ll see how easy it is to keep a loaf on hand all week. Slice it, toast it, top it, and enjoy it warm with butter or your favorite spread. However you serve it, this simple oat and chia bread is sure to become a regular in your kitchen.
Print
Flour-Free Oat & Chia Bread
Ingredients
Here’s everything you need for one loaf.
- 2½ cups rolled oats
- 3 tablespoons chia seeds
- 2 large eggs
- 1 cup water
- 2 tablespoons olive oil
- 1 tablespoon honey
- 1 teaspoon baking powder
- ½ teaspoon salt
- 1 tablespoon mixed seeds, for topping
A Closer Look at the Key Ingredients
Rolled oats. These are the foundation of the loaf. When pulsed in a blender, they break down into a fine, flour-like texture that gives the bread its structure and a mildly sweet, nutty flavor. Use old-fashioned rolled oats for the best results. Quick oats can work, but they’re thinner and may produce a slightly denser loaf.
Chia seeds. Chia seeds are the secret to the bread’s moist texture. They absorb many times their weight in liquid and form a gel-like consistency, which helps bind the batter and keep the crumb soft. They also add a subtle earthy flavor and tiny, pleasant flecks throughout the slices.
Eggs. The eggs provide structure, richness, and lift. Because there’s no gluten in this bread, eggs do a lot of the work of holding everything together.
Water. The water hydrates the oats and chia seeds, creating the thick batter that bakes into a tender loaf.
Olive oil. Olive oil adds moisture, a soft crumb, and a touch of richness. Choose a mild extra virgin olive oil so the flavor doesn’t overpower the oats.
Honey. Just a tablespoon adds a gentle sweetness, helps with browning, and balances the earthiness of the oats and seeds. The bread is not sweet, so it works for savory and sweet toppings alike.
Baking powder. This gives the loaf a little lift so it isn’t overly dense.
Salt. Salt brings out the natural flavor of the oats and keeps the bread from tasting flat.
Mixed seeds. Sunflower seeds, pumpkin seeds, sesame seeds, flaxseeds, or any combination you like make a crunchy, nutty topping and give the loaf its bakery-style look.
Instructions
Preheat your oven to 350°F. Line a loaf pan with parchment paper so the bread lifts out easily and doesn’t stick. A standard loaf pan works well.
Add the rolled oats and chia seeds to a blender and pulse until finely ground. You’re aiming for a flour-like consistency. A few small flecks are fine, but you don’t want large whole oats remaining, since they can make the texture rougher.
Add the eggs, water, olive oil, honey, baking powder, and salt to the blender. Blend until a thick, smooth batter forms. Scrape down the sides if needed and blend again briefly so everything is well combined. The batter will be thick, much like a cake batter or a thick pancake batter.
Let the mixture rest for 10 minutes. This is an important step. During this time, the chia seeds and ground oats absorb the liquid, and the batter thickens. Skipping the rest can give you a looser batter and a less sturdy loaf.
Pour the batter into the lined loaf pan and smooth the top with a spatula or the back of a spoon so the surface is even.
Sprinkle the mixed seeds evenly over the surface. Gently press them in with your fingertips or the back of a spoon so they stay in place while baking.
Bake for 35 to 45 minutes, until the loaf is golden and firm in the center. Ovens vary, so start checking around 35 minutes. A toothpick inserted into the middle should come out mostly clean, and the top should feel set when lightly pressed.
Let the bread cool completely before slicing. This is the step people most often rush, but it matters. As the loaf cools, the crumb finishes setting, and the slices hold together beautifully instead of crumbling. Lift the loaf out with the parchment and place it on a wire rack.
Slice and serve with butter, avocado, cheese, eggs, or your favorite toppings.