Ingredients
Here’s the full ingredient list for one small loaf:
- 2 cups cooked green peas, drained and cooled
- 3 large eggs
- ½ cup rolled oats
- 1 teaspoon baking powder
- ¼ teaspoon salt
- 1 tablespoon olive oil
For equipment, you’ll need a food processor or blender, a small loaf pan, parchment paper (or a little oil for greasing), a spatula, and a wire cooling rack.
Instructions
Preheat your oven to 350°F (175°C). Line a small loaf pan with parchment paper, leaving a little overhang on the long sides so you can lift the loaf out easily. If you prefer, lightly grease the pan instead.
Add the cooked, cooled green peas and the eggs to a food processor or blender. Blend until the mixture is mostly smooth. Pause to scrape down the sides as needed so everything blends evenly.
Add the rolled oats, baking powder, salt, and olive oil. Blend until the ingredients are well combined. You can leave a little texture if you like, since tiny flecks of oats and peas give the finished bread a rustic look and feel.
Pour the batter into your prepared loaf pan and smooth the top with a spatula. Gently tap the pan on the counter to release any large air bubbles.
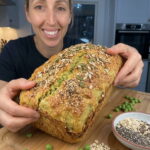
Bake for 40 to 50 minutes. The loaf is ready when it feels firm, looks lightly golden, and a toothpick inserted into the center comes out clean. Ovens vary, so start checking around the 40-minute mark. If the top browns too quickly, loosely cover it with foil for the last 10 minutes.
Let the bread cool in the pan for 10 minutes, then lift it out and transfer it to a wire rack. Allow it to cool completely before slicing. This step matters. The loaf continues to set as it cools, and a fully cooled loaf slices cleanly and has the best texture.