
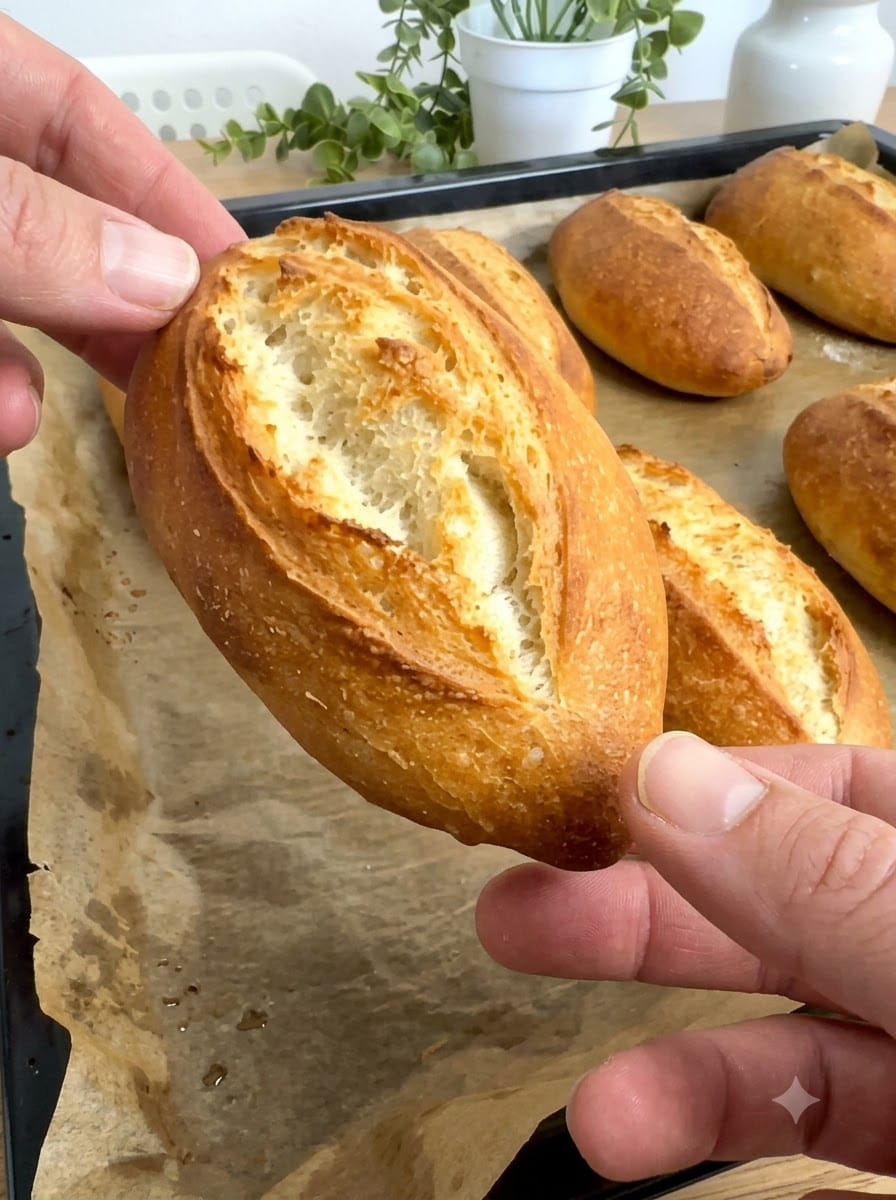
Homemade Mini Baguettes: Golden, Crispy & Chewy
These homemade mini baguettes are beautifully golden and crispy on the outside, with a soft, airy and chewy interior. Made with just a handful of simple ingredients and an easy stretch-and-fold technique, they deliver bakery-style results without complicated kneading. They are perfect for sandwiches, breakfast or serving warm with butter.
If you have ever thought that baguettes were too difficult for a home kitchen, this recipe will change your mind. You do not need a stand mixer, a baguette pan or years of experience. You need flour, water, yeast, salt, a little sugar, a bowl and some patience. The oven and the folding technique do the rest.
In this guide you will find the full recipe, ingredient notes, step-by-step instructions, shaping and scoring tips, troubleshooting advice, variations, storage guidance, serving ideas and answers to frequently asked questions.
What Are Mini Baguettes?
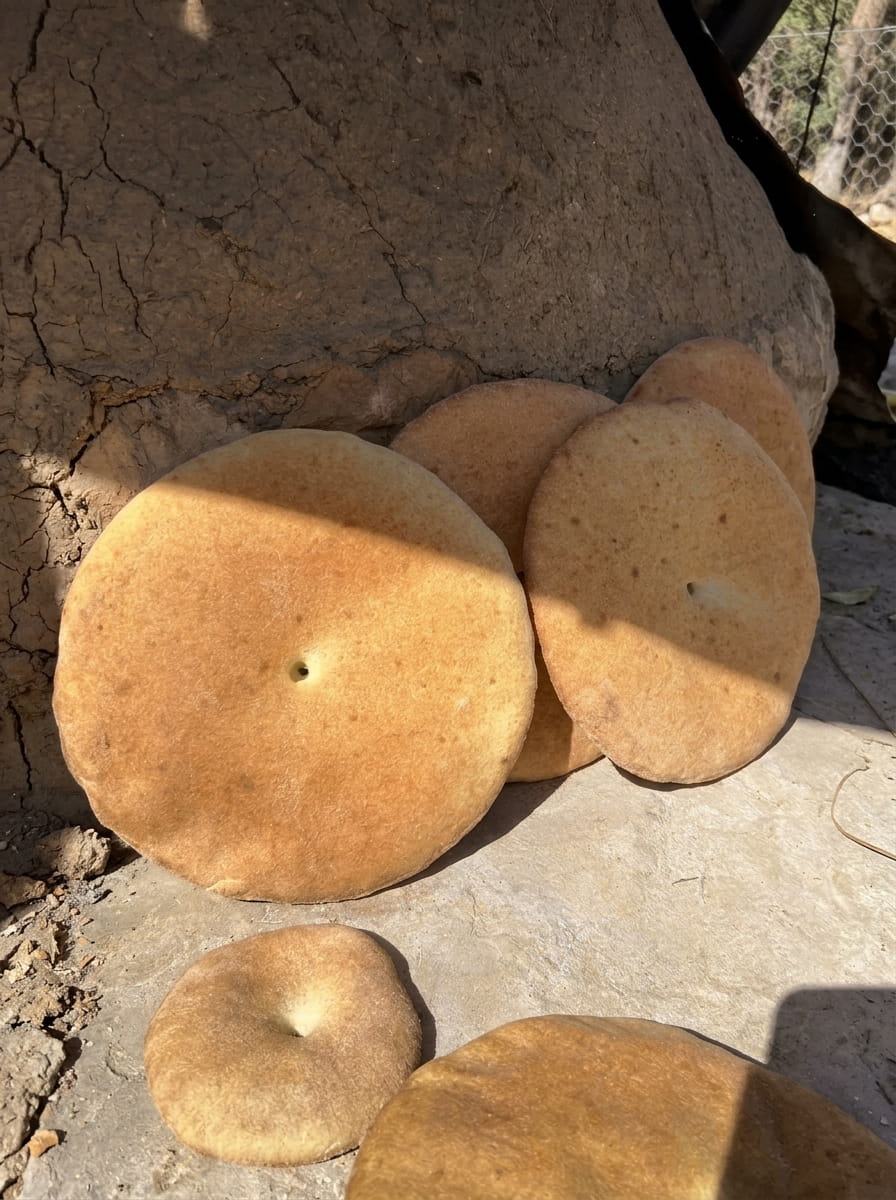
A baguette is the classic long, thin French loaf known for its crisp, crackly crust and light, airy crumb. Mini baguettes are simply smaller versions of the same bread. They are easier to handle, bake faster and fit comfortably on a standard baking tray, which makes them ideal for home bakers.
Because each baguette is small, you get more crust per bite, and the crust is one of the best parts. Mini baguettes are also the perfect size for individual sandwiches, sharing at the table and serving alongside soups, salads and dips.
Why You’ll Love This Recipe
It uses only five ingredients. Water, flour, yeast, salt and a little sugar are all you need.
No traditional kneading is required. A series of gentle stretch-and-folds builds the dough’s strength.
It gives bakery-style results. The golden, crisp crust and chewy, airy interior look and taste professional.
It does not need special equipment. A baking tray, a sharp knife or blade, and a pan of hot water for steam are enough.
The size is practical. Mini baguettes are easy to shape, bake and serve.
It is versatile. Use them for sandwiches, toast, garlic bread, bruschetta or simply with butter.
It is perfect for beginners. The method is forgiving, and the wet dough teaches you how bread should feel.
It beats store-bought. The flavor and aroma of a warm baguette fresh from your own oven is hard to match.
Ingredients You’ll Need
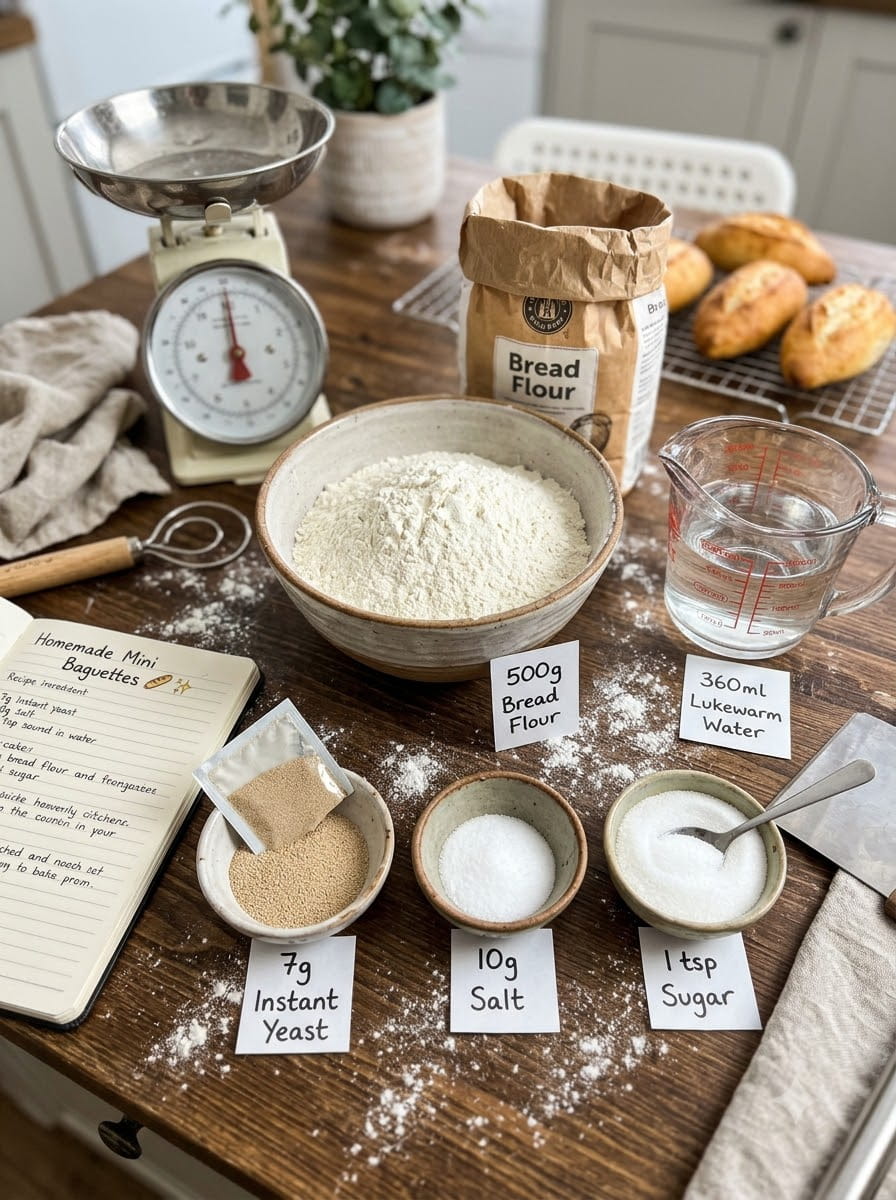
- 360 ml lukewarm water (100–104°F / 38–40°C)
- 500 g bread flour or all-purpose flour
- 7 g instant yeast
- 10 g salt
- 1 teaspoon sugar
Ingredient Notes
Lukewarm water. The water should be warm to the touch but not hot, about 38°C to 40°C (100°F to 104°F). Too hot and it can kill the yeast, too cold and the yeast will be slow. A kitchen thermometer takes the guesswork out.
Bread flour or all-purpose flour. Bread flour has a higher protein content, which creates more gluten, a chewier texture and a taller loaf. All-purpose flour also works well and gives a slightly softer crumb. Weigh the flour with a kitchen scale if you can, because baguette dough is sensitive to hydration. If you use cups, spoon and level rather than scooping.
Instant yeast. Instant yeast can be mixed directly with the water and flour. If you only have active dry yeast, use the same amount and let it foam in the warm water with the sugar for 5 to 10 minutes before adding the flour.
Salt. Salt gives flavor, strengthens the dough and controls the yeast. Do not skip it, as unsalted baguettes taste flat. Ten grams is about 2% of the flour weight, which is standard.
Sugar. One teaspoon gives the yeast a quick boost and helps the crust brown. It does not make the bread sweet.
How to Make Homemade Mini Baguettes
Step 1: Combine the Water, Yeast and Sugar
In a large mixing bowl, combine the lukewarm water, yeast and sugar. Stir gently. You can let it sit for a few minutes to see it become slightly foamy, though instant yeast does not require this.
Step 2: Mix the Dough
Add the flour and salt. Mix with a spatula, wooden spoon or your hand until a sticky, rough dough forms and there is no dry flour left. The dough will look messy and shaggy, which is exactly how it should look at this stage.
Step 3: First Rest
Cover the bowl with a plate, lid or damp towel and let the dough rest for 30 minutes. This rest allows the flour to hydrate fully and begins building gluten with no effort.
Step 4: Stretch and Fold
With a wet hand, gently pull one side of the dough upward and fold it toward the center. Rotate the bowl and repeat on all four sides. This is one set of stretch-and-folds. It strengthens the dough, adds structure and traps air for an open crumb.
Step 5: Repeat the Folds
Cover and rest for 30 minutes. Repeat the folding process two more times, allowing 30 minutes of rest between each fold. In total, you will complete three sets of stretch-and-folds. The dough should become smoother, more elastic and a little puffier after each set.
Step 6: Let the Dough Rise
Cover and let the dough rise until doubled in size, approximately 45 to 60 minutes. Rising times depend on the temperature of your kitchen. In a warm room, it may be faster, and in a cool one, it may take longer. The dough should look airy, domed and full of bubbles.
Step 7: Divide the Dough
Transfer the dough to a lightly floured surface. Use a bench scraper or knife to divide it into 4 to 6 equal portions. Four portions will give you larger mini baguettes, and six will give you smaller ones. For even baking, try to keep them the same size, and use a scale if you want to be precise.
Step 8: Shape the Baguettes
Gently shape each portion into a small baguette. Pat the dough into a rough rectangle, fold the top third down and the bottom third up like a letter, then seal the seam with your fingertips. Roll gently with your palms from the center outward, stretching it into an elongated shape without pressing out too much air. Aim for about 20 to 25 cm (8 to 10 inches) long.
The key is gentle handling. The air inside the dough is what creates the open, airy crumb.
Step 9: Final Proof
Place the baguettes seam-side down on a parchment-lined baking tray, spaced apart. For support, you can pleat a floured kitchen towel or parchment between them, so they hold their shape. Cover and let them rise for 30 to 40 minutes, until puffy. They should look visibly larger and feel soft and airy when gently touched.
Step 10: Preheat and Score
While the dough finishes proofing, preheat the oven to 450°F (230°C). Once the baguettes are ready, score each one diagonally with a sharp blade, razor or serrated knife. Make three to five quick, shallow cuts, about 0.5 cm deep, slightly overlapping each other. Confident, quick cuts work best.
Step 11: Create Steam
Place a heatproof pan of hot water on the lower oven rack to create steam. Be careful of the hot steam when opening the oven. Steam keeps the crust flexible at the start of baking, allowing the loaves to expand fully before the crust sets. It also helps produce a shiny, crackly crust.
Step 12: Bake
Place the tray in the oven and bake for 20 to 25 minutes, until deeply golden and crispy. If they brown unevenly, rotate the tray halfway through. They are done when they feel light, sound hollow when tapped on the bottom and have a deep golden color.
Step 13: Cool
Transfer the baguettes to a wire rack and allow them to cool slightly before serving. Listen for the crust crackling as it cools. This is often called singing, and it is a good sign. Baguettes are best enjoyed within a few hours of baking, while the crust is still crisp.
Tips for the Best Mini Baguettes
Do not add extra flour. The dough is meant to be sticky. Use wet hands for the folds and a light dusting of flour for shaping.
Be gentle when shaping. Keep as much air in the dough as possible for an open, airy crumb.
Use steam. It is essential for a crisp, golden crust and good rise.
Score decisively. A sharp blade and a quick motion prevent dragging and deflating the dough.
Preheat fully. A properly hot oven improves oven spring.
Weigh your ingredients. Precise measurements lead to consistent results.
Watch the dough, not just the clock. Rising times vary, so look for doubled volume and a puffy, airy feel.
Keep the baguettes evenly sized. This ensures they bake at the same rate.
Bake on the middle rack. The steam pan goes below.
Serve fresh. Baguettes are at their best the day they are baked.
Common Mistakes to Avoid
Flat baguettes. The dough may have been overproofed, handled too roughly or too wet. Shape gently and bake once the dough is puffy but still has some spring.
Dense crumb. The dough may not have risen enough, or the yeast may have been weak. Make sure the dough doubles and check the yeast’s freshness.
Pale, soft crust. The oven may not have been hot enough, or there was not enough steam. Preheat well and bake until deeply golden.
Crust too hard or thick. Overbaking or too much steam for too long can cause this. Check the loaves at 20 minutes.
Baguettes spread sideways. The dough was too slack, or the shaping was not tight enough. Create a bit of surface tension while shaping.
Scoring tears the dough. A dull blade or hesitation can cause this. Use a very sharp blade and cut quickly.
Uneven browning. Rotate the tray halfway through baking and keep the baguettes the same size.
Dough sticks to hands. Wet your hands or lightly flour them. Do not add too much flour to the dough.
Delicious Variations
Whole wheat mini baguettes. Replace up to 30% of the flour with whole wheat flour. You may need a little extra water.
Seeded baguettes. Brush with water and sprinkle with sesame, poppy or sunflower seeds before baking.
Garlic and herb baguettes. Add dried herbs and garlic powder to the dough or brush with garlic butter after baking.
Cheese baguettes. Sprinkle shredded cheese on top during the last 5 minutes of baking for a melty, golden crust.
Olive baguettes. Fold chopped olives into the dough during the last stretch-and-fold.
Rosemary and olive oil. Brush with olive oil and sprinkle with rosemary and flaky salt before baking.
Overnight baguettes. After mixing, refrigerate the dough overnight for a deeper, more developed flavor. Let it come to room temperature before shaping.
Baguette bites. Divide the dough into smaller portions to make mini rolls or bread sticks, adjusting the baking time.
Serving Ideas
For breakfast:
- Warm with butter and jam
- Sliced and toasted with honey
- Filled with eggs, cheese or avocado
- Dipped into hot chocolate or café au lait
For sandwiches:
- Ham, cheese and butter, the classic French jambon-beurre
- Turkey, lettuce and tomato
- Chicken salad or tuna salad
- Caprese with mozzarella, tomato and basil
- Roast beef with horseradish
With meals:
- Alongside soups, stews and salads
- With pasta dishes, to mop up the sauce
- With a cheese board, charcuterie and olives
As appetizers and snacks:
- Sliced for bruschetta topped with tomatoes and basil
- Garlic bread brushed with garlic butter
- With hummus, olive tapenade or dips
- Croutons from leftovers
How to Store Mini Baguettes
At room temperature: Baguettes are best the day they are baked. Store leftover baguettes in a paper bag or wrapped in a clean kitchen towel for up to a day. Avoid plastic bags, which soften the crust.
To re-crisp: Warm the baguettes in a 175°C to 190°C (350°F to 375°F) oven for 5 to 8 minutes. A quick sprinkle of water on the crust before reheating helps revive them.
In the freezer: For longer storage, cool the baguettes completely, wrap them tightly or place in a freezer-safe bag and freeze for up to 3 months. Reheat directly from frozen in a hot oven for 10 to 15 minutes.
Using stale baguettes: Turn them into croutons, breadcrumbs, French toast, panzanella or bread pudding.
Avoid the refrigerator: It can make bread stale more quickly.
Nutrition Notes
Baguettes are made with flour, water, yeast and salt, so they are a source of carbohydrates and some protein. The recipe contains very little fat and no dairy or eggs. Exact nutritional values depend on your ingredients and portion size. The bread contains gluten, so it is not suitable for people with celiac disease or gluten intolerance. If you have dietary restrictions or a health condition, check with your doctor or a registered dietitian.
Frequently Asked Questions
Can I use all-purpose flour instead of bread flour?
Yes. The recipe works with either. Bread flour gives a chewier, taller result, and all-purpose flour gives a slightly softer crumb.
Why is the dough so sticky?
This is a high-hydration dough, which is what gives baguettes their open, airy crumb. Use wet hands for the folds and a dusting of flour for shaping.
Do I need to knead the dough?
No. The stretch-and-fold technique builds gluten without traditional kneading.
How do I create steam without a special oven?
Place a heatproof pan on the lower rack while the oven preheats, and pour hot water into it just as you load the baguettes. You can also spritz the oven walls and the loaves with water. Be careful of the hot steam.
Do I need a baguette pan?
No. A baking tray lined with parchment works fine. A baguette pan can help the loaves hold their shape.
How do I score the baguettes?
Use a very sharp blade, razor or serrated knife. Make quick, shallow, slightly diagonal cuts about 0.5 cm deep.
Why did my baguettes not rise?
The yeast may be old, the water may have been too hot or too cold, or the dough may not have had enough time. Check the yeast and use lukewarm water.
Can I make the dough ahead of time?
Yes. After the folds and initial rise, you can refrigerate the dough overnight, then shape, proof and bake the next day.
How many baguettes does this recipe make?
It makes 4 to 6 mini baguettes, depending on how you divide the dough.
Can I double the recipe?
Yes. Double the ingredients, and bake in batches or on multiple trays if needed.
Why is my crust not crispy?
Not enough steam, too low an oven temperature or underbaking can cause it. Make sure the oven is hot and bake until deeply golden. Eat the baguettes the same day for the crispest crust.
Can I use active dry yeast?
Yes. Use the same amount and dissolve it in the warm water with the sugar for 5 to 10 minutes before adding the flour.
Final Thoughts
Homemade mini baguettes are proof that you do not need professional equipment or complicated kneading to bake bread that looks and tastes like it came from a French bakery. With five simple ingredients, a few gentle folds and a hot, steamy oven, you can pull a tray of golden, crackling baguettes from your own oven.
Serve them warm with butter, pile them with your favorite sandwich fillings or tear them apart at the table with soup. The aroma alone is worth the effort.
Bake a batch this weekend, and enjoy the satisfaction of that first crisp, golden bite.
Print
Homemade Mini Baguettes
Ingredients
- 360 ml lukewarm water (100–104°F / 38–40°C)
- 500 g bread flour or all-purpose flour
- 7 g instant yeast
- 10 g salt
- 1 teaspoon sugar
Instructions
In a large mixing bowl, combine the lukewarm water, yeast and sugar. Stir gently. You can let it sit for a few minutes to see it become slightly foamy, though instant yeast does not require this.
Add the flour and salt. Mix with a spatula, wooden spoon or your hand until a sticky, rough dough forms and there is no dry flour left. The dough will look messy and shaggy, which is exactly how it should look at this stage.
Cover the bowl with a plate, lid or damp towel and let the dough rest for 30 minutes. This rest allows the flour to hydrate fully and begins building gluten with no effort.
With a wet hand, gently pull one side of the dough upward and fold it toward the center. Rotate the bowl and repeat on all four sides. This is one set of stretch-and-folds. It strengthens the dough, adds structure and traps air for an open crumb.
Cover and rest for 30 minutes. Repeat the folding process two more times, allowing 30 minutes of rest between each fold. In total, you will complete three sets of stretch-and-folds. The dough should become smoother, more elastic and a little puffier after each set.
Cover and let the dough rise until doubled in size, approximately 45 to 60 minutes. Rising times depend on the temperature of your kitchen. In a warm room, it may be faster, and in a cool one, it may take longer. The dough should look airy, domed and full of bubbles.
Transfer the dough to a lightly floured surface. Use a bench scraper or knife to divide it into 4 to 6 equal portions. Four portions will give you larger mini baguettes, and six will give you smaller ones. For even baking, try to keep them the same size, and use a scale if you want to be precise.
Gently shape each portion into a small baguette. Pat the dough into a rough rectangle, fold the top third down and the bottom third up like a letter, then seal the seam with your fingertips. Roll gently with your palms from the center outward, stretching it into an elongated shape without pressing out too much air. Aim for about 20 to 25 cm (8 to 10 inches) long.
The key is gentle handling. The air inside the dough is what creates the open, airy crumb.
Place the baguettes seam-side down on a parchment-lined baking tray, spaced apart. For support, you can pleat a floured kitchen towel or parchment between them, so they hold their shape. Cover and let them rise for 30 to 40 minutes, until puffy. They should look visibly larger and feel soft and airy when gently touched.
While the dough finishes proofing, preheat the oven to 450°F (230°C). Once the baguettes are ready, score each one diagonally with a sharp blade, razor or serrated knife. Make three to five quick, shallow cuts, about 0.5 cm deep, slightly overlapping each other. Confident, quick cuts work best.
Place a heatproof pan of hot water on the lower oven rack to create steam. Be careful of the hot steam when opening the oven. Steam keeps the crust flexible at the start of baking, allowing the loaves to expand fully before the crust sets. It also helps produce a shiny, crackly crust.
Place the tray in the oven and bake for 20 to 25 minutes, until deeply golden and crispy. If they brown unevenly, rotate the tray halfway through. They are done when they feel light, sound hollow when tapped on the bottom and have a deep golden color.
Transfer the baguettes to a wire rack and allow them to cool slightly before serving. Listen for the crust crackling as it cools. This is often called singing, and it is a good sign. Baguettes are best enjoyed within a few hours of baking, while the crust is still crisp.