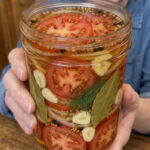
Ingredients
Here is everything you need to make about 8 servings of honey garlic pickled tomato slices with onions:
- 2 lbs firm Roma or vine-ripened tomatoes, sliced 1/4-inch thick
- 1 large sweet onion, thinly sliced
- 2 cups white vinegar
- 2 cups water
- 2 tablespoons pickling salt or kosher salt
- 1/3 cup honey
- 6 cloves garlic, thinly sliced
- 2 sprigs fresh dill (or 1 teaspoon dill seeds)
- 1 teaspoon whole black peppercorns
- 1 teaspoon mustard seeds
- 1 teaspoon coriander seeds
- 1/2 teaspoon celery seeds
- 1/2 teaspoon crushed red pepper flakes (optional)
- 2 bay leaves
Instructions
Follow these simple steps for flavorful, tender-crisp tomato slices every time.
Choose firm tomatoes that are just ripe to help them hold their shape during pickling. They should feel heavy for their size and have no soft spots.
Wash the tomatoes thoroughly and slice them into 1/4-inch rounds using a sharp serrated knife. Gently pat the slices with a paper towel to remove excess surface moisture. Thinly slice the sweet onion.
In a large clean glass jar, or divided between two quart-sized jars, alternate layers of tomato slices and onion slices. Layer gently and avoid pressing down hard, since tomato slices bruise easily.
Tuck the sliced garlic, fresh dill, bay leaves, black peppercorns, mustard seeds, coriander seeds, celery seeds, and crushed red pepper flakes evenly between the layers. Spreading the seasonings throughout the jar helps each slice take on flavor.
In a medium saucepan, combine the white vinegar, water, pickling salt, and honey. Heat over medium heat, stirring until the salt has completely dissolved and the honey is fully incorporated. Do not boil. Gentle heat dissolves everything while protecting the tomatoes’ texture and the honey’s flavor.
Allow the brine to cool for about 5 minutes so it is warm but not boiling. Pouring a very hot brine over delicate tomatoes can make them soft.
Slowly pour the warm brine over the tomatoes until they are completely submerged. Pouring slowly helps prevent the slices from shifting and breaking. Tap the jar gently to release trapped air bubbles.
Place a small pickle weight or a clean food-safe weight on top if needed to keep the tomato slices beneath the brine. Slices that float above the liquid can spoil faster.
Seal the jars tightly and allow them to cool to room temperature on the counter.
Refrigerate for at least 24 hours before serving. For the richest sweet and tangy flavor, allow them to pickle for 2 to 3 days.
Serve chilled on sandwiches, burgers, salads, avocado toast, charcuterie boards, grilled meats, or alongside fried chicken.