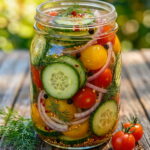
Ingredients
This recipe uses a simple combination of fresh vegetables, aromatics, and a basic vinegar brine. Here’s what you’ll need:
Vegetables and Aromatics
- 2 medium cucumbers, sliced
- 1½ cups cherry tomatoes
- 1 small onion, sliced
- 2–3 garlic cloves, sliced
- 3–4 sprigs fresh dill
- 1 tsp mustard seeds
- ½–1 tsp red chili flakes
- ½ tsp black peppercorns
Brine
- 1 cup white vinegar, 5% acidity
- 1 cup water
- 1 tbsp salt
- 1–2 tbsp sugar
Instructions
This recipe comes together in just a few simple steps, with no cooking of the vegetables required.
Wash all the vegetables thoroughly and prepare a clean glass jar for pickling. Starting with a clean jar helps ensure the best flavor and shelf life for your pickles.
Slice the cucumbers and onion into your desired thickness. Keep the cherry tomatoes whole for a satisfying pop of juiciness, or cut them in half if you prefer them to absorb the brine more quickly and evenly.
Place half of the fresh dill, sliced garlic, mustard seeds, black peppercorns, and chili flakes in the bottom of the jar. Layering the aromatics at the bottom helps ensure their flavor infuses throughout the entire jar as the brine settles in.
Pack the sliced cucumbers, cherry tomatoes, and onion into the jar on top of the aromatics, filling the jar snugly but without overly crushing the vegetables.
Add the remaining dill, garlic, mustard seeds, black peppercorns, and chili flakes on top of the packed vegetables. This ensures every layer of the jar gets a good amount of flavor.
In a saucepan, combine the white vinegar, water, salt, and sugar. Gently heat the mixture just until the salt and sugar fully dissolve — you don’t need to bring it to a rolling boil, just enough heat to dissolve everything evenly.
Carefully pour the warm brine into the jar, making sure all the vegetables are completely covered. Full submersion is important for even pickling and helps prevent spoilage.
Let the jar cool to room temperature on the counter before sealing and refrigerating. This helps prevent thermal shock and ensures safe, gradual cooling.
Seal the jar tightly and refrigerate for at least 24 hours.
For the best flavor, let the pickles sit for 2 to 3 days before serving. This resting period allows the vegetables to fully absorb the tangy, garlicky, herby brine, resulting in a much more flavorful pickle than if eaten too soon.
Keep the jar refrigerated at all times, and always use clean utensils when removing pickles from the jar to help prevent contamination and extend freshness.