

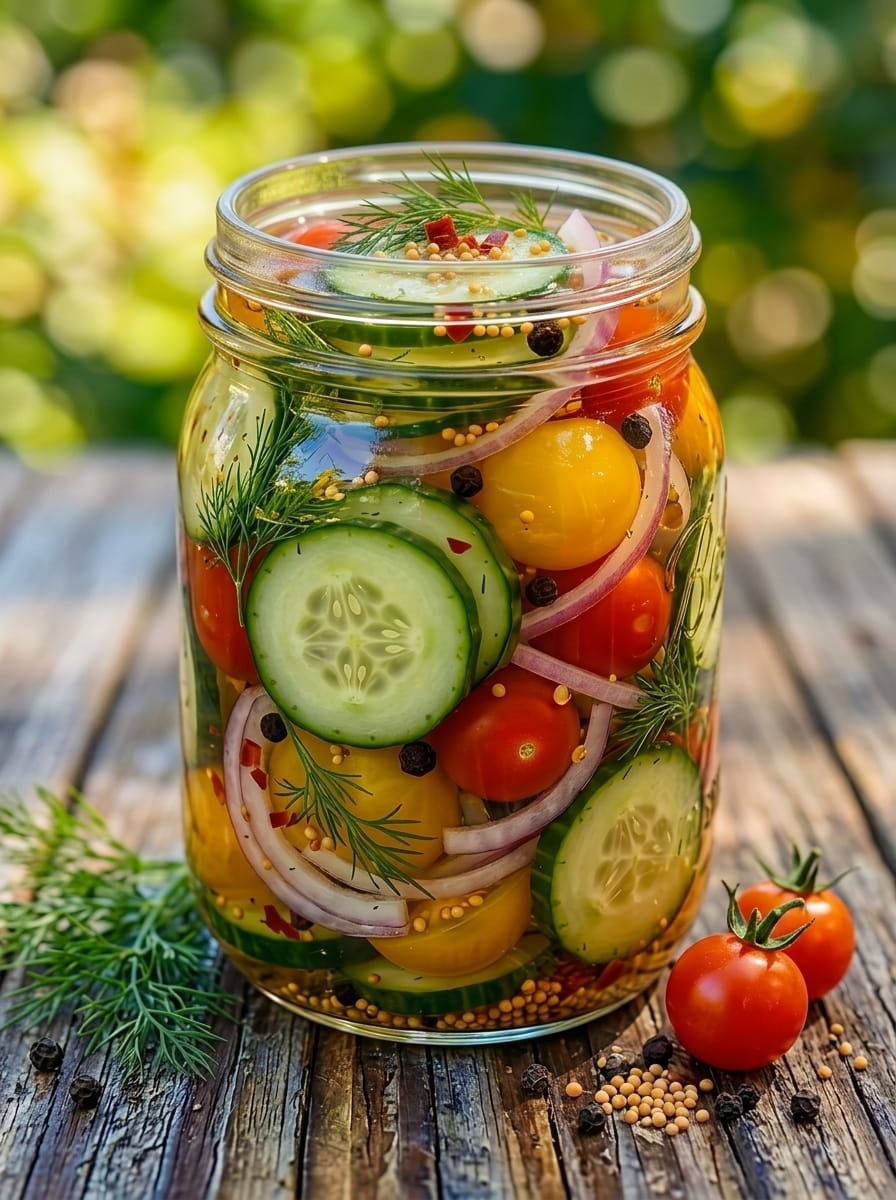
Mixed Vegetable Refrigerator Pickles: A Crisp, Garlicky, No-Fuss Homemade Pickle
Meta Description: Learn how to make Mixed Vegetable Refrigerator Pickles with cucumbers, cherry tomatoes, onion, and fresh dill. An easy, tangy, garlicky homemade pickle recipe.
If you’ve ever wanted to get into homemade pickling but felt intimidated by canning equipment and processing times, this recipe is exactly where to start. Mixed Vegetable Refrigerator Pickles combine crunchy cucumbers, juicy cherry tomatoes, sliced onion, and fresh dill in a simple, tangy vinegar brine loaded with garlic and aromatic pickling spices. No canning experience, special equipment, or complicated techniques required — just a few minutes of prep and a little patience while the flavors develop in your fridge.
What makes this recipe so appealing is its simplicity and versatility. Instead of pickling just one vegetable, this mixed medley combines several different textures and flavors in a single jar, creating a well-rounded, colorful pickle that works as a snack, a side dish, a sandwich topping, or a bright addition to any summer meal. The vinegar brine, infused with garlic, dill, mustard seeds, and a touch of chili, delivers that classic tangy, herby, slightly spicy pickle flavor in every single bite.
Below, you’ll find the complete recipe along with ingredient breakdowns, step-by-step instructions, storage guidance, flavor variations, and creative ways to serve these pickles once they’re ready.
Why You’ll Love This Recipe
- Incredibly easy. No canning equipment or special skills required — just slice, layer, brine, and chill.
- Quick prep time. With just a few minutes of hands-on work, most of the “work” here is simply letting the jar sit in the fridge.
- A variety of textures and flavors. Combining cucumbers, tomatoes, and onion in one jar creates a more dynamic, interesting pickle than a single-vegetable version.
- Customizable heat and flavor. Easily adjust the chili flakes, garlic, or herbs to suit your taste.
- Great fridge staple. Once made, these pickles are always ready to snack on or add to a meal.
- Perfect for beginners. This is one of the easiest possible ways to get started with homemade pickling.
Ingredients You’ll Need
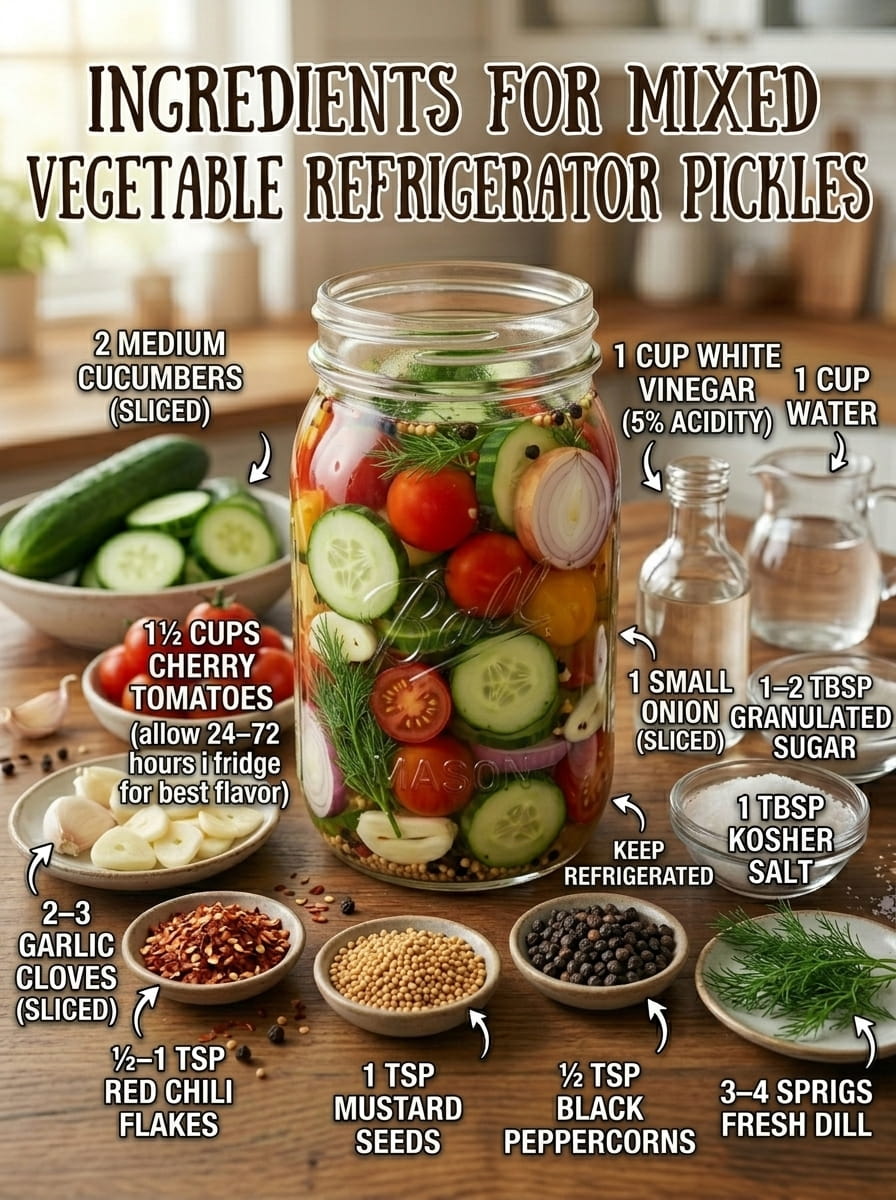
This recipe uses a simple combination of fresh vegetables, aromatics, and a basic vinegar brine. Here’s what you’ll need:
Vegetables and Aromatics
- 2 medium cucumbers, sliced
- 1½ cups cherry tomatoes
- 1 small onion, sliced
- 2–3 garlic cloves, sliced
- 3–4 sprigs fresh dill
- 1 tsp mustard seeds
- ½–1 tsp red chili flakes
- ½ tsp black peppercorns
Brine
- 1 cup white vinegar, 5% acidity
- 1 cup water
- 1 tbsp salt
- 1–2 tbsp sugar
Understanding Each Ingredient’s Role
- Cucumbers provide the classic crisp, refreshing crunch that forms the backbone of most pickle recipes.
- Cherry tomatoes add a juicy, slightly sweet contrast to the tangy brine, along with a pop of color.
- Onion contributes a sharp, savory bite that mellows and sweetens slightly as it pickles.
- Garlic cloves infuse the entire jar with a bold, aromatic punch.
- Fresh dill brings that signature herby, slightly grassy flavor that pairs perfectly with cucumbers and onion.
- Mustard seeds add a gentle tang and pleasant texture, classic in pickling blends.
- Red chili flakes provide a background heat that builds gradually with each bite.
- Black peppercorns contribute warm, subtle spice that rounds out the brine.
- White vinegar (5% acidity) forms the tangy, acidic base of the brine and acts as a natural preservative. Using vinegar with the correct acidity level is important for both flavor and food safety.
- Water balances the vinegar’s sharpness while maintaining enough acidity for safe pickling.
- Salt enhances flavor throughout the brine and supports the pickling process.
- Sugar softens the vinegar’s intensity with a touch of sweetness, helping balance the overall flavor.
Step-by-Step Instructions
This recipe comes together in just a few simple steps, with no cooking of the vegetables required.
Step 1: Wash and Prep
Wash all the vegetables thoroughly and prepare a clean glass jar for pickling. Starting with a clean jar helps ensure the best flavor and shelf life for your pickles.
Step 2: Slice the Vegetables
Slice the cucumbers and onion into your desired thickness. Keep the cherry tomatoes whole for a satisfying pop of juiciness, or cut them in half if you prefer them to absorb the brine more quickly and evenly.
Step 3: Layer the Aromatics
Place half of the fresh dill, sliced garlic, mustard seeds, black peppercorns, and chili flakes in the bottom of the jar. Layering the aromatics at the bottom helps ensure their flavor infuses throughout the entire jar as the brine settles in.
Step 4: Pack the Vegetables
Pack the sliced cucumbers, cherry tomatoes, and onion into the jar on top of the aromatics, filling the jar snugly but without overly crushing the vegetables.
Step 5: Add the Remaining Aromatics
Add the remaining dill, garlic, mustard seeds, black peppercorns, and chili flakes on top of the packed vegetables. This ensures every layer of the jar gets a good amount of flavor.
Step 6: Make the Brine
In a saucepan, combine the white vinegar, water, salt, and sugar. Gently heat the mixture just until the salt and sugar fully dissolve — you don’t need to bring it to a rolling boil, just enough heat to dissolve everything evenly.
Step 7: Pour the Brine
Carefully pour the warm brine into the jar, making sure all the vegetables are completely covered. Full submersion is important for even pickling and helps prevent spoilage.
Step 8: Cool
Let the jar cool to room temperature on the counter before sealing and refrigerating. This helps prevent thermal shock and ensures safe, gradual cooling.
Step 9: Seal and Refrigerate
Seal the jar tightly and refrigerate for at least 24 hours.
Step 10: Let the Flavors Develop
For the best flavor, let the pickles sit for 2 to 3 days before serving. This resting period allows the vegetables to fully absorb the tangy, garlicky, herby brine, resulting in a much more flavorful pickle than if eaten too soon.
Step 11: Store and Serve
Keep the jar refrigerated at all times, and always use clean utensils when removing pickles from the jar to help prevent contamination and extend freshness.
Spicy Variation
If you love a little extra heat, this recipe is easy to spice up. Add a few slices of fresh jalapeño to the jar along with the other vegetables, or simply increase the amount of red chili flakes in both layers of aromatics. Either adjustment adds a noticeable, building spice that pairs beautifully with the tangy, garlicky brine.
How Long Do These Refrigerator Pickles Last?
Stored properly in an airtight jar in the refrigerator, these mixed vegetable pickles will typically stay fresh for up to 2 weeks. It’s important to note that these are refrigerator pickles, not shelf-stable canned pickles — they have not gone through a hot water bath canning process and must always be kept refrigerated.
Always use clean utensils when serving to avoid introducing bacteria into the jar, which can shorten shelf life. Discard the pickles if you notice any signs of spoilage, such as mold, an unpleasant or off odor, sliminess, or unusual discoloration.
Tips for the Best Mixed Vegetable Refrigerator Pickles
- Use fresh, firm vegetables. Crisp cucumbers, firm cherry tomatoes, and fresh onion result in the best texture once pickled.
- Slice cucumbers evenly. Consistent thickness ensures even pickling and a more enjoyable texture throughout the jar.
- Don’t skip the resting time. While technically ready after 24 hours, the flavor is significantly better after 2 to 3 days, once the brine has had time to fully penetrate the vegetables.
- Use the right vinegar acidity. Sticking to 5% acidity white vinegar ensures the brine has the correct balance of tang and preservation power.
- Fully submerge the vegetables. Any vegetables exposed to air above the brine line are more prone to spoilage, so make sure the liquid completely covers everything.
- Adjust sweetness to taste. Start with 1 tablespoon of sugar and add more if you prefer a slightly sweeter pickle, tasting the brine before pouring if desired.
Flavor Variations to Try
Once you’ve made the classic version, try these variations to switch things up:
- Extra Spicy: Add sliced jalapeños or increase the red chili flakes for a bigger heat kick, as suggested in the spicy variation above.
- Herb Swap: Replace or supplement the dill with fresh thyme, tarragon, or basil for a different aromatic profile.
- Sweet and Tangy: Increase the sugar slightly for a more pronounced sweet-tangy balance, similar to a bread-and-butter pickle style.
- Extra Garlicky: Double the garlic cloves for a bolder, more pungent flavor throughout the jar.
- Bell Pepper Addition: Add sliced bell peppers to the mix for extra color, crunch, and a touch of natural sweetness.
- Curry-Spiced Version: Add ½ teaspoon of curry powder to the brine for a warm, unique twist on the classic flavor profile.
Delicious Ways to Use These Pickles
These crisp, tangy pickles are a wonderfully versatile addition to all kinds of meals. Here are some of the best ways to enjoy them:
- Snacking Straight From the Jar – Simple, refreshing, and endlessly satisfying on their own.
- Side Dish – Serve alongside grilled meats, sandwiches, or a summer meal for a bright, tangy accompaniment.
- Sandwiches – Layer the cucumbers and onions into sandwiches or burgers for extra crunch and tang.
- Salads – Chop and toss into green salads, potato salads, or pasta salads for a burst of tangy flavor.
- Charcuterie Boards – Add a small bowl to your next charcuterie or grazing board for color, crunch, and acidity.
- Grain Bowls – Add to rice, quinoa, or farro bowls alongside roasted vegetables and a protein of your choice.
- Tacos – Chop and sprinkle over tacos for a bright, tangy contrast to rich, savory fillings.
- Bloody Marys – Use the pickled cherry tomatoes and cucumber slices as a fun, tangy garnish.
- Cheese Boards – Pair with sharp cheeses for a tangy contrast that cuts through rich, creamy flavors.
- Summer Picnics and Barbecues – Bring a jar along to add a fresh, crunchy element to any outdoor gathering.
Frequently Asked Questions
Can I use pickling cucumbers instead of regular cucumbers? Yes, pickling cucumbers (such as Kirby cucumbers) tend to have a firmer texture and fewer seeds, making them an excellent choice for this recipe. Regular slicing cucumbers will also work, though the texture may be slightly softer.
Do I need to peel the cucumbers before pickling? No, peeling is not necessary. The skin helps the cucumber slices maintain their structure and adds a nice visual contrast to the jar.
Can I use grape tomatoes instead of cherry tomatoes? Yes, grape tomatoes work just as well and can be used interchangeably with cherry tomatoes in this recipe.
Why do I need to use 5% acidity vinegar specifically? Vinegar with 5% acidity provides the right balance of tang and preservation power for safe, effective pickling. Using a vinegar with lower acidity can affect both the flavor and the safety of the finished pickles.
Can I reuse the brine for a second batch of vegetables? It’s best to make a fresh batch of brine each time to ensure proper acidity and food safety. Reusing brine can dilute its preservative strength and lead to inconsistent flavor.
How do I know if my pickles have gone bad? Signs of spoilage include mold, an unpleasant or sour odor beyond the normal tangy pickle smell, sliminess, or unusual discoloration. If you notice any of these signs, discard the pickles.
Can I make a larger batch of this recipe? Yes, this recipe scales up easily. Simply increase the vegetables and brine ingredients proportionally, and divide the mixture among multiple clean jars as needed.
Final Thoughts
Mixed Vegetable Refrigerator Pickles are proof that homemade pickling doesn’t have to be complicated. With crisp cucumbers, juicy cherry tomatoes, sharp onion, and a garlicky, herby vinegar brine, this recipe delivers big, tangy flavor with minimal effort and no special equipment required. It’s the perfect starting point for anyone new to pickling, while still being flavorful enough to earn a permanent spot in the fridge of experienced picklers too.
Make a batch, let it chill for a couple of days, and enjoy these crisp, refreshing pickles as a snack, side dish, or flavorful addition to sandwiches, salads, and summer meals all season long.
Print
Mixed Vegetable Refrigerator Pickles
Ingredients
This recipe uses a simple combination of fresh vegetables, aromatics, and a basic vinegar brine. Here’s what you’ll need:
Vegetables and Aromatics
- 2 medium cucumbers, sliced
- 1½ cups cherry tomatoes
- 1 small onion, sliced
- 2–3 garlic cloves, sliced
- 3–4 sprigs fresh dill
- 1 tsp mustard seeds
- ½–1 tsp red chili flakes
- ½ tsp black peppercorns
Brine
- 1 cup white vinegar, 5% acidity
- 1 cup water
- 1 tbsp salt
- 1–2 tbsp sugar
Instructions
This recipe comes together in just a few simple steps, with no cooking of the vegetables required.
Wash all the vegetables thoroughly and prepare a clean glass jar for pickling. Starting with a clean jar helps ensure the best flavor and shelf life for your pickles.
Slice the cucumbers and onion into your desired thickness. Keep the cherry tomatoes whole for a satisfying pop of juiciness, or cut them in half if you prefer them to absorb the brine more quickly and evenly.
Place half of the fresh dill, sliced garlic, mustard seeds, black peppercorns, and chili flakes in the bottom of the jar. Layering the aromatics at the bottom helps ensure their flavor infuses throughout the entire jar as the brine settles in.
Pack the sliced cucumbers, cherry tomatoes, and onion into the jar on top of the aromatics, filling the jar snugly but without overly crushing the vegetables.
Add the remaining dill, garlic, mustard seeds, black peppercorns, and chili flakes on top of the packed vegetables. This ensures every layer of the jar gets a good amount of flavor.
In a saucepan, combine the white vinegar, water, salt, and sugar. Gently heat the mixture just until the salt and sugar fully dissolve — you don’t need to bring it to a rolling boil, just enough heat to dissolve everything evenly.
Carefully pour the warm brine into the jar, making sure all the vegetables are completely covered. Full submersion is important for even pickling and helps prevent spoilage.
Let the jar cool to room temperature on the counter before sealing and refrigerating. This helps prevent thermal shock and ensures safe, gradual cooling.
Seal the jar tightly and refrigerate for at least 24 hours.
For the best flavor, let the pickles sit for 2 to 3 days before serving. This resting period allows the vegetables to fully absorb the tangy, garlicky, herby brine, resulting in a much more flavorful pickle than if eaten too soon.
Keep the jar refrigerated at all times, and always use clean utensils when removing pickles from the jar to help prevent contamination and extend freshness.






