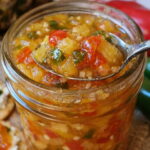
Ingredients
Here is everything you need to make this pineapple jalapeño jelly:
- 4 cups fresh pineapple, finely crushed
- 4 fresh jalapeños, finely diced
- 1 1/2 cups granulated sugar
- 1/2 cup apple cider vinegar
- 2 tablespoons fresh lemon juice
- 1 tablespoon fresh lime juice
- 1 box powdered fruit pectin
- 1/2 teaspoon salt
- 1 teaspoon lemon zest
You will also need clean jars with lids for storing the finished jelly.
Instructions
Follow these steps for a glossy, spreadable result.
Wash your jars and lids in hot, soapy water, rinse well, and set them on the counter. Measure all of your ingredients before you start, because the jelly comes together quickly and you’ll want everything ready. Finely crush the pineapple and finely dice the jalapeños.
Add the crushed pineapple, diced jalapeños, sugar, apple cider vinegar, lemon juice, lime juice, lemon zest, and salt to a large saucepan. Use a roomy pot, since the mixture bubbles up and expands as it boils.
Stir the mixture well and bring it to a full rolling boil over medium-high heat, stirring frequently. A full rolling boil is one that keeps bubbling vigorously even when you stir it.
Once the mixture is boiling, add the powdered pectin and stir continuously so it dissolves evenly without clumping.
Return the mixture to a vigorous boil and cook for 1 to 2 minutes, stirring constantly. Watch the timing carefully, since boiling too long can weaken the set.
Remove the pot from the heat and skim off any foam from the surface with a spoon. Skimming gives the finished jelly a clearer, glossier appearance.
Carefully ladle the hot jelly into clean jars, leaving about 1/4 inch of space at the top. Use a funnel if you have one to keep the rims clean, and wipe the rims with a damp paper towel before closing.
Let the jars cool at room temperature, then refrigerate until the jelly is fully set. Don’t be alarmed if the jelly looks thin while it’s still warm. Jelly firms up as it cools.
Chill for at least 4 hours before serving for the best glossy, spreadable texture. Some jellies need a full day to reach their final consistency.
Serve over cream cheese with crackers, use as a glaze for grilled chicken, or spread onto sandwiches, burgers, and charcuterie boards.