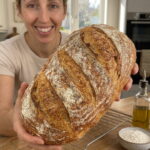
Ingredients
- 3½ cups bread flour, 440 g
- 1½ cups warm water, 360 ml
- 2¼ teaspoons active dry yeast, 7 g
- 1½ teaspoons salt, 9 g
- 1 tablespoon olive oil
Instructions
In a large bowl, combine the warm water and active dry yeast. Let stand for 5 to 10 minutes until foamy. A creamy layer of foam on top shows the yeast is alive. If nothing happens after 10 minutes, the yeast may be old or the water may have been too hot or too cold. Start over with fresh yeast.
Add the bread flour, salt, and olive oil. Mix until a rough, slightly sticky dough forms. Use a wooden spoon or your hand. The dough should come together into a shaggy mass with no dry flour left.
Knead by hand for 8 to 10 minutes, or use a stand mixer with a dough hook for 5 to 7 minutes, until the dough becomes smooth and elastic.
To knead by hand, turn the dough onto a lightly floured surface. Push the dough away from you with the heel of your hand, fold it back over itself, and rotate it a quarter turn. Repeat. At first the dough will be sticky, but it will become smoother and less tacky as you work it. Add a very small sprinkle of flour only if the dough sticks heavily to your hands.
The dough is ready when it feels smooth, springs back slowly when poked, and passes the windowpane test. To try this test, pinch off a small piece and stretch it gently. If it stretches into a thin, translucent membrane without tearing, the gluten is well developed.
Place the dough in a lightly greased bowl. Cover and let rise in a warm place for 1 to 1½ hours, or until doubled in size. Cover the bowl with a clean towel, plastic wrap, or a plate. A turned-off oven with the light on, or a spot near a warm appliance, works well. The dough is ready when it looks puffy and a finger pressed into it leaves a dent that fills back in slowly.
Gently deflate the dough and shape it into a round or oval loaf. Place it on a parchment-lined baking sheet.
To shape an oval loaf, pat the dough into a rough rectangle, fold the top third down and the bottom third up like a letter, then roll it up from the short end and pinch the seam closed. Roll gently to form a loaf about 10 to 12 inches long with slightly tapered ends. For a round loaf, pull the edges toward the center, pinch to seal, and flip it seam-side down. Cup your hands around the dough and rotate to tighten the surface.
Cover loosely and let rise for 30 to 45 minutes, until puffy. A lightly floured towel or greased plastic wrap works well as a cover. The loaf should look noticeably larger and feel soft. If you gently press it with a floured finger, the dent should spring back slowly.
Preheat the oven to 425°F (220°C). Place an empty metal baking pan on a lower rack to create steam. Start the preheat during the second rise so that the oven is fully hot when the loaf is ready. Use a metal pan, not glass, which can shatter when hot water hits it.
Use a sharp knife to make one or two shallow slashes across the top of the loaf. Cut about ¼ to ½ inch deep, with a quick, confident motion. Scoring gives the bread a place to expand as it bakes, and it creates the classic rustic look.
Place the bread in the oven. Carefully pour a cup of hot water into the empty metal pan to create steam, avoiding splashes. Bake for 25 to 35 minutes, until the crust is golden brown and the loaf sounds hollow when tapped. Close the door quickly to trap the steam. Use oven mitts and keep your face away from the rising steam. The internal temperature of the finished bread should be about 190°F to 200°F (88°C to 93°C).
Transfer the bread to a wire rack and let cool for at least 30 to 45 minutes before slicing. Cooling allows the crumb to finish setting. Slicing too soon can result in a gummy interior. For the crispiest crust, leave the loaf uncovered while it cools, so air can circulate around it.