
Rustic Italian Bread: A Golden, Crusty Homemade Loaf With a Soft, Airy Crumb 🥖🇮🇹✨
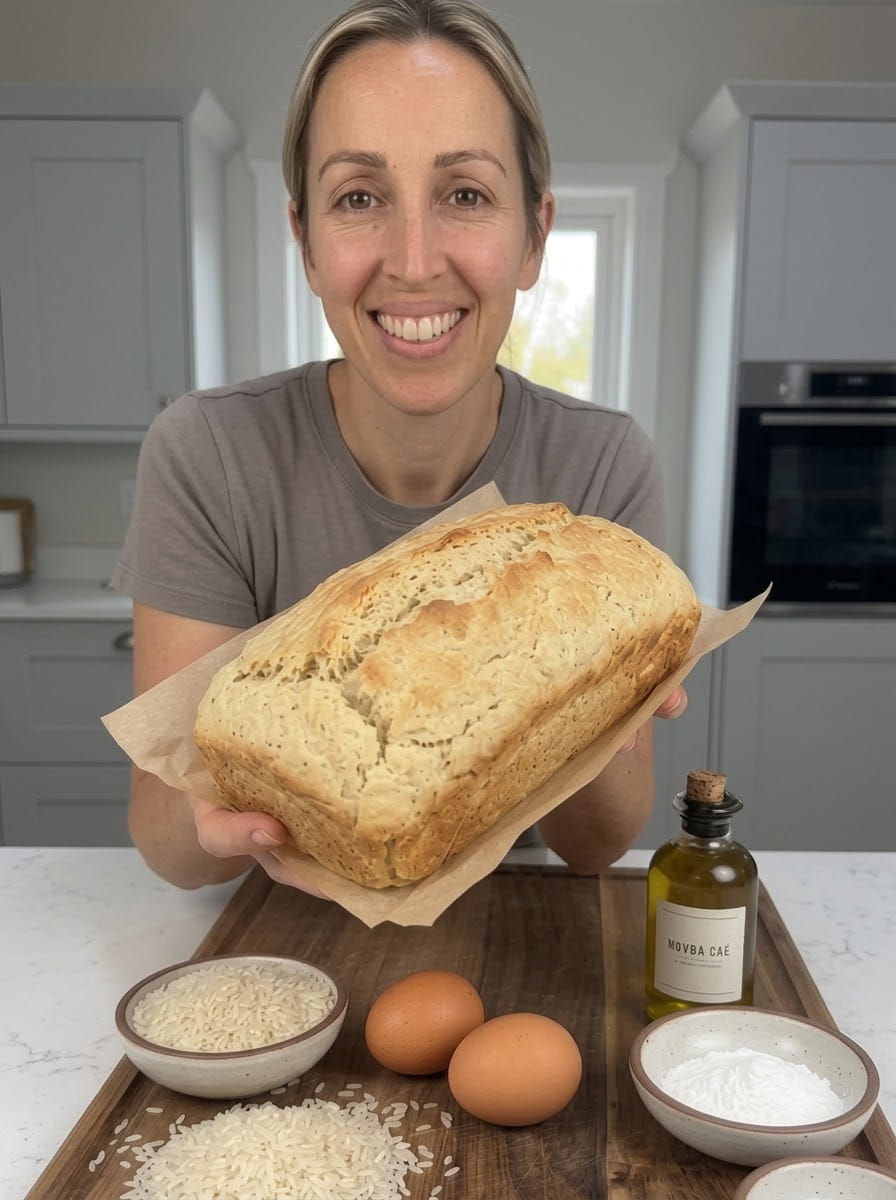
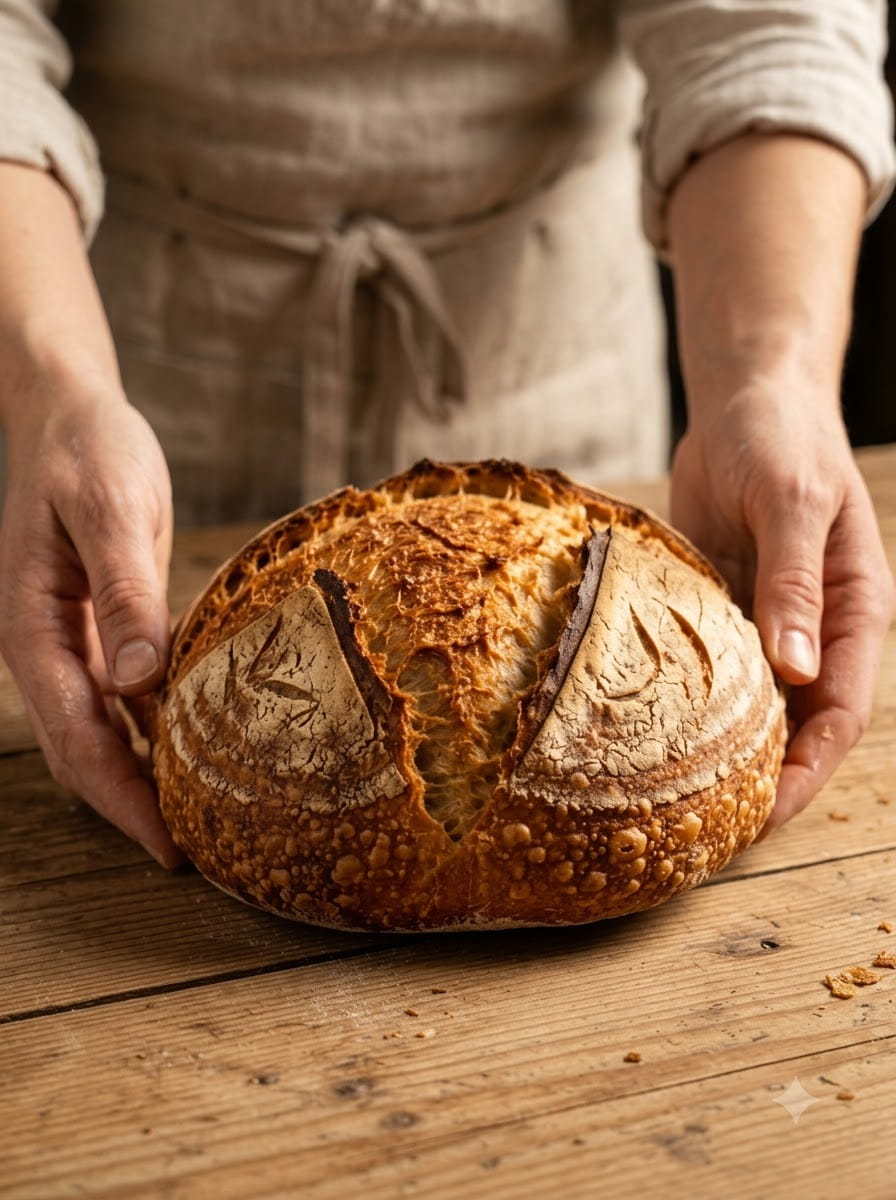
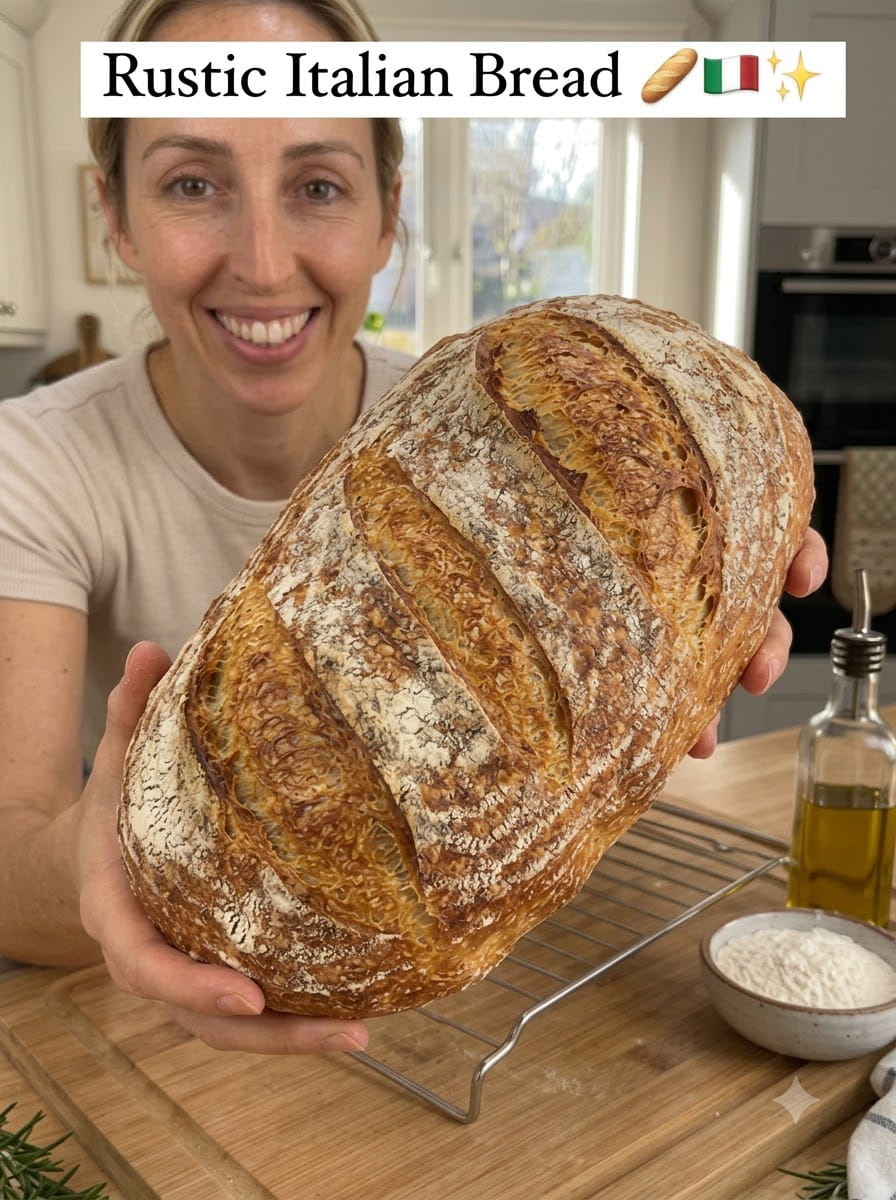
This Rustic Italian Bread features a beautifully golden, crispy crust and a soft, airy interior. Made with simple pantry ingredients, this homemade loaf brings classic bakery-style flavor straight to your kitchen. It is perfect for serving with pasta, dipping in olive oil, making sandwiches, or enjoying warm with butter.
Italian bread is the kind of loaf that makes a meal feel complete. It sits on the table next to a bowl of pasta, soaks up the last of the sauce, and disappears faster than anything else on the plate. The homemade version is easier than most people expect. It uses just five ingredients: bread flour, warm water, active dry yeast, salt, and a touch of olive oil. There is no starter to maintain, no overnight wait, and no special equipment beyond a baking sheet and a pan for steam. From start to finish, you can have a warm, crusty loaf on the table in about three and a half hours, most of which is hands-off rising time.
In this guide, you will find the full recipe, a detailed step-by-step walkthrough, tips for kneading and shaping, how to create steam in a home oven, how to get an extra-crispy crust, troubleshooting help, serving ideas, variations, storage advice, and answers to frequently asked questions about rustic Italian bread.
Why You’ll Love This Rustic Italian Bread
It uses simple pantry ingredients. Bread flour, water, yeast, salt, and olive oil are all you need.
It has a golden, crispy crust. A hot oven and a pan of steam create a crackling crust with a deep golden color.
The inside is soft and airy. Bread flour and proper kneading give the loaf a tender, open crumb with just the right amount of chew.
It is ready in one afternoon. Unlike sourdough or long-ferment loaves, this recipe needs only about 2 hours of rising.
It does not require special equipment. A baking sheet, a sharp knife, and a metal pan are enough. No Dutch oven or baking stone is needed.
It is beginner friendly. The dough is easy to handle, the steps are straightforward, and the method is very forgiving.
It pairs with everything. Serve it with pasta, soup, salad, cheese, or a dish of olive oil.
It makes great sandwiches and toast. The sturdy crumb holds up to fillings and toasts beautifully.
What Is Rustic Italian Bread?
Rustic Italian bread is a hearty, free-form loaf with a thin, crisp crust and a soft, chewy interior. In Italy, there are many regional breads, from pane Toscano to ciabatta to filone, but the style most home bakers think of is a simple, oval or round loaf made from flour, water, yeast, and salt, with a little olive oil for flavor and tenderness.
The word “rustic” refers to the loaf’s homemade, unfussy character. It is shaped by hand, baked directly on a sheet pan, and scored with a few simple slashes. It is not meant to be perfectly uniform. A little irregularity is part of its charm.
The olive oil in this recipe is a small but important detail. It softens the crumb, adds a subtle richness, and gives the bread a gentle flavor that pairs beautifully with Italian dishes.
Ingredients for Rustic Italian Bread
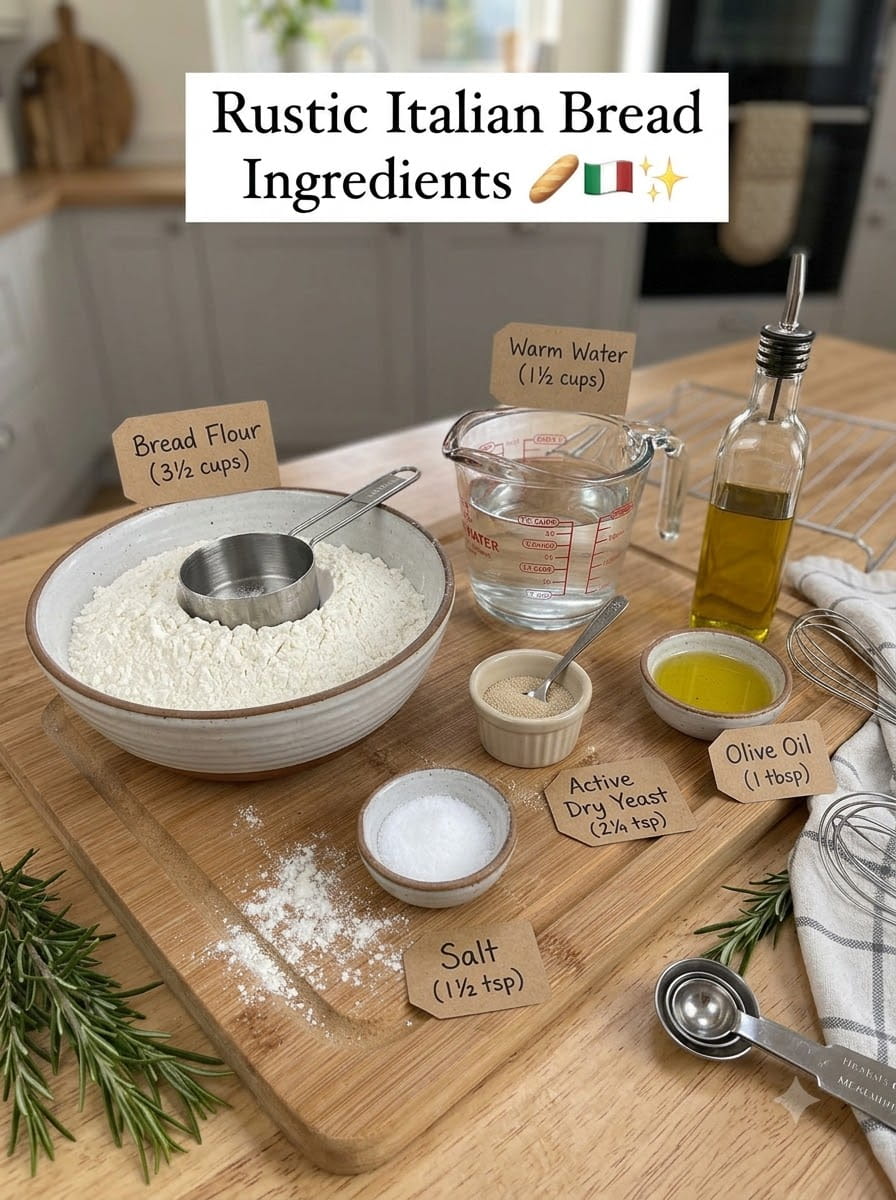
- 3½ cups bread flour, 440 g
- 1½ cups warm water, 360 ml
- 2¼ teaspoons active dry yeast, 7 g
- 1½ teaspoons salt, 9 g
- 1 tablespoon olive oil
A Closer Look at the Ingredients
Bread flour. Bread flour has a higher protein content than all-purpose flour, which develops into strong gluten when kneaded. This gives the loaf its structure, chew, and rise. For the most accurate results, weigh your flour. If you measure by cups, spoon the flour into the measuring cup and level it off, rather than scooping directly from the bag.
Warm water. The water should be warm, about 105°F to 110°F (40°C to 43°C), which feels comfortably warm but not hot. Water that is too hot can kill the yeast, while water that is too cool will slow it down.
Active dry yeast. One standard packet contains about 2¼ teaspoons, or 7 grams. Active dry yeast needs to be dissolved in warm water first, so the foamy step is important. Always check the expiration date. If your yeast is old, it may not activate.
Salt. Salt adds flavor and strengthens the dough. Use fine sea salt or table salt. If using coarse kosher salt, you may want to weigh it, since the volume differs between brands.
Olive oil. One tablespoon of olive oil enriches the dough, softens the crumb, and adds a hint of fruity flavor. A mild extra virgin olive oil works well.
How to Make Rustic Italian Bread: Step-by-Step Instructions
Step 1: Activate the Yeast
In a large bowl, combine the warm water and active dry yeast. Let stand for 5 to 10 minutes until foamy. A creamy layer of foam on top shows the yeast is alive. If nothing happens after 10 minutes, the yeast may be old or the water may have been too hot or too cold. Start over with fresh yeast.
Step 2: Make the Dough
Add the bread flour, salt, and olive oil. Mix until a rough, slightly sticky dough forms. Use a wooden spoon or your hand. The dough should come together into a shaggy mass with no dry flour left.
Step 3: Knead
Knead by hand for 8 to 10 minutes, or use a stand mixer with a dough hook for 5 to 7 minutes, until the dough becomes smooth and elastic.
To knead by hand, turn the dough onto a lightly floured surface. Push the dough away from you with the heel of your hand, fold it back over itself, and rotate it a quarter turn. Repeat. At first the dough will be sticky, but it will become smoother and less tacky as you work it. Add a very small sprinkle of flour only if the dough sticks heavily to your hands.
The dough is ready when it feels smooth, springs back slowly when poked, and passes the windowpane test. To try this test, pinch off a small piece and stretch it gently. If it stretches into a thin, translucent membrane without tearing, the gluten is well developed.
Step 4: First Rise
Place the dough in a lightly greased bowl. Cover and let rise in a warm place for 1 to 1½ hours, or until doubled in size. Cover the bowl with a clean towel, plastic wrap, or a plate. A turned-off oven with the light on, or a spot near a warm appliance, works well. The dough is ready when it looks puffy and a finger pressed into it leaves a dent that fills back in slowly.
Step 5: Shape the Loaf
Gently deflate the dough and shape it into a round or oval loaf. Place it on a parchment-lined baking sheet.
To shape an oval loaf, pat the dough into a rough rectangle, fold the top third down and the bottom third up like a letter, then roll it up from the short end and pinch the seam closed. Roll gently to form a loaf about 10 to 12 inches long with slightly tapered ends. For a round loaf, pull the edges toward the center, pinch to seal, and flip it seam-side down. Cup your hands around the dough and rotate to tighten the surface.
Step 6: Second Rise
Cover loosely and let rise for 30 to 45 minutes, until puffy. A lightly floured towel or greased plastic wrap works well as a cover. The loaf should look noticeably larger and feel soft. If you gently press it with a floured finger, the dent should spring back slowly.
Step 7: Preheat the Oven
Preheat the oven to 425°F (220°C). Place an empty metal baking pan on a lower rack to create steam. Start the preheat during the second rise so that the oven is fully hot when the loaf is ready. Use a metal pan, not glass, which can shatter when hot water hits it.
Step 8: Score the Bread
Use a sharp knife to make one or two shallow slashes across the top of the loaf. Cut about ¼ to ½ inch deep, with a quick, confident motion. Scoring gives the bread a place to expand as it bakes, and it creates the classic rustic look.
Step 9: Bake With Steam
Place the bread in the oven. Carefully pour a cup of hot water into the empty metal pan to create steam, avoiding splashes. Bake for 25 to 35 minutes, until the crust is golden brown and the loaf sounds hollow when tapped. Close the door quickly to trap the steam. Use oven mitts and keep your face away from the rising steam. The internal temperature of the finished bread should be about 190°F to 200°F (88°C to 93°C).
Step 10: Cool
Transfer the bread to a wire rack and let cool for at least 30 to 45 minutes before slicing. Cooling allows the crumb to finish setting. Slicing too soon can result in a gummy interior. For the crispiest crust, leave the loaf uncovered while it cools, so air can circulate around it.
Tips for Kneading Success
Do not add too much flour. A slightly tacky dough makes the softest bread. Adding too much flour while kneading can result in a dense, dry loaf.
Use the right technique. Push, fold, and turn. A rhythm helps, and kneading becomes quicker with practice.
Let the stand mixer do the work. If you use a mixer, knead on low to medium speed. Stop and scrape the bowl if needed.
Rest the dough if it resists. If the dough keeps springing back and is hard to knead, cover it and let it rest for 10 minutes. The gluten will relax.
Check the temperature. Warm dough rises faster. If your kitchen is cold, the rise may take longer.
Do not overknead. Dough that is kneaded too long by machine can become tight and tough. Stop when it is smooth and elastic.
Helpful Tips for the Best Rustic Italian Bread
Check your yeast first. The foamy test in the first step saves you from wasting ingredients on dead yeast.
Weigh your ingredients. A kitchen scale makes bread more consistent.
Let the dough double. A full first rise gives you the best flavor and texture. Watch the dough rather than the clock.
Do not overproof. If the second rise goes too long, the loaf can collapse or lose its shape in the oven.
Preheat the oven fully. A hot oven helps the loaf spring up and creates a crisp crust.
Use steam. Steam keeps the surface moist in the early bake, so the loaf can expand fully, and it helps create a glossy, crackly crust.
Score confidently. A sharp blade and a fast cut make clean slashes.
Use a thermometer. An instant-read thermometer takes the guesswork out of knowing when the loaf is done.
Bake on the middle rack. The loaf bakes evenly in the center of the oven, with the steam pan below.
Cool it uncovered. This preserves the crispy crust.
Steam Techniques for a Home Oven
Steam is the secret to a bakery-style crust. Here are several options.
Hot water in a metal pan. The method used in this recipe. Preheat a sturdy metal pan on the lower rack, and pour in hot water when you load the loaf.
Rocks or chains in the pan. Add lava rocks or a clean metal chain to the pan before preheating. They hold heat and create more steam.
Spray bottle. Spray the oven walls with water several times in the first few minutes of baking. Avoid the oven light and glass door.
Ice cubes. Toss a handful of ice cubes into the hot pan for a slower release of steam.
Safety. Always use thick oven mitts, never use glass for the steam pan, and keep your face away from the steam.
Troubleshooting Common Problems
The yeast did not foam. It may be old, or the water may have been too hot or too cold. Use fresh yeast, and warm water around 105°F to 110°F.
The dough is too sticky. Slightly tacky is normal. Knead longer before adding flour, because the dough often becomes less sticky as the gluten develops. If it still sticks heavily, add flour a teaspoon at a time.
The dough is too dry or stiff. Add water a teaspoon at a time while kneading. Flour absorbs water differently depending on brand and humidity.
The dough did not rise. The yeast may be dead, or the room may be too cold. Use fresh yeast and move the dough to a warmer spot.
The loaf is dense. This can happen from too much flour, too little kneading, old yeast, or an underrisen dough. Measure carefully, knead until smooth, and allow the dough to fully rise.
The loaf is flat. The second rise may have gone too long, or the dough may have been under-kneaded. Shape with more tension and bake when puffy.
The crust is pale. The oven may not have been hot enough, or the loaf may not have baked long enough. Preheat fully and bake until golden brown.
The crust is too hard or thick. The loaf may have baked too long, or too much steam may have been used. Check the loaf near the end of the baking window.
The crust is soft. The loaf may have been covered while cooling, or it may not have baked long enough. Cool uncovered and bake until deeply golden.
The loaf burst open at the side. The scoring may have been too shallow, or the oven may have been very hot. Score slightly deeper, and make sure the dough had a full second rise.
The bottom is too dark. Move the baking sheet to a higher rack, or place a second sheet pan underneath to insulate it.
The inside is gummy. The loaf may have been sliced too soon or underbaked. Bake until it reaches about 190°F to 200°F, and cool for at least 30 to 45 minutes.
Delicious Ways to Serve Rustic Italian Bread
With olive oil and herbs. Pour olive oil into a shallow dish, add a pinch of salt, pepper, and dried herbs, and dip warm slices.
With pasta. Serve alongside spaghetti, lasagna, baked ziti, or any dish with a rich sauce for mopping.
With soup. Pair with minestrone, tomato soup, or white bean soup.
As garlic bread. Slice, spread with garlic butter, and bake until golden.
As bruschetta. Toast slices, rub with garlic, and top with chopped tomatoes, basil, and olive oil.
As sandwiches. Use thick slices for Italian-style sandwiches with deli meats, cheese, and roasted vegetables.
With butter. A warm slice with butter is hard to beat.
With cheese and charcuterie. Serve with cheeses, olives, cured meats, and fruit.
As toast. Toast slices and top with butter and jam, or avocado and an egg.
As croutons and breadcrumbs. Use leftover bread for croutons, panzanella salad, or breadcrumbs.
As bread pudding or French toast. Day-old bread soaks up custard beautifully.
Variations to Try
- Garlic and herb loaf. Knead in minced garlic and dried Italian herbs for a savory loaf.
- Rosemary loaf. Add chopped fresh rosemary to the dough, and brush the top with olive oil before baking.
- Cheese loaf. Knead in grated Parmesan or Asiago.
- Olive bread. Fold in chopped olives during shaping.
- Sun-dried tomato and basil. Add chopped sun-dried tomatoes and dried basil.
- Seeded crust. Brush the loaf with water and sprinkle with sesame, poppy, or fennel seeds before baking.
- Whole wheat blend. Replace up to one cup of the bread flour with whole wheat flour for a heartier loaf. You may need slightly more water.
- Two smaller loaves. Divide the dough in half and shape into two smaller loaves. Reduce the bake time by about 5 to 10 minutes.
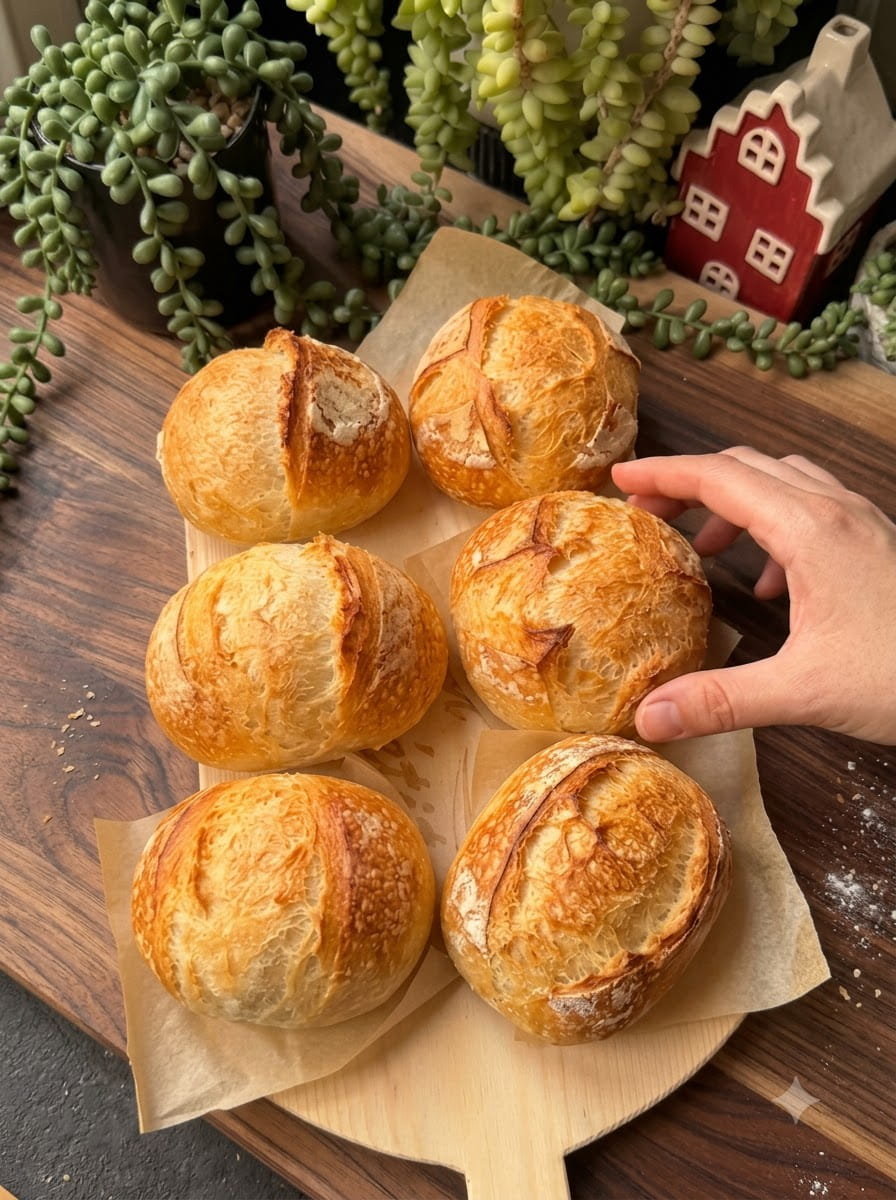
- Rolls. Divide the dough into 8 to 10 pieces and bake for 18 to 22 minutes.
- Sandwich loaf. Shape the dough into a loaf and bake in a greased loaf pan.
Keep in mind that mix-ins can affect hydration and baking time, so keep an eye on the dough.
How to Store Rustic Italian Bread
At room temperature. Once completely cooled, store the loaf in a paper bag or wrapped in a clean kitchen towel for 1 to 2 days. Avoid sealed plastic, which softens the crust.
In the refrigerator. Refrigeration speeds up staling and is generally not recommended.
In the freezer. Slice the cooled loaf and freeze the slices in an airtight bag for up to 3 months. Toast slices directly from the freezer, or thaw and warm in the oven.
Reviving day-old bread. Lightly sprinkle the loaf with water and warm in a 350°F (175°C) oven for 5 to 10 minutes. The crust will crisp, and the inside will soften.
Using leftovers. Turn stale bread into croutons, breadcrumbs, French toast, or bread pudding.
Is Rustic Italian Bread Healthy?
This loaf is made from simple ingredients with no preservatives, additives, or added sugars. It provides carbohydrates for energy, a modest amount of protein, and a little healthy fat from the olive oil.
It is made with refined bread flour, so it is not especially high in fiber. To boost fiber, replace some of the flour with whole wheat. Nutritional values vary with slice size and the specific ingredients you use. If you track nutrition closely, calculate it using your own products.
If you have food allergies, intolerances, or dietary needs, check the labels on your ingredients. This bread contains wheat and gluten.
Frequently Asked Questions
Can I use all-purpose flour instead of bread flour?
Yes, but the bread will be slightly softer and less chewy. All-purpose flour absorbs a little less water, so you may need to reduce the water slightly.
Can I use instant yeast instead of active dry yeast?
Yes. Use the same amount, and mix it directly into the flour. You can skip the activation step, though you can still dissolve it in the water if you like.
Do I need a stand mixer?
No. You can knead by hand in 8 to 10 minutes. A stand mixer simply makes the process easier.
Can I make this dough ahead of time?
Yes. After kneading, place the dough in a lightly oiled bowl, cover, and refrigerate for up to 24 hours. Let it come to room temperature and finish rising before shaping.
Do I need a baking stone or Dutch oven?
No. A baking sheet and a pan of water for steam work well. A baking stone can give a crisper bottom, but it is optional.
How do I know when the dough has doubled?
The dough should look about twice its original size and feel puffy. If you press a finger into it, the dent should fill back in slowly.
Why is my bread dense?
Dense bread is often caused by old yeast, too much flour, too little kneading, or not allowing the dough to rise fully. Check your yeast, measure carefully, and let the dough rise until doubled.
How do I get a crispier crust?
Use steam during the first part of baking, bake until deeply golden, and cool the loaf uncovered on a wire rack. A very hot, fully preheated oven also helps.
How do I know when the bread is done?
The crust should be golden brown, the loaf should sound hollow when tapped on the bottom, and the internal temperature should be about 190°F to 200°F (88°C to 93°C).
Can I freeze the dough?
Yes. After the first rise, shape the loaf, wrap it tightly, and freeze. Thaw overnight in the refrigerator, let it rise until puffy, and bake as directed.
Can I bake this in a loaf pan?
Yes. Shape the dough into a loaf and place it in a greased pan for the second rise. Baking time may be slightly longer.
How long does it stay fresh?
It is best on the day it is baked, and stays good for 1 to 2 days. Freeze slices for longer storage.
Final Thoughts
This Rustic Italian Bread shows how a few simple pantry ingredients can become a golden, crusty loaf with a soft, airy center. With bread flour, warm water, yeast, salt, and a touch of olive oil, and a bit of kneading and rising time, you can have bakery-style bread on your table in a single afternoon.
The method is straightforward: activate the yeast, mix and knead, let it rise, shape, rise again, score, bake with steam, and cool. With a few simple tips, such as checking your yeast, using steam, and letting the loaf cool uncovered, you will get a beautiful loaf every time.
If you are looking for a classic homemade bread to serve with pasta, soup, or a dish of olive oil, give this rustic Italian loaf a try. Tear off a warm slice, listen to the crust crackle, and enjoy a taste of Italian bakery tradition in your own kitchen. 🥖🇮🇹✨
Print
Rustic Italian Bread
Ingredients
- 3½ cups bread flour, 440 g
- 1½ cups warm water, 360 ml
- 2¼ teaspoons active dry yeast, 7 g
- 1½ teaspoons salt, 9 g
- 1 tablespoon olive oil
Instructions
In a large bowl, combine the warm water and active dry yeast. Let stand for 5 to 10 minutes until foamy. A creamy layer of foam on top shows the yeast is alive. If nothing happens after 10 minutes, the yeast may be old or the water may have been too hot or too cold. Start over with fresh yeast.
Add the bread flour, salt, and olive oil. Mix until a rough, slightly sticky dough forms. Use a wooden spoon or your hand. The dough should come together into a shaggy mass with no dry flour left.
Knead by hand for 8 to 10 minutes, or use a stand mixer with a dough hook for 5 to 7 minutes, until the dough becomes smooth and elastic.
To knead by hand, turn the dough onto a lightly floured surface. Push the dough away from you with the heel of your hand, fold it back over itself, and rotate it a quarter turn. Repeat. At first the dough will be sticky, but it will become smoother and less tacky as you work it. Add a very small sprinkle of flour only if the dough sticks heavily to your hands.
The dough is ready when it feels smooth, springs back slowly when poked, and passes the windowpane test. To try this test, pinch off a small piece and stretch it gently. If it stretches into a thin, translucent membrane without tearing, the gluten is well developed.
Place the dough in a lightly greased bowl. Cover and let rise in a warm place for 1 to 1½ hours, or until doubled in size. Cover the bowl with a clean towel, plastic wrap, or a plate. A turned-off oven with the light on, or a spot near a warm appliance, works well. The dough is ready when it looks puffy and a finger pressed into it leaves a dent that fills back in slowly.
Gently deflate the dough and shape it into a round or oval loaf. Place it on a parchment-lined baking sheet.
To shape an oval loaf, pat the dough into a rough rectangle, fold the top third down and the bottom third up like a letter, then roll it up from the short end and pinch the seam closed. Roll gently to form a loaf about 10 to 12 inches long with slightly tapered ends. For a round loaf, pull the edges toward the center, pinch to seal, and flip it seam-side down. Cup your hands around the dough and rotate to tighten the surface.
Cover loosely and let rise for 30 to 45 minutes, until puffy. A lightly floured towel or greased plastic wrap works well as a cover. The loaf should look noticeably larger and feel soft. If you gently press it with a floured finger, the dent should spring back slowly.
Preheat the oven to 425°F (220°C). Place an empty metal baking pan on a lower rack to create steam. Start the preheat during the second rise so that the oven is fully hot when the loaf is ready. Use a metal pan, not glass, which can shatter when hot water hits it.
Use a sharp knife to make one or two shallow slashes across the top of the loaf. Cut about ¼ to ½ inch deep, with a quick, confident motion. Scoring gives the bread a place to expand as it bakes, and it creates the classic rustic look.
Place the bread in the oven. Carefully pour a cup of hot water into the empty metal pan to create steam, avoiding splashes. Bake for 25 to 35 minutes, until the crust is golden brown and the loaf sounds hollow when tapped. Close the door quickly to trap the steam. Use oven mitts and keep your face away from the rising steam. The internal temperature of the finished bread should be about 190°F to 200°F (88°C to 93°C).
Transfer the bread to a wire rack and let cool for at least 30 to 45 minutes before slicing. Cooling allows the crumb to finish setting. Slicing too soon can result in a gummy interior. For the crispiest crust, leave the loaf uncovered while it cools, so air can circulate around it.