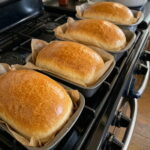
Ingredients
Here is everything you need to make one 9×5-inch loaf:
- 3 cups (375 g) all-purpose flour
- 1 1/4 cups (300 ml) warm milk
- 2 tablespoons granulated sugar
- 1 1/2 teaspoons instant yeast
- 1 teaspoon salt
- 2 tablespoons melted butter
- 1 large egg
You will also need a little extra butter or oil to grease the pan and a bit of melted butter to brush on the finished loaf.
Instructions
Follow these simple steps for a beautifully soft loaf every time.
In a large bowl, combine the flour, sugar, instant yeast, and salt. Whisk or stir briefly so the yeast and salt are evenly distributed through the flour.
Add the warm milk, melted butter, and egg to the bowl. Stir with a wooden spoon until a sticky, soft dough forms. There should be no dry flour left, but the dough will look shaggy and wet. That is exactly right. Do not add extra flour, and do not knead.
Cover the bowl with a lid, a plate, a damp towel, or plastic wrap. Let the dough rise in a warm place for 1 to 2 hours, or until it has doubled in size and looks puffy with bubbles on the surface. The exact time depends on the temperature of your kitchen. A warm spot, such as an oven with only the light turned on, speeds things up. A cooler kitchen means a longer rise.
Lightly grease a 9×5-inch loaf pan with butter, oil, or nonstick spray. For extra insurance, you can line the pan with parchment paper, leaving a bit of overhang on the sides to lift the loaf out easily.
Gently transfer the risen dough into the prepared pan. The dough will be very soft and sticky, so use a spatula or a lightly greased spoon. Lightly grease your hands with a little oil or butter and smooth the surface of the dough, pressing it gently into the corners of the pan. Try not to deflate it more than necessary.
Cover the pan and let the dough rise again for 30 to 45 minutes, until it rises slightly above the rim of the pan. The dough should look puffy and soft. Don’t let it overproof, or it may collapse during baking.
While the dough finishes rising, preheat your oven to 375°F (190°C). Place the rack in the center of the oven.
Bake for 30 to 35 minutes, until the top is lightly golden brown and the loaf sounds hollow when tapped on top. If the crust browns too quickly, tent the loaf loosely with aluminum foil for the last 10 minutes. For perfect doneness, the internal temperature of the bread should reach about 190 to 200°F (88 to 93°C).
As soon as the bread comes out of the oven, brush the hot crust with a little melted butter. This softens the crust and gives the loaf a beautiful sheen and a rich buttery aroma.
Let the bread cool in the pan for a few minutes, then transfer it to a wire rack. Allow it to cool for at least 20 to 30 minutes before slicing. Cutting into bread while it’s piping hot can make the crumb gummy and compress the slices. A little patience gives you cleaner slices and a better texture.