Simple No-Knead Soft Sandwich Bread: Fluffy, Tender, and Perfect for Everyday Sandwiches
There is something deeply satisfying about slicing into a loaf of homemade bread that is still faintly warm, with a lightly golden crust and a center so soft and tender it practically melts. This simple no-knead soft sandwich bread delivers exactly that, and it does it with only seven basic ingredients and a wooden spoon. No stand mixer, no kneading, no special equipment, and no baking experience required.
If you’ve ever been intimidated by bread baking, this recipe is the perfect place to start. You stir everything together in one bowl, let the dough rise, shape it gently into a loaf pan, let it rise again, and bake. The milk, egg, and butter in the dough make the crumb rich and fluffy rather than chewy and dense, which is exactly what you want for sandwiches, toast, and lunchbox favorites. In this guide, you’ll get the full recipe, clear step-by-step instructions, ingredient notes and substitutions, troubleshooting tips, serving ideas, storage advice, and answers to the most common questions about no-knead sandwich bread.
What Is No-Knead Soft Sandwich Bread?
No-knead bread is made by mixing a wet, sticky dough and letting time do the work that kneading usually does. Instead of pushing and folding the dough for ten minutes or more to develop gluten, you simply stir the ingredients until combined and let the dough rest and rise. During that rise, the flour fully hydrates and the gluten strands gradually organize themselves, producing a loaf with good structure and a pleasant, tender crumb.
This particular recipe takes the no-knead method and adapts it for a classic soft sandwich loaf. Warm milk, a little sugar, melted butter, and an egg enrich the dough. The result is a bread that slices cleanly, holds up to fillings, toasts beautifully, and stays soft for days. It is baked in a standard 9×5-inch loaf pan, so it has that familiar, square-sided sandwich shape that fits perfectly in a toaster and a lunchbox.
Why You’ll Love This Recipe
It’s genuinely easy. You stir the dough together in one bowl with a wooden spoon. There is no kneading, no stand mixer, and no complicated shaping.
Only seven ingredients. Flour, milk, sugar, instant yeast, salt, butter, and an egg are all you need, and you likely have most of them in your kitchen already.
Soft, fluffy, and tender. The milk, butter, and egg give the bread a rich, delicate crumb that is far softer than a rustic no-knead artisan loaf.
Perfect for sandwiches. The loaf slices evenly and has a sturdy-but-soft texture that holds up to everything from peanut butter and jelly to turkey and cheese.
Budget friendly. A homemade loaf costs much less than a bakery loaf and tastes fresher than most store-bought options.
No special equipment. All you need is a large bowl, a wooden spoon, and a loaf pan.
A great project for beginners and kids. The simple method is forgiving, and the hands-on steps are easy enough for new bakers and little helpers.
Your kitchen will smell amazing. Few things beat the aroma of fresh bread baking in the oven.
Ingredients You’ll Need
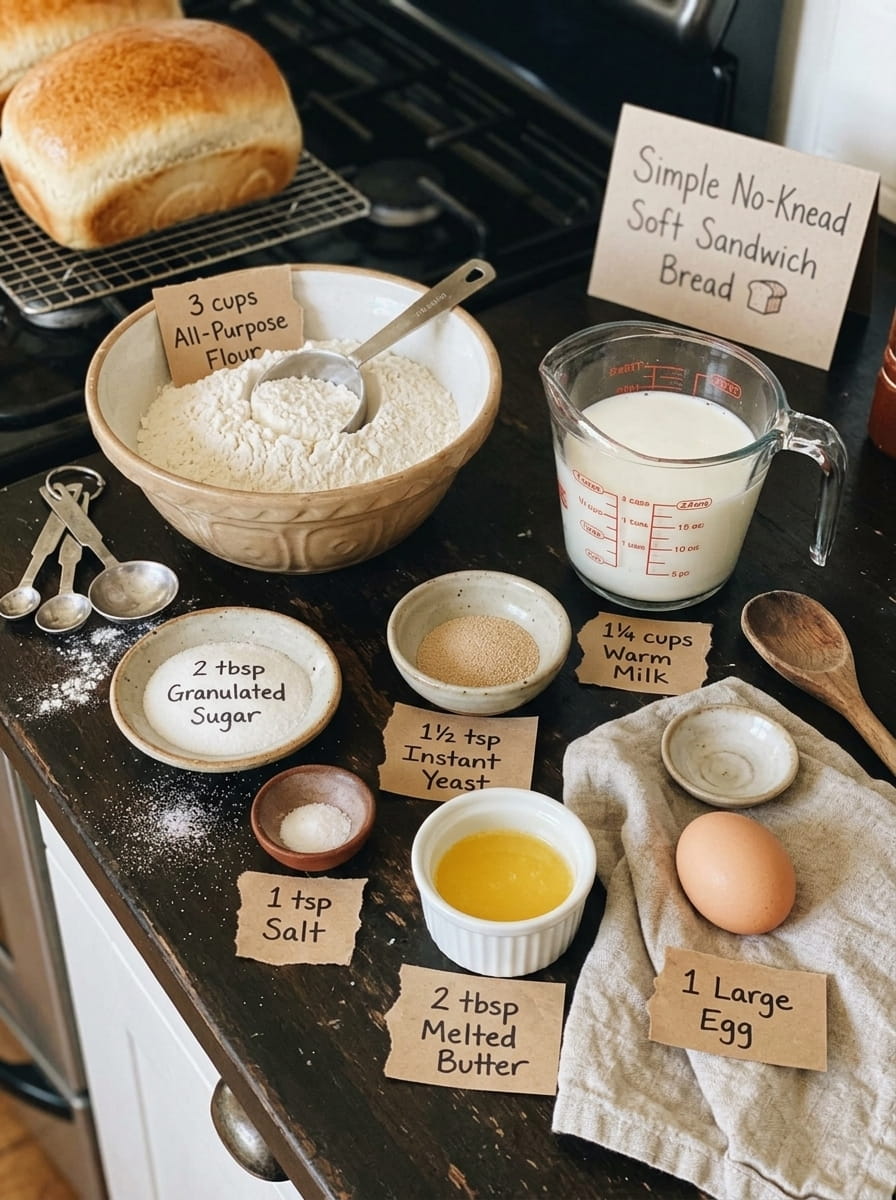
Here is everything you need to make one 9×5-inch loaf:
- 3 cups (375 g) all-purpose flour
- 1 1/4 cups (300 ml) warm milk
- 2 tablespoons granulated sugar
- 1 1/2 teaspoons instant yeast
- 1 teaspoon salt
- 2 tablespoons melted butter
- 1 large egg
You will also need a little extra butter or oil to grease the pan and a bit of melted butter to brush on the finished loaf.
Ingredient Notes and Substitutions
Understanding what each ingredient does will help you get consistent results and make smart substitutions.
All-Purpose Flour
All-purpose flour gives this bread a soft, tender crumb with enough structure to hold together for sandwiches. For the most accurate results, weigh your flour. One cup of all-purpose flour is roughly 125 grams, so 3 cups is 375 grams. If you measure by cups, spoon the flour into the cup and level it off with a knife instead of scooping directly from the bag, which packs in too much flour and can make the dough dry and the bread dense. Bread flour can be used for a slightly chewier, taller loaf, though you may need a splash more milk because bread flour absorbs more liquid.
Warm Milk
Milk adds richness, softness, and a lightly golden crust. The milk should be warm, not hot. Aim for about 100 to 110°F (38 to 43°C), which feels comfortably warm on your wrist, like a baby’s bottle. Milk that is too hot can damage or kill the yeast, while milk that is too cold will slow the rise significantly. If you want to substitute, plant-based milks such as unsweetened soy or oat milk can work, though the flavor and crumb will be slightly different. Water can also be used, but the bread will be less soft and rich.
Granulated Sugar
Two tablespoons of sugar feed the yeast, add a touch of sweetness, and help the crust brown. You can use white sugar or substitute honey in a similar amount for a slightly deeper flavor.
Instant Yeast
Instant yeast can be mixed directly with the dry ingredients, which keeps this recipe simple. If you only have active dry yeast, you can use the same amount, but it is best to stir it into the warm milk with the sugar and let it sit for 5 to 10 minutes until foamy before adding it to the flour. Active dry yeast may also need a slightly longer rise. Always check the expiration date on your yeast, since old yeast is the number one cause of bread that doesn’t rise.
Salt
Salt controls the yeast, strengthens the dough, and brings out the flavor of the bread. Don’t skip it. Bread without salt tastes flat and can rise unevenly. Fine table salt or fine sea salt works best because it blends easily into the dough.
Melted Butter
Butter adds flavor, tenderness, and a soft crumb. Let it cool slightly after melting so it doesn’t warm the dough too much or scramble the egg. You can substitute a neutral oil in the dough, but you’ll lose the buttery flavor.
The Egg
The egg enriches the dough, adding softness, structure, and a golden color. Use a large egg, ideally at room temperature, so it blends in smoothly and doesn’t cool the dough.
How to Make No-Knead Soft Sandwich Bread (Step by Step)
Follow these simple steps for a beautifully soft loaf every time.
Step 1: Combine the Dry Ingredients
In a large bowl, combine the flour, sugar, instant yeast, and salt. Whisk or stir briefly so the yeast and salt are evenly distributed through the flour.
Step 2: Add the Wet Ingredients and Mix
Add the warm milk, melted butter, and egg to the bowl. Stir with a wooden spoon until a sticky, soft dough forms. There should be no dry flour left, but the dough will look shaggy and wet. That is exactly right. Do not add extra flour, and do not knead.
Step 3: First Rise
Cover the bowl with a lid, a plate, a damp towel, or plastic wrap. Let the dough rise in a warm place for 1 to 2 hours, or until it has doubled in size and looks puffy with bubbles on the surface. The exact time depends on the temperature of your kitchen. A warm spot, such as an oven with only the light turned on, speeds things up. A cooler kitchen means a longer rise.
Step 4: Prepare the Pan
Lightly grease a 9×5-inch loaf pan with butter, oil, or nonstick spray. For extra insurance, you can line the pan with parchment paper, leaving a bit of overhang on the sides to lift the loaf out easily.
Step 5: Transfer the Dough
Gently transfer the risen dough into the prepared pan. The dough will be very soft and sticky, so use a spatula or a lightly greased spoon. Lightly grease your hands with a little oil or butter and smooth the surface of the dough, pressing it gently into the corners of the pan. Try not to deflate it more than necessary.
Step 6: Second Rise
Cover the pan and let the dough rise again for 30 to 45 minutes, until it rises slightly above the rim of the pan. The dough should look puffy and soft. Don’t let it overproof, or it may collapse during baking.
Step 7: Preheat the Oven
While the dough finishes rising, preheat your oven to 375°F (190°C). Place the rack in the center of the oven.
Step 8: Bake
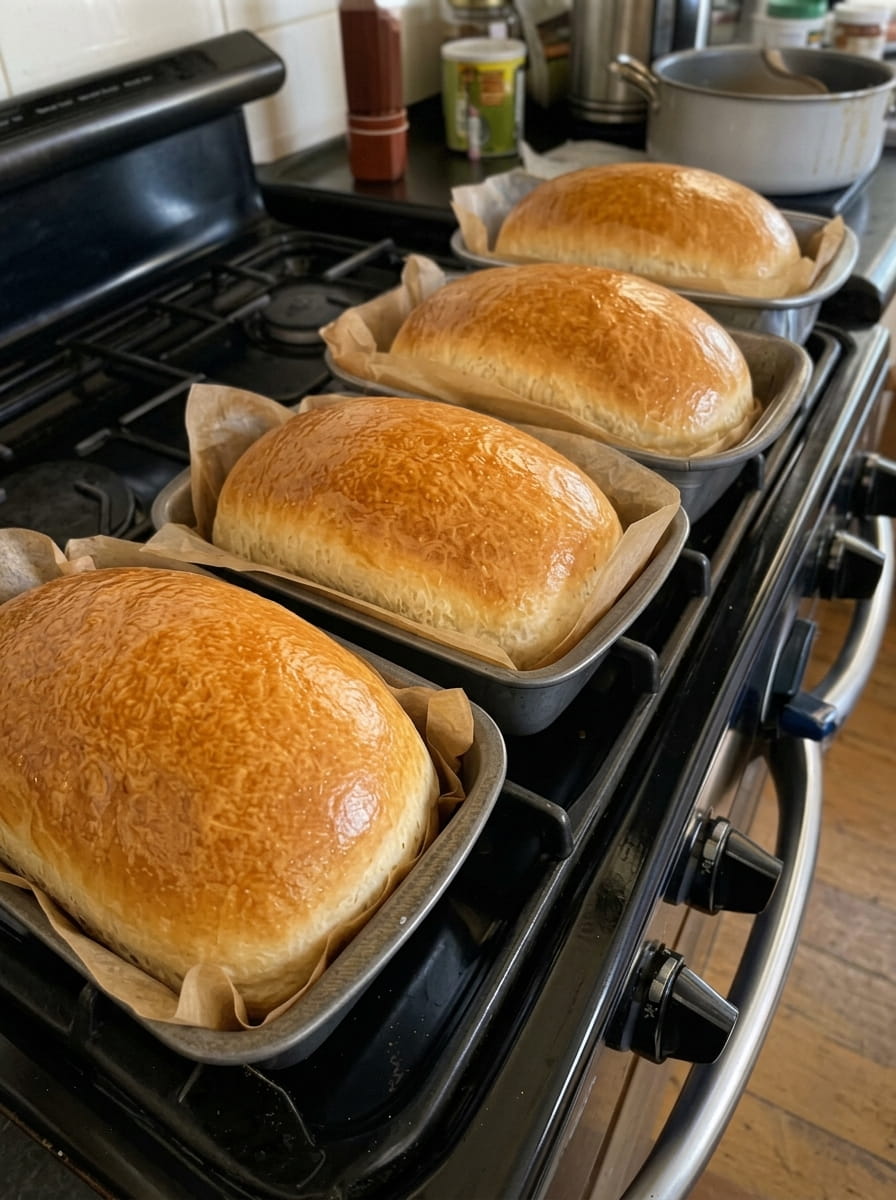
Bake for 30 to 35 minutes, until the top is lightly golden brown and the loaf sounds hollow when tapped on top. If the crust browns too quickly, tent the loaf loosely with aluminum foil for the last 10 minutes. For perfect doneness, the internal temperature of the bread should reach about 190 to 200°F (88 to 93°C).
Step 9: Brush with Butter
As soon as the bread comes out of the oven, brush the hot crust with a little melted butter. This softens the crust and gives the loaf a beautiful sheen and a rich buttery aroma.
Step 10: Cool Before Slicing
Let the bread cool in the pan for a few minutes, then transfer it to a wire rack. Allow it to cool for at least 20 to 30 minutes before slicing. Cutting into bread while it’s piping hot can make the crumb gummy and compress the slices. A little patience gives you cleaner slices and a better texture.
Tips for the Softest, Fluffiest Loaf
A few simple habits make the difference between good bread and bakery-quality bread.
- Measure flour carefully. Weighing is best. Too much flour makes dense, dry bread.
- Check your yeast. If you’re unsure whether your yeast is still active, test it by stirring a pinch with warm milk and a bit of sugar. It should foam within 10 minutes.
- Use warm, not hot, milk. Around 100 to 110°F is the sweet spot for activating yeast without harming it.
- Be patient with the rise. Let the dough double in size during the first rise. Rushing it produces a heavier loaf.
- Keep the dough sticky. A wet, sticky dough produces a soft, moist crumb. Resist the urge to add more flour.
- Grease your hands, not the dough. Lightly greased hands make it easy to handle and smooth the sticky dough.
- Watch the second rise. The dough should reach just above the rim of the pan. If it rises too high, it may collapse in the oven.
- Brush with butter while hot. This is the secret to a soft, shiny, tender crust.
- Cool completely before storing. Wrapping warm bread traps steam and makes the crust soggy.
- Use a thermometer. An instant-read thermometer takes the guesswork out of knowing when your bread is done.
Troubleshooting Common Problems
My dough didn’t rise. The most common culprits are old or inactive yeast, milk that was too hot or too cold, or a kitchen that is too cool. Check the expiration date on your yeast, use milk around 100 to 110°F, and give the dough extra time in a warmer spot.
My bread is dense. Too much flour, an under-risen dough, or old yeast usually causes dense bread. Weigh your flour, and make sure the dough doubles before moving to the pan.
The top is too dark. Ovens vary. Tent the loaf with foil for the last 10 to 15 minutes of baking, and check that your oven rack is in the center position.
The center is gummy. The loaf may be underbaked or was sliced too soon. Make sure it reaches an internal temperature of 190 to 200°F and let it cool fully before cutting.
The loaf collapsed or has a sunken top. The dough may have overproofed during the second rise. Next time, bake it as soon as it reaches just above the rim of the pan.
The crust is too hard. Brush the hot loaf generously with melted butter and cover it loosely with a clean kitchen towel while cooling to soften the crust.
The dough is too sticky to handle. That is normal for no-knead dough. Use lightly greased hands or a greased spatula instead of adding more flour.
Flavor Variations to Try
Once you’ve mastered the basic loaf, it’s easy to customize it.
Honey Soft Sandwich Bread. Replace the sugar with 2 tablespoons of honey for a subtle floral sweetness.
Whole Wheat Blend. Swap up to 1 cup of the all-purpose flour for whole wheat flour. The loaf will be a little denser but nuttier and more wholesome. You may need an extra tablespoon or two of milk.
Garlic Herb Bread. Stir in 1 teaspoon of garlic powder and 1 teaspoon of Italian seasoning with the dry ingredients, then brush with garlic butter after baking.
Cheesy Bread. Mix 1/2 cup of shredded cheddar or Parmesan into the dough for a savory loaf.
Cinnamon Swirl Bread. After the first rise, gently spread the dough in the pan and sprinkle the top with cinnamon sugar before the second rise.
Seeded Top. Brush the surface of the dough with a little milk or beaten egg before baking and sprinkle with sesame seeds, oats, or poppy seeds.
Dinner Rolls. Divide the risen dough into portions, shape into rolls in a greased baking pan, let rise, and bake until golden, about 20 to 25 minutes.
How to Serve Soft Sandwich Bread
This loaf is incredibly versatile. Here are some of the best ways to enjoy it.
- Classic sandwiches. Turkey and cheese, ham and Swiss, chicken salad, egg salad, tuna melt, or a simple peanut butter and jelly.
- Grilled cheese. The soft interior and golden crust make fantastic grilled cheese sandwiches.
- Toast. Slice it thick and toast it for breakfast with butter, jam, honey, or avocado.
- French toast. Slightly stale slices soak up custard beautifully and make rich, fluffy French toast.
- Breakfast sandwiches. Layer with eggs, bacon, and cheese for a satisfying morning meal.
- BLTs and club sandwiches. The tender slices hold up to crisp lettuce, juicy tomatoes, and bacon.
- Bread pudding or strata. Cube leftover bread for a comforting baked dessert or a savory brunch casserole.
- Croutons and breadcrumbs. Cube or crumble stale bread and toast it in the oven with olive oil and seasoning.
- Soup dippers. Serve thick slices alongside tomato soup, chicken noodle soup, or chili.
- Simply buttered. A warm slice with a pat of butter is hard to beat.
Storage Information
Let the bread cool completely before storing. Keep it in an airtight container, a sealed bread bag, or wrapped tightly in plastic wrap at room temperature for 2 to 3 days. For the best texture, store it cut-side down on a cutting board or in a bread box.
Refrigerating: Refrigeration tends to dry out bread more quickly, so it’s best to avoid it unless your kitchen is very warm and humid.
Freezing: For longer storage, slice the cooled loaf, wrap it tightly or place it in a freezer bag with the air pressed out, and freeze for up to 3 months. You can toast slices straight from the freezer or let them thaw at room temperature.
Refreshing day-old bread: Warm slices briefly in a toaster or wrap the loaf in foil and heat in a 300°F oven for 10 minutes to bring back that fresh-baked softness.
Nutrition Notes
Homemade bread contains simple, recognizable ingredients with no preservatives or additives. The exact calories and nutrients per slice depend on how thickly you cut the loaf and the specific ingredients you use. Because this recipe includes milk, egg, and butter, it provides a bit of protein and richness compared to a basic lean loaf. If you’d like exact nutrition numbers, enter your specific ingredients and the number of slices into a recipe nutrition calculator.
Common Mistakes to Avoid
Using water that is too hot. Excessively hot liquid kills yeast and prevents the dough from rising.
Adding too much flour. A sticky dough is correct for this recipe. Extra flour leads to a dry, dense loaf.
Rushing the rise. Give the dough enough time to double in size. Look at the dough, not just the clock.
Skipping the salt. Salt is essential for flavor and structure.
Cutting the bread too soon. Slicing a hot loaf squashes the crumb and makes it gummy. Let it cool for at least 20 to 30 minutes.
Using the wrong pan size. A 9×5-inch pan is ideal. A smaller pan can cause overflow, while a larger one yields a flatter loaf.
Overproofing the second rise. If the dough rises too far above the rim, it can collapse. Bake when it’s just above the pan.
Skipping the grease. Always grease the pan well so the loaf releases cleanly.
Frequently Asked Questions
Do I really not need to knead this bread?
Correct. The sticky dough develops structure during the long first rise, so you only need to stir it together with a wooden spoon.
Can I use active dry yeast instead of instant yeast?
Yes. Use the same amount, stir it into the warm milk with the sugar, and let it sit for 5 to 10 minutes until foamy before adding it to the flour. The rise may take a bit longer.
How do I know when the dough has doubled?
The dough should look noticeably puffy, domed, and full of bubbles, and it should be about twice its original size. Marking the bowl with a piece of tape at the starting level makes it easy to track.
What if my kitchen is cold?
A cool kitchen slows the rise. Place the covered bowl in an oven with only the light turned on, or set it near a warm (not hot) spot. You can also give the dough extra time.
Can I make the dough ahead of time?
Yes. After mixing, cover the bowl and refrigerate the dough for up to 24 hours for a slow, flavorful rise. Let it sit at room temperature for 30 to 60 minutes, transfer it to the pan, and continue with the second rise.
Can I use bread flour?
Yes. Bread flour gives a slightly taller, chewier loaf. You may need a tablespoon or two of extra milk.
Can I use whole wheat flour?
You can replace part of the all-purpose flour with whole wheat flour. Start with up to 1 cup and add a little extra milk if the dough feels too stiff.
Can I make this recipe dairy-free?
You can substitute unsweetened plant-based milk and use plant-based butter or oil. The flavor and softness will be slightly different, but the loaf will still be tasty.
Can I make it without the egg?
The egg adds softness and richness, but you can leave it out and add a splash of extra milk. The crumb will be a bit less tender and the color a bit paler.
Why is my bread dense?
Dense bread is usually caused by too much flour, old yeast, or too short a rise. Weigh your flour, check your yeast, and let the dough double in size.
How do I get a softer crust?
Brush the hot loaf with melted butter right out of the oven and cover it loosely with a clean towel while it cools.
Can I bake it in a different pan?
A 9×5-inch loaf pan is best. If you use a smaller pan, reduce the dough or bake any extra as rolls. A Pullman pan also works if you adjust the rise.
How do I slice homemade bread neatly?
Wait until the loaf has cooled and use a sharp serrated bread knife with a gentle sawing motion.
How long does homemade bread stay fresh?
It stays soft for 2 to 3 days at room temperature in an airtight container, and it freezes well for up to 3 months.
Final Thoughts
This simple no-knead soft sandwich bread proves that homemade bread doesn’t have to be complicated. With just seven ingredients, one bowl, and a wooden spoon, you can bake a soft, fluffy, tender loaf with a lightly golden crust and a delicious buttery finish. It’s perfect for everyday sandwiches, morning toast, and everything in between, and it’s easy enough for beginners to get right on the very first try.
Mix up a batch this weekend, let the dough do its work, and enjoy the smell of fresh bread filling your kitchen. Once you taste a warm slice, you may never go back to store-bought.
Did you try this recipe? Leave a comment and rating below, and tell us how you enjoy your homemade sandwich bread. Don’t forget to save this recipe on Pinterest for later! 🍞🥪✨
Print
Simple No-Knead Soft Sandwich Bread
Ingredients
Here is everything you need to make one 9×5-inch loaf:
- 3 cups (375 g) all-purpose flour
- 1 1/4 cups (300 ml) warm milk
- 2 tablespoons granulated sugar
- 1 1/2 teaspoons instant yeast
- 1 teaspoon salt
- 2 tablespoons melted butter
- 1 large egg
You will also need a little extra butter or oil to grease the pan and a bit of melted butter to brush on the finished loaf.
Instructions
Follow these simple steps for a beautifully soft loaf every time.
In a large bowl, combine the flour, sugar, instant yeast, and salt. Whisk or stir briefly so the yeast and salt are evenly distributed through the flour.
Add the warm milk, melted butter, and egg to the bowl. Stir with a wooden spoon until a sticky, soft dough forms. There should be no dry flour left, but the dough will look shaggy and wet. That is exactly right. Do not add extra flour, and do not knead.
Cover the bowl with a lid, a plate, a damp towel, or plastic wrap. Let the dough rise in a warm place for 1 to 2 hours, or until it has doubled in size and looks puffy with bubbles on the surface. The exact time depends on the temperature of your kitchen. A warm spot, such as an oven with only the light turned on, speeds things up. A cooler kitchen means a longer rise.
Lightly grease a 9×5-inch loaf pan with butter, oil, or nonstick spray. For extra insurance, you can line the pan with parchment paper, leaving a bit of overhang on the sides to lift the loaf out easily.
Gently transfer the risen dough into the prepared pan. The dough will be very soft and sticky, so use a spatula or a lightly greased spoon. Lightly grease your hands with a little oil or butter and smooth the surface of the dough, pressing it gently into the corners of the pan. Try not to deflate it more than necessary.
Cover the pan and let the dough rise again for 30 to 45 minutes, until it rises slightly above the rim of the pan. The dough should look puffy and soft. Don’t let it overproof, or it may collapse during baking.
While the dough finishes rising, preheat your oven to 375°F (190°C). Place the rack in the center of the oven.
Bake for 30 to 35 minutes, until the top is lightly golden brown and the loaf sounds hollow when tapped on top. If the crust browns too quickly, tent the loaf loosely with aluminum foil for the last 10 minutes. For perfect doneness, the internal temperature of the bread should reach about 190 to 200°F (88 to 93°C).
As soon as the bread comes out of the oven, brush the hot crust with a little melted butter. This softens the crust and gives the loaf a beautiful sheen and a rich buttery aroma.
Let the bread cool in the pan for a few minutes, then transfer it to a wire rack. Allow it to cool for at least 20 to 30 minutes before slicing. Cutting into bread while it’s piping hot can make the crumb gummy and compress the slices. A little patience gives you cleaner slices and a better texture.