Ingredients
For the Kielbasa
- 2 lbs kielbasa sausage, cut into 1-inch bite-sized pieces — Choose a good-quality smoked kielbasa for the best flavor. Cutting it into uniform, bite-sized pieces ensures even flavor absorption and makes for easy snacking.
- 5 garlic cloves, thinly sliced — Adds pungent, savory depth throughout the brine and kielbasa.
- 1 small onion, thinly sliced — Contributes sweetness, crunch, and aromatic flavor.
- 2 fresh jalapeños, thinly sliced — Brings bright, building heat to every bite.
- 1 Fresno chile, thinly sliced — Adds a slightly sweeter, fruitier heat that complements the jalapeño.
For the Pickling Brine
- 1½ cups white vinegar — Provides the sharp, tangy backbone of the brine.
- ½ cup water — Balances the vinegar’s acidity.
- ¼ cup honey — Adds natural sweetness that balances the heat and acidity perfectly.
- 1 tablespoon pickling salt — Enhances flavor and helps preserve the pickled bites.
- 1 teaspoon mustard seeds — Adds warm, slightly peppery flavor.
- 1 teaspoon black peppercorns — Provides mild heat and aromatic complexity.
- ½ teaspoon celery seeds — Adds a subtle earthy, herbal note.
- ½ teaspoon red pepper flakes — Boosts the overall heat level of the brine.
- 1 bay leaf — Infuses the brine with a subtle herbal aroma.
Instructions
Begin by cutting the kielbasa into bite-sized, one-inch pieces. For the best flavor, heat a skillet over medium heat and lightly brown the kielbasa pieces for three to four minutes, turning occasionally so each side gets a bit of color. This step isn’t strictly necessary, but it adds a wonderful depth of flavor and slightly firmer texture that holds up beautifully once pickled. Once browned, remove the kielbasa from the skillet and let it cool slightly before moving on to the next step.
While the kielbasa cools, thinly slice the garlic cloves, onion, jalapeños, and Fresno chile. Try to keep the slices relatively uniform in thickness so they distribute evenly throughout the jar and infuse the brine consistently.
In a saucepan, combine the white vinegar, water, honey, pickling salt, mustard seeds, black peppercorns, celery seeds, red pepper flakes, and bay leaf. Place the saucepan over medium heat and bring the mixture to a gentle simmer, stirring occasionally until the salt and honey have fully dissolved into the liquid. There’s no need to boil vigorously — a gentle simmer is enough to meld all the flavors together into a cohesive brine.
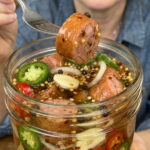
Choose a large, clean glass jar that can comfortably hold all of the kielbasa and vegetables. Begin by adding a portion of the sliced garlic, onion, jalapeño, and Fresno chile to the bottom of the jar. Next, add a layer of the browned kielbasa pieces. Continue alternating layers of vegetables and kielbasa until everything has been packed into the jar. Layering in this way ensures the aromatics and peppers are evenly distributed throughout the jar rather than settling at the bottom.
Once the brine has finished simmering, carefully pour it over the layered kielbasa and vegetables, making sure everything is completely submerged in the liquid. Leave a small amount of headspace near the top of the jar. If you notice any air pockets forming between the layers, gently tap the jar on the counter or use a clean utensil to release trapped air and help the brine settle evenly throughout.
Allow the jar to cool at room temperature, uncovered, until it’s no longer warm to the touch. Cooling the jar before sealing helps prevent excess condensation from forming inside, which could dilute the brine or affect the texture of the kielbasa and vegetables over time.
Once cooled, seal the jar tightly with its lid and place it in the refrigerator. While you can technically sample the kielbasa bites after just a few hours, it’s best to let the jar rest for at least 24 hours so the kielbasa has adequate time to absorb the sweet, spicy, garlicky brine. For even deeper, more developed flavor, allow the jar to rest for two to three days before serving — the extra time makes a noticeable difference in how thoroughly the flavors penetrate the sausage.
When you’re ready to serve, simply remove the kielbasa bites from the refrigerator and serve them chilled straight from the jar. They pair wonderfully with cheese, crackers, olives, additional pickles, or as part of a larger BBQ or charcuterie spread. Consider providing small skewers or toothpicks to make grabbing individual bites easy for guests.