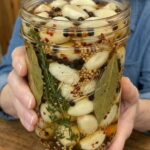
Ingredients
Here is everything you need to make about one large jar of pickled garlic.
- 3 cups fresh garlic cloves, peeled
- 1½ cups white vinegar
- ½ cup water
- 2 tablespoons granulated sugar
- 1 tablespoon kosher salt
- 1 teaspoon dried oregano
- 1 teaspoon black peppercorns
- 1 teaspoon mustard seeds
- ½ teaspoon red pepper flakes
- 2 fresh rosemary sprigs
You will also need a clean glass jar with a tight-fitting lid (a large jar of roughly one quart or one liter works well, or you can divide the garlic between two smaller jars) and a small saucepan.
Instructions
Wash your glass jar and lid in hot, soapy water, then rinse well. A clean jar helps keep your pickled garlic fresh. Peel the garlic cloves and trim off any hard root ends. Discard any cloves that are bruised, soft or discolored. Place the peeled cloves into the clean jar.
In a small saucepan, combine the white vinegar, water, sugar, salt, oregano, black peppercorns, mustard seeds, red pepper flakes and rosemary sprigs.
Bring the mixture to a gentle simmer over medium heat, stirring until the sugar and salt completely dissolve. You do not need a hard, rolling boil. A gentle simmer for a couple of minutes is plenty to dissolve the seasonings and wake up the herbs.
Carefully pour the hot brine over the garlic cloves, making sure they are fully submerged. Make sure some of the peppercorns, mustard seeds and a rosemary sprig end up in the jar. If any cloves poke above the liquid, press them down with a clean spoon. Cloves that stick out of the brine can discolor or spoil.
Let the jar cool on the counter until it reaches room temperature. Leave the lid off or loosely placed while it cools, since sealing a very hot jar can create pressure and lead to cloudy brine.
Once cool, seal the jar tightly and move it to the refrigerator. Let it chill for at least 24 hours before tasting.
For the best flavor, let the garlic pickle for two to three days before serving. During that time, the brine fully penetrates the cloves, the harshness mellows, and the herbs and spices infuse everything.
Keep the jar refrigerated and enjoy the cloves straight from the jar, or add them to sandwiches, salads, pasta, grilled meats, rice bowls and charcuterie boards.