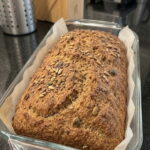
Ingredients
- 500 g whole-grain rye flour
- 200 g mixed seeds, such as sunflower seeds, flaxseeds and pumpkin seeds
- 500 ml lukewarm water
- 7 g instant dry yeast
- 10 g salt
- 1 tablespoon honey
Instructions
In a large bowl, combine the rye flour, mixed seeds, instant yeast and salt. Stir well with a spoon or spatula so the yeast and salt are spread throughout the flour.
Pour in the lukewarm water and add the honey. Stir until everything is evenly combined and no dry flour remains. The dough will be thick, sticky and heavy, more like a very stiff batter or a wet paste than a typical bread dough. This is exactly right. No kneading is necessary.
If you are using a stand mixer, a few turns of the paddle attachment can help, but it is not required. Do not add extra flour to make it less sticky. The stickiness is normal for rye.
Cover the bowl with a plate, a lid or a damp kitchen towel and leave the dough in a warm place for 45 to 60 minutes, until it has risen slightly. Rye dough does not double in size the way wheat dough does. You may see a few bubbles on the surface and a slightly puffier look. That is enough.
While the dough rests, grease a standard loaf pan or line it with parchment paper. Parchment makes it easier to lift out the loaf, especially because seed-heavy rye dough can stick stubbornly.
Scrape the dough into the prepared pan. Wet a spatula or your hands with water and smooth the top. The water prevents the dough from sticking to the tool. Press the dough gently into the corners to avoid air pockets. If you like, sprinkle a few extra seeds over the surface for a rustic, bakery-style finish.
Cover the pan loosely and let the dough rest for another 20 to 30 minutes. While it rests, preheat the oven to 200°C (400°F). The dough will puff up slightly, and you might notice small cracks forming on the surface. This is typical of rye bread.
Place the loaf pan in the preheated oven and bake at 200°C (400°F) for 15 minutes. This initial blast of heat gives the loaf a good oven spring and helps form the crust. Then reduce the temperature to 180°C (350°F) and bake for another 45 to 55 minutes, until the loaf is firm and cooked through.
To check doneness, tap the bottom of the loaf after removing it from the pan. It should sound hollow. If you have a thermometer, the internal temperature should reach about 95°C to 98°C (203°F to 208°F). If the top is browning too quickly, cover it loosely with foil for the last part of baking.
Remove the bread from the pan and place it on a wire rack. Allow it to cool completely before slicing. This step matters more than it might seem. Rye bread needs time to set. The interior structure continues to firm up as it cools, and cutting into a warm loaf can leave it gummy and sticky. For the best texture, wait at least a few hours, or even until the next day.