
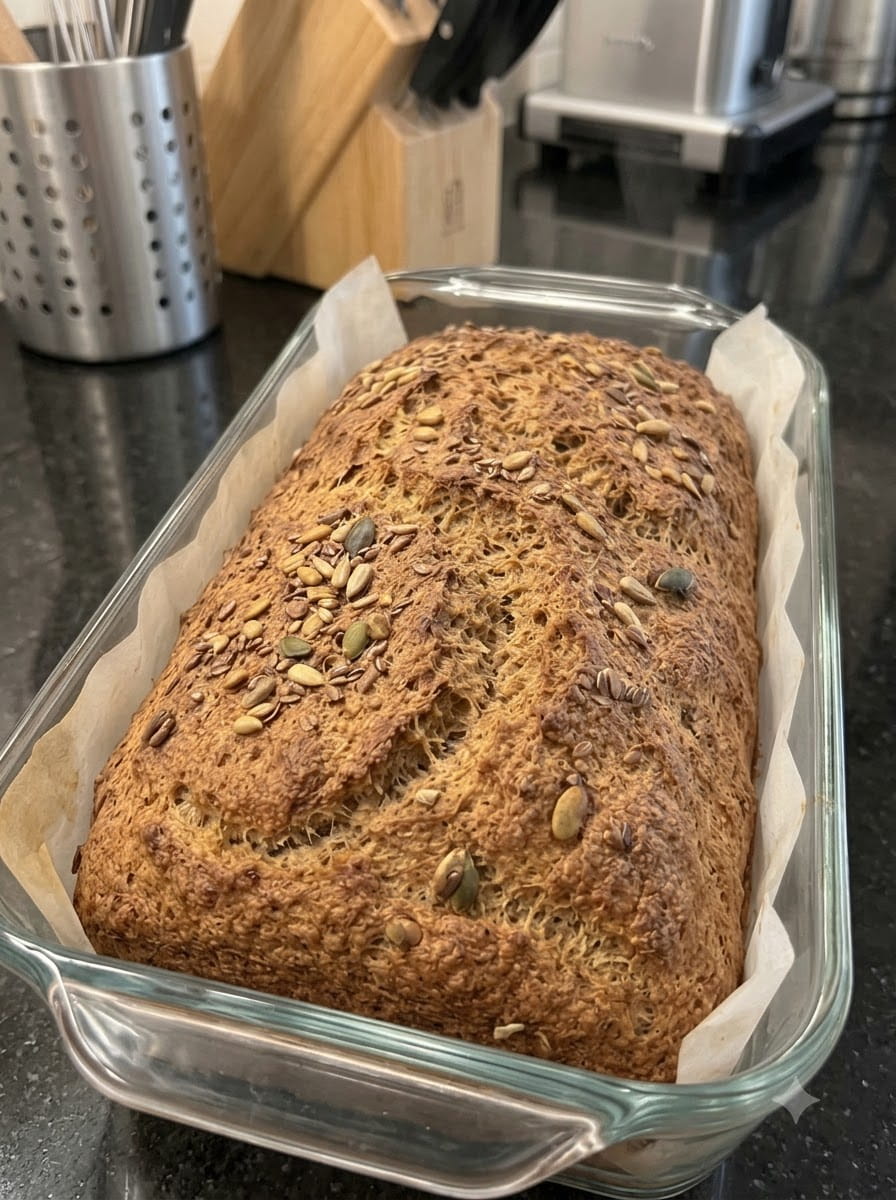
The Ultimate No-Knead Whole-Grain Rye Bread
This hearty no-knead rye bread is wonderfully moist, dense and packed with nutritious seeds in every slice. Made with whole-grain rye flour and a mix of sunflower, flax and pumpkin seeds, it requires no kneading, no folding and no shaping. You simply mix the ingredients, let the dough rest and bake it into a rustic homemade loaf with a deep, earthy flavor.
If you have ever wanted to bake your own rye bread but felt intimidated by sourdough starters, long fermentation times or complicated techniques, this recipe is for you. It uses instant yeast, one bowl and a spoon. The result is a thick, seed-studded loaf that is perfect for breakfast, sandwiches or serving alongside a warm bowl of soup.
Below you will find the full recipe, ingredient notes, detailed instructions, troubleshooting tips, variations, storage advice, serving ideas and answers to frequently asked questions.
What Makes This Rye Bread Special?
Most bread recipes rely on wheat flour and its gluten to create an airy structure. Rye flour behaves very differently. It contains less gluten-forming protein and a lot of starch-degrading enzymes and gums called pentosans, which absorb water and make the dough sticky and heavy. That is why rye dough is not kneaded like wheat dough. It does not become stretchy and elastic, and working it too much does not help.
This recipe embraces that nature of rye. The dough is thick, sticky and spoonable. You stir it together, let it rise briefly and bake it in a loaf pan. The pan supports the dough as it bakes, and the seeds add texture, flavor and nutrition. The final loaf is moist, dense and sliceable, with a satisfying chew.
Why You’ll Love This Recipe
No kneading, folding or shaping. The dough goes from bowl to pan with a spatula. It is one of the easiest breads you can make.
It is made with 100% whole-grain rye flour. There is no wheat flour in the ingredient list, which gives the bread its distinct, robust flavor.
It is loaded with seeds. Sunflower, flax and pumpkin seeds add crunch, nutty flavor, healthy fats and fiber.
It uses just six ingredients. Rye flour, seeds, water, yeast, salt and honey. No special equipment is required.
It is quick for a rye bread. With instant yeast and two short rests, you can have a loaf in the oven in about an hour and a half or less from the time you start.
It is great for meal prep. The loaf keeps well and slices neatly, making it ideal for sandwiches, toasts and snacks throughout the week.
Ingredients You’ll Need
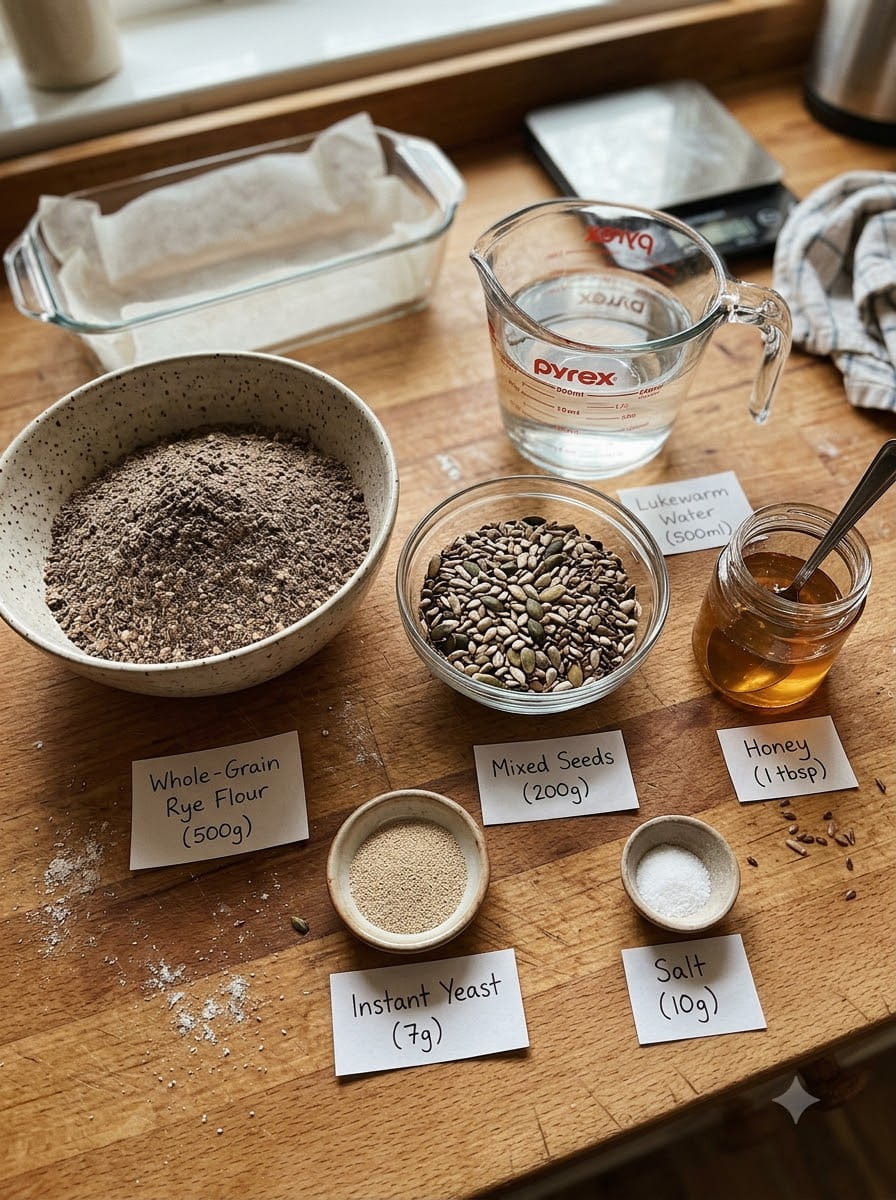
- 500 g whole-grain rye flour
- 200 g mixed seeds, such as sunflower seeds, flaxseeds and pumpkin seeds
- 500 ml lukewarm water
- 7 g instant dry yeast
- 10 g salt
- 1 tablespoon honey
Ingredient Notes
Whole-grain rye flour. This is the heart of the recipe. Whole-grain rye flour, sometimes sold as dark rye or wholemeal rye, includes the bran and germ, which gives a nuttier flavor and more fiber than light rye. Look for finely or medium-ground flour for a more even crumb. Weighing the flour on a kitchen scale is strongly recommended, because rye packs differently than wheat and cup measurements can vary a lot.
Mixed seeds. Sunflower seeds add a mild, buttery crunch. Flaxseeds add nuttiness and absorb water, helping keep the loaf moist. Pumpkin seeds bring a pleasant bite and a hint of earthiness. You can use whole flaxseeds or golden flaxseeds. The 200 g of seeds is a generous amount, which is what makes this loaf so hearty.
Lukewarm water. The water should feel just slightly warm to the touch, around body temperature. Water that is too hot can kill the yeast, while cold water will slow the rise considerably.
Instant dry yeast. Instant yeast can be mixed straight into the dry ingredients without activating it first. If you only have active dry yeast, dissolve it in a little of the lukewarm water for a few minutes before using it.
Salt. Salt adds flavor and also helps control the yeast. Rye bread without enough salt tastes flat, so do not reduce it too much.
Honey. A tablespoon of honey feeds the yeast, adds a very subtle sweetness and balances rye’s earthy, slightly sour flavor. Maple syrup or molasses can be used in its place.
How to Make No-Knead Whole-Grain Rye Bread
Step 1: Mix the Dry Ingredients
In a large bowl, combine the rye flour, mixed seeds, instant yeast and salt. Stir well with a spoon or spatula so the yeast and salt are spread throughout the flour.
Step 2: Add the Liquids
Pour in the lukewarm water and add the honey. Stir until everything is evenly combined and no dry flour remains. The dough will be thick, sticky and heavy, more like a very stiff batter or a wet paste than a typical bread dough. This is exactly right. No kneading is necessary.
If you are using a stand mixer, a few turns of the paddle attachment can help, but it is not required. Do not add extra flour to make it less sticky. The stickiness is normal for rye.
Step 3: Let the Dough Rest
Cover the bowl with a plate, a lid or a damp kitchen towel and leave the dough in a warm place for 45 to 60 minutes, until it has risen slightly. Rye dough does not double in size the way wheat dough does. You may see a few bubbles on the surface and a slightly puffier look. That is enough.
Step 4: Prepare the Pan
While the dough rests, grease a standard loaf pan or line it with parchment paper. Parchment makes it easier to lift out the loaf, especially because seed-heavy rye dough can stick stubbornly.
Step 5: Transfer the Dough
Scrape the dough into the prepared pan. Wet a spatula or your hands with water and smooth the top. The water prevents the dough from sticking to the tool. Press the dough gently into the corners to avoid air pockets. If you like, sprinkle a few extra seeds over the surface for a rustic, bakery-style finish.
Step 6: Allow a Second Rise
Cover the pan loosely and let the dough rest for another 20 to 30 minutes. While it rests, preheat the oven to 200°C (400°F). The dough will puff up slightly, and you might notice small cracks forming on the surface. This is typical of rye bread.
Step 7: Bake
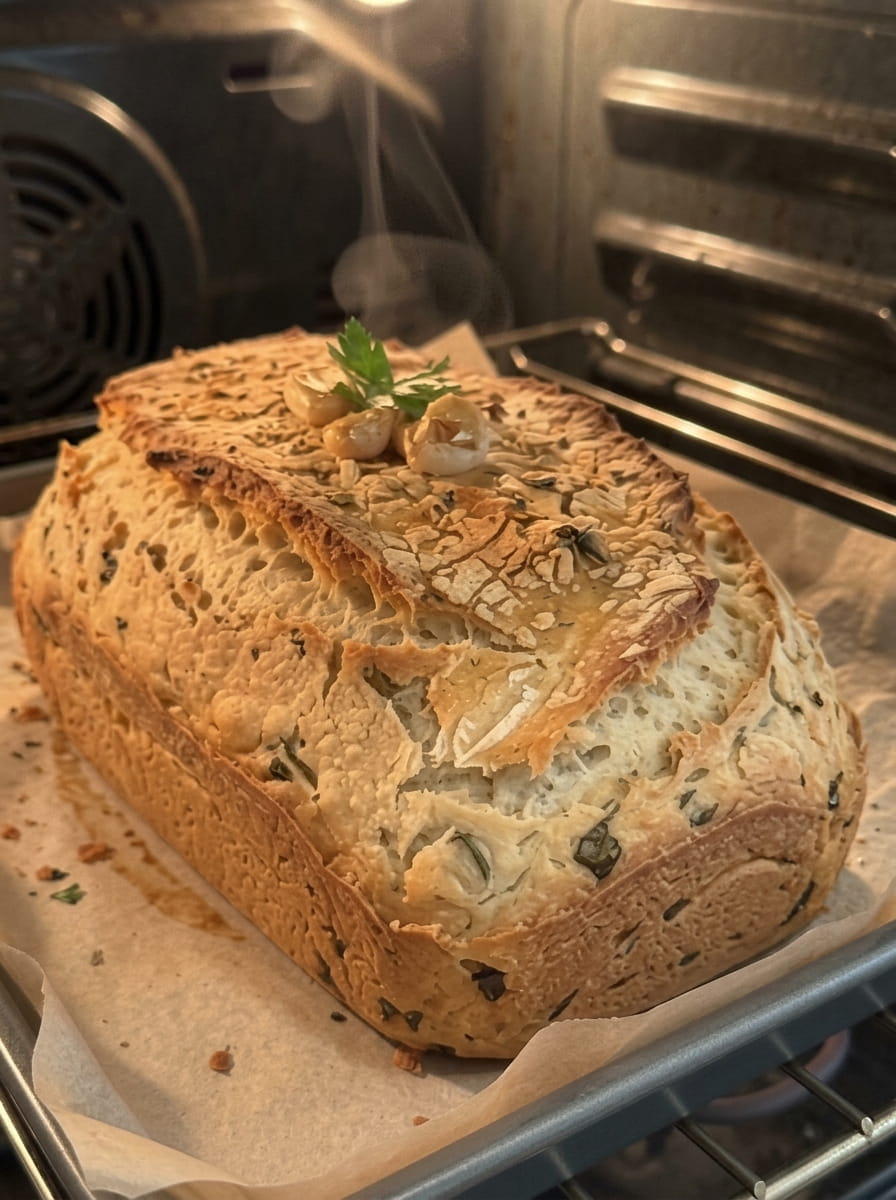
Place the loaf pan in the preheated oven and bake at 200°C (400°F) for 15 minutes. This initial blast of heat gives the loaf a good oven spring and helps form the crust. Then reduce the temperature to 180°C (350°F) and bake for another 45 to 55 minutes, until the loaf is firm and cooked through.
To check doneness, tap the bottom of the loaf after removing it from the pan. It should sound hollow. If you have a thermometer, the internal temperature should reach about 95°C to 98°C (203°F to 208°F). If the top is browning too quickly, cover it loosely with foil for the last part of baking.
Step 8: Cool Completely
Remove the bread from the pan and place it on a wire rack. Allow it to cool completely before slicing. This step matters more than it might seem. Rye bread needs time to set. The interior structure continues to firm up as it cools, and cutting into a warm loaf can leave it gummy and sticky. For the best texture, wait at least a few hours, or even until the next day.
Tips for the Best Rye Bread
Do not add more flour. Rye dough is supposed to be sticky. Adding extra flour will give you a drier, denser loaf.
Use a wet spatula. Wet tools make it far easier to smooth the surface without dragging the dough.
Measure by weight. A kitchen scale makes a big difference with rye flour and seeds.
Keep the dough warm. A turned-off oven with the light on, a spot near a warm (not hot) appliance, or a sunny kitchen counter all work well for the rise.
Do not rush the cooling. The patience pays off with clean slices and a better texture.
Slice thinly or thickly? Both work. Thick slices are great for toasting and open-faced sandwiches, while thin slices suit sandwiches and cheese boards. A serrated bread knife helps.
Let it age a day. Many bakers say rye bread tastes better the day after baking, when its flavors have mellowed and the crumb has settled.
Common Mistakes to Avoid
The loaf is gummy inside. It was likely cut too early or underbaked. Make sure the loaf sounds hollow on the bottom and let it cool completely before slicing.
The bread did not rise much. Rye does not rise as dramatically as wheat, so a modest rise is normal. However, if there is no change at all, your yeast may be old or your water may have been too hot or too cold. Check the expiration date and use lukewarm water.
The crust is too hard. Bake for the shorter end of the time range and cover the loaf with foil if the top is darkening too fast. You can also brush the warm crust with a little water or oil.
The loaf is too dry. Too much flour, too long in the oven or slicing too early to compare can give this impression. Weigh your ingredients and check for doneness on time.
The seeds are falling out. Press the extra topping seeds gently into the dough. A light spray of water before sprinkling helps them stick.
Variations to Try
Caraway seed rye bread. Add 1 to 2 tablespoons of caraway seeds to the dough for the classic rye flavor.
Fruit and nut rye. Fold in a handful of raisins, chopped dried apricots or walnuts for a slightly sweet, textured loaf.
Molasses rye bread. Replace the honey with a tablespoon of molasses for a darker color and deeper flavor.
Beer rye bread. Replace part of the water with dark beer for a richer, maltier taste.
Seed swap. Try sesame seeds, chia seeds, poppy seeds or hemp seeds in place of some of the mixed seeds.
Herb rye bread. Add dried dill, thyme or rosemary for an aromatic loaf that pairs beautifully with soups and cheese.
Add a little wheat flour. If you prefer a lighter, softer crumb, replace some of the rye flour with whole-wheat or bread flour. Keep in mind that the texture and rise will change.
Serving Ideas
This hearty bread is delicious in so many ways.
Breakfast:
- Toasted with butter and honey
- Topped with cream cheese, smoked salmon and fresh dill
- Spread with mashed avocado and a soft-boiled or poached egg
- Served with nut butter and sliced banana
Lunch:
- As a sandwich with turkey, cheese, mustard and crunchy greens
- Topped with hummus and sliced vegetables
- Alongside soups such as lentil, tomato, mushroom or vegetable
- With tuna salad or egg salad
Dinner and snacks:
- As a rustic side for stews and hearty salads
- Topped with sliced cheese, pickles and cold cuts for a simple open-faced sandwich
- Cut into small pieces for a cheese and charcuterie board
- Toasted and served with olive oil and a pinch of flaky salt
How to Store Rye Bread
At room temperature: Once completely cooled, wrap the loaf in a clean kitchen towel or store it in a bread box or paper bag. It stays fresh for 4 to 5 days. Dense rye bread tends to hold moisture well, so it does not stale as fast as many wheat breads.
In the refrigerator: You can refrigerate it for up to a week in an airtight container, which is helpful in warm or humid climates. Toast the slices to refresh them.
In the freezer: Slice the loaf and freeze it in a freezer-safe bag with parchment between slices for up to 3 months. Toast slices straight from the freezer or thaw them at room temperature.
Tip: Avoid storing the loaf in a plastic bag while it is still warm, as trapped steam makes the crust soggy.
Nutrition and Health Benefits
Whole-grain rye is valued for its high fiber content, and it is often described as filling and satisfying. The mixed seeds in this loaf add healthy fats, plant-based protein, vitamins and minerals. Flaxseeds are known for their omega-3 fatty acids and fiber, sunflower seeds provide vitamin E, and pumpkin seeds contribute magnesium and zinc.
Because this bread is dense and seed-rich, a slice goes a long way. Exact nutritional values depend on your ingredients and slice size. Rye bread contains gluten, so it is not suitable for people with celiac disease or gluten intolerance. If you follow a special diet or have a health condition, check with a doctor or registered dietitian.
Frequently Asked Questions
Do I really not need to knead this bread?
Correct. Rye flour has very little gluten-forming ability, so kneading does not improve the structure. Stirring until combined is all that is needed.
Why is the dough so sticky?
Rye flour contains compounds that absorb a lot of water and make dough tacky. A wet, heavy dough is normal and results in a moist loaf.
Can I use active dry yeast instead of instant yeast?
Yes. Dissolve it in a small amount of the lukewarm water with the honey, let it sit for about 5 to 10 minutes until foamy, and then proceed with the recipe.
Can I use a different type of rye flour?
Whole-grain rye flour gives the best flavor and texture for this recipe. Light rye flour will produce a milder, softer loaf, and you might need to adjust the water slightly.
Can I make this bread without honey?
Yes. You can use sugar, maple syrup or molasses, or leave it out. The yeast will still work, though the flavor will be slightly less rounded.
Can I make this bread vegan?
Replace the honey with maple syrup, agave or sugar, and the recipe is fully vegan.
Can I make it without seeds?
You can leave them out, but the dough will be wetter and the bread will taste and feel quite different. If you remove the seeds, consider reducing the water slightly.
What size loaf pan should I use?
A standard loaf pan of around 25 by 11 cm (10 by 4.5 inches) works well. The dough is heavy, so a pan that is too large will produce a flatter loaf.
How do I know when it is done?
The loaf should feel firm, look deeply golden brown and sound hollow when you tap the bottom. An internal temperature around 95°C to 98°C (203°F to 208°F) also indicates it is ready.
Why is it best to wait before slicing?
Rye bread continues to set as it cools. Cutting too early can make the crumb seem wet and gummy even if it is fully baked.
Can I add sourdough starter?
You can adapt this recipe by adding sourdough starter and adjusting the flour, water and rise time, but that would be a different recipe with a longer fermentation.
Final Thoughts
This no-knead whole-grain rye bread proves that homemade bread does not need to be complicated. With only six ingredients and a handful of simple steps, you can bake a moist, dense, seed-packed loaf that looks and tastes like it came from an artisan bakery.
It is ideal for breakfast toast, hearty sandwiches and dunking into soup. Mix the dough, give it time to rest and let the oven do the rest. The aroma alone is worth it.
Bake a loaf this week, try one of the variations and make this rye bread part of your regular rotation. Once you taste your first thick, seedy slice, you may never go back to store-bought.
Print
The Ultimate No-Knead Whole-Grain Rye Bread
Ingredients
- 500 g whole-grain rye flour
- 200 g mixed seeds, such as sunflower seeds, flaxseeds and pumpkin seeds
- 500 ml lukewarm water
- 7 g instant dry yeast
- 10 g salt
- 1 tablespoon honey
Instructions
In a large bowl, combine the rye flour, mixed seeds, instant yeast and salt. Stir well with a spoon or spatula so the yeast and salt are spread throughout the flour.
Pour in the lukewarm water and add the honey. Stir until everything is evenly combined and no dry flour remains. The dough will be thick, sticky and heavy, more like a very stiff batter or a wet paste than a typical bread dough. This is exactly right. No kneading is necessary.
If you are using a stand mixer, a few turns of the paddle attachment can help, but it is not required. Do not add extra flour to make it less sticky. The stickiness is normal for rye.
Cover the bowl with a plate, a lid or a damp kitchen towel and leave the dough in a warm place for 45 to 60 minutes, until it has risen slightly. Rye dough does not double in size the way wheat dough does. You may see a few bubbles on the surface and a slightly puffier look. That is enough.
While the dough rests, grease a standard loaf pan or line it with parchment paper. Parchment makes it easier to lift out the loaf, especially because seed-heavy rye dough can stick stubbornly.
Scrape the dough into the prepared pan. Wet a spatula or your hands with water and smooth the top. The water prevents the dough from sticking to the tool. Press the dough gently into the corners to avoid air pockets. If you like, sprinkle a few extra seeds over the surface for a rustic, bakery-style finish.
Cover the pan loosely and let the dough rest for another 20 to 30 minutes. While it rests, preheat the oven to 200°C (400°F). The dough will puff up slightly, and you might notice small cracks forming on the surface. This is typical of rye bread.
Place the loaf pan in the preheated oven and bake at 200°C (400°F) for 15 minutes. This initial blast of heat gives the loaf a good oven spring and helps form the crust. Then reduce the temperature to 180°C (350°F) and bake for another 45 to 55 minutes, until the loaf is firm and cooked through.
To check doneness, tap the bottom of the loaf after removing it from the pan. It should sound hollow. If you have a thermometer, the internal temperature should reach about 95°C to 98°C (203°F to 208°F). If the top is browning too quickly, cover it loosely with foil for the last part of baking.
Remove the bread from the pan and place it on a wire rack. Allow it to cool completely before slicing. This step matters more than it might seem. Rye bread needs time to set. The interior structure continues to firm up as it cools, and cutting into a warm loaf can leave it gummy and sticky. For the best texture, wait at least a few hours, or even until the next day.