Creamy Garlic Herb Stuffed Mini Peppers: The Easy Appetizer Everyone Will Ask About
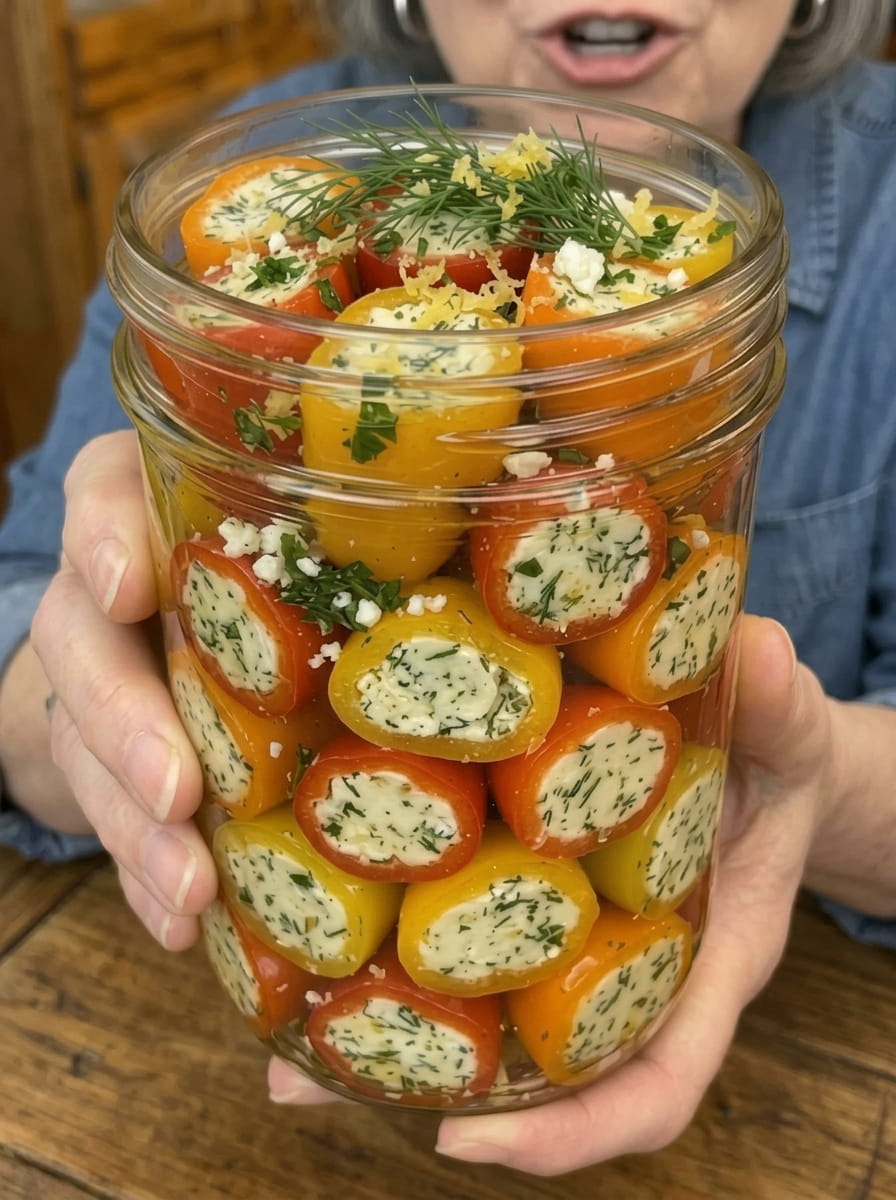
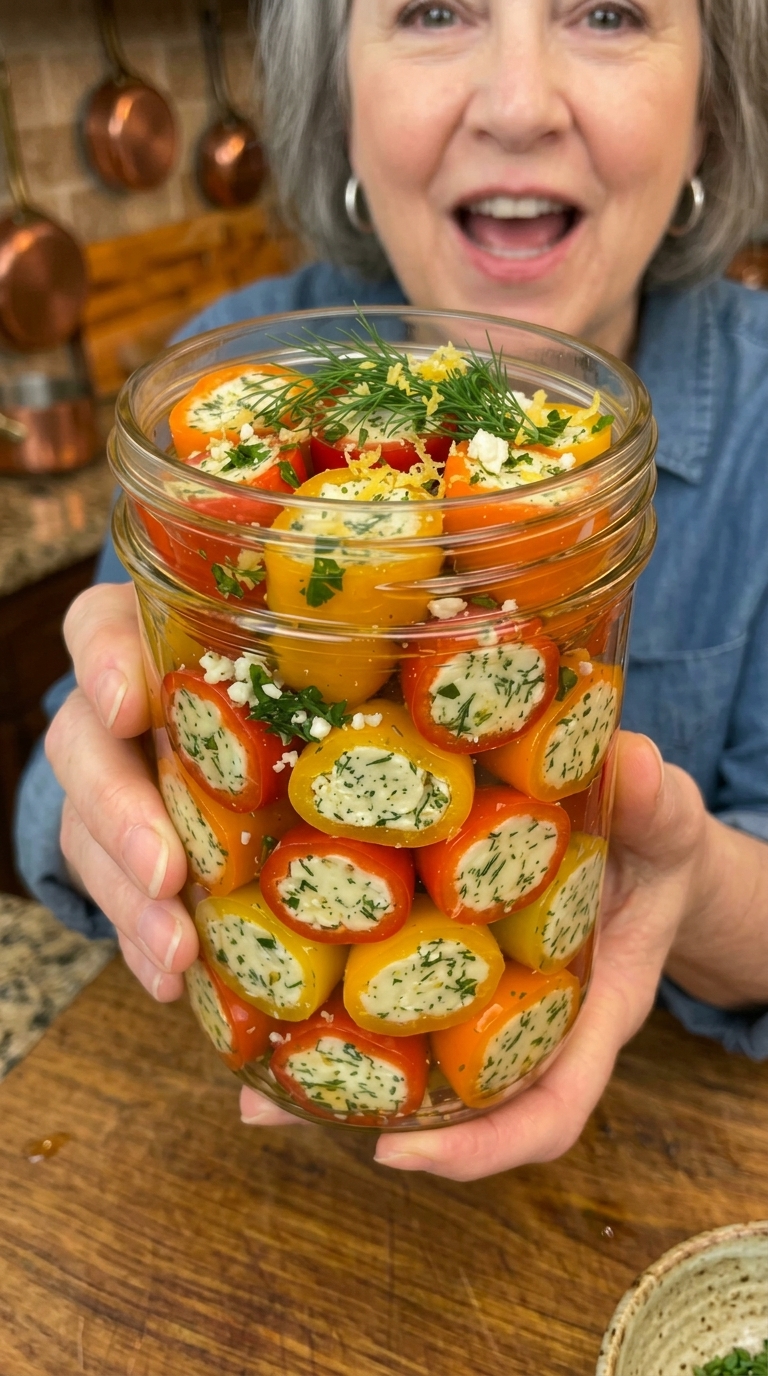
If you’re searching for a crowd-pleasing appetizer that’s equal parts beautiful and delicious, look no further than these Creamy Garlic Herb Stuffed Mini Peppers. Sweet, crisp mini peppers are halved and filled with a luscious mixture of cream cheese, Greek yogurt, garlic, Parmesan, and fresh herbs, then baked until the edges are tender and the filling turns warm, creamy, and lightly golden. The result is a two-bite appetizer that looks like it came from a professional catering spread but takes less than 30 minutes from start to finish.
Whether you’re hosting a holiday party, putting together a snack board for game day, prepping a brunch spread, or just craving an easy savory bite, this recipe checks every box. It’s colorful, it’s flavorful, it comes together with pantry-friendly ingredients, and it’s endlessly customizable. Below, you’ll find everything you need to know to make the best stuffed mini peppers of your life — from ingredient tips to storage tricks to creative variations.
Why You’ll Love This Recipe
There’s a reason stuffed mini peppers show up on nearly every party appetizer list, and once you make a batch, you’ll understand why.
They’re naturally low-carb and gluten-free. Because the “shell” of this appetizer is a vegetable instead of bread, pastry, or crackers, this dish fits seamlessly into low-carb, keto-friendly, and gluten-free menus without any substitutions needed.
The flavor is rich but balanced. Cream cheese and Greek yogurt create a filling that’s decadent yet tangy, while garlic, Parmesan, and a mix of fresh and dried herbs keep every bite savory and aromatic. A splash of fresh lemon juice brightens the whole thing so it never feels heavy.
They’re make-ahead friendly. You can prep the filling, stuff the peppers, and refrigerate them hours before your guests arrive, then pop them in the oven right before serving.
They’re visually stunning. Mini sweet peppers come in vibrant shades of red, orange, and yellow, so this dish adds instant color and elegance to any spread — no styling skills required.
They’re endlessly adaptable. Swap in different cheeses, add a protein like crispy bacon, or spice things up with a pinch of red pepper flakes. This base recipe is a jumping-off point for dozens of variations.
Ingredients You’ll Need
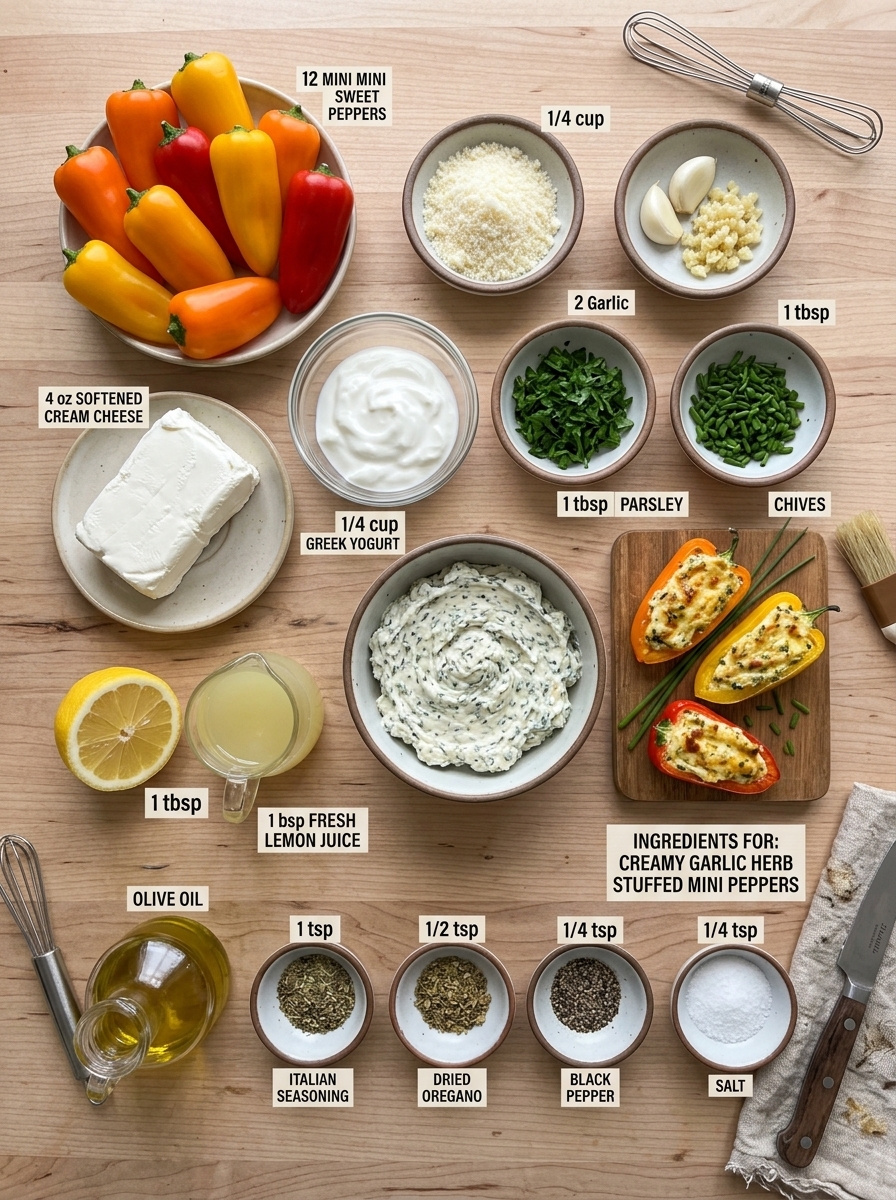
Here’s a closer look at what goes into these stuffed peppers and why each ingredient earns its place in the filling.
Mini sweet peppers — The star of the show. Unlike bell peppers, mini sweet peppers have a naturally sweet, mild flavor and a thinner skin that softens beautifully in the oven without becoming mushy. Their small size also makes them perfect for two-bite appetizers.
Olive oil — A light brushing helps the peppers roast rather than steam, encouraging those lightly caramelized edges that add depth of flavor.
Cream cheese — The base of the filling, providing richness and that classic creamy texture. Make sure it’s fully softened at room temperature so it blends smoothly without lumps.
Plain Greek yogurt — This lightens up the filling, adds a pleasant tang, and boosts the protein content compared to using cream cheese alone.
Parmesan cheese — Finely grated Parmesan adds a salty, nutty, umami-rich flavor and helps the filling turn golden and slightly crisp on top as it bakes.
Garlic — Freshly minced garlic is essential here; it infuses the entire filling with warm, savory depth that pre-minced or powdered garlic simply can’t replicate.
Fresh parsley and chives — These herbs add brightness, color, and a subtle oniony bite from the chives. Fresh herbs make a noticeable difference in flavor compared to dried.
Italian seasoning and dried oregano — These dried herb blends round out the flavor profile with warm, earthy, slightly floral notes that complement the fresh herbs.
Black pepper and salt — Simple seasonings that bring all the flavors into balance.
Fresh lemon juice — A small but mighty addition. The acidity cuts through the richness of the cream cheese and yogurt, keeping the filling from tasting flat or heavy.
Step-by-Step Instructions
1. Preheat and Prep
Start by preheating your oven to 375°F. While it heats, wash your mini sweet peppers thoroughly and pat them dry. Slice each pepper in half lengthwise, right through the stem, and use a small spoon or paring knife to remove the seeds and white membranes. Removing the membranes helps reduce excess moisture and bitterness, giving you a cleaner, sweeter bite.
2. Arrange and Oil
Place the pepper halves cut-side up on a large baking sheet, ideally lined with parchment paper for easy cleanup. Lightly brush the peppers with olive oil. This small step helps the peppers roast rather than steam, giving them a slightly tender-crisp texture with just enough caramelization at the edges.
3. Make the Filling
In a mixing bowl, combine the softened cream cheese, Greek yogurt, Parmesan cheese, minced garlic, chopped parsley, chopped chives, Italian seasoning, dried oregano, black pepper, salt, and fresh lemon juice. Using a spatula or hand mixer, blend everything together until the mixture is smooth, creamy, and fully combined. Take a moment to taste and adjust the seasoning here — if you love a bolder garlic flavor, feel free to add an extra clove.
4. Stuff the Peppers
Spoon the filling into each pepper half, or for a neater presentation, transfer the mixture to a piping bag or a zip-top bag with the corner snipped off and pipe it in. Fill each pepper generously, mounding the filling slightly since it will settle a bit as it bakes.
5. Bake to Golden Perfection
Transfer the baking sheet to the preheated oven and bake for 12 to 15 minutes, until the peppers are fork-tender and the filling is warm, creamy, and just beginning to turn golden on top. If you love extra color, you can broil the peppers for the final 1 to 2 minutes — just watch closely so they don’t burn.
6. Cool, Garnish, and Serve
Let the stuffed peppers rest for a few minutes after baking; the filling will be very hot straight out of the oven. Garnish with a sprinkle of fresh parsley or chives for a pop of color, then serve warm.
Tips for the Best Stuffed Mini Peppers
Use room-temperature cream cheese. Cold cream cheese is difficult to blend smoothly and often leaves lumps in the filling. Set it out for at least 30 minutes before you start, or soften it in the microwave in 10-second bursts.
Don’t skip drying the peppers. After washing, pat the peppers completely dry. Excess water can make the olive oil slide right off and can also water down the filling as they bake.
Choose peppers that can stand upright. Look for mini peppers with a relatively flat bottom or a shape that allows the halves to sit steadily on the baking sheet — this keeps the filling from sliding out before it sets.
Pipe for a polished look. If you’re serving these at a party or holiday gathering, piping the filling with a piping bag (or even a sturdy plastic bag) creates a neater, more professional presentation than spooning it in.
Watch the bake time closely. Ovens vary, and mini peppers can go from tender to overly soft quickly. Start checking around the 12-minute mark.
Let them rest before serving. The filling is molten straight from the oven. A 3 to 5 minute rest makes them easier — and safer — to eat.
Delicious Variations to Try
One of the best things about this recipe is how easily it adapts to different tastes and occasions. Here are some ideas to make it your own:
Bacon Garlic Herb Stuffed Peppers — Fold in 2 to 3 tablespoons of finely chopped, cooked crispy bacon for a smoky, savory twist that pairs beautifully with the creamy filling.
Spicy Kick — Add a pinch of red pepper flakes or a small dash of hot sauce to the filling for a subtle heat that balances the sweetness of the peppers.
Cheddar Ranch Version — Swap the Parmesan for sharp shredded cheddar and add a teaspoon of ranch seasoning mix for a completely different but equally crowd-pleasing flavor profile.
Sun-Dried Tomato and Basil — Stir in finely chopped sun-dried tomatoes and fresh basil instead of parsley and chives for a Mediterranean-inspired variation.
Everything Bagel Topping — Sprinkle everything bagel seasoning over the stuffed peppers before baking for a crunchy, savory finishing touch.
Herb Swap — No chives on hand? Try finely chopped green onion, dill, or basil instead. Fresh herbs are flexible, so use what you have or what’s in season.
Protein Boost — For a heartier bite, mix in finely chopped cooked shrimp or shredded rotisserie chicken.
What to Serve With Stuffed Mini Peppers
These stuffed peppers are wonderfully versatile and pair well with a variety of dishes and occasions:
- Party and Holiday Spreads: Serve alongside a charcuterie board, deviled eggs, or a cheese platter for a colorful addition to your appetizer table.
- Brunch: Pair with a quiche, fresh fruit salad, or a light green salad for an elegant brunch spread.
- Game Day Snacking: Add them to a spread with buffalo chicken dip, sliders, and other savory finger foods.
- Wine Night: Their creamy, garlicky flavor pairs beautifully with a crisp white wine like Sauvignon Blanc or a light rosé.
- Simple Weeknight Snack: Enjoy a few on their own as a low-carb, protein-packed snack any night of the week.
Make-Ahead and Storage Tips
To make ahead: You can prepare the filling up to 2 days in advance and store it in an airtight container in the refrigerator. You can also stuff the peppers ahead of time, cover them tightly, and refrigerate for up to 24 hours before baking. When you’re ready to serve, simply pop them in the oven as directed, adding a couple of extra minutes to the bake time if they’re going in cold.
Storing leftovers: Allow any leftover stuffed peppers to cool completely, then store them in an airtight container in the refrigerator for up to 3 days.
Reheating: For the best texture, reheat leftovers in the oven at 350°F for about 8 to 10 minutes, until warmed through. You can also microwave them in short bursts, though the peppers may soften slightly more than they would with oven reheating.
Freezing: This recipe is best enjoyed fresh, as the cream cheese filling and pepper texture can change slightly after freezing and thawing. If you do want to freeze them, assemble the unbaked stuffed peppers, freeze them in a single layer until solid, then transfer to a freezer bag. Bake from frozen, adding several extra minutes to the cook time.
Frequently Asked Questions
Can I use regular bell peppers instead of mini sweet peppers? Yes, though you’ll need to adjust the recipe slightly. Cut bell peppers into smaller pieces or use bell pepper halves and increase the bake time since they’re thicker and larger than mini peppers.
Can I make this recipe dairy-free? You can experiment with dairy-free cream cheese and yogurt alternatives, though the texture and flavor will differ somewhat from the original recipe.
How do I keep the filling from oozing out while baking? Make sure your peppers are dried well, don’t overfill them past the rim, and avoid opening the oven door too often, which can cause temperature fluctuations that affect texture.
Can I prepare these without an oven, like in an air fryer? Yes. Air fry the stuffed peppers at 375°F for about 8 to 10 minutes, checking for doneness a couple of minutes early since air fryers tend to cook faster than conventional ovens.
What can I use instead of Greek yogurt? Sour cream is a great one-to-one substitute if you don’t have Greek yogurt on hand, though it will make the filling slightly richer and less tangy.
Final Thoughts
Creamy Garlic Herb Stuffed Mini Peppers are the kind of appetizer that disappears fast at every gathering — and for good reason. They’re simple to make, endlessly customizable, and deliver big flavor in every colorful, two-bite package. Whether you’re setting out a holiday appetizer spread, building a snack board for movie night, or just want an easy savory bite to enjoy on a weeknight, this recipe is guaranteed to become a go-to in your kitchen rotation.
Give them a try at your next gathering, and don’t be surprised when someone asks for the recipe before the platter is even empty.
Recipe Card: Creamy Garlic Herb Stuffed Mini Peppers
Prep Time: 15 minutes | Cook Time: 12–15 minutes | Total Time: about 30 minutes | Yield: 24 pepper halves (12 whole peppers)
Ingredients
- 12 mini sweet peppers
- 1 teaspoon olive oil
- 4 ounces cream cheese, softened
- ¼ cup plain Greek yogurt
- ¼ cup finely grated Parmesan cheese
- 2 garlic cloves, finely minced
- 1 tablespoon fresh parsley, chopped
- 1 tablespoon fresh chives, chopped
- 1 teaspoon Italian seasoning
- ½ teaspoon dried oregano
- ¼ teaspoon black pepper
- ¼ teaspoon salt
- 1 tablespoon fresh lemon juice
Instructions
- Preheat the oven to 375°F.
- Wash the mini sweet peppers and slice them in half lengthwise. Remove the seeds and membranes.
- Arrange the pepper halves on a baking sheet and lightly brush them with olive oil.
- In a bowl, combine the softened cream cheese, Greek yogurt, Parmesan, garlic, parsley, chives, Italian seasoning, oregano, black pepper, salt, and lemon juice.
- Mix until smooth, creamy, and well combined.
- Spoon or pipe the filling evenly into each pepper half.
- Bake for 12 to 15 minutes, until the peppers are tender and the filling is warm and lightly golden.
- Let the stuffed peppers cool for a few minutes before serving.
- Garnish with fresh parsley or chives and serve warm as an appetizer, party bite, brunch dish, or snack-board favorite.
-
Print

Creamy Garlic Herb Stuffed Mini Peppers
Ingredients
Here’s a closer look at what goes into these stuffed peppers and why each ingredient earns its place in the filling.
Mini sweet peppers — The star of the show. Unlike bell peppers, mini sweet peppers have a naturally sweet, mild flavor and a thinner skin that softens beautifully in the oven without becoming mushy. Their small size also makes them perfect for two-bite appetizers.
Olive oil — A light brushing helps the peppers roast rather than steam, encouraging those lightly caramelized edges that add depth of flavor.
Cream cheese — The base of the filling, providing richness and that classic creamy texture. Make sure it’s fully softened at room temperature so it blends smoothly without lumps.
Plain Greek yogurt — This lightens up the filling, adds a pleasant tang, and boosts the protein content compared to using cream cheese alone.
Parmesan cheese — Finely grated Parmesan adds a salty, nutty, umami-rich flavor and helps the filling turn golden and slightly crisp on top as it bakes.
Garlic — Freshly minced garlic is essential here; it infuses the entire filling with warm, savory depth that pre-minced or powdered garlic simply can’t replicate.
Fresh parsley and chives — These herbs add brightness, color, and a subtle oniony bite from the chives. Fresh herbs make a noticeable difference in flavor compared to dried.
Italian seasoning and dried oregano — These dried herb blends round out the flavor profile with warm, earthy, slightly floral notes that complement the fresh herbs.
Black pepper and salt — Simple seasonings that bring all the flavors into balance.
Fresh lemon juice — A small but mighty addition. The acidity cuts through the richness of the cream cheese and yogurt, keeping the filling from tasting flat or heavy.
Instructions
1. Preheat and Prep Start by preheating your oven to 375°F. While it heats, wash your mini sweet peppers thoroughly and pat them dry. Slice each pepper in half lengthwise, right through the stem, and use a small spoon or paring knife to remove the seeds and white membranes. Removing the membranes helps reduce excess moisture and bitterness, giving you a cleaner, sweeter bite.
2. Arrange and Oil Place the pepper halves cut-side up on a large baking sheet, ideally lined with parchment paper for easy cleanup. Lightly brush the peppers with olive oil. This small step helps the peppers roast rather than steam, giving them a slightly tender-crisp texture with just enough caramelization at the edges.
3. Make the Filling In a mixing bowl, combine the softened cream cheese, Greek yogurt, Parmesan cheese, minced garlic, chopped parsley, chopped chives, Italian seasoning, dried oregano, black pepper, salt, and fresh lemon juice. Using a spatula or hand mixer, blend everything together until the mixture is smooth, creamy, and fully combined. Take a moment to taste and adjust the seasoning here — if you love a bolder garlic flavor, feel free to add an extra clove.
4. Stuff the Peppers Spoon the filling into each pepper half, or for a neater presentation, transfer the mixture to a piping bag or a zip-top bag with the corner snipped off and pipe it in. Fill each pepper generously, mounding the filling slightly since it will settle a bit as it bakes.
5. Bake to Golden Perfection Transfer the baking sheet to the preheated oven and bake for 12 to 15 minutes, until the peppers are fork-tender and the filling is warm, creamy, and just beginning to turn golden on top. If you love extra color, you can broil the peppers for the final 1 to 2 minutes — just watch closely so they don’t burn.
6. Cool, Garnish, and Serve Let the stuffed peppers rest for a few minutes after baking; the filling will be very hot straight out of the oven. Garnish with a sprinkle of fresh parsley or chives for a pop of color, then serve warm.