Easy 3-Ingredient Chickpea Bread: A Soft, Protein-Rich Loaf With No Yeast or Kneading
If you’ve ever wanted fresh homemade bread without the hassle of yeast, proofing, or kneading, this Easy 3-Ingredient Chickpea Bread is for you. 🫘🍞 It’s soft, hearty, and satisfying, and it comes together with just chickpeas, eggs, and baking powder. You only need a food processor, a loaf pan, and about an hour.
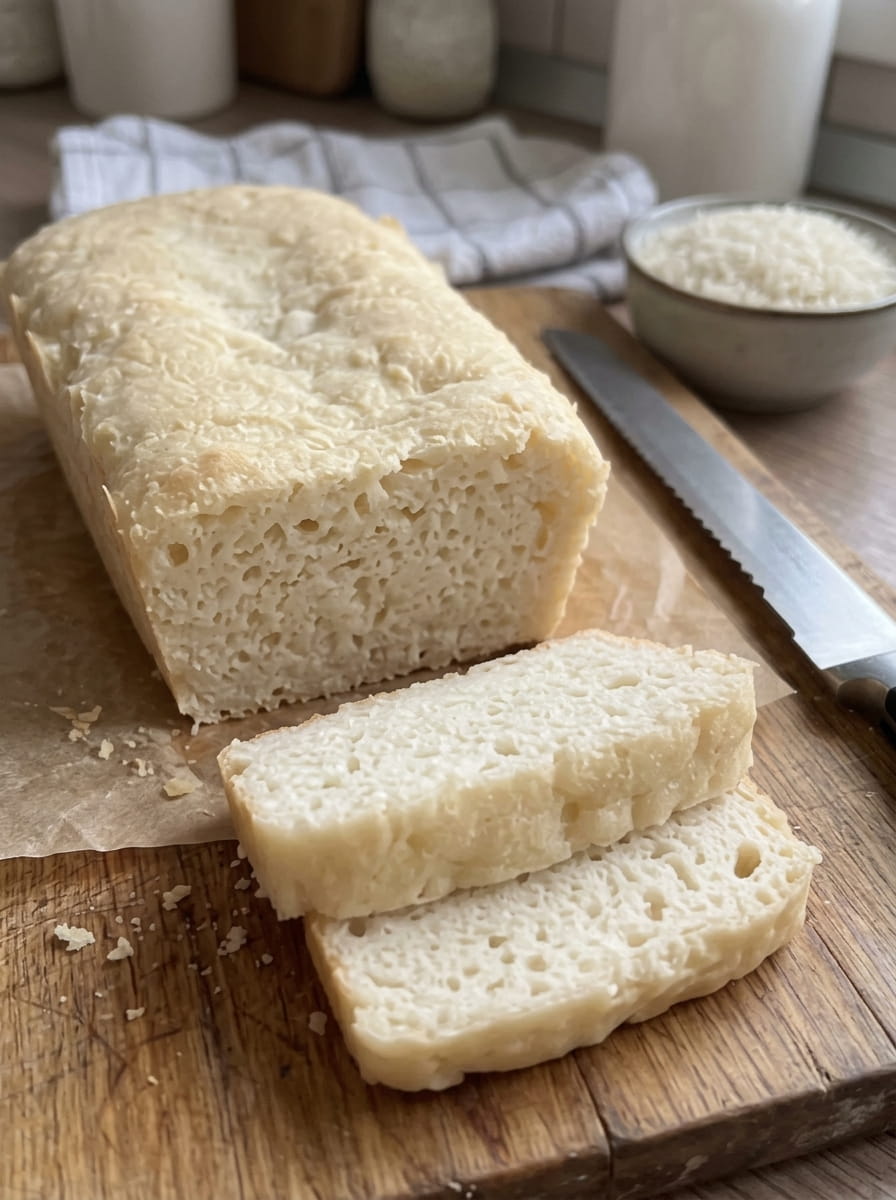
The loaf has a tender, moist crumb and a mild, slightly nutty flavor that works with sweet and savory toppings alike. Toast it for breakfast, stack it into a sandwich, or serve it next to a warm bowl of soup. It’s also naturally free of wheat flour, which makes it a handy option if you’re cutting back on gluten-containing ingredients (see the note on cross-contamination below).
In this guide, you’ll find the full recipe, step-by-step instructions, troubleshooting tips, flavor variations, serving ideas, and storage advice so your loaf turns out right every time.
Why You’ll Love This Chickpea Bread
Plenty of “healthy bread” recipes call for long ingredient lists, specialty flours, or hours of rising time. This one is different.
- Only three ingredients. Canned chickpeas, eggs, and baking powder are all you need. Most people already have them in the pantry and fridge.
- No yeast and no kneading. The baking powder gives the loaf its lift, so there’s no waiting for dough to rise.
- Protein-rich. Chickpeas and eggs are both good sources of protein, so a slice is more filling than a typical slice of white sandwich bread.
- Naturally wheat-free. There’s no wheat flour in the recipe, making it a great choice for anyone avoiding wheat.
- Beginner-friendly. If you can use a blender and a loaf pan, you can make this bread.
- Versatile. It’s mild enough to go sweet or savory, and it’s easy to customize with herbs, spices, and seeds.
- Budget-friendly. Canned chickpeas and eggs are inexpensive, so you get a wholesome loaf for a fraction of what specialty bakery bread costs.
Ingredients You’ll Need 🛒
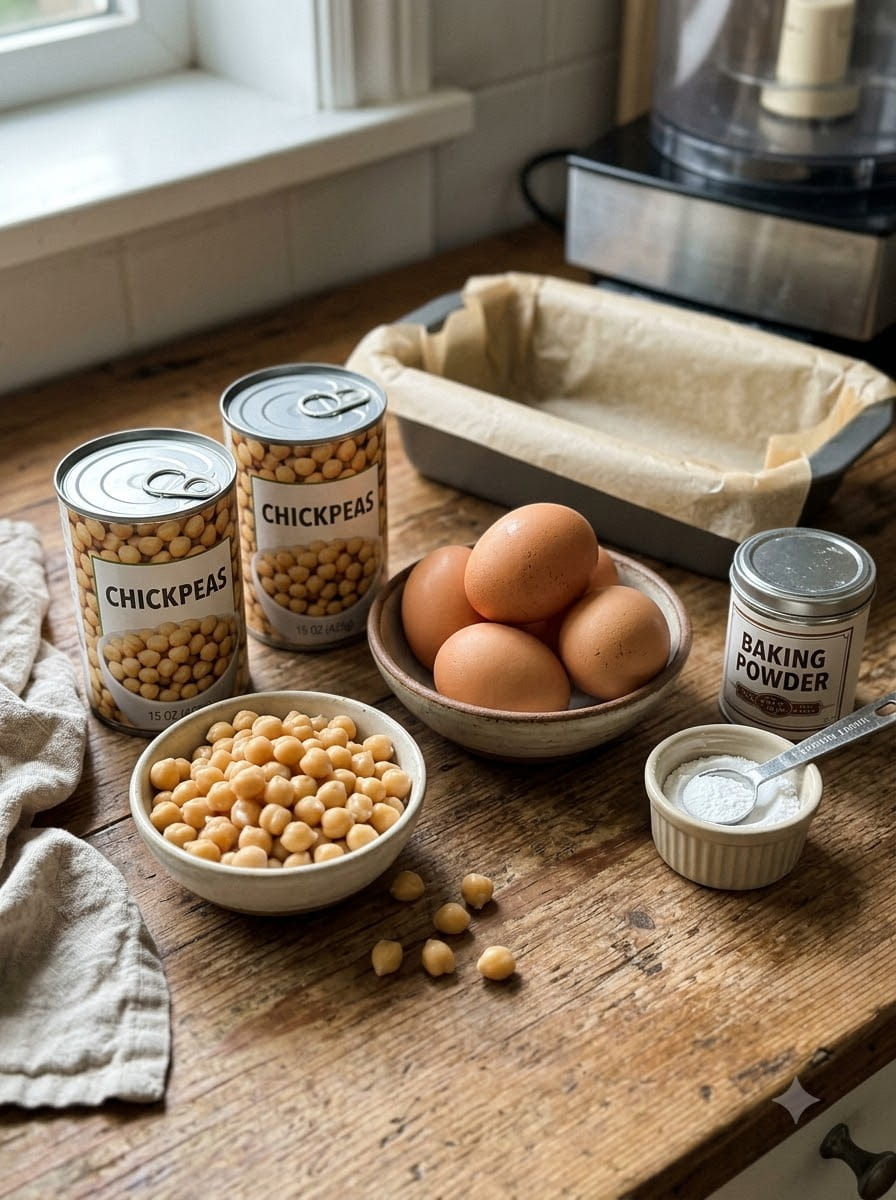
Here’s everything you need for one standard loaf:
- 2 cans chickpeas (15 oz / 425 g each), drained and rinsed very well
- 4 large eggs
- 2 teaspoons baking powder
That’s the entire list. For equipment, you’ll want a food processor or high-powered blender, a standard loaf pan, parchment paper (or a little oil or butter for greasing), a spatula, and a wire cooling rack.
A Closer Look at Each Ingredient
Chickpeas. These are the foundation of the loaf. When blended until smooth, they behave much like a flour-based batter, giving the bread body and a soft, dense-but-tender texture. Rinsing them thoroughly matters. The liquid in the can can add a slightly briny or “canned” taste, and rinsing removes most of it. Pat them fairly dry after rinsing so the batter isn’t too wet.
Eggs. Eggs act as the binder and structure-builder. They hold the blended chickpeas together, add moisture, and help the loaf set as it bakes. Large eggs at room temperature blend more smoothly into the chickpeas, so take them out of the fridge about 15 to 20 minutes before you start if you can.
Baking powder. This is your leavening agent. It reacts with moisture and heat to create small bubbles, giving the bread some lift so it isn’t a dense brick. Make sure your baking powder is fresh. If the tin has been open for more than six months or so, it may have lost its strength, and your loaf could turn out flat.
How to Make Easy 3-Ingredient Chickpea Bread 👩🍳
Step 1: Preheat and Prepare the Pan
Preheat your oven to 350°F (175°C). Line a loaf pan with parchment paper, leaving a little overhang on the long sides so you can lift the bread out easily later. If you don’t have parchment, lightly grease the pan with oil or butter instead.
Step 2: Blend the Chickpeas and Eggs
Add the drained, rinsed chickpeas and the eggs to a food processor or blender. Blend until the mixture is completely smooth and creamy. Stop and scrape down the sides once or twice so no whole chickpeas or chunky bits are left behind. Smoothness is the secret here, because lumps in the batter will show up as uneven texture in the baked loaf.
Step 3: Add the Baking Powder
Sprinkle in the baking powder and blend just briefly, only until it’s evenly incorporated. Avoid overmixing at this stage. Blending too long after adding the baking powder can knock out some of the air and reduce the rise.
Step 4: Fill the Pan
Pour the batter into your prepared loaf pan. Use a spatula to smooth the top into an even layer. Give the pan a gentle tap on the counter to release any large air bubbles.
Step 5: Bake
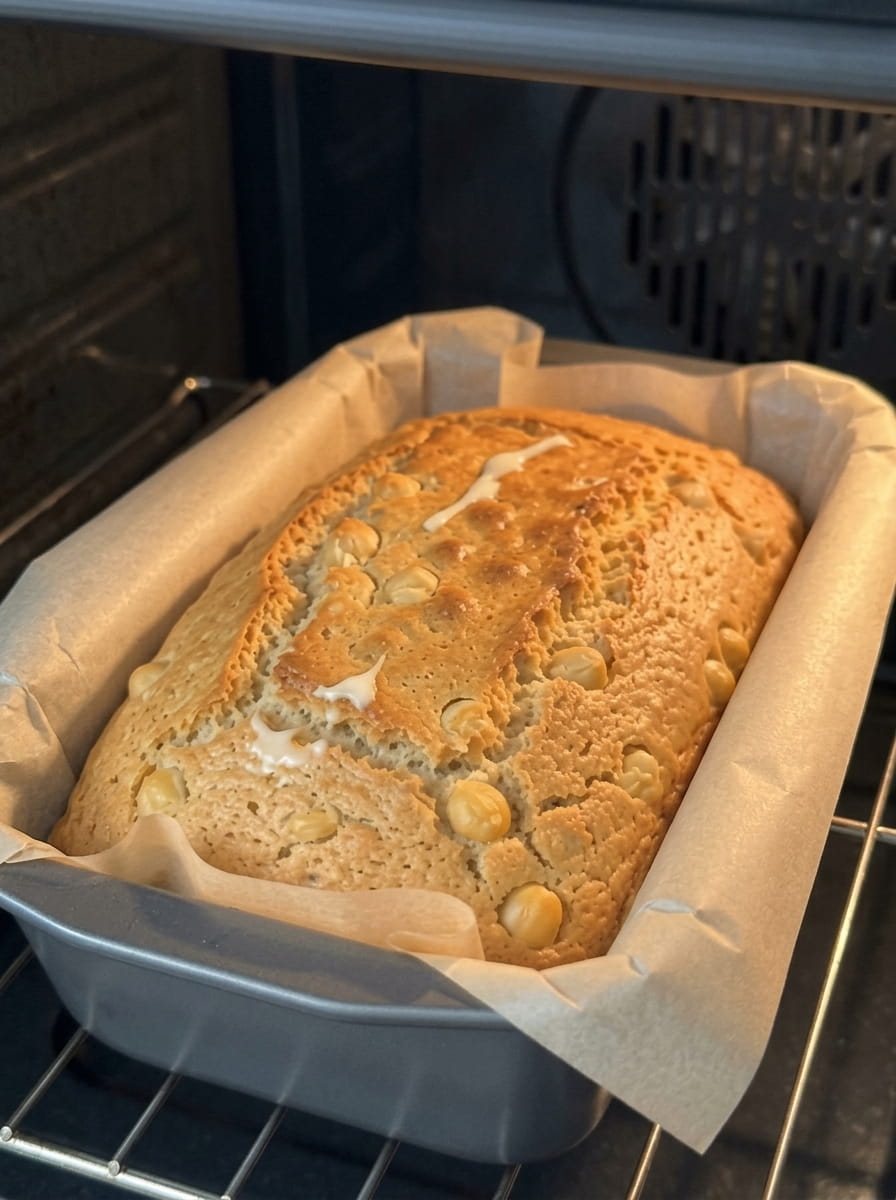
Bake for 45 to 55 minutes. The loaf is done when it feels firm to the touch, looks lightly golden on top, and a toothpick inserted into the center comes out clean. Ovens vary, so start checking around the 45-minute mark. If the top is browning too quickly, loosely tent it with foil for the last 10 minutes.
Step 6: Cool Completely
Let the bread cool in the pan for 10 to 15 minutes. Then lift it out, using the parchment overhang, and transfer it to a wire rack to cool completely before slicing. Don’t skip this step. The loaf continues to set as it cools, and slicing too early can leave the inside seeming gummy or damp.
Pro Tips for the Best Chickpea Bread
A few small details make the difference between a good loaf and a great one.
Rinse and drain well. Excess liquid is the number one cause of a soggy loaf. Rinse the chickpeas under cold water, let them drain in a colander for a few minutes, and pat them with a clean towel.
Blend until truly smooth. A food processor does a great job, but you’ll need to scrape the bowl a few times. A high-powered blender also works, though you may need to add the ingredients in stages if your blender struggles with the thick mixture.
Use fresh baking powder. Test it by dropping half a teaspoon into a little hot water. If it fizzes vigorously, it’s good to go.
Don’t overbake or underbake. An underbaked loaf will be gummy in the center, and an overbaked one can turn dry. Rely on the toothpick test and the firmness of the top rather than the clock alone.
Let it cool fully. Patience pays off. A fully cooled loaf slices cleanly and has a better texture.
Slice and toast. Because this bread is moist and dense, toasting each slice firms up the outside and gives it a lovely crisp edge. It’s often even better the day after baking, once it’s had time to settle.
Troubleshooting Common Problems
My bread is too dense. Chickpea bread is naturally denser than yeast bread, but a very heavy loaf may mean old baking powder or overmixing after the baking powder was added. Check the freshness of your leavener and keep that final blend short.
The middle is gummy or wet. This usually means the loaf needed more time in the oven, or it was cut before cooling. Bake a little longer, and always let the bread cool completely on a wire rack.
It tastes too “beany.” Make sure you rinse the chickpeas very well. You can also add a pinch of salt, a little garlic powder, or some herbs to balance the flavor. A small amount of lemon zest can also brighten the taste.
The loaf stuck to the pan. Parchment paper is the most reliable fix. If you’re greasing instead, be generous and cover the corners.
The top cracked. Small cracks are normal and completely fine. They happen as the loaf rises and sets, and they don’t affect the taste.
Delicious Variations to Try
The basic three-ingredient loaf is wonderful on its own, but it’s also an easy base for experimenting. Add a few extras to the blender along with the baking powder, or fold them in afterward.
Savory ideas
- A pinch of salt and a little black pepper
- Garlic powder or onion powder
- Dried herbs such as rosemary, thyme, or Italian seasoning
- A handful of grated cheese
- Everything-bagel seasoning sprinkled on top
- Sesame seeds, sunflower seeds, or pumpkin seeds on the crust
Sweet ideas
- A teaspoon of cinnamon with a drizzle of honey or maple syrup
- A splash of vanilla extract
- A handful of raisins or chopped dried fruit stirred into the batter
- Crushed walnuts or pecans folded in
Keep in mind that adding extras means the recipe is no longer strictly three ingredients, and very wet add-ins can change the texture, so start small.
What to Serve With Chickpea Bread
Because the flavor is mild and the texture is soft and hearty, this bread pairs well with nearly anything. Here are some favorite ways to enjoy it:
For breakfast
- Toasted with mashed avocado and a squeeze of lemon
- Topped with scrambled or fried eggs
- Spread with butter, nut butter, or a drizzle of honey
- Served with sliced tomatoes and a sprinkle of salt and pepper
For lunch
- As sandwich bread with turkey, chicken, or veggie fillings
- Alongside a big green salad
- Topped with hummus, cucumber, and fresh herbs
- Cut into strips for dipping into soup
For dinner
- Served beside a warm bowl of lentil, tomato, or vegetable soup
- Used as a base for open-faced toasts with roasted vegetables
- Torn into pieces to scoop up stews and dips
For snacks
- Toasted and topped with cream cheese or ricotta and fruit
- Spread with almond or peanut butter
- Layered with sliced banana and a dash of cinnamon
Storage and Meal Prep Tips
Room temperature. Because this loaf is moist, it’s best not to leave it out for long. If your kitchen is cool, it can sit covered for a few hours, but refrigeration is safer for anything longer.
Refrigerator. Once the bread has cooled completely, wrap it well or store it in an airtight container. It will keep for about 4 to 5 days in the fridge. Toast the slices to refresh the texture.
Freezer. For longer storage, slice the cooled loaf, place parchment paper between slices, and freeze them in a freezer-safe bag for up to 2 to 3 months. Pop slices straight into the toaster from frozen, which makes this bread perfect for busy mornings.
Reheating. A toaster, toaster oven, or a hot skillet all work well. Reheating brings back a slightly crisp outside and a soft inside.
Is Chickpea Bread Healthy?
This loaf is a more nutrient-dense alternative to many store-bought breads. Chickpeas provide plant-based protein and dietary fiber, and eggs add high-quality protein as well. Together, they make a slice that tends to be more filling and satisfying than a slice of plain white bread.
The exact nutrition will depend on the brand of chickpeas, the size of your eggs, and how thickly you slice the loaf, so if you’re tracking calories or macros precisely, it’s best to enter your specific ingredients into a nutrition calculator.
A few notes worth knowing:
- Gluten. The recipe contains no wheat flour, but if you need to avoid gluten strictly, check that your canned chickpeas and baking powder are labeled gluten-free to rule out cross-contamination.
- Sodium. Canned chickpeas can contain added salt. Look for low-sodium or no-salt-added cans, and rinse well.
- Allergens. The recipe contains eggs, so it isn’t suitable for anyone with an egg allergy.
- Dietary needs. If you follow a special diet for medical reasons, check with your healthcare provider about whether this bread fits your plan.
Frequently Asked Questions
Can I use dried chickpeas instead of canned?
Yes. Cook them until very soft, drain them thoroughly, and let them cool. You’ll need roughly the same amount as two cans, about 3 cups cooked. Make sure they’re well drained so the batter isn’t too wet.
Can I make this bread without eggs?
Eggs are essential to the structure of this particular recipe, so an egg-free version would need a different formulation. Common substitutes like flax eggs don’t always give the same result in a three-ingredient loaf.
Can I use a blender instead of a food processor?
You can, as long as it’s powerful enough to handle the thick mixture. You may need to stop and stir or add the ingredients in two batches.
Does it taste like hummus?
Not really. Baking mellows the chickpea flavor into something mild and slightly nutty. Without tahini, garlic, and lemon, it doesn’t taste like a dip, and most people find the flavor quite neutral.
Why is my bread so moist?
Chickpea bread is naturally moister than traditional wheat bread. Toasting the slices improves the texture considerably.
Can I double the recipe?
Yes. Use two loaf pans, or a larger pan, and adjust the baking time. Check for doneness with a toothpick, since a deeper loaf may need extra time.
What size loaf pan should I use?
A standard 9 x 5-inch (23 x 13 cm) loaf pan works well. A smaller pan will give you a taller, denser loaf that needs more baking time.
Is this bread good for sandwiches?
It is, especially when toasted. Slice it moderately thick so it holds up to fillings without falling apart.
Final Thoughts
This Easy 3-Ingredient Chickpea Bread proves that great homemade bread doesn’t have to be complicated. With chickpeas, eggs, and baking powder, you get a soft, protein-rich loaf that’s ready in about an hour with minimal effort and almost no cleanup. It’s an easy way to put a pantry staple to work, and it’s flexible enough to become a regular part of your breakfasts, lunches, and snacks.
Print
Easy 3-Ingredient Chickpea Bread
Ingredients
Here’s everything you need for one standard loaf:
- 2 cans chickpeas (15 oz / 425 g each), drained and rinsed very well
- 4 large eggs
- 2 teaspoons baking powder
That’s the entire list. For equipment, you’ll want a food processor or high-powered blender, a standard loaf pan, parchment paper (or a little oil or butter for greasing), a spatula, and a wire cooling rack.
Instructions
Preheat your oven to 350°F (175°C). Line a loaf pan with parchment paper, leaving a little overhang on the long sides so you can lift the bread out easily later. If you don’t have parchment, lightly grease the pan with oil or butter instead.
Add the drained, rinsed chickpeas and the eggs to a food processor or blender. Blend until the mixture is completely smooth and creamy. Stop and scrape down the sides once or twice so no whole chickpeas or chunky bits are left behind. Smoothness is the secret here, because lumps in the batter will show up as uneven texture in the baked loaf.
Sprinkle in the baking powder and blend just briefly, only until it’s evenly incorporated. Avoid overmixing at this stage. Blending too long after adding the baking powder can knock out some of the air and reduce the rise.
Pour the batter into your prepared loaf pan. Use a spatula to smooth the top into an even layer. Give the pan a gentle tap on the counter to release any large air bubbles.
Bake for 45 to 55 minutes. The loaf is done when it feels firm to the touch, looks lightly golden on top, and a toothpick inserted into the center comes out clean. Ovens vary, so start checking around the 45-minute mark. If the top is browning too quickly, loosely tent it with foil for the last 10 minutes.
Let the bread cool in the pan for 10 to 15 minutes. Then lift it out, using the parchment overhang, and transfer it to a wire rack to cool completely before slicing. Don’t skip this step. The loaf continues to set as it cools, and slicing too early can leave the inside seeming gummy or damp.