Flour-Free Oat & Chia Bread: The Viral TikTok Recipe That Actually Lives Up to the Hype
If your social media feed has been flooded with videos of a soft, golden loaf of bread made entirely from oats and chia seeds, you’re not imagining it. This Flour-Free Oat & Chia Bread has taken TikTok by storm, and for good reason. With no flour, no yeast, and no complicated kneading involved, this simple blender bread delivers a tender, fluffy texture with a hearty oat flavor and a satisfying bite from the chia seeds. It’s the kind of recipe that sounds almost too easy to work, yet somehow turns out exactly as soft and delicious as promised.
In this article, we’ll cover everything you need to know about making the perfect Flour-Free Oat & Chia Bread, including step-by-step instructions, ingredient substitutions, troubleshooting tips, serving ideas, storage guidance, and answers to the most frequently asked questions about this viral recipe.
Why This Flour-Free Oat & Chia Bread Has Gone Viral
It’s not every day that a homemade bread recipe captures the attention of millions on social media, but this one has earned its popularity through a combination of simplicity, nutrition, and genuinely impressive results.
It’s completely flour-free. Unlike traditional bread recipes that rely on wheat flour or specialty gluten-free flour blends, this recipe uses nothing but rolled oats as its base, ground directly in the blender. This makes it an appealing option for anyone looking to reduce refined flour in their diet or simply try something different.
It requires no yeast or proofing time. Traditional bread baking often involves a lengthy process of activating yeast, kneading dough, and waiting for it to rise. This recipe skips all of that entirely, relying on baking powder for lift instead, which means you can go from ingredients to oven in under 20 minutes of active prep time.
It’s made entirely in a blender. There’s no stand mixer, no kneading by hand, and no specialized equipment required. Everything comes together in a single blender, making this one of the most low-effort bread recipes you’ll ever try.
It’s naturally nutritious. Between the fiber-rich oats and the omega-3-packed chia seeds, this bread offers a nutritional profile that far exceeds typical white bread, making it a wholesome option for breakfast, snacking, or sandwiches.
It’s incredibly versatile. This bread’s mild, hearty flavor pairs well with both sweet and savory toppings, making it just as suitable for an avocado toast base as it is for a peanut butter and honey snack.
Ingredients You’ll Need
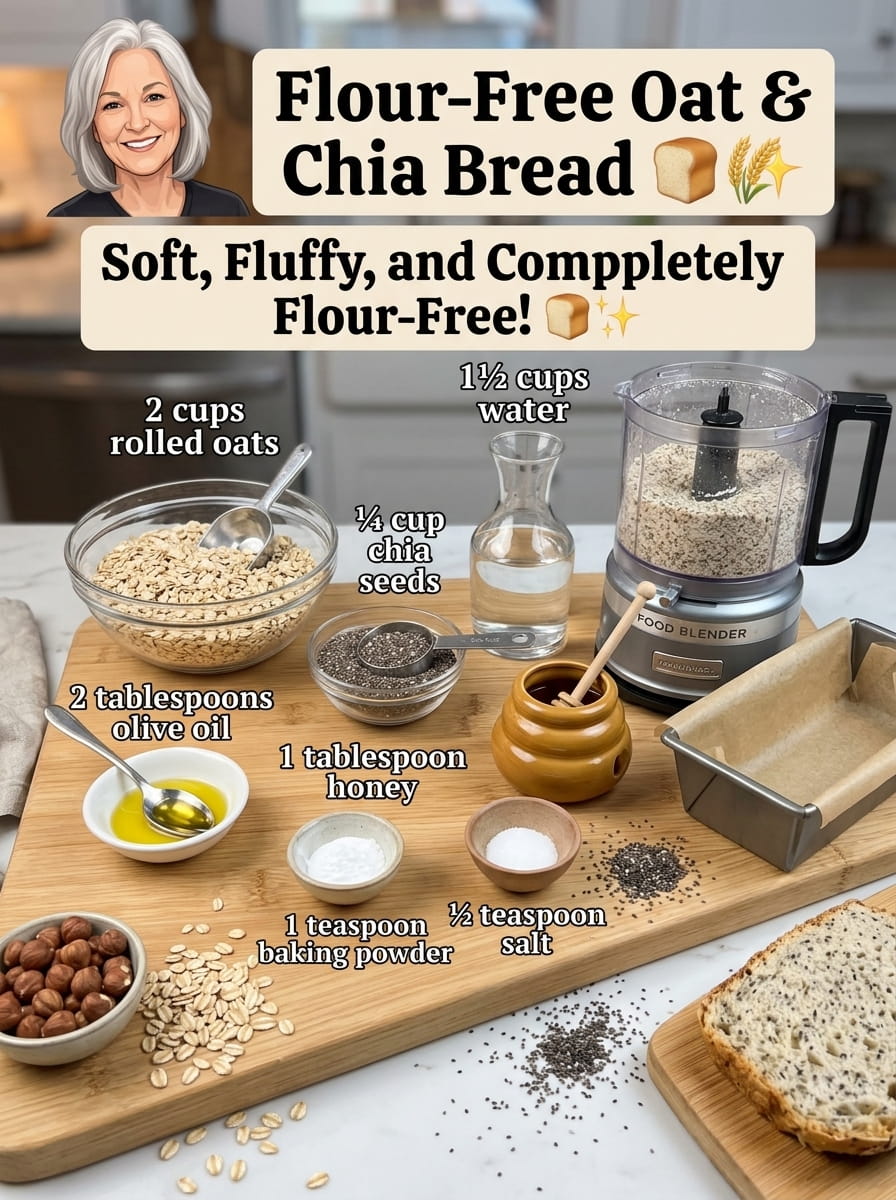
This recipe’s beauty lies in its simplicity. With just seven pantry staples, you can create a complete loaf of bread.
- 2 cups rolled oats – The base of the bread, ground into a fine, flour-like consistency
- ¼ cup chia seeds – Adds a satisfying bite and acts as a natural binder once hydrated
- 1½ cups water – Hydrates the oats and chia seeds, creating the batter’s structure
- 2 tablespoons olive oil – Adds moisture and richness to the finished texture
- 1 tablespoon honey – Provides a subtle sweetness that balances the hearty oat flavor
- 1 teaspoon baking powder – Provides the lift and fluffiness in place of traditional yeast
- ½ teaspoon salt – Balances and enhances all the other flavors
Step-by-Step Preparation Instructions
This recipe comes together in just a few simple steps, with most of the work happening in the blender.
Step 1: Grind the oats and chia seeds. Add the rolled oats and chia seeds to a blender and blend until they reach a fine, flour-like consistency. This step is essential, as it creates the foundation that gives the bread its tender crumb rather than a chunky, overly textured loaf.
Step 2: Add the remaining ingredients. Add the water, olive oil, honey, baking powder, and salt directly into the blender with the ground oat and chia mixture.
Step 3: Blend until smooth. Blend everything together until the batter is smooth and fully combined, scraping down the sides of the blender if needed to make sure no dry pockets remain.
Step 4: Let the batter rest. Allow the batter to rest for 10 to 15 minutes. During this time, the chia seeds will absorb the liquid and begin to thicken the mixture, giving the batter the right consistency for baking.
Step 5: Transfer to a loaf pan. Pour the rested batter into a lined loaf pan, using a spatula to smooth the surface evenly.
Step 6: Bake until golden and firm. Bake at 350°F for 35 to 45 minutes, or until the bread is firm to the touch and lightly golden on top. A toothpick inserted into the center should come out clean or with just a few moist crumbs.
Step 7: Cool completely. Let the bread cool completely in the pan or on a wire rack before slicing. This step is crucial, as the bread continues to set as it cools, and slicing too early can result in a gummy or overly soft texture.
Step 8: Slice and serve. Once fully cooled, slice the bread and serve with your favorite sweet or savory toppings.
Tips for the Best Flour-Free Oat & Chia Bread
Grind the oats thoroughly. Take the time to blend the oats and chia seeds until they reach a fine, flour-like texture. Under-blending can result in a gritty, uneven crumb rather than the soft, tender texture this bread is known for.
Don’t skip the resting time. The 10 to 15 minute rest is what allows the chia seeds to absorb liquid and thicken the batter into the right consistency for baking. Skipping this step can result in a batter that’s too thin and doesn’t hold its shape well in the oven.
Use room-temperature water. Using water that’s at room temperature, rather than very cold water, helps the chia seeds hydrate more evenly during the resting period.
Line your loaf pan properly. Use parchment paper to line your loaf pan, leaving some overhang on the sides. This makes removing the finished bread significantly easier and helps prevent sticking.
Resist the urge to slice too early. As tempting as it is to cut into a freshly baked loaf, letting this bread cool completely, ideally for at least an hour, allows it to fully set and makes slicing much cleaner.
Check for doneness with a toothpick. Since this bread doesn’t rise or brown in quite the same way as traditional wheat bread, use a toothpick test in the center of the loaf to confirm it’s fully baked through.
Ingredient Substitutions and Variations
While this recipe is wonderfully simple as written, there’s plenty of room to customize it to your taste or dietary needs.
Swap the sweetener. Maple syrup or agave nectar can be used in place of honey for a vegan-friendly version of this bread.
Add mix-ins for extra flavor. Fold in a handful of raisins, chopped walnuts, sunflower seeds, or a sprinkle of cinnamon before pouring the batter into the loaf pan for added texture and flavor.
Make it savory. Reduce or omit the honey and add herbs like rosemary or thyme, along with a bit of garlic powder, for a savory version of this bread that pairs beautifully with soups and stews.
Use a different oil. Melted coconut oil or avocado oil can be used in place of olive oil for a slightly different flavor profile.
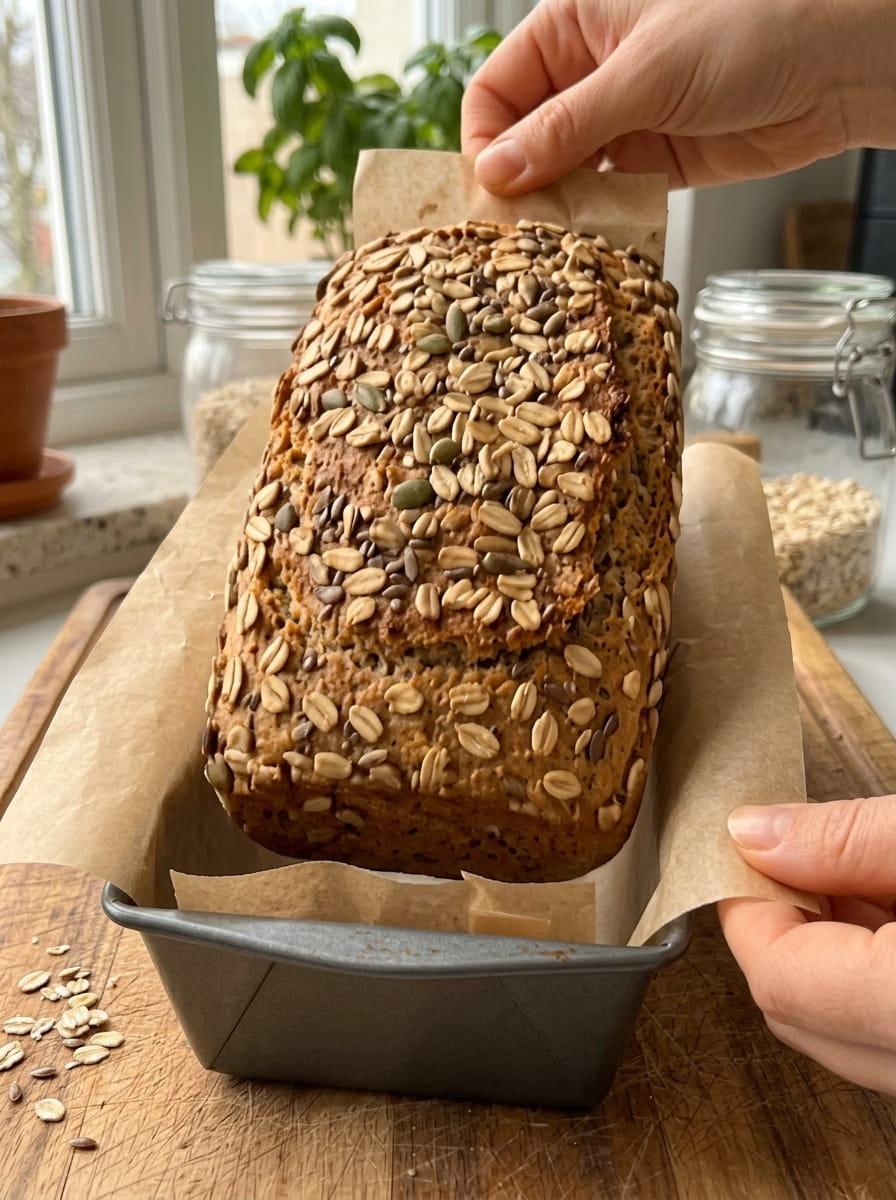
Add seeds on top. Before baking, sprinkle a mix of additional oats, chia seeds, or sesame seeds on top of the batter for a more rustic, bakery-style appearance.
Adjust for a nut-free or seed-free kitchen. This recipe is naturally nut-free as written, making it a safe option for those with nut allergies, though always double-check your oats are processed in a facility free of cross-contamination if that’s a concern.
Troubleshooting Common Issues
My bread turned out too dense. This is often caused by under-blending the oats and chia seeds, resulting in an uneven texture, or by not allowing the batter to rest long enough before baking. Make sure the oat mixture reaches a fine, flour-like consistency, and don’t skip the resting period.
My bread didn’t rise much. Unlike yeast breads, this recipe relies on baking powder for a gentle lift rather than a dramatic rise. A subtle rise is normal and expected; if your baking powder is old or expired, however, it may not provide enough lift, so make sure it’s fresh.
My bread was gummy in the center. This typically means the bread needed a few more minutes in the oven, or that it was sliced before cooling completely. Always test with a toothpick in the center and allow the loaf to cool fully before cutting.
My batter was too thin even after resting. If your batter seems too thin after the resting period, you can let it rest for an additional 5 to 10 minutes, as chia seeds continue to absorb liquid gradually.
Serving Suggestions
This Flour-Free Oat & Chia Bread’s mild, hearty flavor makes it a wonderfully versatile base for all kinds of toppings and pairings.
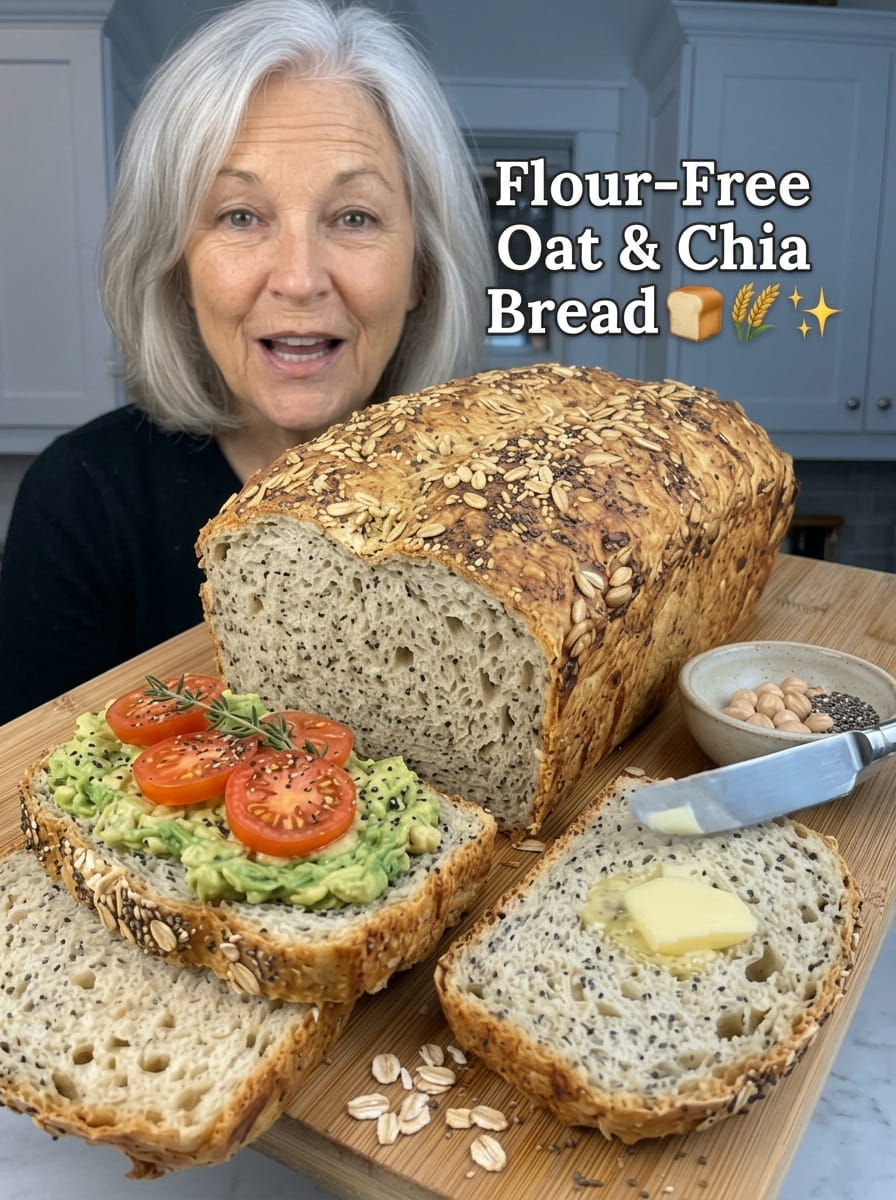
- Classic breakfast toast: Top with butter and a drizzle of honey, or your favorite nut butter and sliced banana.
- Savory avocado toast: Layer with mashed avocado, a sprinkle of salt, and a dash of red pepper flakes for a satisfying, nutritious breakfast or snack.
- Sandwich bread: Use sliced pieces as the base for a hearty sandwich, pairing well with both savory and lightly sweet fillings.
- With soup or stew: Serve alongside a warm bowl of soup for dipping, taking advantage of its hearty, absorbent texture.
- Topped with jam or preserves: The bread’s subtle sweetness pairs wonderfully with fruit preserves for a simple, satisfying snack.
- Toasted with cream cheese: Toast a slice and spread with cream cheese for a quick, protein-rich snack.
Storage and Make-Ahead Tips
This bread stores well, making it a convenient option to prepare in advance for the week ahead.
Room temperature storage: Once fully cooled, this bread can be stored in an airtight container at room temperature for up to 2 days.
Refrigeration: For longer freshness, store the bread in an airtight container in the refrigerator for up to 5 to 6 days.
Freezing: This bread freezes exceptionally well. Slice it before freezing, then store the slices in a freezer-safe bag with parchment paper between layers to prevent sticking. It will keep well in the freezer for up to 2 to 3 months. Thaw individual slices at room temperature or toast them directly from frozen.
Reheating: A quick toast in the toaster or a few minutes in the oven can help refresh the bread’s texture, especially after refrigeration.
Frequently Asked Questions
Is this bread gluten-free?
This recipe is naturally flour-free, and if made with oats that are labeled certified gluten-free, the bread can be considered gluten-free as well. Standard rolled oats are sometimes processed in facilities that also handle wheat, so check the label if gluten is a strict concern.
Can I use quick oats instead of rolled oats?
Rolled oats are recommended for this recipe, as they grind into a more consistent, flour-like texture. Quick oats can sometimes result in a slightly different texture, though they can be used in a pinch.
Why do I need to let the batter rest before baking?
The resting period allows the chia seeds to absorb the liquid in the batter and swell, which thickens the mixture and helps the bread achieve its signature tender texture once baked.
Can I make this recipe vegan?
Yes, simply substitute the honey with maple syrup or agave nectar, and this recipe becomes fully vegan while maintaining its soft, tender texture.
Why is my bread not rising very much?
This bread is designed to have a subtle rise from the baking powder rather than a dramatic, yeast-like rise. As long as it’s cooked through and has a tender, fluffy interior, a modest rise is completely normal for this style of bread.
Can I add mix-ins like nuts or dried fruit?
Absolutely. Folding in a handful of chopped nuts, seeds, or dried fruit before baking is a great way to customize this bread’s flavor and texture.
How do I know when the bread is fully baked?
The bread should be firm to the touch and lightly golden on top. Insert a toothpick into the center; it should come out clean or with just a few moist crumbs, rather than wet batter.
Can I double this recipe for a larger loaf?
Yes, this recipe can be doubled, though you may need to adjust the baking time slightly and ensure your loaf pan is large enough to accommodate the increased volume of batter.
Final Thoughts
Flour-Free Oat & Chia Bread proves that viral recipes sometimes earn their popularity for all the right reasons. With its soft, tender crumb, hearty oat flavor, and satisfying bite from the chia seeds, this bread offers a genuinely delicious result from an incredibly simple, blender-based process. Whether you’re drawn to it for its flour-free nature, its nutritional benefits, or simply its viral appeal, this is a recipe that delivers on its promise.
Once you try your first slice warm from the oven, it’s easy to see why this bread has captured so much attention—and why it’s likely to become a regular in your own kitchen rotation.
Print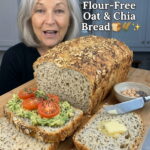
Flour-Free Oat & Chia Bread
Ingredients
This recipe’s beauty lies in its simplicity. With just seven pantry staples, you can create a complete loaf of bread.
- 2 cups rolled oats – The base of the bread, ground into a fine, flour-like consistency
- ¼ cup chia seeds – Adds a satisfying bite and acts as a natural binder once hydrated
- 1½ cups water – Hydrates the oats and chia seeds, creating the batter’s structure
- 2 tablespoons olive oil – Adds moisture and richness to the finished texture
- 1 tablespoon honey – Provides a subtle sweetness that balances the hearty oat flavor
- 1 teaspoon baking powder – Provides the lift and fluffiness in place of traditional yeast
- ½ teaspoon salt – Balances and enhances all the other flavors
Instructions
This recipe comes together in just a few simple steps, with most of the work happening in the blender.
Step 1: Grind the oats and chia seeds. Add the rolled oats and chia seeds to a blender and blend until they reach a fine, flour-like consistency. This step is essential, as it creates the foundation that gives the bread its tender crumb rather than a chunky, overly textured loaf.
Step 2: Add the remaining ingredients. Add the water, olive oil, honey, baking powder, and salt directly into the blender with the ground oat and chia mixture.
Step 3: Blend until smooth. Blend everything together until the batter is smooth and fully combined, scraping down the sides of the blender if needed to make sure no dry pockets remain.
Step 4: Let the batter rest. Allow the batter to rest for 10 to 15 minutes. During this time, the chia seeds will absorb the liquid and begin to thicken the mixture, giving the batter the right consistency for baking.
Step 5: Transfer to a loaf pan. Pour the rested batter into a lined loaf pan, using a spatula to smooth the surface evenly.
Step 6: Bake until golden and firm. Bake at 350°F for 35 to 45 minutes, or until the bread is firm to the touch and lightly golden on top. A toothpick inserted into the center should come out clean or with just a few moist crumbs.
Step 7: Cool completely. Let the bread cool completely in the pan or on a wire rack before slicing. This step is crucial, as the bread continues to set as it cools, and slicing too early can result in a gummy or overly soft texture.
Step 8: Slice and serve. Once fully cooled, slice the bread and serve with your favorite sweet or savory toppings.