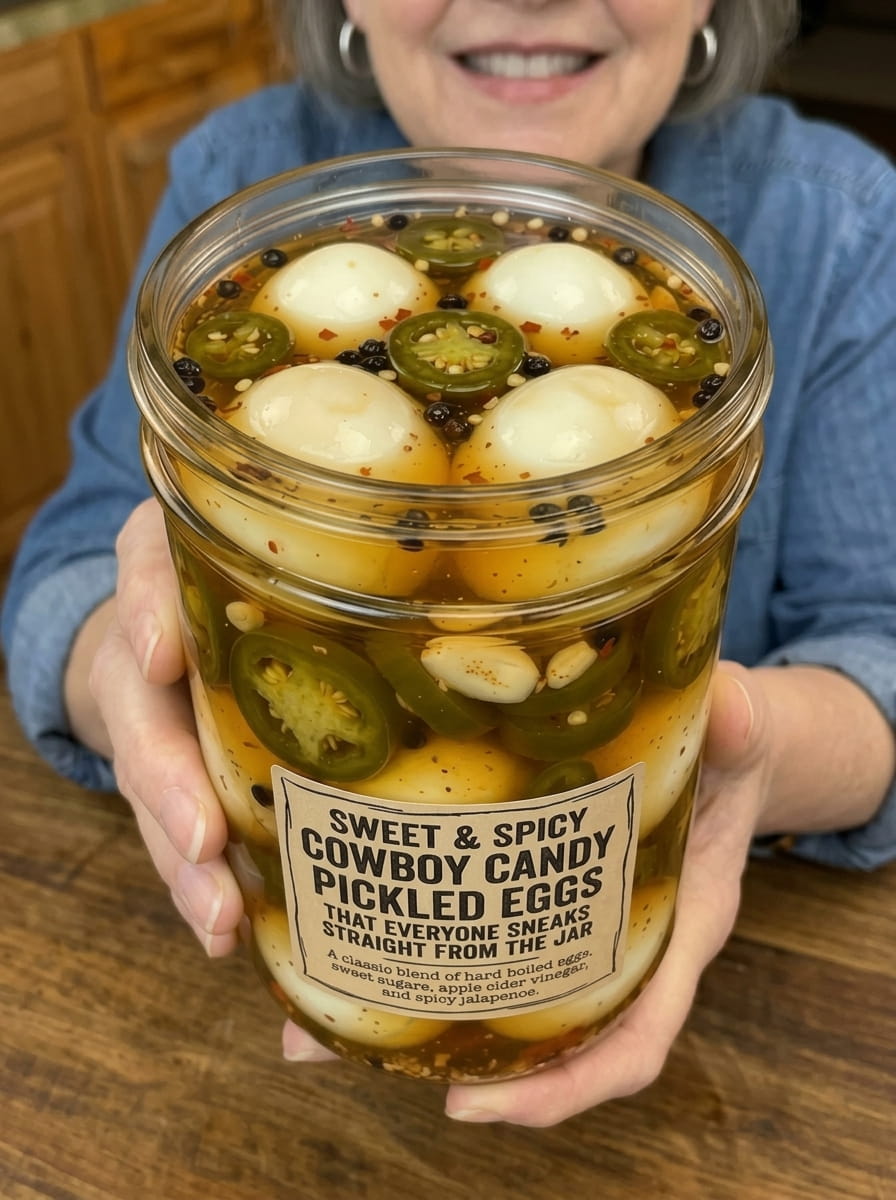
Sweet & Spicy Cowboy Candy Pickled Eggs: The Addictive Snack You Can’t Stop Eating
If you’re a fan of bold, tangy snacks with a sweet-and-spicy kick, Sweet & Spicy Cowboy Candy Pickled Eggs are about to become your new obsession. This recipe takes classic hard-boiled eggs and transforms them with a vibrant cowboy candy-style brine loaded with jalapeños, garlic, mustard seeds, and warm spices. The result is a protein-packed snack that delivers the perfect balance of sweetness, tang, and heat in every single bite—the kind of jar that mysteriously empties faster than you expect.
In this guide, we’ll walk through everything you need to know to make the perfect batch of Sweet & Spicy Cowboy Candy Pickled Eggs, including step-by-step instructions, ingredient tips, creative serving ideas, storage guidance, and answers to the most frequently asked questions about this bold, flavor-packed snack.
What Makes Cowboy Candy Pickled Eggs So Addictive?
Pickled eggs have long been a staple of bar snacks, picnic spreads, and Southern pantries, but this version elevates the tradition by borrowing from the beloved “cowboy candy” style of pickling made famous by candied jalapeños. Instead of a purely savory, vinegar-forward brine, this recipe uses a sweet-tangy syrup infused with sugar, mustard seeds, turmeric, and sliced jalapeños, giving the eggs a completely different character than a traditional pickled egg.
As the eggs sit in this flavorful brine, they absorb layers of sweetness, tang, and gentle heat, while the jalapeños and garlic nestled in the jar continue to infuse the liquid with even more bold flavor. The longer they sit, the more intense and well-rounded the flavor becomes, making this one of those rare snacks that actually improves the longer it waits in your refrigerator.
Why You’ll Love This Recipe
It’s a protein-packed, satisfying snack. Unlike many pickled condiments, these eggs offer substantial protein, making them a filling, energizing snack rather than just a flavor accent.
It delivers bold, balanced flavor. The combination of sweet sugar, tangy apple cider vinegar, warm turmeric, and spicy jalapeños creates a complex flavor profile that’s far more interesting than a traditional pickled egg.
It’s incredibly simple to make. With just a handful of pantry staples and a short simmering process, this recipe comes together with minimal hands-on effort.
It’s a fantastic make-ahead snack. Because the eggs need several days to fully absorb the brine’s flavor, this is a true make-ahead recipe that rewards a little patience with maximum flavor payoff.
It’s a crowd-pleasing addition to any spread. Whether set out on a snack board, served at a game-day party, or packed for a BBQ, these eggs tend to disappear quickly, making them a reliable hit at any gathering.
Ingredients You’ll Need
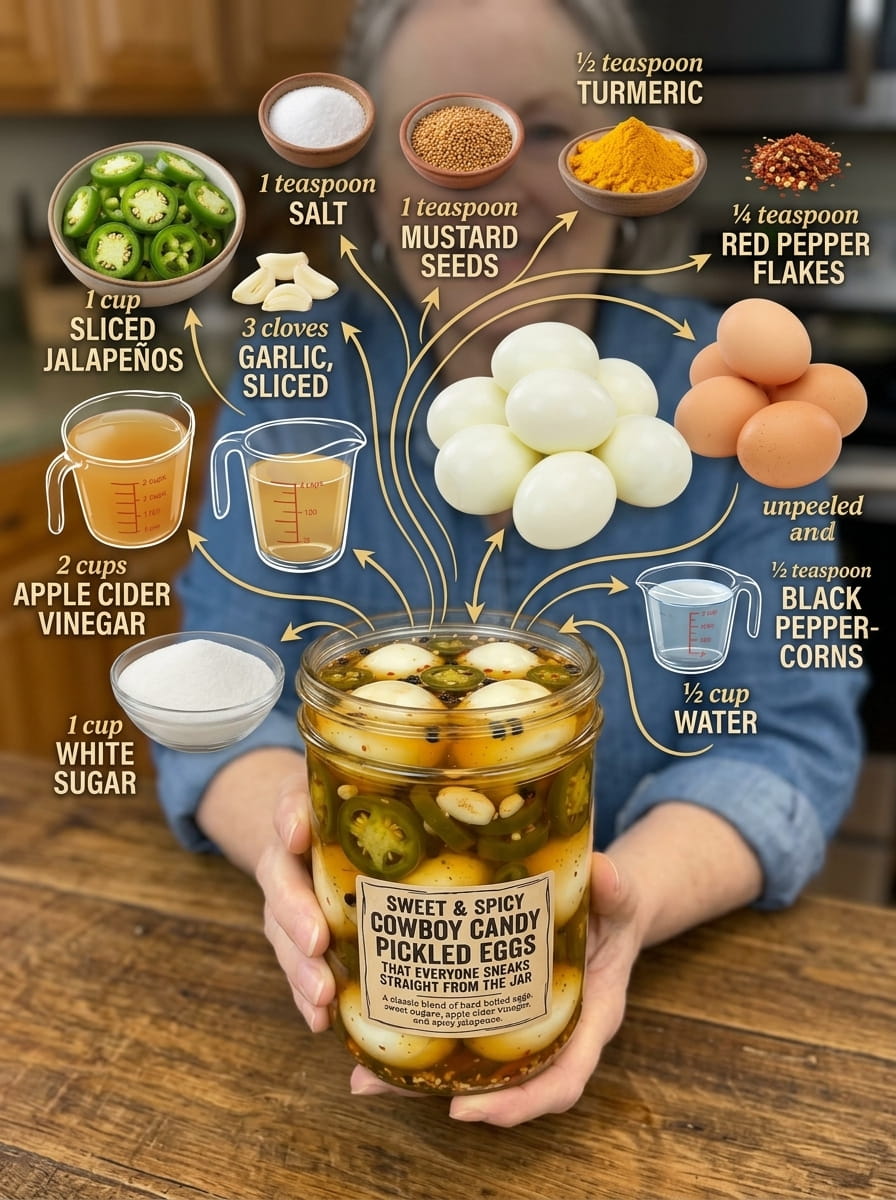
This recipe relies on a short list of pantry staples combined with a flavorful sweet-spicy brine.
The Base
- 8–10 hard-boiled eggs – The star of the recipe, providing a satisfying, protein-rich base
The Brine
- 2 cups apple cider vinegar – Provides the essential tang and helps preserve the eggs
- 1 cup white sugar – Creates the signature sweet contrast against the tangy vinegar
- ½ cup water – Balances the acidity of the brine
The Flavor Boosters
- 1 cup sliced jalapeños – Adds the signature heat and classic cowboy candy flavor
- 3 cloves garlic, sliced – Infuses the brine with savory depth
- 1 teaspoon salt
- 1 teaspoon mustard seeds
- ½ teaspoon black peppercorns
- ½ teaspoon turmeric – Adds warm color and subtle earthy flavor
- ¼ teaspoon red pepper flakes – Boosts the heat level slightly
Step-by-Step Preparation Instructions
Making these pickled eggs is a simple process that mostly requires patience while the flavors develop in the refrigerator.
Step 1: Prepare the eggs. Peel the hard-boiled eggs carefully, making sure to remove all bits of shell, and set them aside.
Step 2: Build the brine. In a saucepan, combine the apple cider vinegar, water, sugar, salt, mustard seeds, black peppercorns, turmeric, and red pepper flakes.
Step 3: Dissolve the sugar and salt. Bring the mixture to a gentle boil over medium heat, stirring frequently until the sugar and salt have completely dissolved into the liquid.
Step 4: Add the jalapeños and garlic. Stir in the sliced jalapeños and garlic, then let the mixture simmer for 2 to 3 minutes to soften the jalapeños slightly and allow their flavor to infuse into the brine.
Step 5: Pack the eggs into a jar. Carefully place the peeled, hard-boiled eggs into a clean, 1-quart wide-mouth jar, arranging them as snugly as possible without crushing them.
Step 6: Pour the hot brine over the eggs. Pour the hot pickling brine directly over the eggs in the jar, making sure they are completely submerged and covered by the liquid.
Step 7: Add the jalapeños and garlic. Distribute the sliced jalapeños and garlic cloves from the saucepan around the eggs in the jar for extra flavor and visual appeal.
Step 8: Cool before sealing. Allow the jar to cool to room temperature on the counter before sealing it tightly with a lid.
Step 9: Refrigerate for several days. Transfer the sealed jar to the refrigerator and let it chill for at least 3 to 5 days before serving. This extended resting period is essential, allowing the eggs to fully absorb the sweet, tangy, spicy brine.
Step 10: Serve and enjoy. Once properly chilled and infused, serve these pickled eggs straight from the jar, on a snack board, alongside BBQ dishes, or sliced into sandwiches.
Tips for the Best Cowboy Candy Pickled Eggs
Use eggs that are easy to peel. Slightly older eggs (about a week past their purchase date) tend to peel much more easily than very fresh eggs, resulting in smoother, more attractive pickled eggs.
Cool the eggs completely before peeling. Shocking the hard-boiled eggs in an ice bath immediately after cooking and letting them cool fully makes the peeling process significantly easier and helps prevent the whites from tearing.
Make sure the eggs stay fully submerged. Keeping the eggs completely covered by the brine is essential for both even flavor absorption and food safety. If needed, you can place a small clean weight or a folded piece of parchment on top to help keep them submerged.
Don’t rush the resting time. While it might be tempting to try these eggs after just a day, the full 3 to 5 day resting period makes a significant difference in flavor. The eggs need this time to fully absorb the sweet, spicy brine all the way through.
Adjust the heat to your preference. The jalapeños and red pepper flakes provide a moderate level of heat in this recipe. For a milder version, remove the jalapeño seeds before slicing. For extra heat, leave the seeds intact or add a sliced serrano pepper.
Use a wide-mouth jar for easy access. A wide-mouth quart jar makes it much easier to add and remove the eggs without breaking them against a narrow opening.
Ingredient Substitutions and Variations
This recipe offers plenty of room for customization based on your taste preferences and what you have on hand.
Adjust the sweetness. If you prefer a less sweet pickled egg, you can reduce the sugar slightly, though keep in mind that sugar plays an important role in both the flavor balance and the brine’s preservation qualities.
Swap the peppers. For a milder version, substitute some or all of the jalapeños with banana peppers. For extra heat, add a sliced serrano or habanero pepper into the mix.
Add beet juice for color. If you’d like to give your pickled eggs a vibrant pink-red hue in addition to the flavor, add a splash of beet juice or a few slices of canned beets to the jar along with the brine.
Experiment with additional spices. A cinnamon stick, a few whole cloves, or a bay leaf can be added to the brine for a warmer, more complex flavor profile.
Make a smaller or larger batch. This recipe scales easily up or down depending on how many eggs you’d like to pickle, just be sure to adjust the brine quantity proportionally to ensure the eggs stay fully submerged.
Creative Ways to Serve Cowboy Candy Pickled Eggs
These sweet and spicy pickled eggs are versatile enough to fit into many different snacking and serving occasions.
- Straight from the jar: Sometimes the simplest way to enjoy these eggs is the best—keep a jar in the fridge for an easy, protein-packed snack anytime.
- On snack boards: Halve or quarter the eggs and arrange them alongside cheese, crackers, and cured meats for a colorful, flavorful addition to any snack spread.
- At game-day parties: These bold, flavorful eggs make a memorable addition to any game-day spread, offering something different from typical chips and dips.
- With BBQ dishes: Serve alongside smoked or grilled meats, where their tangy sweetness provides a refreshing contrast to rich, smoky flavors.
- Sliced into sandwiches: Slice the eggs and layer them into a sandwich for an unexpected, flavorful twist on a classic egg sandwich.
- Chopped into egg salad: Use these pickled eggs in place of regular hard-boiled eggs when making egg salad for a tangy, spicy variation on the classic.
- As a topping: Finely chop a pickled egg and use it to top deviled eggs, salads, or avocado toast for an extra punch of flavor.
Storage and Shelf Life
Proper storage is key to both the food safety and flavor development of these pickled eggs.
Refrigeration: Store the sealed jar in the refrigerator at all times. These pickled eggs will keep well for up to 3 to 4 weeks when properly stored and kept submerged in the brine.
Keep the eggs submerged. Always make sure the eggs remain fully covered by the brine throughout storage, as this is essential for both consistent flavor and food safety.
Use clean utensils. Always use a clean fork or tongs when removing eggs from the jar to help extend the jar’s freshness and prevent contamination.
Do not leave at room temperature. Unlike some pickled vegetables, these eggs must be kept refrigerated at all times and should not be left out at room temperature for extended periods, particularly at gatherings or picnics.
Freezing: Freezing is not recommended for pickled eggs, as the texture of the egg whites becomes rubbery and unpleasant once frozen and thawed.
Frequently Asked Questions
How long do cowboy candy pickled eggs last in the refrigerator?
When properly stored in a sealed jar and kept fully submerged in the brine, these pickled eggs last for up to 3 to 4 weeks in the refrigerator.
How long do I need to wait before eating these pickled eggs?
For the best flavor, let the eggs rest in the refrigerator for at least 3 to 5 days before eating. This extended resting period allows the sweet, spicy brine to fully penetrate the eggs.
Are these eggs very spicy?
This recipe has a moderate heat level from the jalapeños and red pepper flakes. For a milder version, remove the jalapeño seeds before slicing; for more heat, leave them in or add a spicier pepper.
Can I reuse the brine for a second batch of eggs?
While it’s possible to reuse the brine once, the flavor will be noticeably weaker the second time around, since much of the sugar, salt, and spice has already been absorbed by the first batch of eggs. For the best flavor, it’s recommended to make a fresh batch of brine for each round of eggs.
Is it safe to store these eggs at room temperature like traditional canned pickles?
No, these pickled eggs must always be stored in the refrigerator. Unlike shelf-stable canned pickles, this recipe is not processed for room-temperature storage and must be kept cold at all times for food safety.
Can I make a larger batch of this recipe?
Yes, this recipe scales easily. Simply increase the number of eggs and proportionally increase the brine ingredients, making sure to use a large enough jar to keep all the eggs fully submerged.
Why did my eggs turn a slightly yellow or orange color?
This is completely normal and comes from the turmeric in the brine, which naturally imparts a warm yellow-orange hue to the eggs as they pickle.
Can I use this same brine for other pickled vegetables?
Yes, this sweet-spicy brine works wonderfully for pickling vegetables like sliced carrots, green beans, or cauliflower, in addition to eggs.
Final Thoughts
Sweet & Spicy Cowboy Candy Pickled Eggs bring a bold, memorable twist to a classic pantry snack, combining sweet, tangy, and spicy flavors into one irresistible, protein-packed bite. With their vibrant color and addictive flavor, these eggs are the kind of snack that tends to disappear quickly from any snack board, BBQ spread, or game-day table. While they do require a few days of patience for the flavors to fully develop, that wait pays off in a snack that’s well worth keeping stocked in your refrigerator.
Once you try this recipe, don’t be surprised if you find yourself making batch after batch to keep up with demand.
Print
Sweet & Spicy Cowboy Candy Pickled Eggs
Ingredients
This recipe relies on a short list of pantry staples combined with a flavorful sweet-spicy brine.
The Base
- 8–10 hard-boiled eggs – The star of the recipe, providing a satisfying, protein-rich base
The Brine
- 2 cups apple cider vinegar – Provides the essential tang and helps preserve the eggs
- 1 cup white sugar – Creates the signature sweet contrast against the tangy vinegar
- ½ cup water – Balances the acidity of the brine
The Flavor Boosters
- 1 cup sliced jalapeños – Adds the signature heat and classic cowboy candy flavor
- 3 cloves garlic, sliced – Infuses the brine with savory depth
- 1 teaspoon salt
- 1 teaspoon mustard seeds
- ½ teaspoon black peppercorns
- ½ teaspoon turmeric – Adds warm color and subtle earthy flavor
- ¼ teaspoon red pepper flakes – Boosts the heat level slightly
Instructions
Making these pickled eggs is a simple process that mostly requires patience while the flavors develop in the refrigerator.
Step 1: Prepare the eggs. Peel the hard-boiled eggs carefully, making sure to remove all bits of shell, and set them aside.
Step 2: Build the brine. In a saucepan, combine the apple cider vinegar, water, sugar, salt, mustard seeds, black peppercorns, turmeric, and red pepper flakes.
Step 3: Dissolve the sugar and salt. Bring the mixture to a gentle boil over medium heat, stirring frequently until the sugar and salt have completely dissolved into the liquid.
Step 4: Add the jalapeños and garlic. Stir in the sliced jalapeños and garlic, then let the mixture simmer for 2 to 3 minutes to soften the jalapeños slightly and allow their flavor to infuse into the brine.
Step 5: Pack the eggs into a jar. Carefully place the peeled, hard-boiled eggs into a clean, 1-quart wide-mouth jar, arranging them as snugly as possible without crushing them.
Step 6: Pour the hot brine over the eggs. Pour the hot pickling brine directly over the eggs in the jar, making sure they are completely submerged and covered by the liquid.
Step 7: Add the jalapeños and garlic. Distribute the sliced jalapeños and garlic cloves from the saucepan around the eggs in the jar for extra flavor and visual appeal.
Step 8: Cool before sealing. Allow the jar to cool to room temperature on the counter before sealing it tightly with a lid.
Step 9: Refrigerate for several days. Transfer the sealed jar to the refrigerator and let it chill for at least 3 to 5 days before serving. This extended resting period is essential, allowing the eggs to fully absorb the sweet, tangy, spicy brine.
Step 10: Serve and enjoy. Once properly chilled and infused, serve these pickled eggs straight from the jar, on a snack board, alongside BBQ dishes, or sliced into sandwiches.