
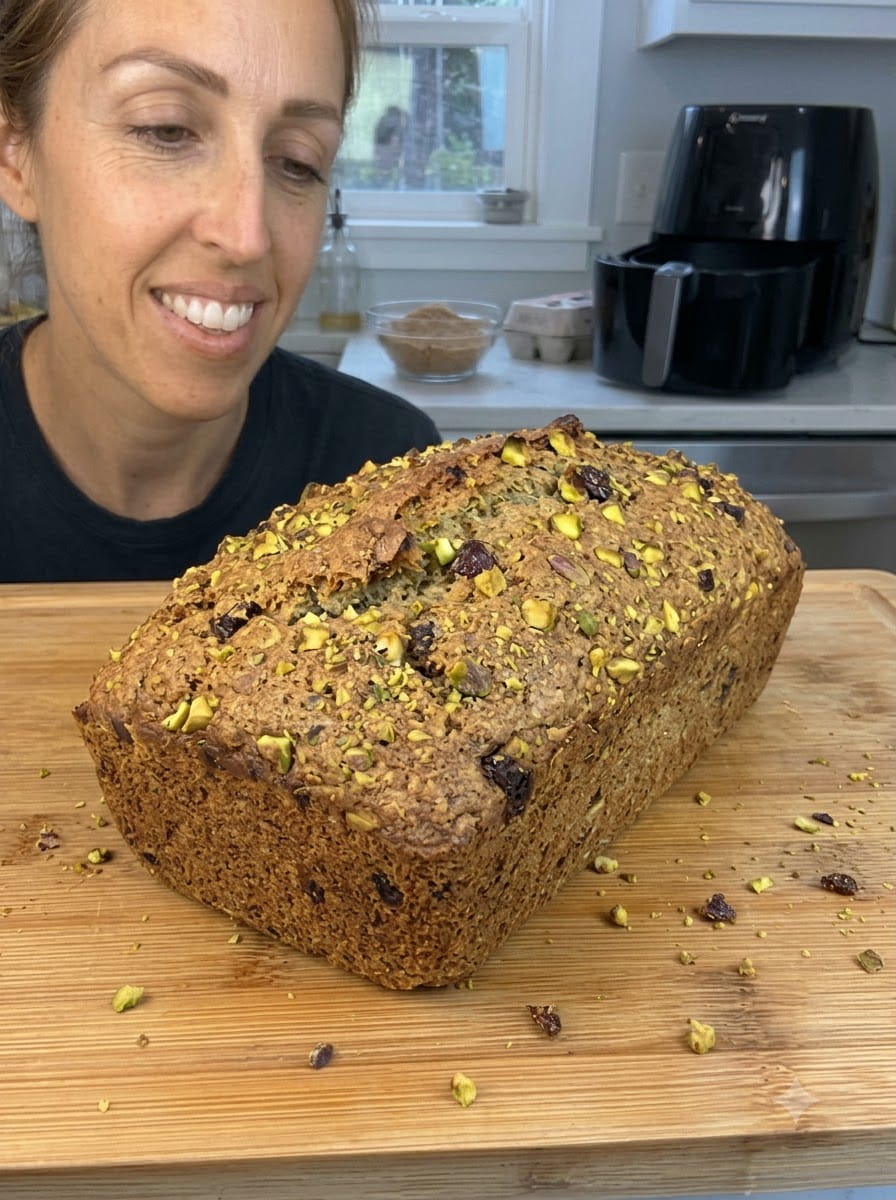
Pistachio and Date Loaf Cake
This Pistachio and Date Loaf Cake is a deliciously moist, tender homemade treat packed with naturally sweet dates and crunchy pistachios. Brown sugar and vanilla bring a warm, rich flavor, while soaking the dates in milk helps create a soft, flavorful crumb. Every slice offers the perfect balance of chewy sweetness and nutty crunch. Whether served with afternoon coffee, enjoyed as a breakfast treat, shared with family, or wrapped up as a thoughtful homemade gift, this easy loaf cake is sure to become a favorite.
Why You’ll Love This Pistachio and Date Loaf Cake
- Naturally sweet flavor: Dates provide rich caramel-like sweetness and chewy texture.
- Delicious nutty crunch: Pistachios add color, flavor, and texture to every slice.
- Soft and moist crumb: Butter, milk, eggs, and soaked dates help keep the cake tender.
- Simple ingredients: No complicated baking techniques or special equipment are needed.
- Perfect for sharing: This loaf is ideal for afternoon tea, brunch, holidays, and homemade gifts.
- Make-ahead friendly: The flavor develops beautifully after the cake has cooled.
Ingredients 🛒
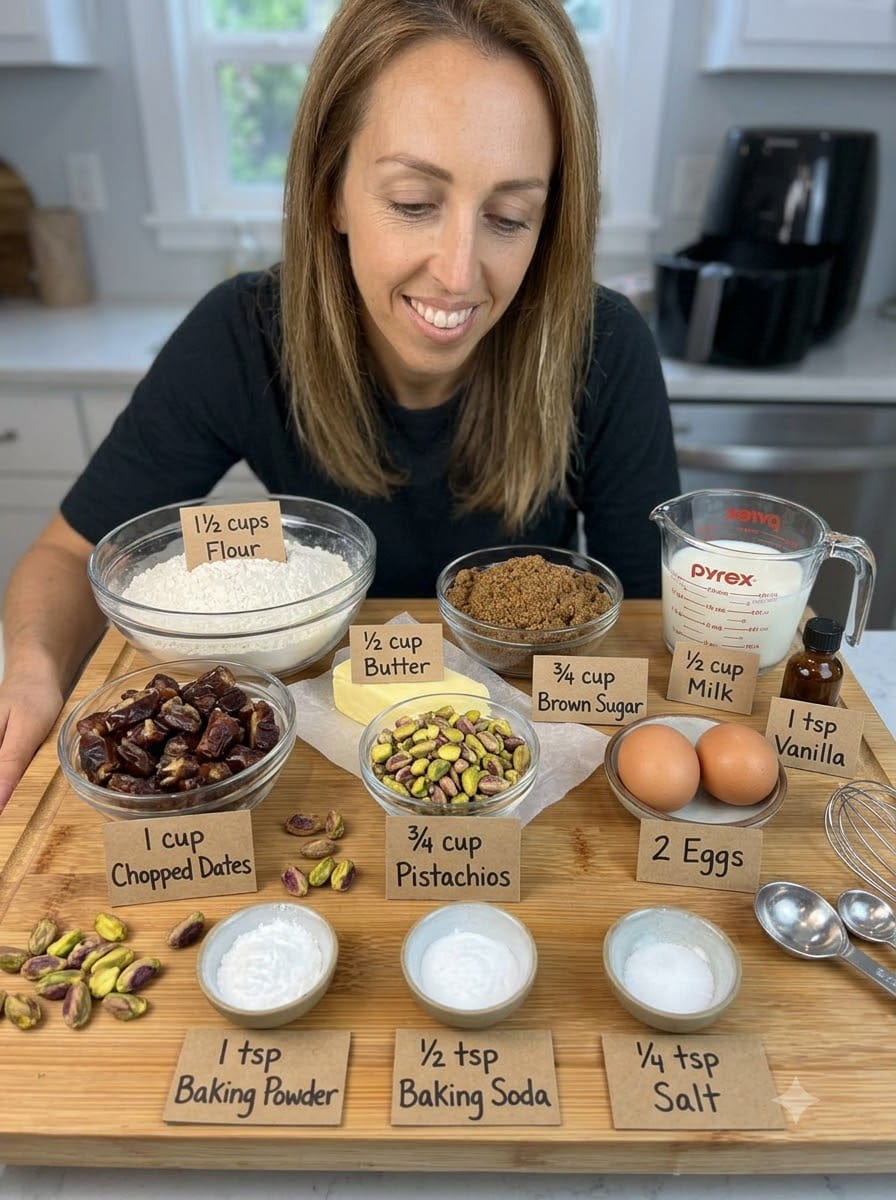
- 1½ cups all-purpose flour
- 1 cup pitted dates, chopped
- ¾ cup shelled pistachios, roughly chopped
- ½ cup unsalted butter, softened
- ¾ cup brown sugar
- 2 large eggs
- ½ cup milk
- 1 teaspoon vanilla extract
- 1 teaspoon baking powder
- ½ teaspoon baking soda
- ¼ teaspoon salt
Instructions 📌
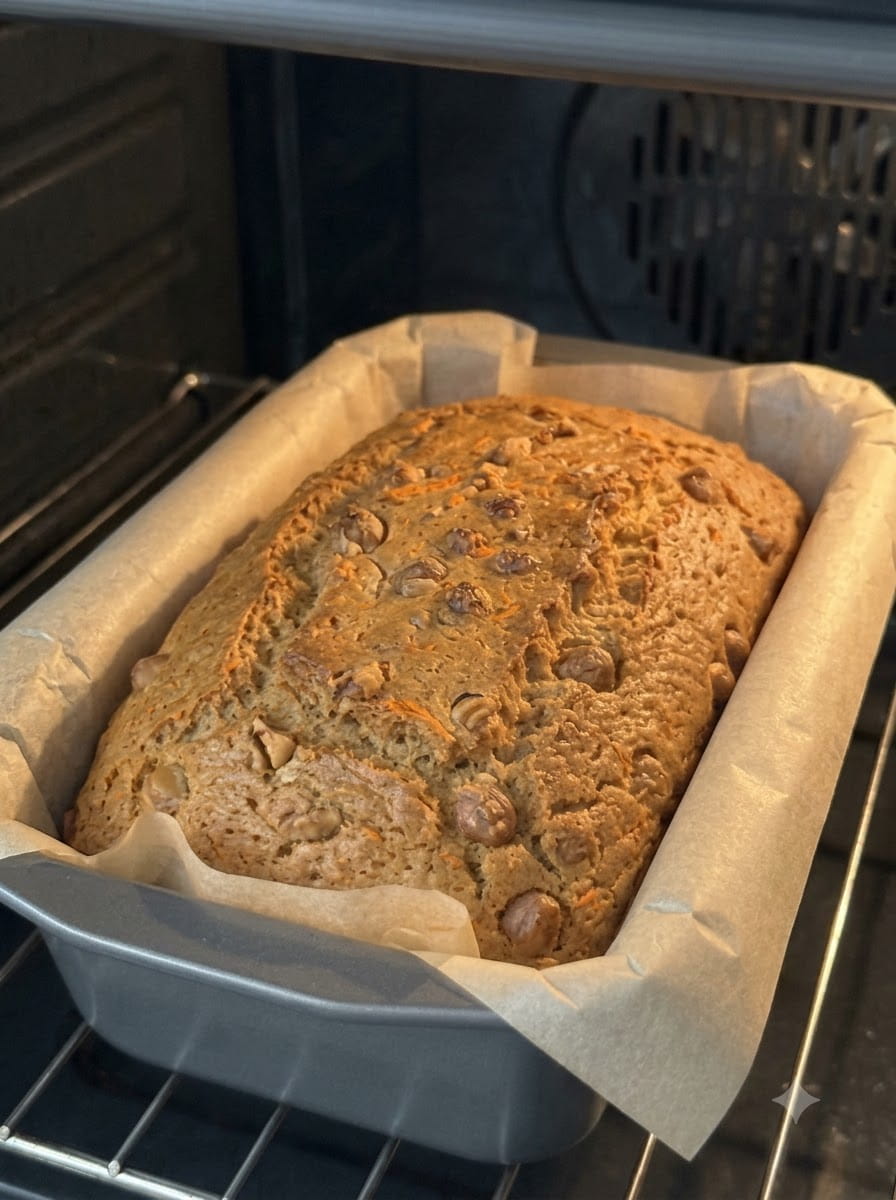
- Prepare the oven and pan: Preheat the oven to 350°F (175°C). Grease a standard loaf pan and line it with parchment paper, leaving a little overhang to make removing the cake easier.
- Soak the dates: Place the chopped dates in a bowl and cover them with the warm milk. Let them soak for 10 minutes until softened. Mash lightly with a fork, leaving some small pieces for texture.
- Cream the butter and sugar: In a large mixing bowl, beat the softened butter and brown sugar until the mixture becomes light, creamy, and fluffy. This usually takes about 2–3 minutes with an electric mixer.
- Add the eggs: Beat in the eggs one at a time, mixing well after each addition. Add the vanilla extract and mix until combined.
- Combine the dry ingredients: In a separate bowl, whisk together the flour, baking powder, baking soda, and salt. Mixing these ingredients separately helps distribute the leavening agents evenly.
- Make the batter: Gradually fold the dry ingredients into the butter mixture, alternating with the date-and-milk mixture. Begin and finish with the flour mixture. Mix gently until just combined.
- Add the pistachios: Fold in most of the chopped pistachios, reserving a small handful for the top. Avoid overmixing to keep the cake soft and tender.
- Fill the loaf pan: Transfer the batter into the prepared pan. Smooth the surface gently with a spatula and sprinkle the reserved pistachios evenly over the top.
- Bake: Bake for 45–55 minutes, or until a toothpick inserted into the center comes out clean or with a few moist crumbs. If the top browns too quickly, loosely cover it with aluminum foil during the final part of baking.
- Cool: Let the loaf rest in the pan for 10–15 minutes. Carefully lift it out using the parchment paper and transfer it to a wire rack to cool completely.
- Slice and serve: Cut into thick slices and enjoy with coffee, tea, or a glass of milk.
Tips for the Best Date and Pistachio Loaf
Use soft, fresh dates. Soft dates blend more easily into the batter and provide a naturally moist texture. If your dates are particularly dry, let them soak for a few extra minutes.
Don’t skip soaking the dates. Warm milk softens the dates and helps distribute their sweetness throughout the cake. Lightly mashing them also creates a richer texture.
Bring ingredients to room temperature. Softened butter, room-temperature eggs, and milk help the batter combine more evenly and reduce the risk of a dense loaf.
Measure the flour carefully. Too much flour can make the cake dry. For the most consistent results, use a kitchen scale or spoon the flour into your measuring cup and level it off.
Avoid overmixing. Once the flour is added, fold gently until no large dry patches remain. Excessive mixing can develop gluten and make the loaf tougher.
Chop the pistachios evenly. Roughly chopped nuts provide a pleasant crunch without creating overly large pieces that make slicing difficult.
Check the center before removing the cake. Loaf cakes can look finished on the outside while remaining underbaked in the middle. Test the center with a toothpick and allow additional baking time if needed.
Variations and Customizations
This recipe is easy to customize while keeping its delicious date-and-pistachio character.
Orange Pistachio Date Loaf
Add 1 teaspoon of finely grated orange zest to the wet ingredients. Orange adds a fresh citrus aroma that complements the sweetness of the dates.
Cinnamon Date Loaf
Add ½ teaspoon of ground cinnamon to the dry ingredients for a warm, cozy flavor. A small pinch of ground cardamom also works beautifully.
Chocolate Chip Version
Fold ½ cup of chocolate chips into the batter along with the pistachios. Dark chocolate is especially delicious with dates.
Honey-Sweetened Variation
Replace a small portion of the brown sugar with honey. Keep in mind that honey adds moisture, so the texture and baking time may change slightly.
Extra Nutty Loaf
Combine pistachios with chopped walnuts or almonds. Keep the total amount of nuts similar to the original recipe so the batter maintains its structure.
Dairy-Free Variation
Use a plant-based butter alternative and unsweetened oat milk or almond milk. Choose products suitable for baking and expect slight differences in flavor and texture.
How to Serve Pistachio and Date Loaf Cake
This loaf cake is delicious on its own, but a few simple additions can make each slice feel extra special.
- Serve warm or at room temperature with freshly brewed coffee.
- Enjoy a slice with black tea or mint tea.
- Spread a little softened butter over a warm slice.
- Add a spoonful of thick Greek yogurt for a breakfast-style treat.
- Serve with fresh berries for a light afternoon dessert.
- Drizzle with a little honey for extra sweetness.
- Add a thin layer of cream cheese frosting for a more dessert-like presentation.
For a beautiful finish, sprinkle a few extra chopped pistachios over the sliced loaf just before serving.
How to Store Pistachio and Date Loaf Cake
Allow the loaf to cool completely before storing it. Warm cake creates condensation inside containers, which can make the crust damp.
At room temperature: Store in an airtight container in a cool, dry place for up to 3 days.
In the refrigerator: Keep the loaf tightly wrapped or in an airtight container for up to 5–7 days. Refrigeration may make the crumb firmer, so allow slices to come to room temperature before serving.
In the freezer: Wrap individual slices or the whole cooled loaf tightly in plastic wrap, then place in a freezer-safe container or bag. Freeze for up to 3 months for best quality.
To thaw: Let frozen slices thaw at room temperature or warm them gently in the microwave for a few seconds. Thaw a whole loaf overnight in the refrigerator, then bring it to room temperature before serving.
Common Mistakes to Avoid
Using dates that are too dry: Very dry dates can remain chewy and firm after baking. Soaking them in warm milk helps soften them.
Adding too much flour: Excess flour can create a heavy, dry cake. Measure carefully rather than packing flour into the cup.
Overmixing the batter: Mixing too vigorously after adding flour can produce a tougher texture. Fold gently.
Using butter that is too cold: Cold butter will not cream properly with brown sugar. Allow it to soften before mixing.
Opening the oven too early: Opening the oven repeatedly can affect the cake’s rise. Wait until the loaf is close to the expected baking time before checking it.
Removing the cake too soon: A warm loaf is delicate and can break when sliced. Let it cool completely for cleaner slices.
Frequently Asked Questions
Can I use Medjool dates?
Yes. Medjool dates are an excellent choice because they are naturally soft, sweet, and rich in flavor. Remove the pits before chopping.
Can I use salted pistachios?
Unsalted pistachios are recommended because they give you better control over the salt level. If using salted pistachios, consider reducing or omitting the added salt.
Can I prepare the batter ahead of time?
For the best rise and texture, bake the batter soon after mixing. Baking powder and baking soda begin working once the wet and dry ingredients are combined.
Why is my loaf cake dense?
A dense loaf can result from overmixing, too much flour, cold ingredients, or insufficient baking. Measure carefully and mix only until the ingredients are combined.
How do I know when the cake is ready?
Insert a toothpick into the center. It should come out clean or with a few moist crumbs. Wet batter on the toothpick means the loaf needs more baking time.
Can I make this recipe in muffin tins?
Yes. Divide the batter between lined muffin cups, filling each about two-thirds full. Bake at 350°F (175°C), checking for doneness after approximately 18–25 minutes. Baking time will vary depending on the size of the muffins.
Can I add a glaze?
Absolutely. A simple powdered sugar glaze made with a little milk or orange juice works beautifully. Drizzle it over the completely cooled loaf.
Can I make the cake without pistachios?
Yes. You can omit the pistachios or replace them with chopped walnuts or almonds. The cake will still have plenty of flavor from the dates and brown sugar.
Recipe Details
- Prep Time: 20 minutes
- Bake Time: 45–55 minutes
- Cooling Time: 45–60 minutes
- Total Time: Approximately 1 hour 50 minutes to 2 hours 15 minutes
- Oven Temperature: 350°F (175°C)
- Category: Cakes and Quick Breads
- Cuisine: American-inspired homemade baking
- Method: Oven baking
- Main Ingredients: Dates, pistachios, flour, butter, eggs, and brown sugar
Final Thoughts
This Pistachio and Date Loaf Cake is the kind of homemade bake that makes an ordinary afternoon feel special. The dates bring natural sweetness and a soft, chewy texture, while pistachios add a beautiful crunch and lovely green color. With its tender crumb and warm vanilla flavor, every slice is comforting, satisfying, and perfect for sharing.
Bake a loaf for your next coffee break, weekend gathering, or homemade gift. Once you try this delicious combination of dates and pistachios, it may become one of your favorite easy loaf cakes!
Pistachio and Date Loaf Cake
Ingredients
- 1½ cups all-purpose flour
- 1 cup pitted dates, chopped
- ¾ cup shelled pistachios, roughly chopped
- ½ cup unsalted butter, softened
- ¾ cup brown sugar
- 2 large eggs
- ½ cup milk
- 1 teaspoon vanilla extract
- 1 teaspoon baking powder
- ½ teaspoon baking soda
- ¼ teaspoon salt
Instructions
Step 1: Prepare the Oven and Loaf Pan
Preheat your oven to 350°F (175°C).
Line a standard loaf pan with parchment paper, leaving a little extra paper hanging over the sides. This will make it easier to remove the bread after baking.
You can lightly grease the pan before adding the parchment paper to help keep everything in place.
Step 2: Blend the Cottage Cheese and Eggs
Add the cottage cheese and eggs to a blender or food processor.
Blend until the mixture becomes smooth and creamy, with no large cottage cheese curds remaining.
This step is important because a smooth mixture helps create a more even bread texture.
Step 3: Transfer to a Mixing Bowl
Pour the blended cottage cheese and egg mixture into a large mixing bowl.
Use a spatula to scrape the sides of the blender so you don’t leave any of the mixture behind.
Step 4: Add the Self-Rising Flour
Gradually add the self-rising flour to the wet mixture.
Stir gently with a spatula or wooden spoon until the ingredients come together and form a thick, sticky dough.
Avoid overmixing. Stop once the flour is incorporated and no large dry patches remain.
The dough will be thicker and stickier than traditional sandwich bread dough. This is normal for this recipe.
Step 5: Transfer the Dough to the Loaf Pan
Spoon the dough into your prepared loaf pan.
Spread it evenly using a spatula, gently smoothing the surface.
Because the dough is thick, take a moment to distribute it evenly so the loaf bakes consistently.
Step 6: Bake Until Golden
Place the loaf pan in the preheated oven.
Bake for 40–50 minutes, or until the top becomes beautifully golden brown and the center is fully baked.
Insert a toothpick into the middle of the loaf. It should come out clean or with a few moist crumbs, not wet dough.
If the top browns too quickly, loosely cover it with aluminum foil during the remaining baking time.
Step 7: Cool in the Pan
Remove the bread from the oven and allow it to cool in the pan for approximately 10 minutes.
This resting period helps the loaf settle and makes it easier to remove without breaking.
Step 8: Transfer to a Wire Rack
Carefully lift the bread out of the pan using the parchment paper.
Transfer it to a wire rack and allow it to cool before slicing.
Cooling completely helps the crumb set and prevents the slices from becoming gummy or falling apart.
Step 9: Slice and Enjoy!
Cut the loaf into slices using a sharp serrated bread knife.
Serve warm with butter, toast it with your favorite toppings, or use it to prepare delicious homemade sandwiches.