
Soft & Fluffy No-Knead White Sandwich Bread: The Easy Homemade Loaf
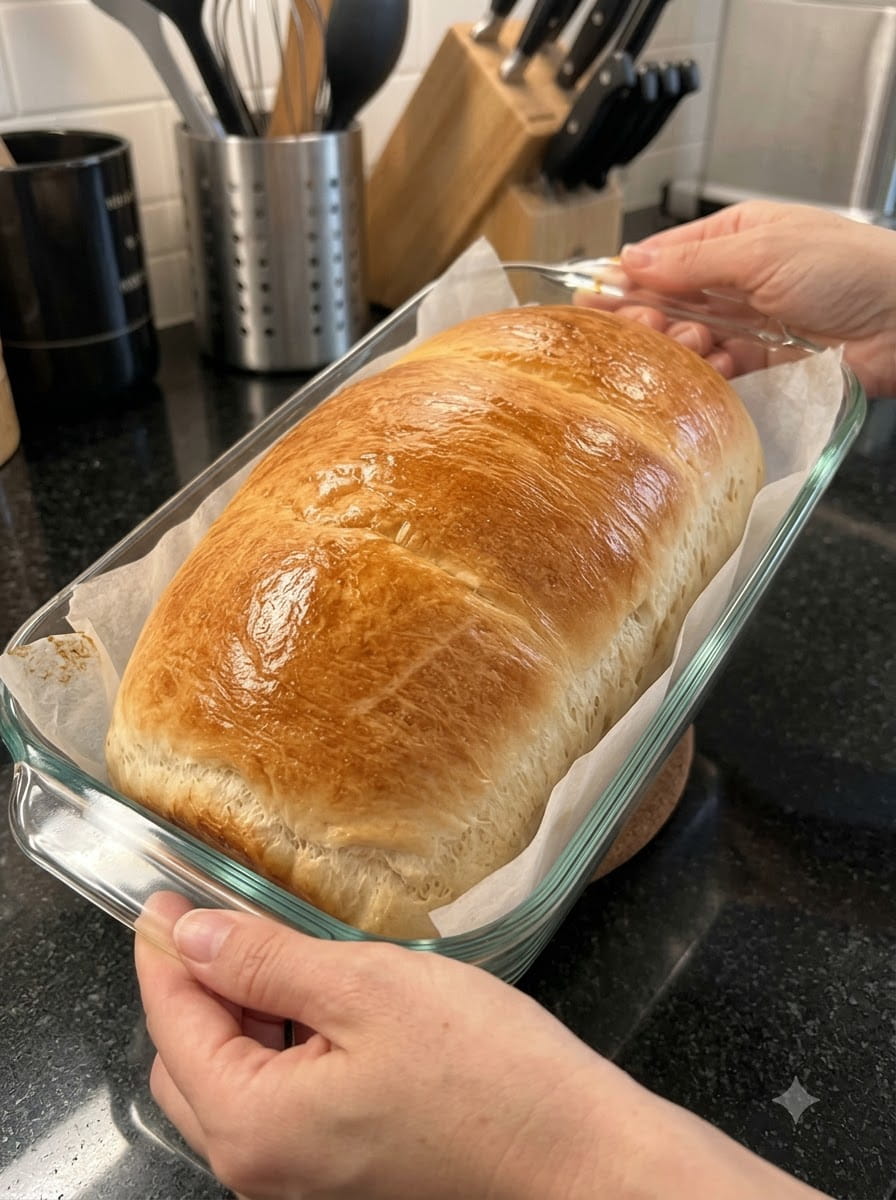
There is nothing quite like a slice of homemade white bread: soft, tender, lightly sweet, and still warm from the oven. For many people, bread baking feels like a project reserved for weekends and stand mixers. This soft and fluffy no-knead white sandwich bread changes that. You whisk a few wet ingredients, stir in the flour with a wooden spoon, let the dough rise twice, and bake.
The recipe uses simple pantry ingredients: flour, warm milk, sugar, yeast, salt, butter, and an egg. The milk, butter, and egg make the crumb rich and tender, while a brush of melted butter at the end gives the crust a soft, golden finish. It is exactly the kind of loaf you want for morning toast, sandwiches, grilled cheese, or a slice with butter and jam.
This guide covers the full recipe, what each ingredient does, step-by-step directions, tips for a tall and fluffy loaf, variations, storage, troubleshooting, and answers to common questions.
Why You’ll Love This No-Knead Sandwich Bread
No kneading and no stand mixer. A bowl and a wooden spoon are all the equipment you need for the dough.
Soft and fluffy texture. Milk, butter, and egg create a tender, cloud-like crumb that stays soft for days.
Simple ingredients. Everything is a pantry or fridge staple. There are no specialty ingredients to hunt down.
Beginner-friendly. The dough is forgiving. If you can stir and wait, you can bake this loaf.
Versatile. It slices cleanly for sandwiches, toasts beautifully, and makes superb French toast and grilled cheese.
Better than store-bought. Homemade bread has no preservatives and a fresh flavor that packaged loaves cannot match.
Ingredients You’ll Need
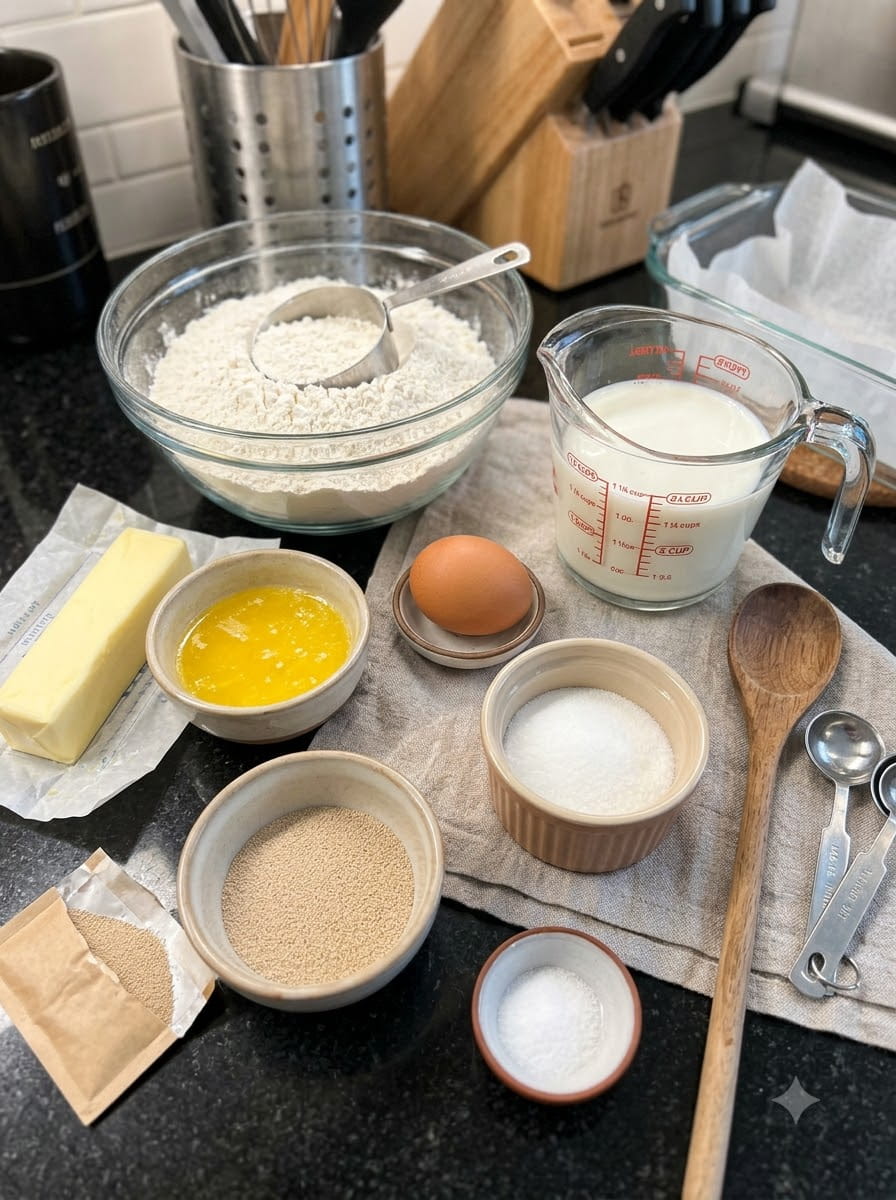
This recipe makes one 9-by-5-inch loaf.
- 3½ cups all-purpose flour or bread flour
- 1¼ cups warm milk
- 2 tablespoons granulated sugar
- 2¼ teaspoons instant yeast (one standard packet)
- 1 teaspoon salt
- 3 tablespoons unsalted butter, melted (plus a little extra for brushing)
- 1 large egg
What Each Ingredient Does
Flour
All-purpose flour gives a soft, tender loaf. Bread flour, which has more protein, gives a slightly taller, chewier loaf with a bit more structure. Both work well here, so use what you have. Because this is a no-knead dough, bread flour can help build a little extra strength without any effort.
Warm Milk
Milk adds richness, softness, and a golden crust. It should be warm, not hot: about 105 to 110°F (40 to 43°C) is ideal. It should feel comfortably warm on your wrist. Milk that is too hot can kill the yeast and stop the dough from rising.
Sugar
Sugar feeds the yeast, adds a touch of sweetness, and helps the crust brown. Two tablespoons is just enough to support fermentation without making the loaf taste sweet.
Instant Yeast
Instant yeast is the leavening that makes the bread rise. It can be mixed straight into the liquid. If you only have active dry yeast, use the same amount but let it stand in the warm milk and sugar for about 5 minutes until foamy, as the recipe notes.
Salt
Salt controls the yeast, strengthens the dough, and brings out the flavor. Never skip it, since bread without salt tastes flat.
Melted Butter
Butter makes the crumb soft and tender and adds a rich, buttery flavor. Let it cool slightly before adding it so it doesn’t warm the dough too much or scramble the egg.
Egg
The egg enriches the dough, adds structure, and contributes to a soft, fluffy, golden loaf.
Equipment
- Large mixing bowl
- Wooden spoon or sturdy spatula
- 9-by-5-inch loaf pan
- Clean kitchen towel or plastic wrap
- Pastry brush
- Wire cooling rack
- Instant-read thermometer (optional but useful)
Step-by-Step Instructions
Step 1: Combine the Milk, Sugar, and Yeast
In a large mixing bowl, combine the warm milk, sugar, and yeast. If you are using active dry yeast, let the mixture stand for 5 minutes until foamy. With instant yeast, you can move on right away, though a short rest does no harm.
Step 2: Add the Wet Ingredients
Add the melted butter, egg, and salt. Whisk until combined and smooth.
Step 3: Add the Flour
Gradually add the flour, mixing with a wooden spoon until a thick, sticky dough forms. It will be shaggy and wetter than a kneaded dough. Stir until no dry flour remains, and then stop. There is no need to knead.
Step 4: First Rise
Cover the bowl with a clean kitchen towel or plastic wrap and let the dough rise in a warm place for 60 to 90 minutes, or until doubled in size. A turned-off oven with the light on, or a spot near a warm (not hot) appliance, works well.
Step 5: Prepare the Pan
Lightly grease a 9-by-5-inch loaf pan with butter or oil. You can also line it with parchment for easy removal.
Step 6: Deflate and Shape
Gently deflate the dough with a spatula or lightly greased hands. Transfer it to the prepared loaf pan and smooth the top. Lightly greased hands help, since the dough is sticky.
Step 7: Second Rise
Cover the pan and let the dough rise again for 30 to 45 minutes, until it rises just above the rim of the pan. Don’t let it rise too far past the rim, or it may collapse in the oven.
Step 8: Preheat the Oven
While the dough finishes rising, preheat your oven to 350°F (175°C).
Step 9: Bake
Bake for 30 to 35 minutes, until the top is deep golden brown and the loaf is fully baked. An instant-read thermometer inserted into the center should read about 190 to 200°F (88 to 93°C). If the top browns too quickly, loosely tent it with foil for the last 10 minutes.
Step 10: Brush With Butter
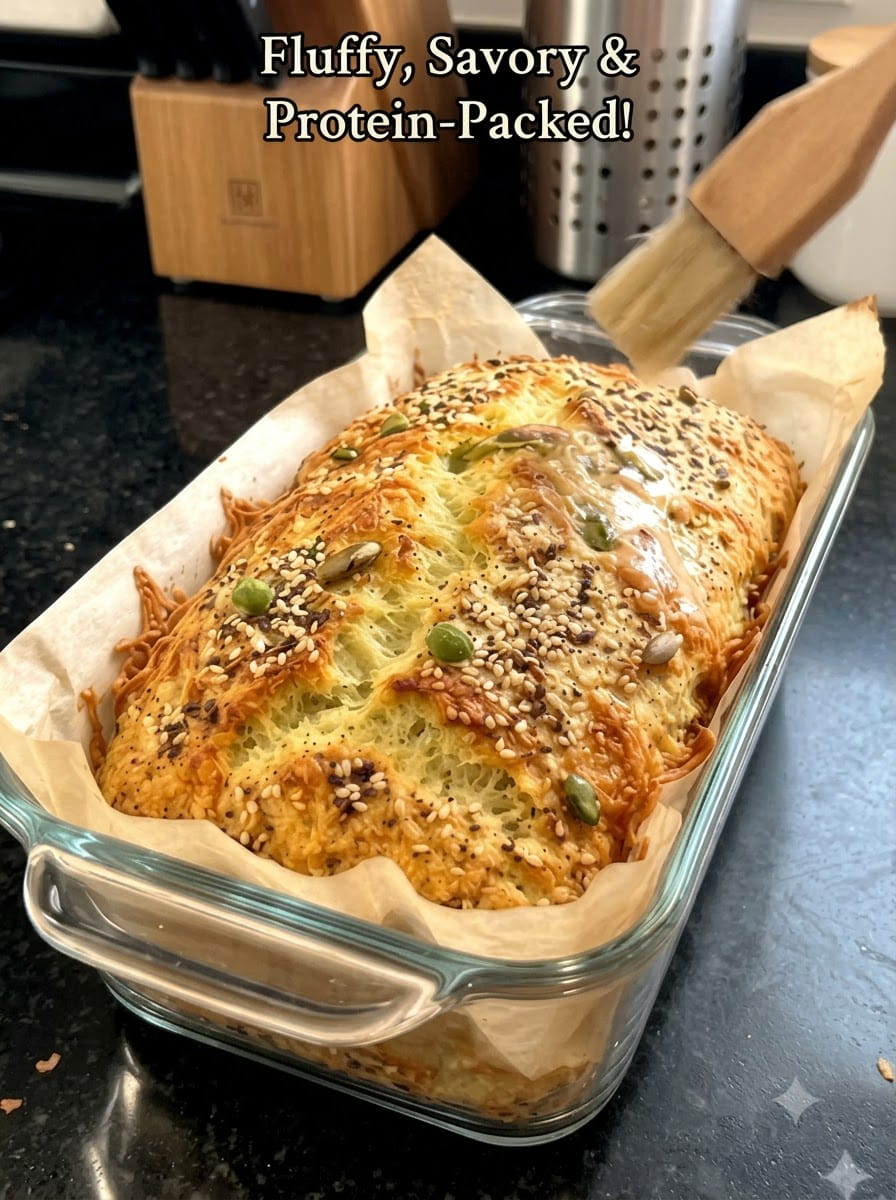
Remove the loaf from the oven and brush the top with a little melted butter. This keeps the crust soft and adds a glossy, buttery finish.
Step 11: Cool in the Pan
Let the loaf cool in the pan for 10 minutes, then turn it out onto a wire rack.
Step 12: Cool Before Slicing
Allow the bread to cool before slicing. Cutting hot bread can squash the crumb and make it gummy. Waiting about an hour gives the cleanest slices.
Why This Recipe Works
Time replaces kneading. In a traditional loaf, kneading develops gluten. In a no-knead dough, time does that job. As the wet dough rests and rises, the flour hydrates fully and gluten strands form on their own, giving you structure without effort.
Enriched dough means a softer crumb. Milk, butter, and egg add fat and protein that tenderize the crumb and slow staling, so the bread stays soft longer than a lean loaf made with only water.
Two rises build texture. The first rise develops flavor and gas. The second rise, in the pan, gives the loaf its final shape and lift, which is what makes it tall and fluffy.
A butter brush finishes the crust. Brushing butter onto the hot loaf softens the crust, which is exactly what you want for sandwich bread.
Tips for the Fluffiest Loaf
Check your milk temperature. Aim for 105 to 110°F (40 to 43°C). Too cold slows the rise, and too hot can kill the yeast.
Use fresh yeast. Check the expiration date. Old yeast is a common reason bread fails to rise.
Measure flour correctly. Spoon the flour into the measuring cup and level it off instead of scooping, which packs in too much. For the best accuracy, use a scale: 3½ cups is about 440 grams.
Find a warm spot. A kitchen that is too cold will make the rise take much longer. Be patient and judge by the dough, not the clock.
Don’t over-proof. If the dough rises far above the rim during the second rise, it can deflate in the oven. Bake as soon as it crowns just above the pan.
Grease your hands. The sticky dough releases much more easily with lightly greased hands or a greased spatula.
Don’t skip the cooling time. The crumb sets as the bread cools, and a patient cook gets cleaner, softer slices.
Store it properly. Once fully cooled, wrap the loaf to keep it soft.
Delicious Ways to Use This Bread
Breakfast
- Toasted with butter and jam or honey
- French toast
- Egg-in-a-hole or breakfast sandwiches
Lunch
- Classic ham and cheese or turkey sandwiches
- Grilled cheese
- Chicken salad or egg salad sandwiches
Snacks and dinner
- Cinnamon sugar toast
- Garlic bread, brushed with garlic butter and toasted
- Bread pudding, using day-old slices
- Homemade croutons or breadcrumbs
Variations to Try
Honey white bread. Swap the sugar for honey for a slightly deeper sweetness.
Whole wheat blend. Replace 1 cup of the flour with whole wheat flour for added fiber and a nuttier taste. You may need a splash more milk.
Herb and garlic loaf. Add 1 teaspoon of garlic powder and 1 tablespoon of mixed dried herbs to the dough.
Cheese loaf. Stir in ½ cup of shredded cheddar for a savory, cheesy bread.
Cinnamon swirl. Roll the dough out, sprinkle with cinnamon sugar, roll it up, and bake in the pan.
Seeded top. Brush the top with a little milk or egg wash before baking and sprinkle with sesame, poppy, or sunflower seeds.
Dinner rolls. Divide the dough into 12 pieces, place them in a greased pan, rise, and bake for about 20 to 25 minutes.
Storage and Freezing Tips
Room temperature. Store the cooled loaf in a bread bag or airtight container for 3 to 4 days.
Refrigerator. Refrigeration can dry bread out faster, so it is usually best to avoid it unless your kitchen is very warm and humid.
Freezer. Slice the loaf once cooled, place it in a freezer-safe bag with parchment between slices if you like, and freeze for up to 3 months. Toast the slices straight from frozen or thaw at room temperature.
Reviving stale bread. Slightly stale slices are perfect for toast, French toast, or bread pudding.
Troubleshooting Common Problems
The dough didn’t rise. The yeast may be old, or the milk may have been too hot or too cold. Check the yeast’s date and use a thermometer on the milk next time. A cold kitchen can also slow the process, so give it more time in a warmer spot.
The loaf is dense. Possible causes are too much flour, under-proofing, or old yeast. Measure the flour carefully and let the dough fully double and rise above the rim.
The loaf collapsed or has a sunken top. The dough probably over-proofed during the second rise. Bake as soon as it rises just above the pan rim.
The crust is too dark. Tent the loaf with foil partway through baking, or check that your oven temperature is accurate.
The center is gummy or doughy. The loaf may be underbaked or sliced too early. Bake until it reaches 190 to 200°F (88 to 93°C) inside, and let it cool properly.
The crust is too hard. Brush with butter right after baking and cover the loaf with a towel as it cools.
The bread is dry. You may have added too much flour or overbaked it. Measure carefully and watch the bake time.
The dough is too sticky to handle. It is meant to be sticky. Use greased hands, not extra flour, because extra flour can make the loaf dry.
Frequently Asked Questions
Can I use water instead of milk?
Yes, but the loaf will be less tender and less rich, with a slightly paler crust. Milk is what gives this bread its soft, sandwich-style texture.
Can I use dairy-free milk?
Unsweetened plant milks such as soy or oat milk can work, and you can use a dairy-free butter alternative. The flavor and crust color may differ slightly.
Can I use active dry yeast instead of instant yeast?
Yes. Use the same amount, and let it stand in the warm milk and sugar for about 5 minutes until foamy before continuing. The rise may take a little longer.
Do I really not need to knead?
Correct. The long rise gives the gluten time to develop on its own. The result is a soft, tender crumb, which is slightly more open than a kneaded loaf.
Can I make the dough ahead of time?
Yes. After mixing, you can let the dough do its first rise in the refrigerator overnight, then shape it, let it come to room temperature for the second rise, and bake. Because timing varies, rely on the dough’s size rather than the clock.
Why is my bread too crumbly?
This often means too much flour or not enough liquid. Measure carefully, preferably by weight.
Can I double the recipe?
Yes, and you can bake two loaves in separate pans. Make sure your bowl is large enough for the dough to double.
Can I bake it in a different pan?
A 9-by-5-inch pan is ideal. A slightly smaller pan gives a taller loaf, while a larger pan yields a flatter one, and you should adjust the baking time accordingly.
How do I know when the bread is done?
It should be deep golden on top, sound hollow when tapped on the bottom, and reach about 190 to 200°F (88 to 93°C) in the center.
How can I keep the bread soft?
Brush the top with butter right after baking, let it cool completely, and store it in a bag or airtight container.
Final Thoughts
This soft and fluffy no-knead white sandwich bread proves that great bread does not need hard work. A bowl, a spoon, a handful of pantry staples, and a little patience give you a tall, golden loaf with a tender crumb and a buttery crust.
Make it for sandwiches, toast it for breakfast, or slice it warm and slather it with butter and honey. Once you taste the difference, you may find yourself skipping the store-bought loaf for good.
Print
Soft & Fluffy No-Knead White Sandwich Bread
Ingredients
This recipe makes one 9-by-5-inch loaf.
- 3½ cups all-purpose flour or bread flour
- 1¼ cups warm milk
- 2 tablespoons granulated sugar
- 2¼ teaspoons instant yeast (one standard packet)
- 1 teaspoon salt
- 3 tablespoons unsalted butter, melted (plus a little extra for brushing)
- 1 large egg
Instructions
In a large mixing bowl, combine the warm milk, sugar, and yeast. If you are using active dry yeast, let the mixture stand for 5 minutes until foamy. With instant yeast, you can move on right away, though a short rest does no harm.
Add the melted butter, egg, and salt. Whisk until combined and smooth.
Gradually add the flour, mixing with a wooden spoon until a thick, sticky dough forms. It will be shaggy and wetter than a kneaded dough. Stir until no dry flour remains, and then stop. There is no need to knead.
Cover the bowl with a clean kitchen towel or plastic wrap and let the dough rise in a warm place for 60 to 90 minutes, or until doubled in size. A turned-off oven with the light on, or a spot near a warm (not hot) appliance, works well.
Lightly grease a 9-by-5-inch loaf pan with butter or oil. You can also line it with parchment for easy removal.
Gently deflate the dough with a spatula or lightly greased hands. Transfer it to the prepared loaf pan and smooth the top. Lightly greased hands help, since the dough is sticky.
Cover the pan and let the dough rise again for 30 to 45 minutes, until it rises just above the rim of the pan. Don’t let it rise too far past the rim, or it may collapse in the oven.
While the dough finishes rising, preheat your oven to 350°F (175°C).
Bake for 30 to 35 minutes, until the top is deep golden brown and the loaf is fully baked. An instant-read thermometer inserted into the center should read about 190 to 200°F (88 to 93°C). If the top browns too quickly, loosely tent it with foil for the last 10 minutes.
Remove the loaf from the oven and brush the top with a little melted butter. This keeps the crust soft and adds a glossy, buttery finish.
Let the loaf cool in the pan for 10 minutes, then turn it out onto a wire rack.
Allow the bread to cool before slicing. Cutting hot bread can squash the crumb and make it gummy. Waiting about an hour gives the cleanest slices.