
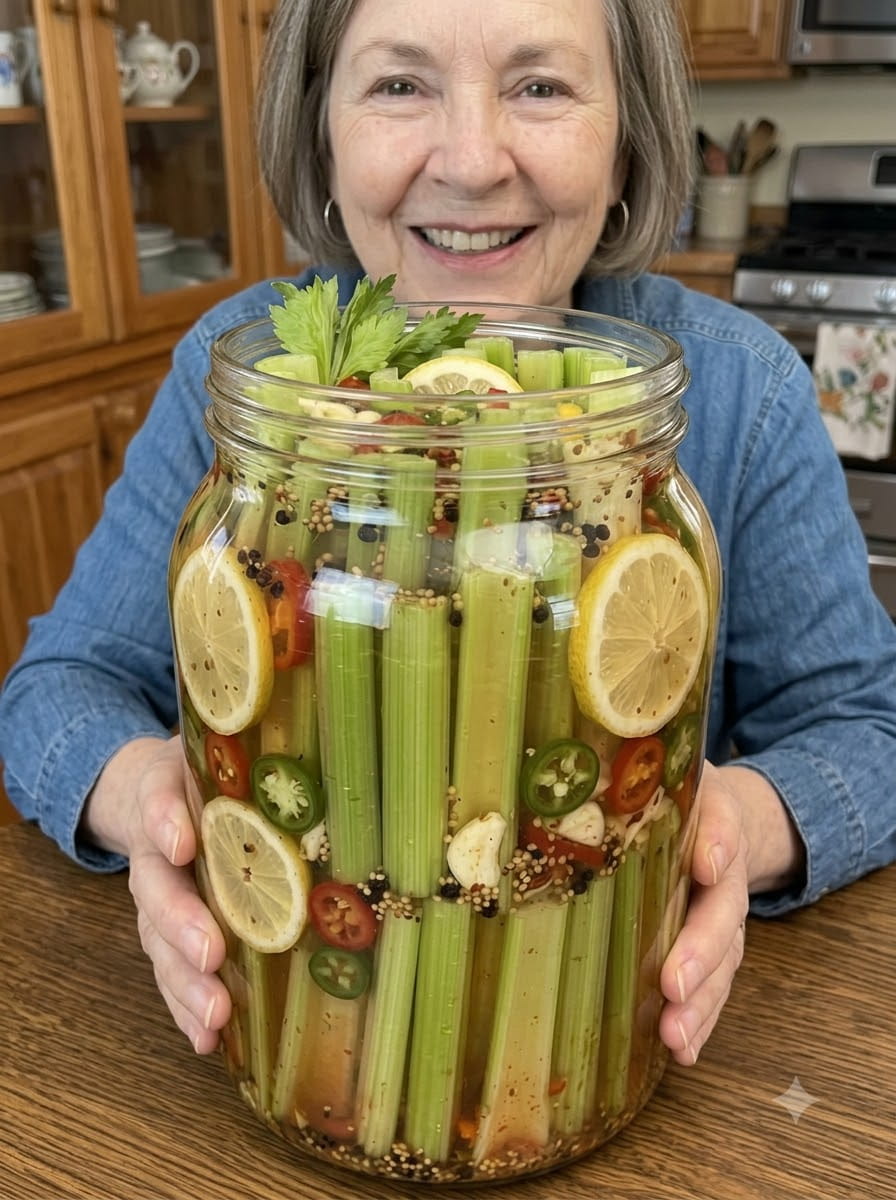
Bloody Mary Pickled Celery: Tangy, Spicy Refrigerator Pickles
Bloody Mary pickled celery is crisp, tangy and delightfully spicy, with all the savory flavors of a classic Bloody Mary packed into a single crunchy stick. Horseradish, hot sauce, Worcestershire sauce, garlic, black peppercorns and celery seeds mingle in a sharp vinegar brine that transforms ordinary celery into a bold, zesty snack.
You can serve these pickled celery sticks as a garnish in a Bloody Mary, add them to a relish tray or brunch spread, or simply munch on them straight from the jar. They take about ten minutes to prepare, require no canning equipment and are ready to enjoy after just one to two days in the fridge.
In this guide you will find the complete recipe, ingredient notes, step-by-step instructions, tips for the crunchiest results, flavor variations, storage advice, serving ideas and answers to frequently asked questions.
What Is Bloody Mary Pickled Celery?
Bloody Mary pickled celery is a quick refrigerator pickle. Fresh celery sticks are submerged in a hot-then-cooled brine made from vinegar, water, salt and Bloody Mary-style seasonings. Instead of the tomato juice and vodka, the brine borrows the other key flavors of the cocktail: horseradish for sharp heat, hot sauce for a peppery kick, Worcestershire sauce for savory depth, garlic for punch and celery seed for an extra-celery taste.
The result is a pickle that tastes like the best part of a Bloody Mary garnish. The celery stays crisp, becomes tangy and spicy, and picks up a savory, slightly umami edge from the Worcestershire sauce.
Why You’ll Love This Recipe
It is incredibly easy. There is no canning, no sterilizing equipment and no complicated technique. You simply heat a brine, pour it over the celery and refrigerate.
It is full of flavor. Horseradish, hot sauce, garlic and Worcestershire sauce make these pickles bold, zesty and addictive.
It is perfect for Bloody Marys. A pickled celery stick turns a cocktail into a showpiece and adds flavor as you sip. It also makes a great garnish for a non-alcoholic virgin Mary.
It is a low-calorie snack. Celery is light and crunchy, and the brine adds big flavor without adding much in the way of calories.
It is made with pantry staples. Most of the ingredients are probably already in your fridge or cupboard.
It makes a great gift or party contribution. A jar of these spicy pickles is a fun host gift, especially around brunch season and the holidays.
It uses up a whole bunch of celery. If you have a bunch of celery that you are not sure how to use, this recipe turns it into something exciting.
Ingredients You’ll Need
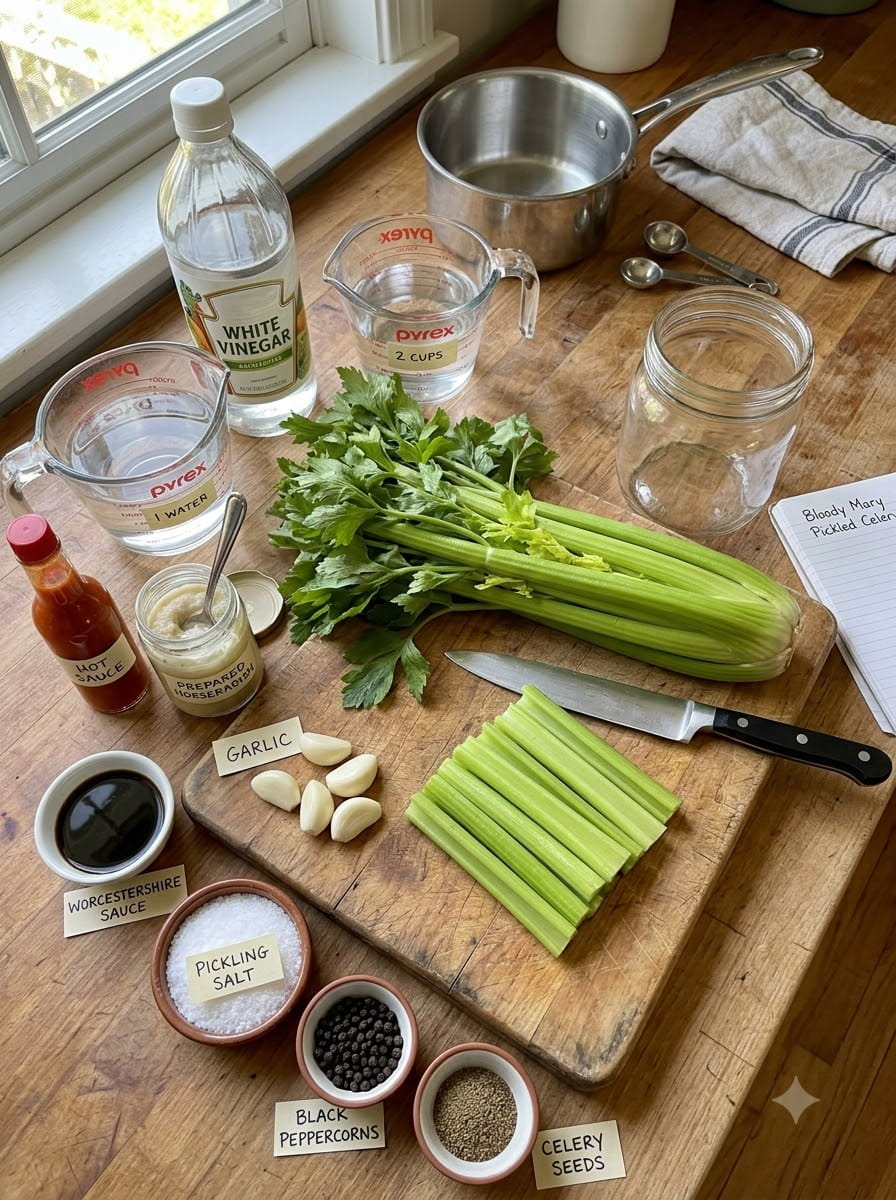
- 1 bunch celery, washed and cut into jar-length sticks
- 2 cups white vinegar
- 1 cup water
- 2 tablespoons prepared horseradish
- 2 tablespoons hot sauce
- 2 cloves garlic, peeled
- 1 tablespoon Worcestershire sauce
- 1 tablespoon pickling salt
- 1 teaspoon black peppercorns
- 1 teaspoon celery seeds
Ingredient Notes
Celery. Choose a firm, fresh bunch with crisp, tightly packed stalks and bright leaves. Limp celery will not become crisp when pickled. The inner, thicker stalks are great for pickling. The tender inner hearts and leaves can be used as a garnish or added to the jar for extra flavor.
White vinegar. Distilled white vinegar gives a clean, sharp tang and lets the other seasonings shine. Check that it is at least 5% acidity, which is standard for most bottled white vinegar. The acidity is important for flavor and for keeping the pickles properly preserved in the refrigerator.
Water. Water balances the sharpness of the vinegar so the pickles are tangy without being harsh.
Prepared horseradish. Use jarred prepared horseradish, which is grated horseradish root in vinegar. It brings the signature nasal heat that makes a Bloody Mary so distinctive. Avoid creamy horseradish sauce, which contains mayonnaise or cream and does not belong in a pickling brine.
Hot sauce. Any vinegar-based hot sauce works well. Classic Louisiana-style hot sauce is a great choice. Adjust the amount to suit your heat tolerance.
Garlic. Whole, peeled cloves infuse the brine with gentle garlic flavor. You can lightly smash them to release more flavor.
Worcestershire sauce. This adds savory, tangy, umami depth, which is a signature taste of a Bloody Mary. Note that traditional Worcestershire sauce contains anchovies, so it is not vegetarian. Vegan versions are available in many stores.
Pickling salt. Pickling salt is pure salt without anti-caking agents or additives, so it keeps the brine clear. If you do not have it, you can use kosher salt, but because the crystal size differs, measure by weight or use slightly more by volume. Avoid iodized table salt, which can cloud the brine and may affect flavor.
Black peppercorns. Whole peppercorns release slow, warm spice into the brine.
Celery seeds. These provide concentrated celery flavor and a classic pickling aroma that ties in beautifully with the celery sticks.
How to Make Bloody Mary Pickled Celery
Step 1: Wash and Cut the Celery
Wash the celery thoroughly under cold running water and trim the root end. Separate the stalks and cut them into sticks that fit inside a clean glass jar. Leave a little room at the top, about half an inch to an inch, so the brine can cover the celery completely.
A wide-mouth quart jar or a tall jar typically works best for celery sticks. If your sticks are too tall, trim them to fit. You can use the leftover trimmings in soups, stocks or salads.
Step 2: Make the Brine
In a saucepan, combine the white vinegar, water, prepared horseradish, hot sauce, Worcestershire sauce and pickling salt.
Step 3: Heat and Dissolve
Heat the mixture gently over medium heat, stirring until the salt dissolves completely. You do not need to boil it hard. As soon as the salt has dissolved and the brine is steaming, remove it from the heat. Let it cool slightly, so it is warm but not scalding.
Allowing the brine to cool for a few minutes helps the celery keep its crunch. Pouring a boiling brine straight over the celery can soften it.
Step 4: Pack the Jar
Place the celery sticks, garlic cloves, black peppercorns and celery seeds into a clean glass jar. Stand the celery sticks upright and pack them in snugly so they stay submerged.
Step 5: Add the Brine
Pour the brine over the celery until it is completely covered. Include the horseradish and any spices that settled in the saucepan. If needed, press the celery down gently to make sure it is fully submerged. Any celery sticking out above the brine may become discolored or spoil.
Step 6: Seal and Refrigerate
Let the jar cool to room temperature, then seal it tightly and place it in the refrigerator. For the best flavor, wait at least 24 to 48 hours before eating. The longer the celery rests, the more flavorful and tangy it becomes.
Step 7: Serve
Serve the pickled celery chilled. Use it as a Bloody Mary garnish or enjoy it as a tangy, spicy snack.
Tips for the Crunchiest, Tastiest Pickled Celery
Start with very fresh celery. Crisp, fresh celery makes crisp pickles. If your celery is a bit limp, soak the sticks in ice water for 30 minutes before pickling to revive them.
Cool the brine slightly. Hot brine is fine, but a boiling brine can cook the celery. Let it cool just a little.
Keep everything submerged. Make sure all the celery sits below the surface of the brine. If sticks float, you can weigh them down with a small fermentation weight or a piece of parchment paper pressed down inside the jar.
Use a clean jar. Wash the jar and lid in hot, soapy water and rinse well before filling.
Be patient. The flavors need time to develop. The pickles are tasty after one day but even better after two or three.
Adjust the heat. For a spicier pickle, add more hot sauce, a sliced jalapeño or a pinch of red pepper flakes. For a milder one, reduce the hot sauce and horseradish.
Trim the ends. Cutting a small piece from the bottom of each stick can help the brine penetrate more evenly.
Shake or turn the jar. Gently tilting the jar once a day during the first couple of days helps the flavors distribute.
Common Mistakes to Avoid
Soft or limp pickles. This is usually caused by older celery or very hot brine. Use fresh celery and let the brine cool a bit.
Cloudy brine. Iodized salt or additives in table salt can cause cloudiness. Use pickling salt or kosher salt. Some cloudiness from spices or horseradish is normal.
Pickles that are too salty or too sour. Measure the ingredients carefully. If the flavor is too strong after a few days, you can rinse the sticks lightly before serving.
Floating celery. Pack the jar snugly and keep the celery submerged for even pickling and better safety.
Skipping the wait. Eating the pickles right away gives you a mild flavor. Give them at least 24 hours.
Treating them as shelf-stable. This is a refrigerator pickle recipe. Do not store the jar at room temperature. Keep it in the fridge at all times.
Delicious Variations
Extra spicy pickled celery. Add sliced fresh jalapeños, habaneros, serrano peppers or red pepper flakes to the jar.
Smoky Bloody Mary celery. Add a pinch of smoked paprika or a few drops of liquid smoke to the brine.
Old Bay or seafood-style celery. Add a teaspoon of seafood seasoning for a Maryland-style Bloody Mary flavor.
Dill and mustard seed. Add fresh dill sprigs and a teaspoon of mustard seeds for a more classic dill pickle feel.
Lemon-pepper celery. Add a few strips of lemon zest and extra cracked black pepper for a bright, peppery version.
Pickled celery and olives. Add a handful of green olives to the jar for a martini-meets-Bloody-Mary effect.
Mixed veggie Bloody Mary pickles. Add green beans, carrots, cocktail onions or asparagus alongside the celery for a colorful pickle jar. Cut them into similar sizes so they pickle evenly.
Apple cider vinegar version. Replace some of the white vinegar with apple cider vinegar for a slightly fruitier, mellower tang.
Serving Ideas
In a Bloody Mary. The most obvious and delicious use. Place a pickled celery stick in a glass of Bloody Mary or virgin Mary as a flavorful, edible stirrer. Add a skewer of olives, pickled green beans, cheese cubes or bacon for a loaded garnish.
On a brunch board. Arrange the celery sticks on a platter with deviled eggs, smoked salmon, cheese, crackers and cured meats.
On a relish tray. Serve with olives, pickled onions, carrots and cornichons for holidays and gatherings.
With dips. Pair with ranch, blue cheese dressing, cream cheese dip, hummus or tzatziki.
In sandwiches and burgers. Chop pickled celery and add it to sandwiches, tuna salad, chicken salad or egg salad for a tangy crunch.
In salads. Slice thinly and toss into potato salad, pasta salad, coleslaw or green salads.
As a snack. A cold stick straight from the jar is a refreshing, low-calorie, flavorful snack.
With grilled foods. Serve alongside burgers, hot dogs, grilled sausages or barbecue to cut through richness.
How to Store Pickled Celery
In the refrigerator: Keep the sealed jar in the refrigerator at all times. Quick refrigerator pickles like these are best within 2 to 3 weeks for peak crispness and flavor. Make sure the celery stays submerged in the brine.
Do not can or leave at room temperature. This recipe is not tested or intended for water-bath canning or shelf storage. If you want shelf-stable pickles, follow a tested canning recipe designed for that purpose.
Discard if something seems off. If the brine smells unusual, the celery turns slimy or you see mold, throw the jar out.
Reusing the brine: For best results and food safety, it is better to make a fresh brine for each batch rather than reusing it many times.
Nutrition Notes
Celery is naturally low in calories and rich in water, and it provides some fiber, vitamin K and potassium. Pickling adds sodium from the salt and flavor from the vinegar and spices. As with any pickle, the sodium content can be significant, so enjoy in moderation if you are watching your salt intake. Exact nutritional values vary depending on the ingredients and how much brine each stick absorbs. If you have a health condition or follow a special diet, check with your doctor or a registered dietitian.
Frequently Asked Questions
How long do I need to wait before eating them?
At least 24 to 48 hours is ideal. They are edible earlier, but the flavor is much better after a day or two in the brine.
How long do Bloody Mary pickled celery sticks last?
In the refrigerator, they usually keep well for about 2 to 3 weeks, though they are crispest in the first couple of weeks.
Do I need to can them?
No. This is a refrigerator pickle recipe, so no canning is required. Keep them refrigerated.
Can I use apple cider vinegar instead of white vinegar?
Yes, though it will change the flavor slightly. Make sure it has at least 5% acidity.
Can I make it less spicy?
Yes. Reduce the hot sauce and horseradish, or use a milder hot sauce. You can also leave out the black peppercorns for a mellower flavor.
Can I make it spicier?
Absolutely. Add more hot sauce, sliced hot peppers or crushed red pepper flakes.
Is Worcestershire sauce vegetarian?
Traditional Worcestershire sauce contains anchovies, so it is not vegetarian or vegan. Look for vegetarian or vegan Worcestershire sauce if needed.
Can I use celery leaves?
Yes. Tender celery leaves can be added to the jar for extra flavor or used as a garnish.
Why is my celery floating?
Celery is naturally buoyant. Pack the jar tightly, and use a weight or piece of parchment paper to keep the sticks submerged.
Can I use these in a non-alcoholic drink?
Yes. They are a great garnish for a virgin Mary, a Caesar-style mocktail or even a glass of tomato juice.
Can I double the recipe?
Yes. Simply double all the ingredients and use additional jars as needed. Make sure each jar is packed with celery and fully covered by brine.
Can I use creamy horseradish?
It is not recommended. Use plain prepared horseradish, which is made from grated horseradish root and vinegar.
Final Thoughts
Bloody Mary pickled celery is a simple way to turn a humble vegetable into a bold, tangy, spicy treat. With a short ingredient list, a few minutes of effort and a little time in the refrigerator, you get a jar of crunchy, flavor-packed celery sticks that are ready to garnish cocktails, brighten snack platters and add zing to everyday meals.
Make a jar this week, let the flavors develop and enjoy them chilled. Whether you are hosting a weekend brunch, stocking up for the holidays or just looking for a low-calorie snack with a kick, this recipe is a keeper.
Bloody Mary Pickled Celery
Ingredients
- 1 bunch celery, washed and cut into jar-length sticks
- 2 cups white vinegar
- 1 cup water
- 2 tablespoons prepared horseradish
- 2 tablespoons hot sauce
- 2 cloves garlic, peeled
- 1 tablespoon Worcestershire sauce
- 1 tablespoon pickling salt
- 1 teaspoon black peppercorns
- 1 teaspoon celery seeds
Instructions
Wash the celery thoroughly under cold running water and trim the root end. Separate the stalks and cut them into sticks that fit inside a clean glass jar. Leave a little room at the top, about half an inch to an inch, so the brine can cover the celery completely.
A wide-mouth quart jar or a tall jar typically works best for celery sticks. If your sticks are too tall, trim them to fit. You can use the leftover trimmings in soups, stocks or salads.
In a saucepan, combine the white vinegar, water, prepared horseradish, hot sauce, Worcestershire sauce and pickling salt.
Heat the mixture gently over medium heat, stirring until the salt dissolves completely. You do not need to boil it hard. As soon as the salt has dissolved and the brine is steaming, remove it from the heat. Let it cool slightly, so it is warm but not scalding.
Allowing the brine to cool for a few minutes helps the celery keep its crunch. Pouring a boiling brine straight over the celery can soften it.
Place the celery sticks, garlic cloves, black peppercorns and celery seeds into a clean glass jar. Stand the celery sticks upright and pack them in snugly so they stay submerged.
Pour the brine over the celery until it is completely covered. Include the horseradish and any spices that settled in the saucepan. If needed, press the celery down gently to make sure it is fully submerged. Any celery sticking out above the brine may become discolored or spoil.
Let the jar cool to room temperature, then seal it tightly and place it in the refrigerator. For the best flavor, wait at least 24 to 48 hours before eating. The longer the celery rests, the more flavorful and tangy it becomes.
Serve the pickled celery chilled. Use it as a Bloody Mary garnish or enjoy it as a tangy, spicy snack.